Teltonika RUT950 Setup Guide
The Teltonika RUT950 has entered its product End of Life (EOL) phase. It will cease being supported by Teltonika Networks and Soracom on December 31st, 2025.
Requirements
To get set up, you will need the following:
- A Soracom account
- A Soracom IoT SIM card
- The Teltonika RUT950 router
- A computer or tablet
SIM Registration
If you have not already done so, take a moment to follow the instructions in the SIM Registration documentation and register your Soracom SIM card to your account.
Hardware Setup
-
Carefully remove the Soracom IoT SIM card from its packaging.
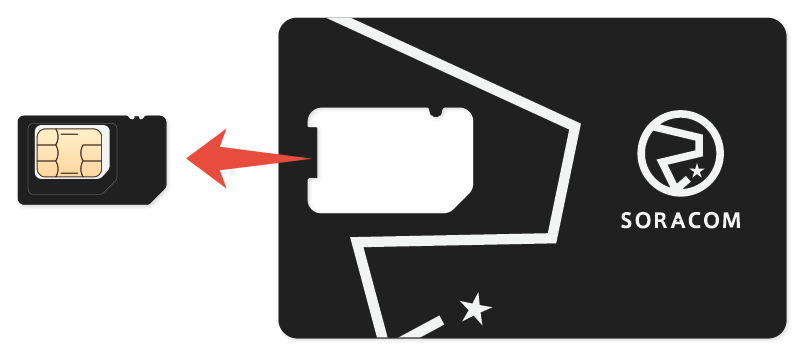
The plan01s SIM is a 3-in-1 design that allows you to conveniently break out the SIM card into standard/mini (2FF), micro (3FF), and nano (4FF) form factors. As the RUT950 uses the standard/mini (2FF) size, take care to keep the original SIM card size when removing it from its packaging.
If you have already broken out the SIM card to a smaller size, or if you are using a different Soracom IoT SIM card that has a smaller form factor, you can use a SIM card adapter (sold separately) to change the form factor back to standard/mini (2FF).
-
Using the SIM eject tool included with your RUT950, depress the SIM eject button in order to release the SIM card tray.
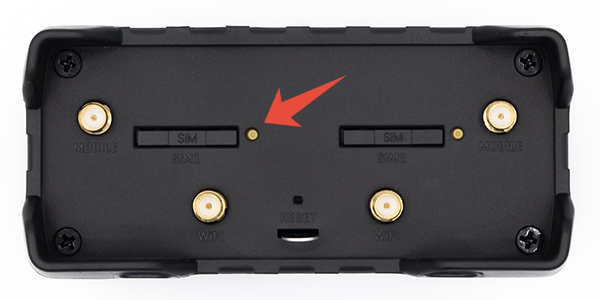
The RUT950 is a dual-SIM router which allows you to provide a secondary SIM for failover (such as poor network signal, exceeding data limit, or other rules). By default, SIM slot 1 is configured as the Primary SIM slot. If you intend to use the Soracom IoT SIM as your primary cellular connection, use SIM slot 1. You can also manually override this setting from within the RUT950 configuration.
-
Lay the SIM card onto the SIM card tray, paying attention to the orientation notch.
- Re-insert the SIM card tray into the RUT950.
Your RUT950 is now ready for software configuration. Plug in the RUT950 power adapter and allow it a few minutes to boot.
Software Configuration
To set up the RUT950 to use the Soracom IoT SIM card cellular connection, we just need to configure the Soracom APN settings and let the router search for and connect to a cellular network.
Teltonika provides several ways to access router settings. In this guide, we will use the built-in WebUI configuration, which can be accessed by connecting a computer or tablet to the WiFi network broadcasted by the router, or by connecting to its ethernet port.
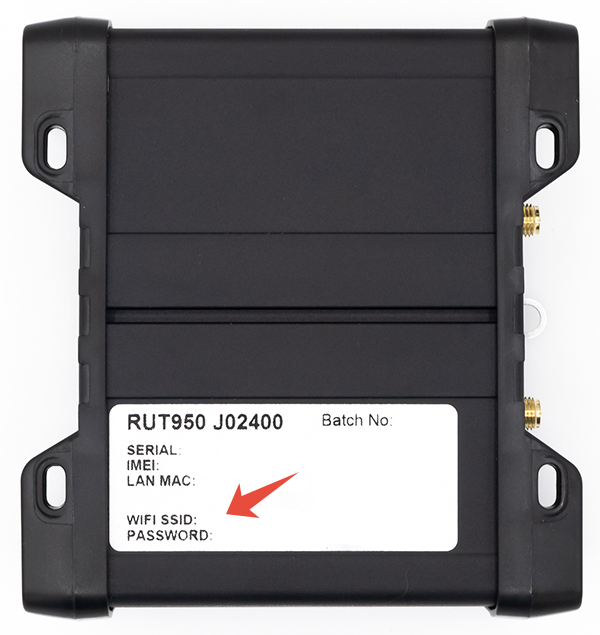
The following instructions assume that your RUT950 still contains factory default settings for the WiFi SSID name and password, administrator password, and LAN settings. If you have already configured your RUT950 to use other settings, substitute your settings as required.
-
From a computer or tablet, connect to the WiFi network that is broadcasted by the router. The default WiFi SSID name and password is printed on the back of the router.
-
Open the WebUI configuration screen by visiting
http://192.168.1.1from a web browser. -
Log in to the WebUI using the default username
adminand default passwordadmin01.When logging in for the first time, you may be asked to change the default administrator password. Follow the instructions to change the password, then continue below.
-
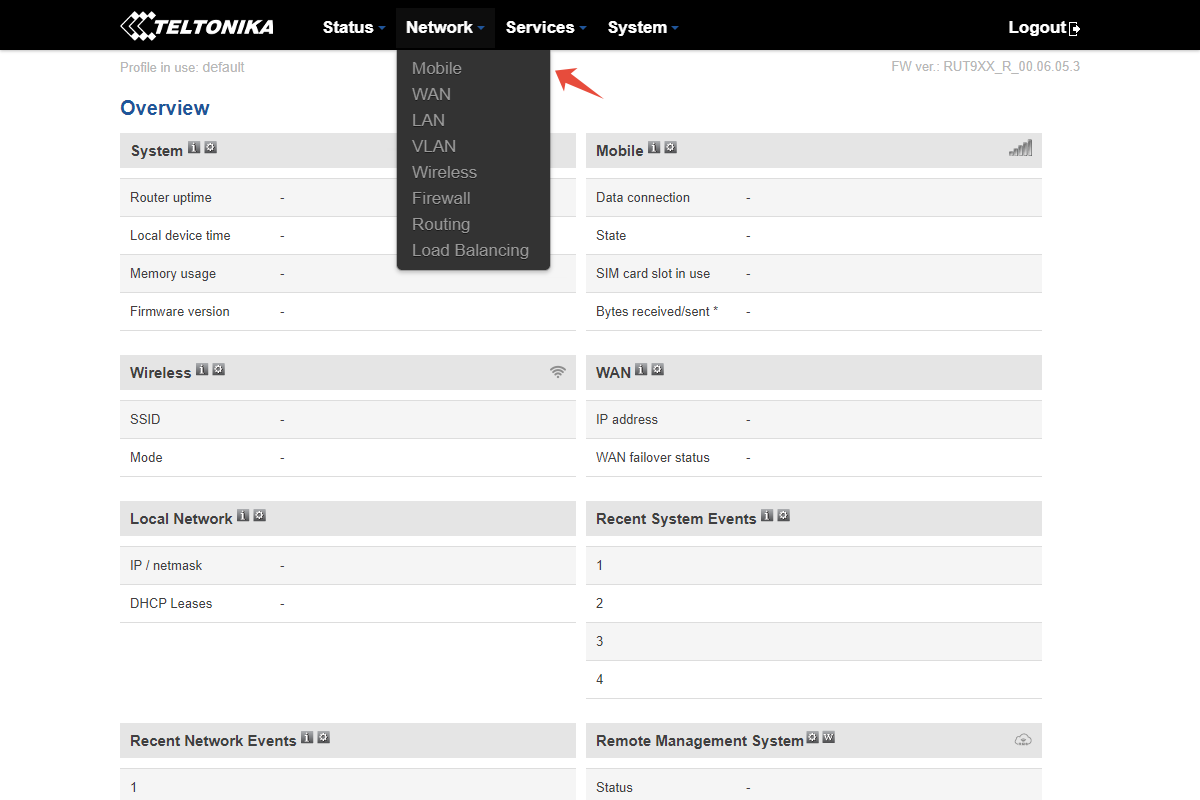
Once you are logged in, you will see the main RUT950 status overview page. Click the Network menu, then select Mobile.
-
Enter the APN setting
soracom.io. If the Auto checkbox is selected, you may need to uncheck it in order to enter the APN setting.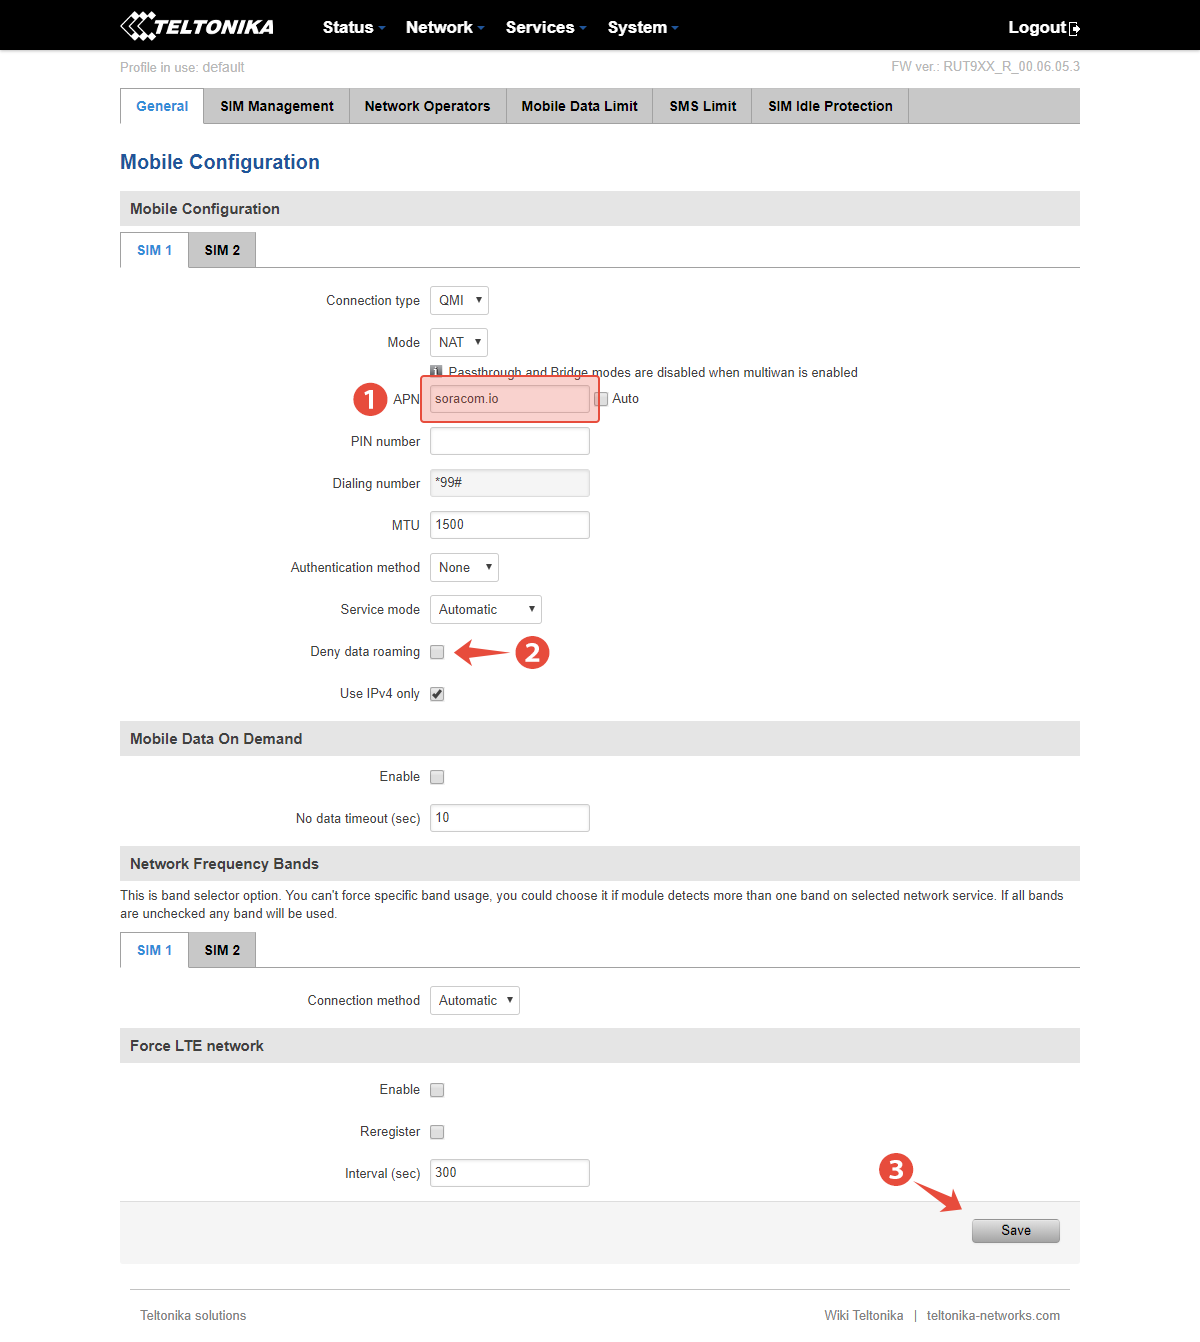
Ensure that the Deny data roaming option is also unchecked. You can leave the other settings with their default values.
Then click the Save button.
The RUT950 will take a minute to save the settings and reload the configuration.
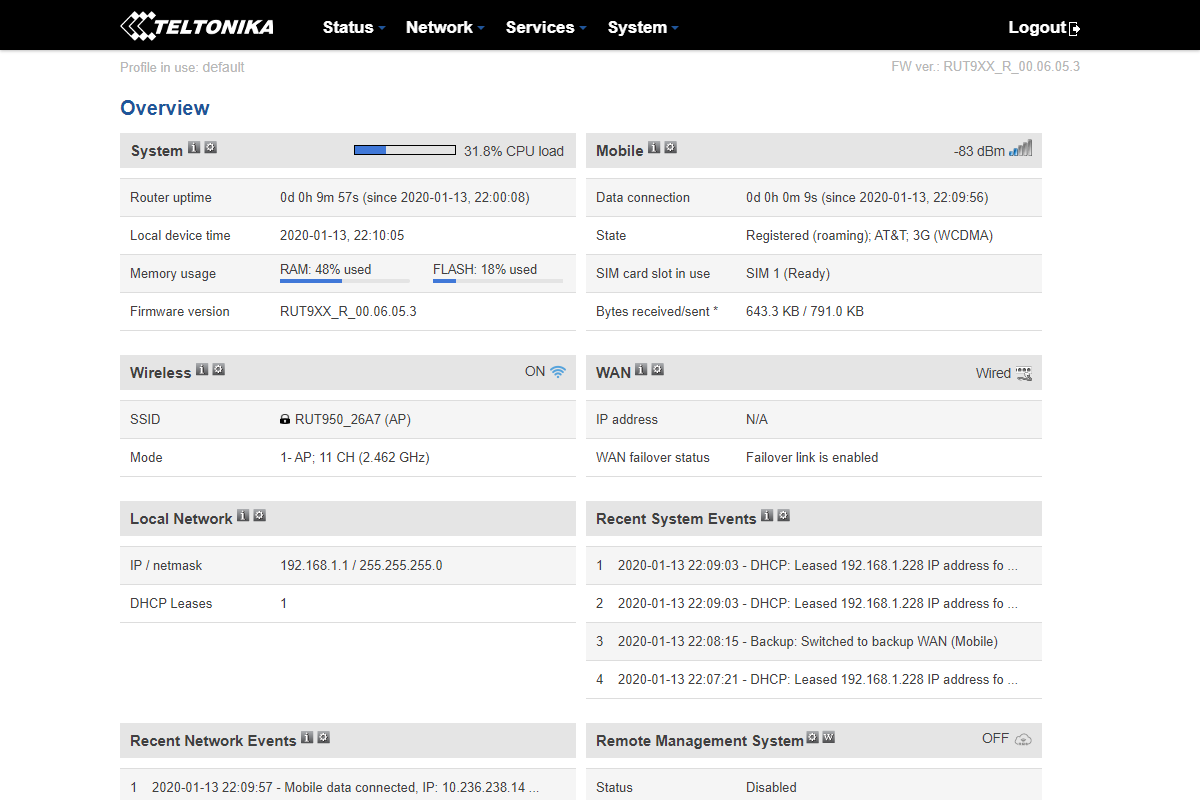
After a few minutes, the router should finish searching for available networks and automatically connect. You can check the cellular connection status by clicking the Status menu and selecting Overview to return to the main screen, and verifying the cellular connection from the Mobile section.
Advanced Configuration
Manual Network Selection
While the RUT950 is intelligent enough to automatically select the best available network, in some situations you may prefer to manually select the cellular network by yourself.
From the Network menu, select Mobile. Then select the Network Operators tab.
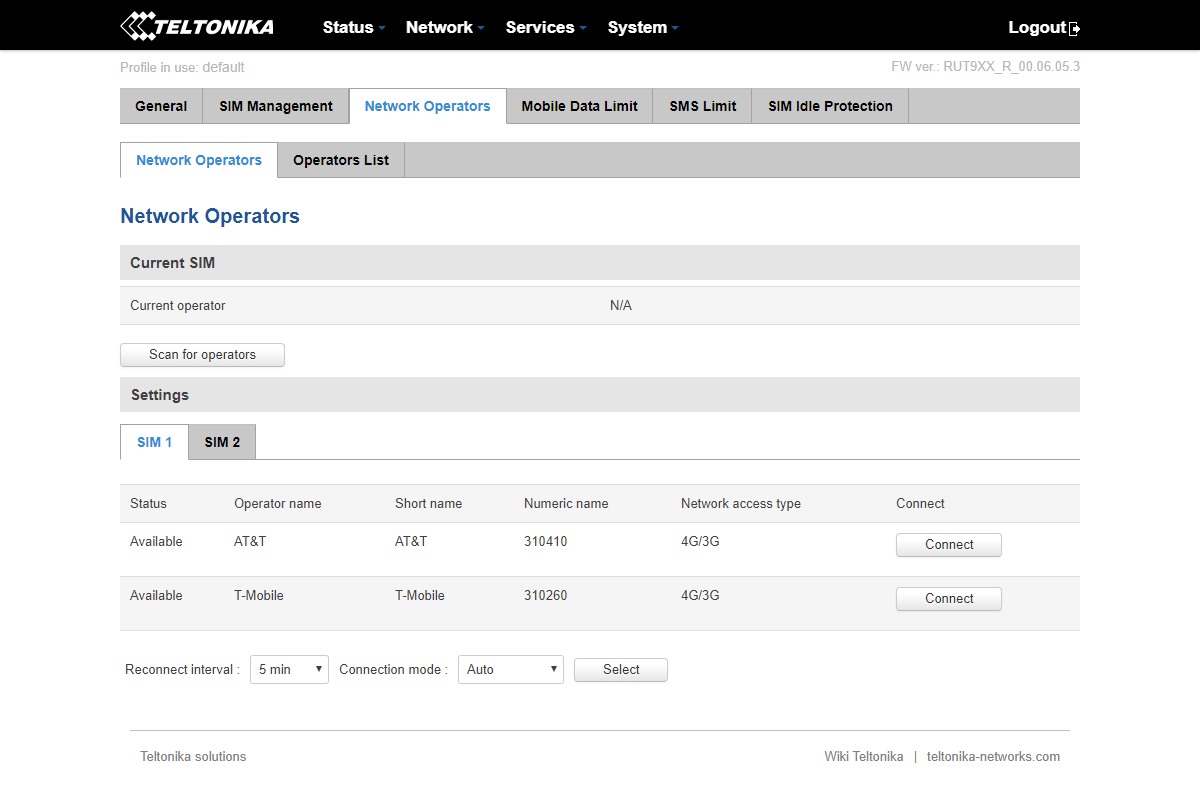
From this screen, you can click the Scan for operators button to manually check which cellular networks are available in your area. Once complete, a list of detected networks will be displayed. You can then click the Connect button to manually connect to a specific network.
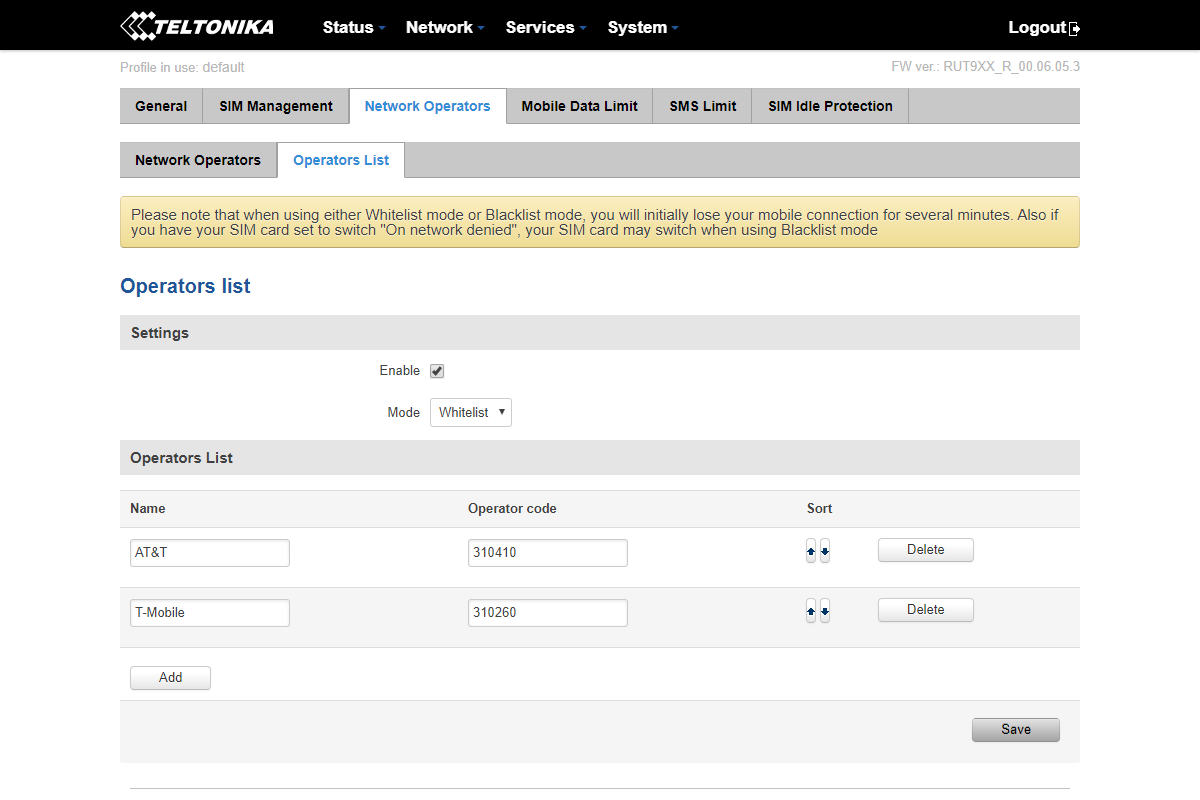
Additionally, if you would like to manually specify which networks the router is allowed to connect to (for example, in order to prevent the router from connecting to a particular network), you can click on the Operators List tab and add/remove networks as needed: