Using Beam to Connect to AWS IoT Core
Introduction
Soracom Beam makes it easy to send data from a device to AWS IoT Core . In this guide, we will set up a simple end-to-end connection with Beam to forward an MQTT message from our device to AWS IoT. As a bonus, we'll also integrate AWS SNS with IoT Core so that we can receive push email notifications when IoT Core receives MQTT messages.
Prerequisites
This guide assumes that you are familiar with the basics of AWS, as well as how to configure your IoT device to publish MQTT messages. In addition, you will need the following:
- A cellular device which can publish MQTT messages, with an IoT SIM card inserted
- An AWS account
- Your AWS account ID
Goal
Once we have completed this guide, our application should look something like this:
Device Soracom Beam AWS IoT Core AWS SNS Email notification
We will be using MQTT to publish messages from our device. As AWS IoT Core requires MQTTS, we will need to provide some form of encryption when publishing messages. Rather than configuring MQTTS directly on our device, we'll take advantage of Beam's ability to add encryption to our data, which will help simplify our development process.
Configure AWS IoT Core
Let's start by setting up AWS IoT Core. We need to create a "Thing" (our device), configure its security by creating a certificate, and add a security policy to the certificate.
1. Create a Thing
- Open the AWS IoT Core dashboard . Make sure to switch to the AWS region you want to use for your application.
-
From the left side menu, click Manage, then click Things. If this is your first device, click Register a thing. Otherwise, click the Create button instead.

-
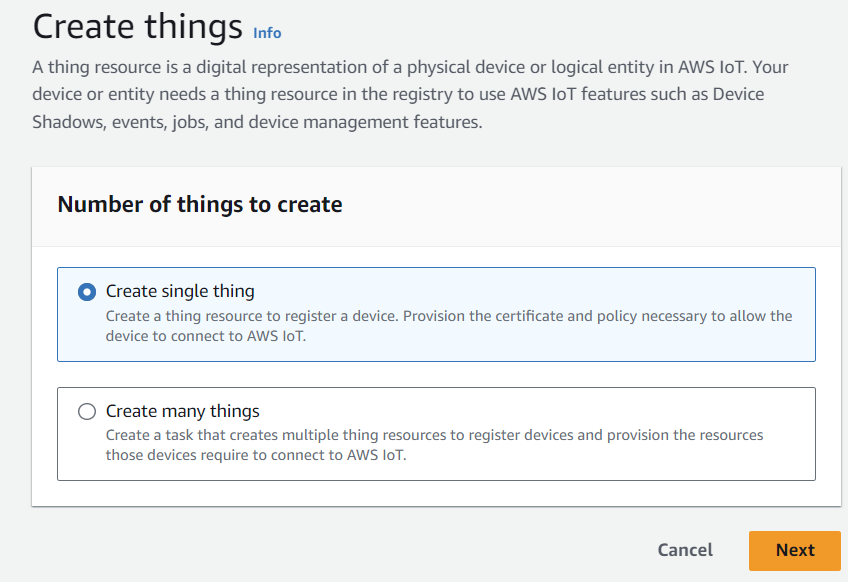
We're only setting up one device right now, so click Create a single thing.
-
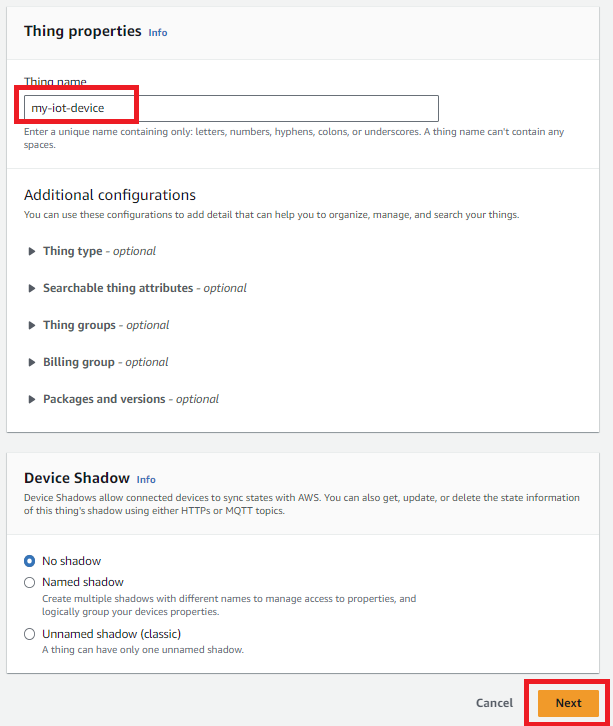
Enter a name for your device, and click Next.
2. Configure Security
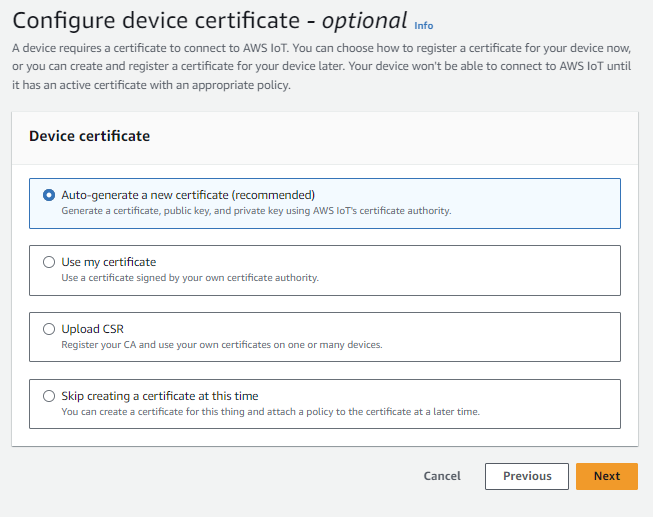
AWS IoT Core requires some form of authentication in order to prevent unwanted devices from accessing IoT Core. For convenience, we will use a standard X.509 certificate, which will be signed by AWS IoT's Root CA.
-
In the next step, click Create certificate.
-
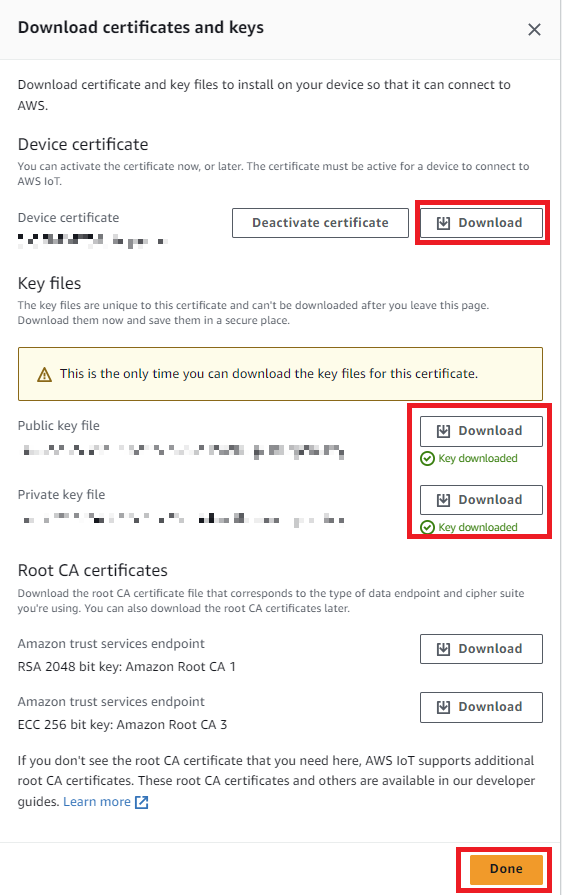
The certificates contain the data that will authenticate our device, so let's go ahead and download them. We also need to download the Root CA for AWS IoT. Then we need to click Activate to enable the certificate.
- Next, we need to attach a policy to the certificate. However we will create a custom policy, so click Done for now.
3. Create a Policy
While our certificate will authenticate our device, AWS IoT Core uses policies to define what actions the device can perform. We will create a new policy and attach it to our certificate. This way, when our device connects to AWS IoT Core using our certificate for authentication, IoT Core will automatically know which actions should be allowed or blocked.
-
From the AWS IoT Core dashboard, click Secure, then click Policies. If this is your first policy, click Create a policy. Otherwise, click the Create button instead.
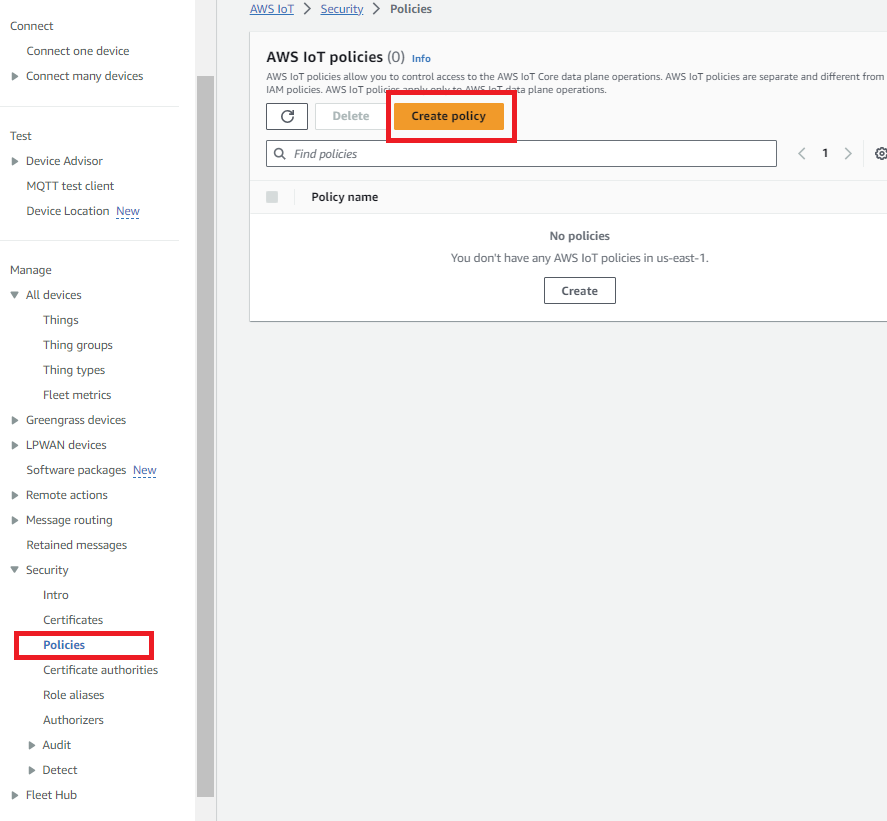
-
Let's give our policy a memorable name. Since we are creating a custom policy, click Advanced mode, then paste the following policy into the statement editor:
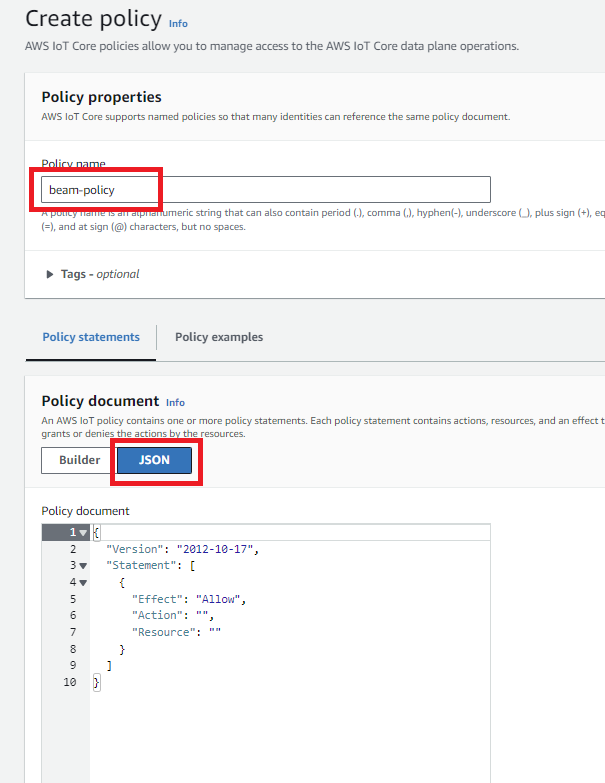
{
  "Version": "2012-10-17",
  "Statement": [
    {
      "Effect": "Allow",
      "Action": [
        "iot:Connect",
        "iot:Publish",
        "iot:Subscribe",
        "iot:Receive"
      ],
      "Resource": "arn:aws:iot:us-east-2:900012345678:*"
    }
  ]
}
This policy includes one definition which allows the following actions:
- iot:Connect - Allows our device to connect to AWS IoT
- iot:Publish - Allows our device to publish messages.
- iot:Subscribe - Allows our device to subscribe to a topic.
- iot:Receive - Allows our device to receive messages that are published to a topic.
By specifying the
*wildcard in the Resource parameter, these actions will be allowed in all resources in your AWS IoT application.When integrating with AWS IoT, we recommend allowing all typical MQTT actions in order to avoid any connection problems due to a device attempting to perform and action that is not allowed, and then revising the policy for security after you have verified the initial connection.
Make sure to replace the region name with your application region, and enter your AWS account ID.
Finally, click Create to create the policy.
-
Now we just need to attach this policy to our certificate, so that AWS knows which actions are permitted. From the AWS IoT Core dashboard, click Secure, then click Certificates. Find the certificate we created earlier, click its Menu button, and select Attach policy.

-
Select the custom policy we created, and click Attach.

4. Find the Forwarding Destination
At this point, we have successfully created a device on AWS IoT Core, with a certificate for authenticating the device, and a policy which defines what actions the device can perform on AWS IoT Core. Next, we will set up Soracom Beam to forward MQTT messages to AWS IoT. However, we need to know the forwarding destination, so let's make a note of it first.
-
From the AWS IoT Core dashboard, click Settings. You'll find the Custom endpoint for IoT Core. This is the address where we will configure Beam to forward data from our device.
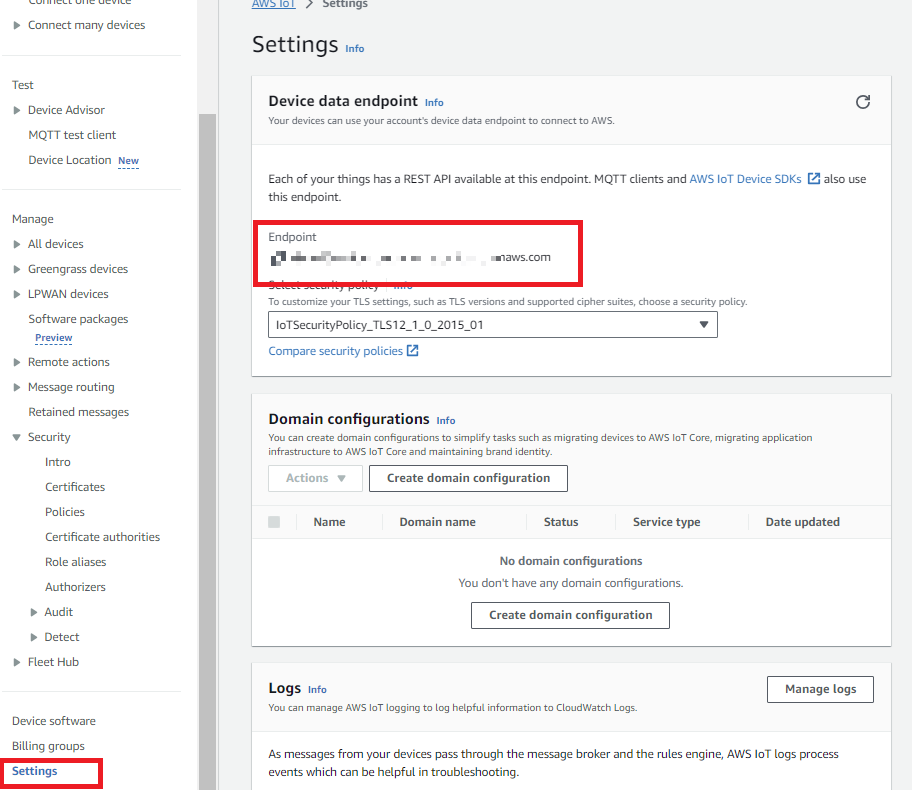
Now that we have AWS IoT Core set up, let's head over to the Soracom User Console to configure Beam.
Configure Soracom Beam
Now that you've made it this far, breathe easy — configuring Beam is the easiest part! All we need to do is point beam to our AWS IoT Core custom endpoint, and provide the X.509 certificate we created earlier.
We'll need the following files handy:
- Our X.509 certificate,
****-certificate.pem.crt - Our X.509 private key,
****-private.pem.key - The Root CA for AWS IoT certificate
5. Create an IoT SIM Group
To use Soracom Beam, we need to create a group. Beam settings will apply to all Air devices within the group.
If your device already belongs to a group, you can configure Beam for that group. Open the Group settings page from the User Console by clicking the Menu icon, selecting Groups, and then clicking the name of the group. Then just skip ahead to the next step.
- From the User Console, click the Menu icon and select SIM Management.
-
Find your IoT SIM in the list, and click the to select it. Then click the Actions menu, and select Change group.

-
Click the Group dropdown and select Create group.... Enter a name for your group, then click Create. Finally, click Change Group.
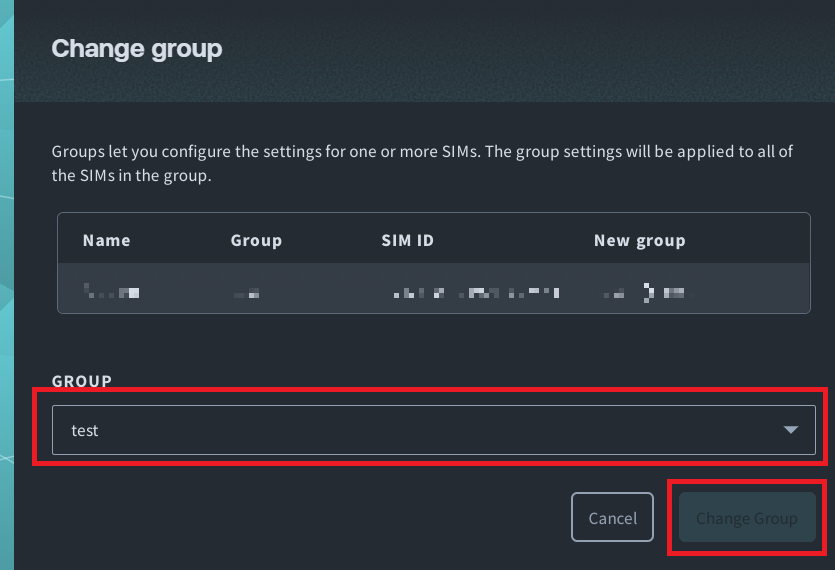
Your IoT SIM will now be added to this group. You should see your group in the Group column for the IoT SIM.
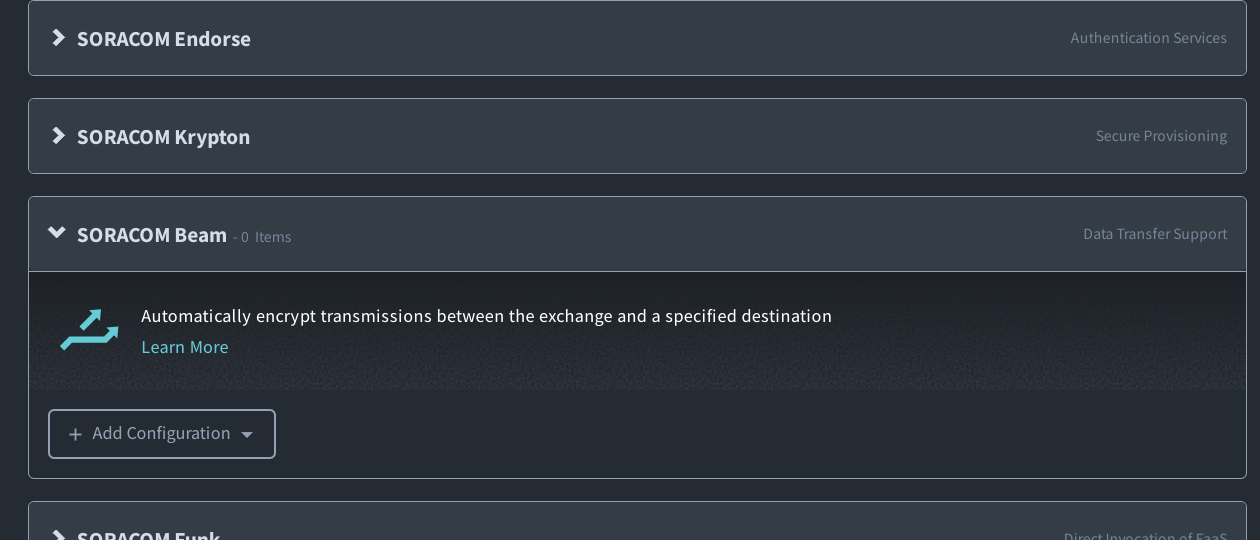
6. Add a Beam Configuration
Let's open the group in order to set up Beam. You can either click the name of the group from the SIM Management page, or from the Groups page.
-
From the group settings page, click the SORACOM Beam panel.
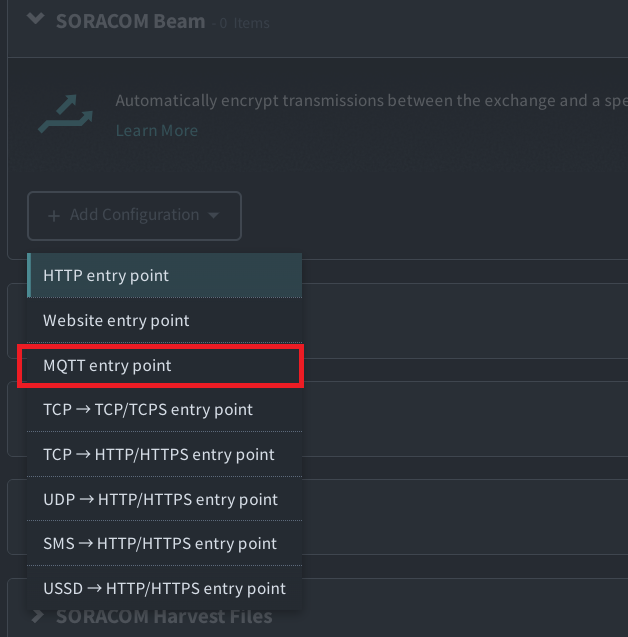
-
Click the + button to add a new configuration, and select MQTT entry point.
-
Enter the following Destination settings:
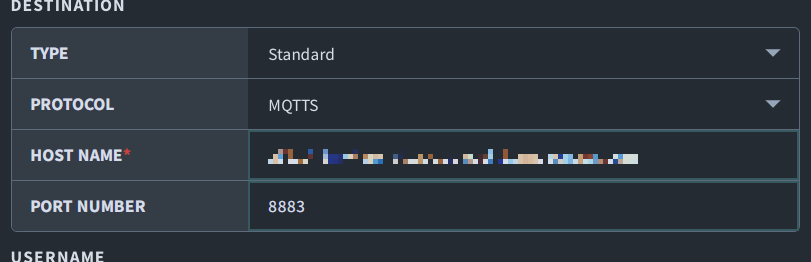
- Type - Standard MQTT broker
- Protocol - MQTTS
- Host name - Our AWS IoT Core custom endpoint from earlier
- Port number -
8883
- Next, we need to provide our X.509 certificate. Click to enable Client cert, then click the + button to add the certificate.
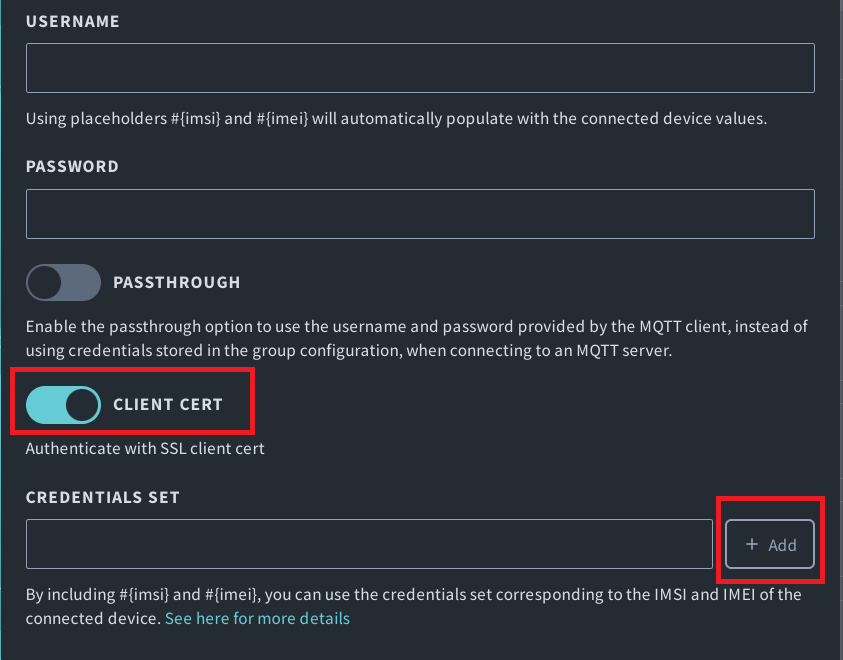
-
Enter a name for t)his set of credentials, then copy and paste the contents of the device private key, device certificate, and Root CA for AWS IoT certificate into the corresponding fields.
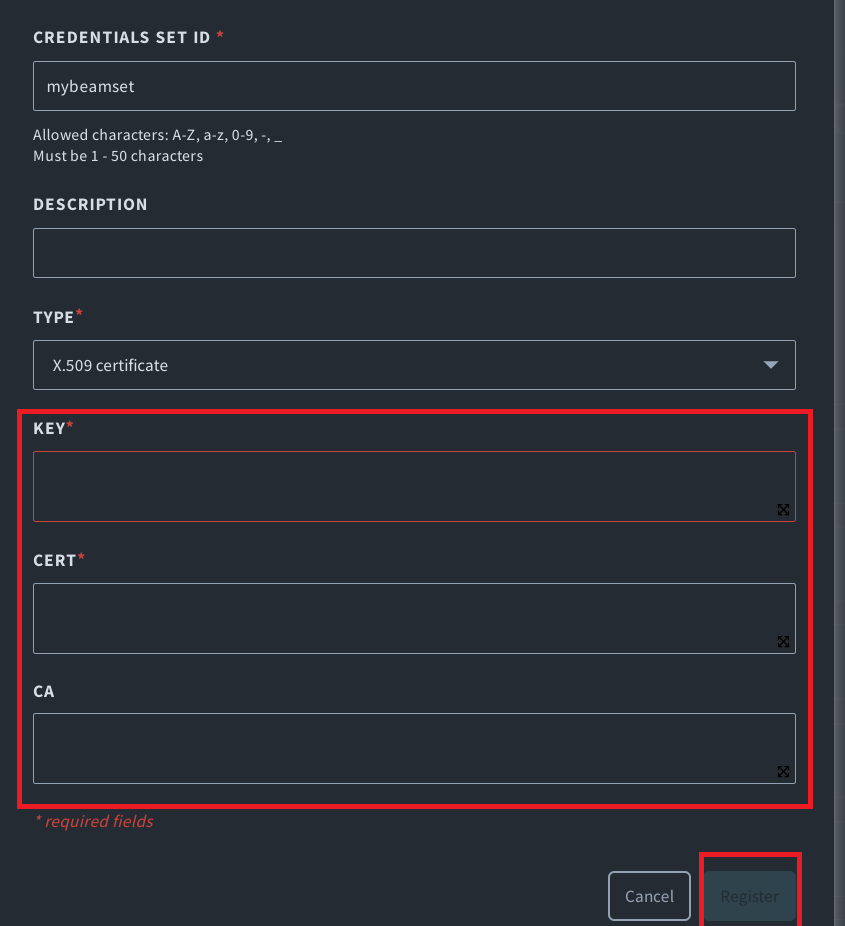
Click Register to save the certificate.
The certificate will automatically be selected for the Beam configuration.
While we're still on the Beam configuration dialog, let's go ahead and make a note of the Entry point information as well: we need to publish our MQTT message through host beam.soracom.io on port 1883.
Finally, click Save to save the configuration.
We have now finished configuring Beam to use our device credentials to forward MQTT messages from our device to AWS IoT Core, so let's try sending a test message!
Test the Connection
Everything is now ready for testing! In order to see data from our device arriving on AWS IoT Core, we need a way to monitor the messages. Fortunately, IoT Core provides a convenient Test area directly in the IoT Core dashboard. All we need to do is open it up and subscribe to our beamtest topic.
-
From the AWS IoT Core dashboard, click Test. In the Subscription topic input, type
beamtestand click the Subscribe to topic button.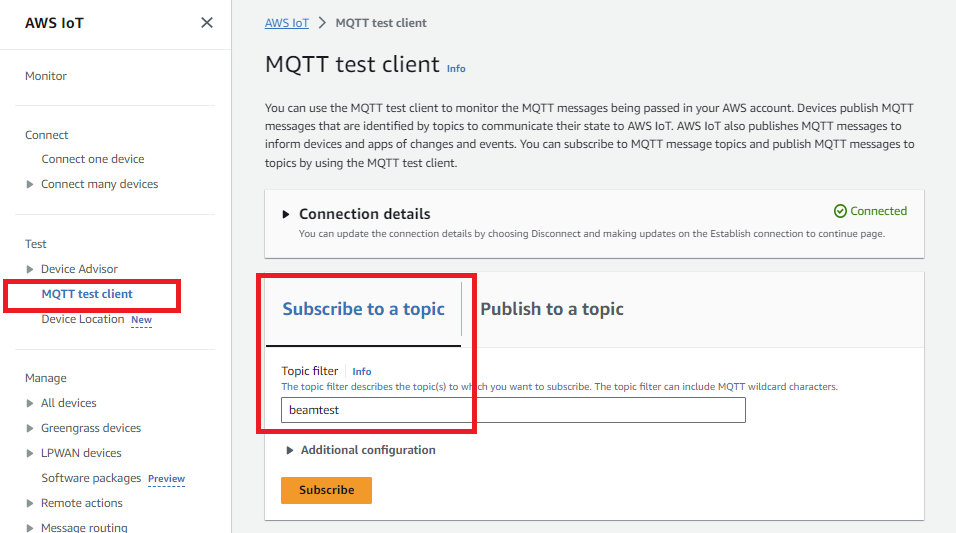
Now, let's send a test message from our device!
Using a Raspberry Pi
To test our application, we need the following:
- A Raspberry Pi, accessible directly or via SSH
- A 3G/LTE modem attached, with an IoT SIM card inserted
- mosquitto_tools installed using
sudo apt install mosquitto-clients
Turn on the Raspberry Pi and check that it is able to connect to 3G/LTE. Then run mosquitto_pub to publish a message:
mosquitto_pub -d -h beam.soracom.io -t beamtest -m 'Hello, world!'Here, we're specifying:
- -h - the MQTT host, which is our
beam.soracom.ioBeam entry point - -t - the message topic, which we configured to be
beamtestearlier on AWS IoT Core - -m - our message content
- Since we're using the standard MQTT port
1883, we don't need to specify it here
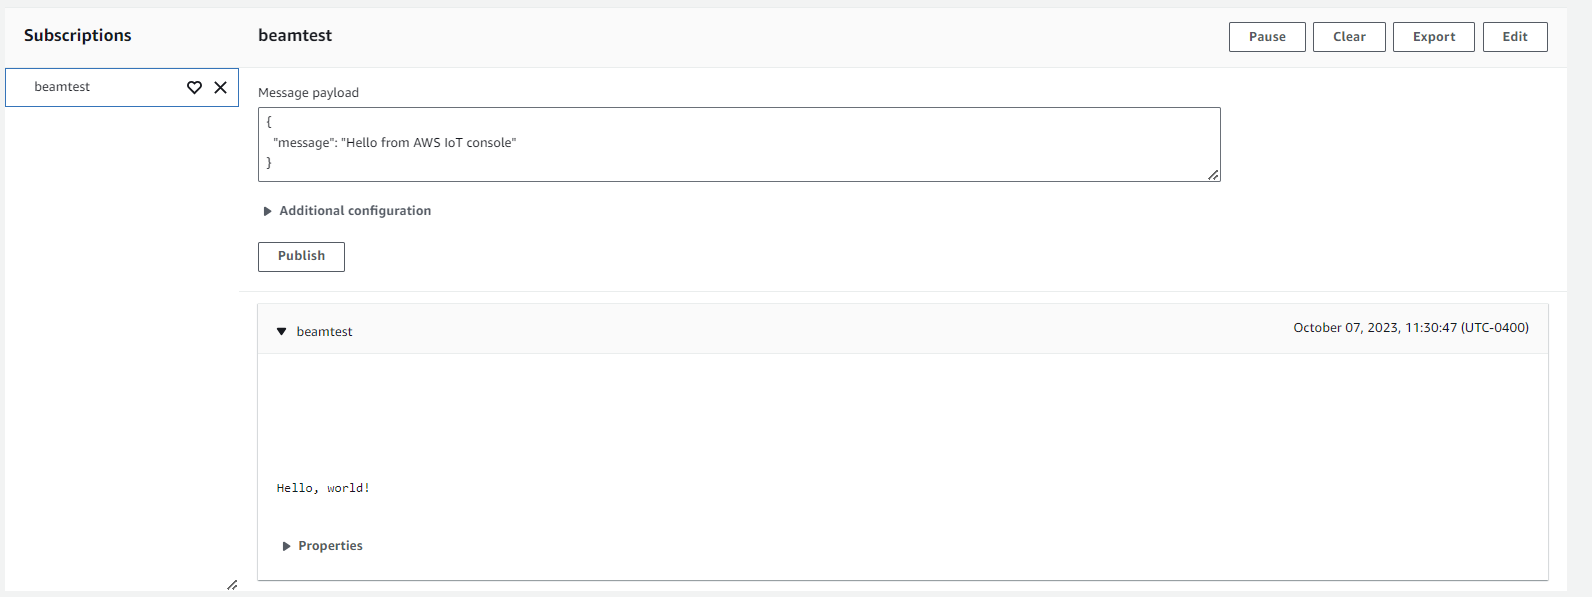
We should see the following return:
>Received CONNACK
>Sending PUBLISH (d0, q0, r0, m1, 'beamtest', ... (13 bytes))
CONNACK lets us know that our device has successfully connected to Beam. From there, Beam will take care of forwarding the message (with encryption!) to AWS IoT Core. A moment later, our test message has arrived!
Using Wio 3G/LTE (Arduino)
As the Wio 3G/LTE has a built-in cellular modem, we just need to insert our IoT SIM card into the SIM card slot. Then let's test with a simple Arduino program:
#include <WioLTEforArduino.h>
#include <WioLTEClient.h>
#include <PubSubClient.h>

#define APN      "soracom.io"
#define USERNAME "sora"
#define PASSWORD "sora"

WioLTE Wio;
WioLTEClient WioClient(&Wio);
PubSubClient MqttClient;

void setup() {
  delay(200);

  Wio.Init();
  Wio.PowerSupplyLTE(true);

  delay(500);

  Wio.Activate(APN, USERNAME, PASSWORD);

  MqttClient.setServer("beam.soracom.io", 1883);
  MqttClient.setClient(WioClient);
  MqttClient.connect("my-wio-device");

  MqttClient.publish("beamtest", "Hello, world!");
}

void loop() {

}
In our program, we use:
MqttClient.setServer- the Beam entry point host name and port numberMqttClient.connect- a name that identifies our deviceMqttClient.publish- the publish command, containing the topic name and message content
Since our program doesn't contain any output, we won't see any response in a serial console. However, we should still be able to see the message arrive on IoT Core.
Troubleshooting
If messages aren't getting through, we can do some quick troubleshooting:
- The device is connected to a 2G, 3G, or LTE network using an IoT SIM
- The device can successfully connect to the Beam entry point
- When using mosquitto_tools, the
mosquitto_pubcommand should returnCONNACK - If your device has multiple network interfaces, ensure that traffic for
beam.soracom.ioor100.127.127.100is routed using the cellular connection
- When using mosquitto_tools, the
- The device is assigned to the group that contains our Beam configuration
- The Beam configuration destination host matches the AWS IoT Core custom endpoint
- AWS IoT Core Test area is subscribed to the
beamtesttopic
If things still aren't working, we can further inspect by using an MQTT client, such as MQTT.fx:
Test with the Beam Test Server
- Change your Beam configuration to use the Beam test server as the forwarding destination:
- Host name -
beamtest.soracom.io - Port number -
8883
- Host name -
- Connect to the test server using your MQTT client with the following credentials:
- Username -
beamtest - Password -
passwd
- Username -
- Subscribe to the
beamtesttopic from your MQTT client, then publish a message from your device.
If successful, you should see the message appear in your MQTT client.
Test the AWS IoT Core MQTT Broker
- Update your AWS IoT Core certificate policy to allow
iot:Subscribeandiot:Receiveactions. This will allow your MQTT client to subscribe to MQTT topics and receive messages. - Connect to your AWS IoT Core Thing interface using your MQTT client with SSL/TLS authentication and the certificate files created earlier.
- Type - Self-signed certificate
- CA - the Root CA for AWS IoT certificate file
- Client Certificate - the
****-.certificate.pem.crtfile - Client Key - the
****-private.pem.keyfile
- Subscribe to the
beamtesttopic from your MQTT client, then publish a message from your device.
If successful, you should see the message appear in your MQTT client.
Next Steps: Get Email Notifications
While the Test area of IoT Core is useful for some quick debugging, opening it up and manually subscribing to a topic is not very useful. As a next step, let's add AWS Simple Notification Service (SNS) so that we get an email push notification whenever our device publishes a message.
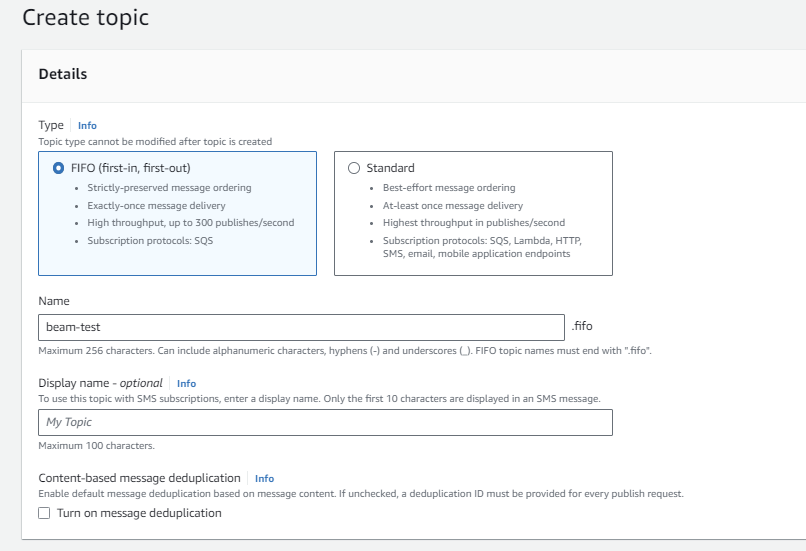
7. Create a SNS Topic
First, we need to create a notification topic.
- Open the AWS Simple Notification Service dashboard . Make sure to switch to the AWS region you want to use for your application.
-
From the left side menu, click Topics, then click Create topic.
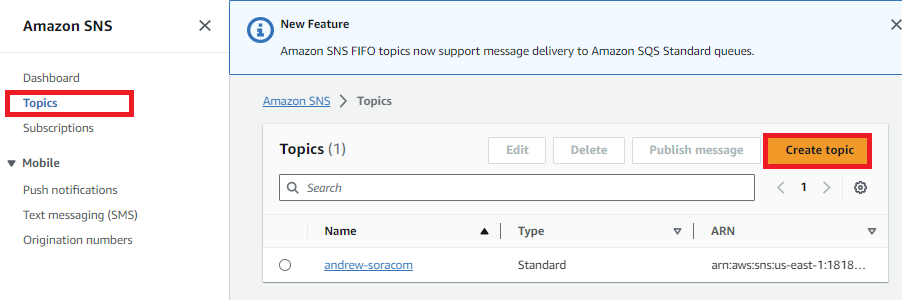
-
Enter a name for this topic, then click Create topic.
You will automatically be taken to the new topic's details page once it is created.
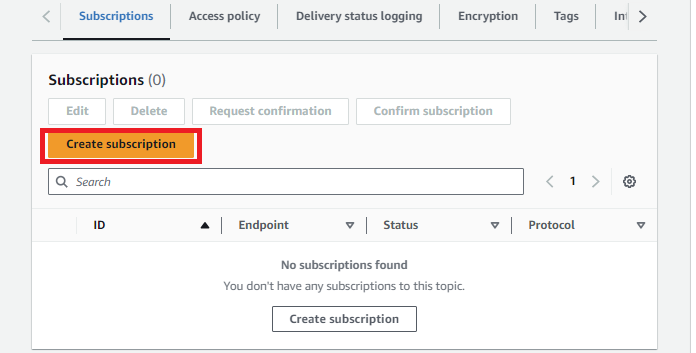
8. Subscribe to the SNS Topic
Next, let's subscribe to the topic.
-
From the topic details page, click Create subscription.
-
Let's configure our subscription with the following settings:
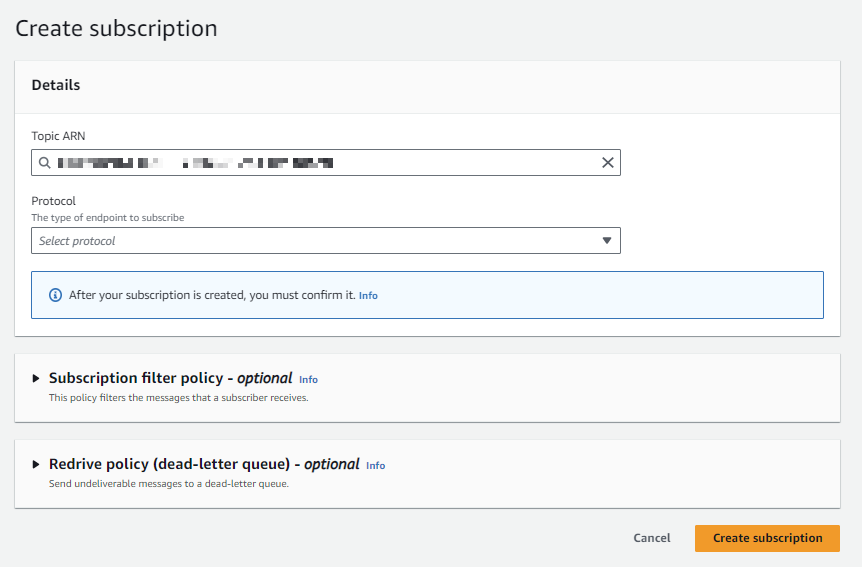
- Topic ARN - the ARN of the topic we just created
- Protocol -
Email - Endpoint - our email address
Click Create subscription.
Once the subscription has been created, AWS will send a confirmation email to our email address:
Follow the instructions to confirm that you want to receive email messages from this topic.
9. Add a Push Notification
Now we've finished creating our SNS topic and subscribing it. Next, we just need to update our IoT Core settings to send messages from beamtest to the SNS topic.
-
From the AWS IoT Core dashboard, click Act. If this is your first AWS IoT rule, click Create a rule. Otherwise, click the Create button instead.
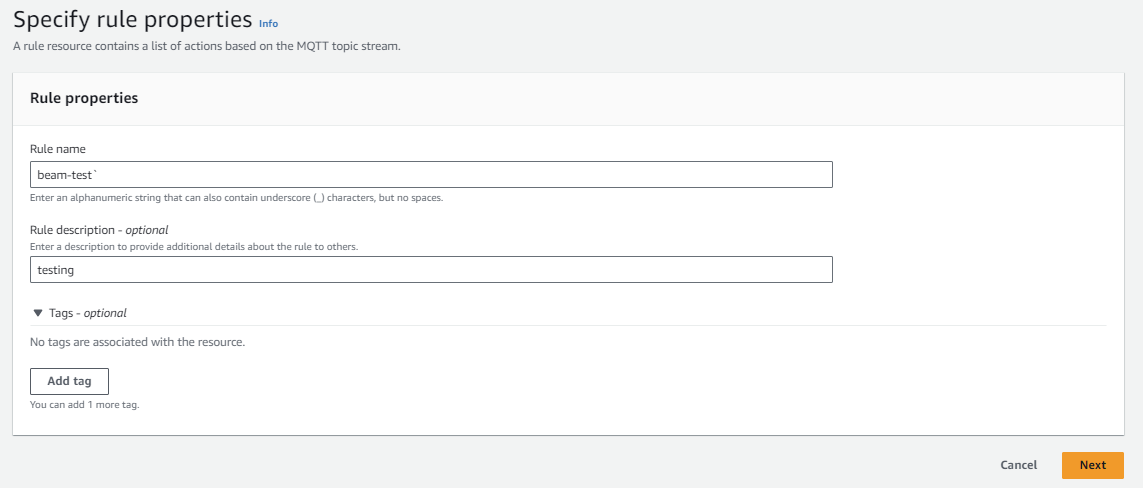
-
We'll configure our rule with the following settings:
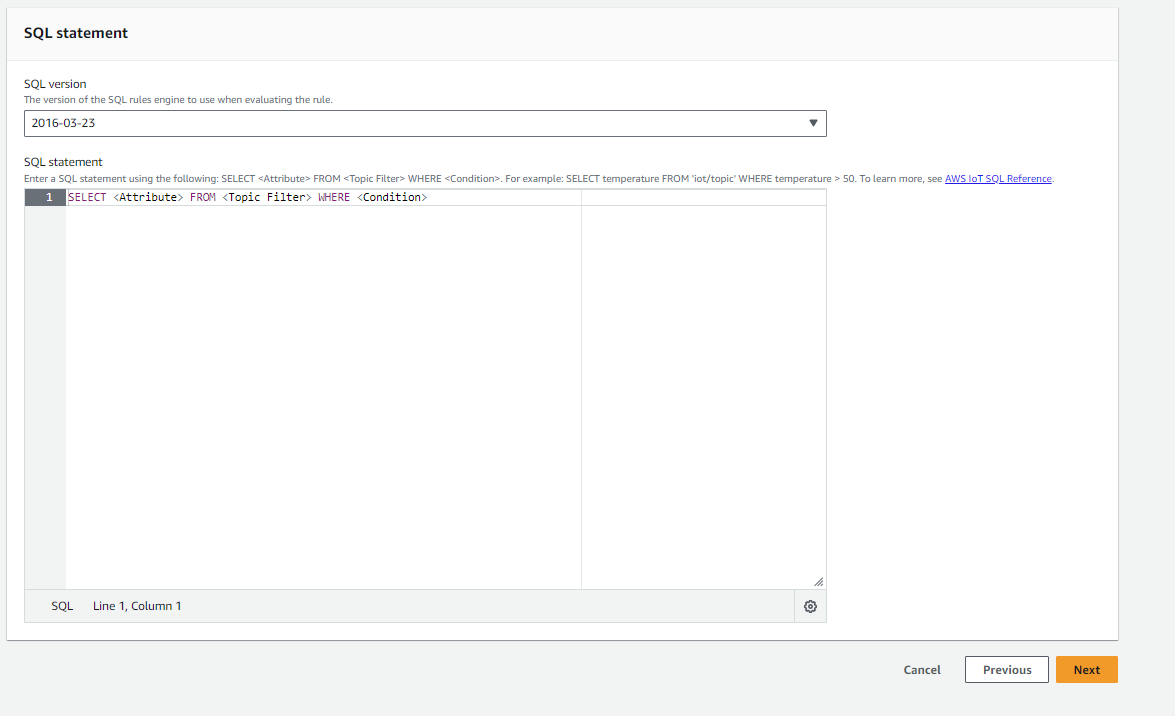
- Name - any name that helps us identify this rule
- Rule query statement -
SELECT * FROM 'beamtest'. This tells AWS IoT Core to use this rule for all*messages from thebeamtestMQTT topic.
Then, click Add action to add an action that will be performed anytime a message matches this rule.
-
In the list of available actions, select Send a message as an SNS push notification, then click Configure action.
-
Now let's configure how IoT Core will send messages to SNS:
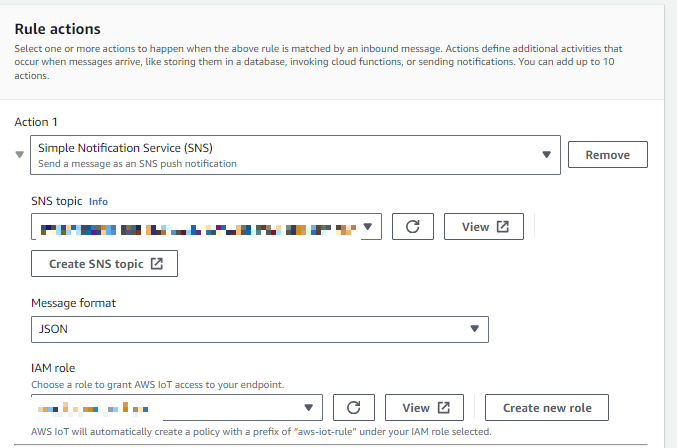 )
)For SNS target, click the Select button. Then search for and select the SNS topic created earlier.
For the Message format, we'll use RAW message data for now, to keep things simple.
When AWS IoT Core performs this action, it requires an IAM role to access AWS SNS. Let's create a new role for this action by clicking Create Role and giving it an appropriate name. AWS will automatically enable access to SNS for this role.
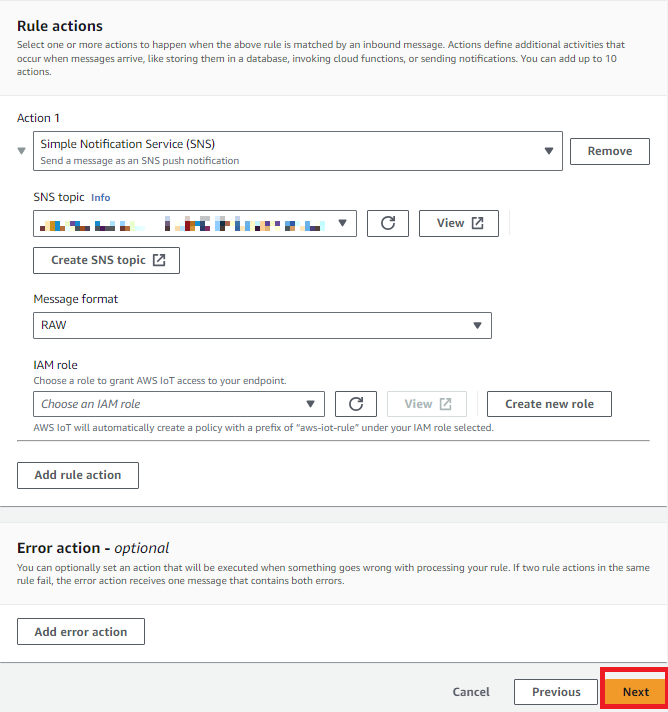
Once we've configured the action, click Add action.
-
Finally, click Create rule to finish creating the rule.
Great! Now with this integration, when our device publishes a message:
- Beam will encrypt our data and send it to IoT Core
- IoT Core will verify the X.509 certificate and security policy
- IoT Core will also forward messages from the
beamtesttopic to SNS - SNS will forward notifications to our email
Let's give it a try using the same connection test from earlier. In just a moment, we should receive an email:
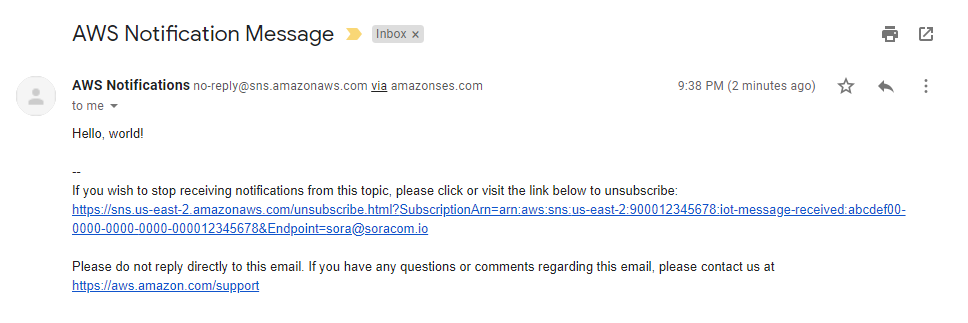
Awesome!
Next Steps: Use Multiple Certificates
Because Beam configuration is handled in a group, all IoT SIMs that are added to the group will use the same configuration. This is great for simplifying device configuration, as you only need to configure Beam once, and can simply add additional IoT SIMs to the group in order to inherit those settings.
However, this means that all IoT SIMs in the same group will effectively share one set of AWS IoT Core credentials when connecting via Beam to IoT Core. Because AWS IoT allows you to apply different policies to different certificates, you may prefer a configuration where the Beam entry point (used by the devices), and Beam destination endpoint (AWS IoT Core custom endpoint) are the same for all IoT SIMs, but each IoT SIM's connection is authenticated using separate credentials.
To learn how to customize your Beam configuration to support multiple credentials for each IoT SIM, head over to our Using Multiple Credentials with Beam guide .
Wrap-Up
Since our device's X.509 certificate is stored on the Soracom cloud, we don't need to worry about saving the private keys directly on the device. This will make device configuration easier, especially if we have dozens of devices to setup, and will also reduce the risk of an attacker intercepting our credentials.
On top of that, we can add multiple devices to our IoT SIM group, and they will all use the same credentials to connect to AWS IoT Core, removing the need to generate a new set of certificates for every device.
Since Beam takes care of encrypting our data, we can also send data from our device without needing to add encryption libraries or consume additional cellular data.
If we didn't use Beam, we would have to manually hardcode the AWS IoT Core Thing interface on each of our devices, store the required certificates on each device, and perform encryption directly on our device when publishing a message. If any certificate needed to be changed, or if we wanted to use a different Thing interface, we would have to reconfigure each of our devices manually.
Using Beam let's us take care of all of that directly from the User Console.