Send Data Using Soracom Funnel AWS IoT Adapter
Introduction
Soracom Funnel (Funnel) is an adapter that transfers data from the device directly to a specific cloud service.
In this guide, we will summarize the data transmitted from the device into the AWS IoT, filter the data with the AWS IoT rule engine, and perform the notification by Amazon SNS (Simple Notification Service) as an example, using Funnel's AWS IoT I will explain the basic usage of the adapter.
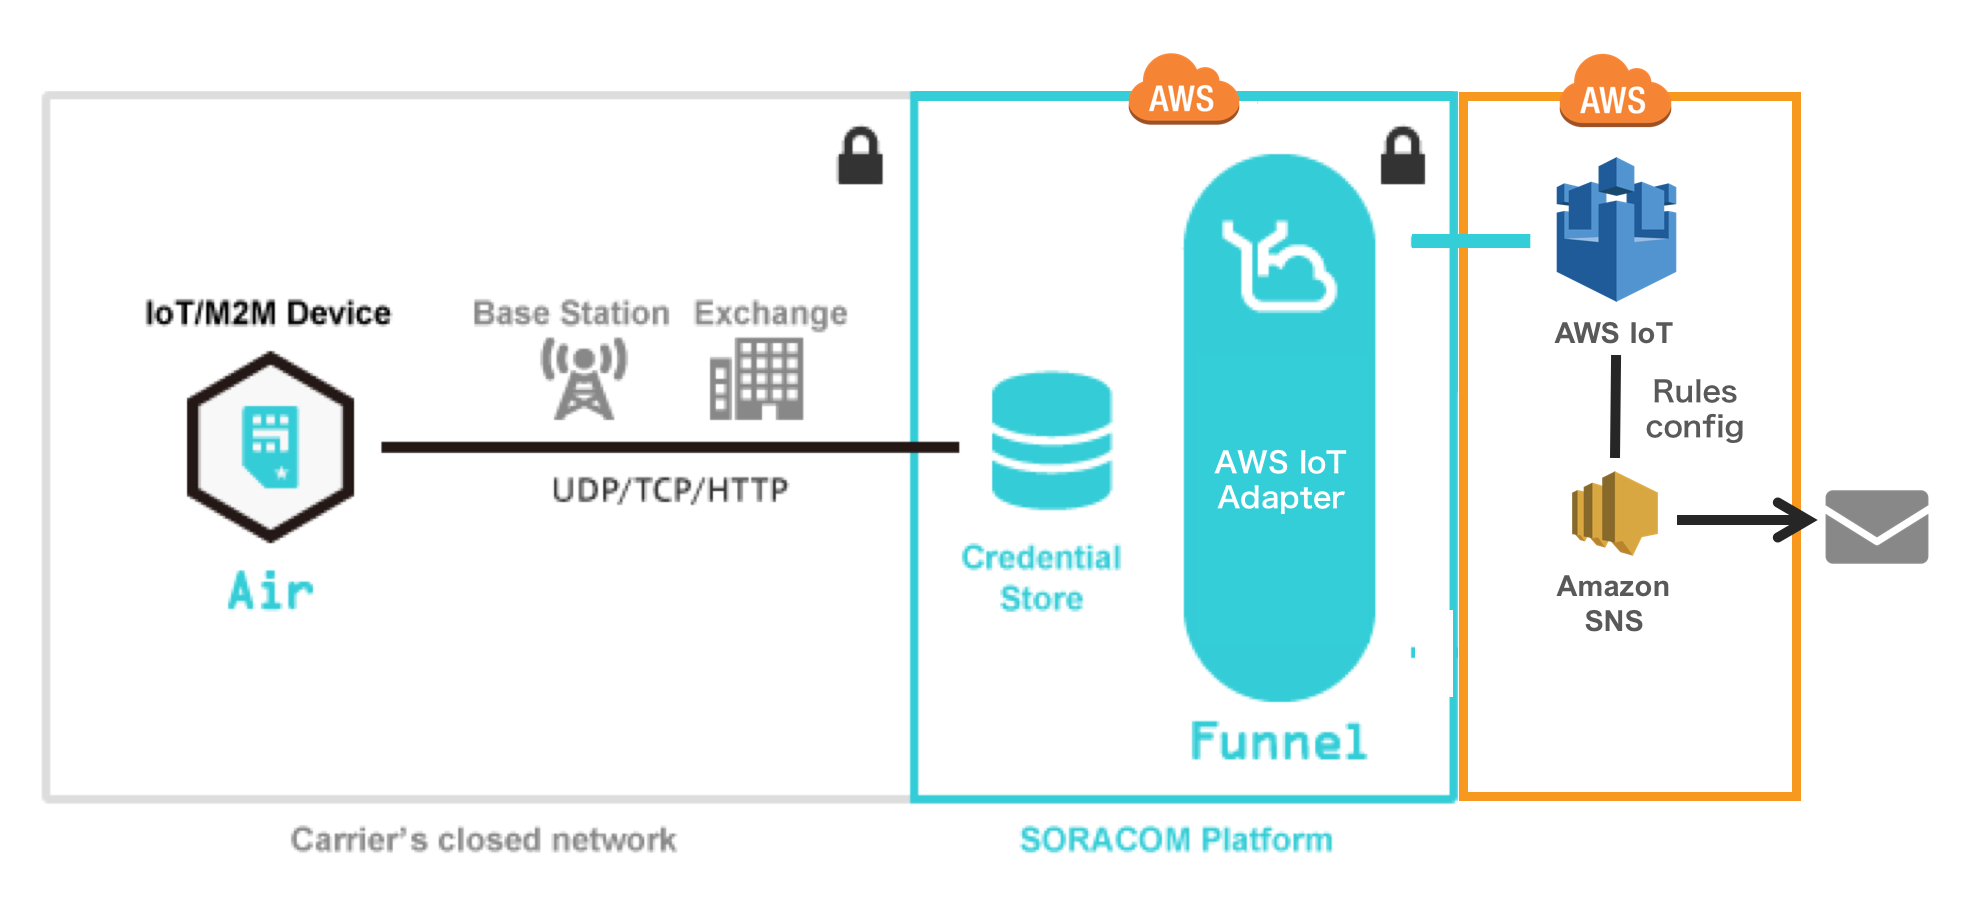
AWS IoT has various functions such as device management, but in this guide we will process the data sent from Funnel using the function called "rule engine" which distributes data. If you change the setting of the rule engine, you can specify data distribution and action according to the purpose of the system. For example, it can be used for notifying when the temperature acquired by the sensor exceeds a specific value.
Here, the flow from setup to operation confirmation will be explained along the following steps.
The premise of this guide is as follows.
- You have created a Soracom account
- You have already created an AWS account
- You have a device that can communicate with a cellular network using a Soracom IoT SIM
Funnel uses TLS 1.2. Ensure that you configure your cloud service to support TLS 1.2.
Set up AWS SNS
In this guide, data arrived at AWS IoT is sorted by rule engine, and if there is data that matches the condition, e-mail will be sent by SNS. First set up Amazon SNS for email notification.
Refer to AWS documentation and create SNS topics and subscribe.
- AWS Documentation: Create a Topic
- AWS Documentation:
Subscribe to a Topic
- In this time I will set up to be able to receive notifications by email from SNS topic. When creating a subscription, Protocol specifies Email and register a mail address. When you subscribe to the topic, you will receive a confirmation email. Click the link in the email to complete the registration.
Set up AWS IoT
Next, set up the AWS IoT to receive data from Funnel.
Confirm Endpoint
Open the AWS IoT management console and click Settings in the lower left of the menu screen.
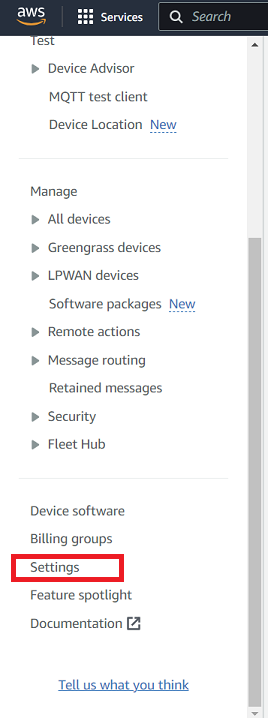
- When using AWS IoT for the first time, press the "Get Started" button in the center of the AWS management console screen. Move to the menu screen.
The endpoint assigned to your AWS account will be displayed, make a note of the contents. For example, when setting up AWS IoT in the AWS Tokyo region, the following end points are assigned.
<Random character string>.iot.ap-norththeast-1.amazonaws.com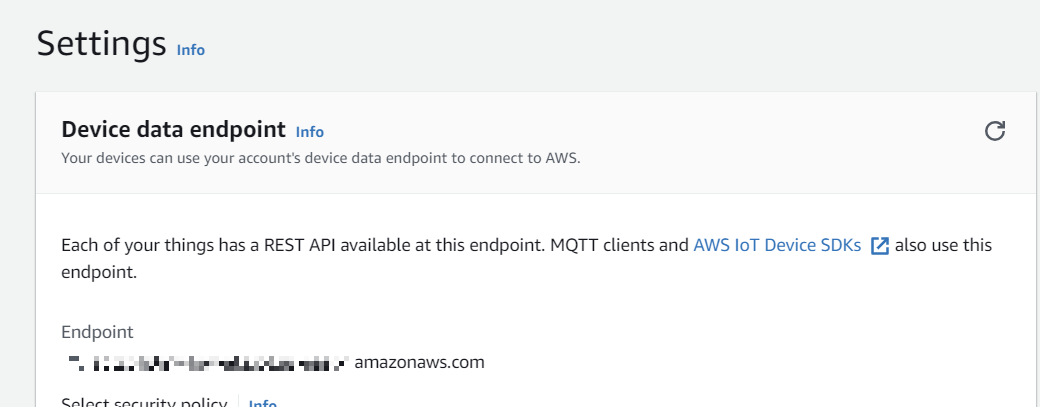
Create Rules
AWS IoT processes the data sent from the IoT device according to the rules and executes the action. This time we will create a rule to notify the SNS if the device's IMEI is a specific value.
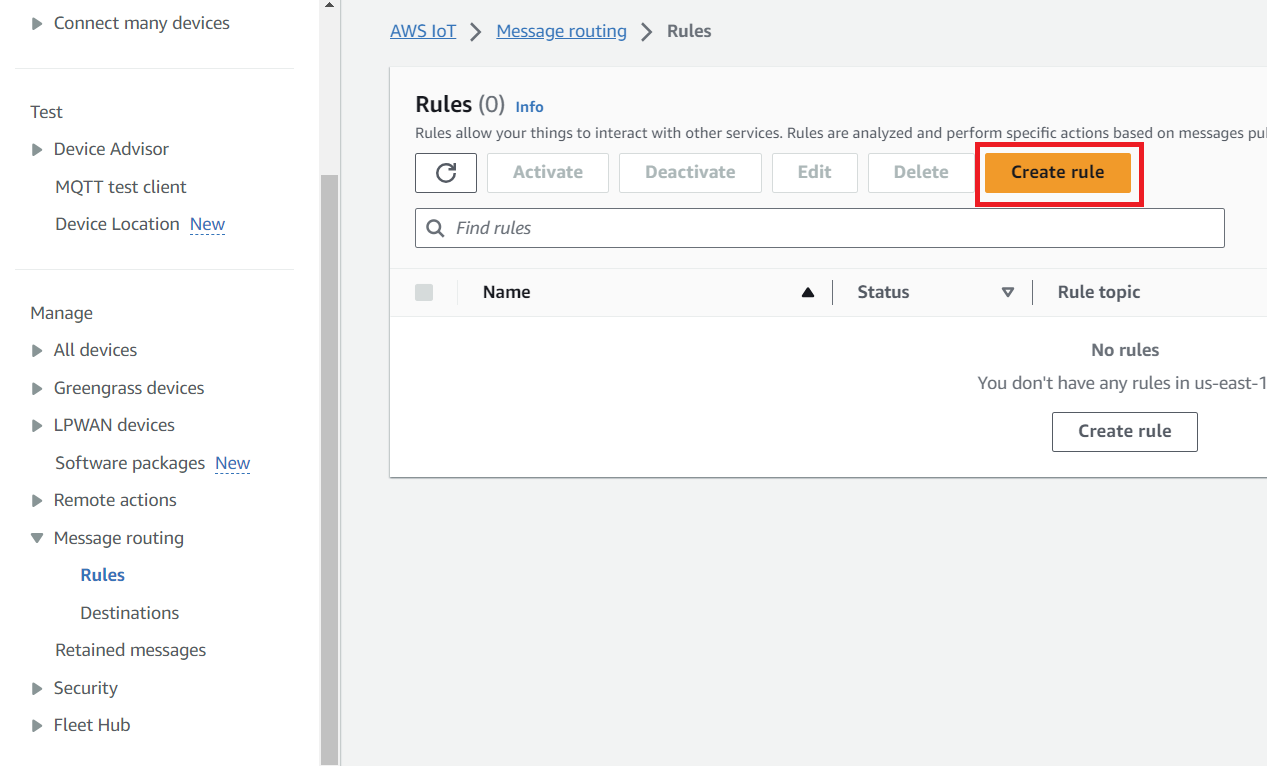
From the menu on the left side of the screen, click the Rule> Create a rule button and make the following entries: We filter only messages delivered under a topic named myTopic that contain a specific IMEI and send the entire message with the SNS mail function when there is a corresponding one .
- Name:
sns_test - Description:
test rule - Message Source
- Using SQL version: Leave as default
- Attribute:
* - Topic Filter:
myTopic/# - Condition:
imei='{IMEI of IoT SIM}'
- Set one or more actions
- "Add action" Click the button.
- Click the "Add action" button to display a list of items that can be specified as actions. From the list, select "Send a message as an SNS push notification" and specify the SNS topic you created in the first step. In the "IAM role name" section, click the "Create a new role" button and enter "aws_iot_sns" and click the button to create a new IAM Role. The figure below is a screen shot of the SNS topic and IAM Role input screen.
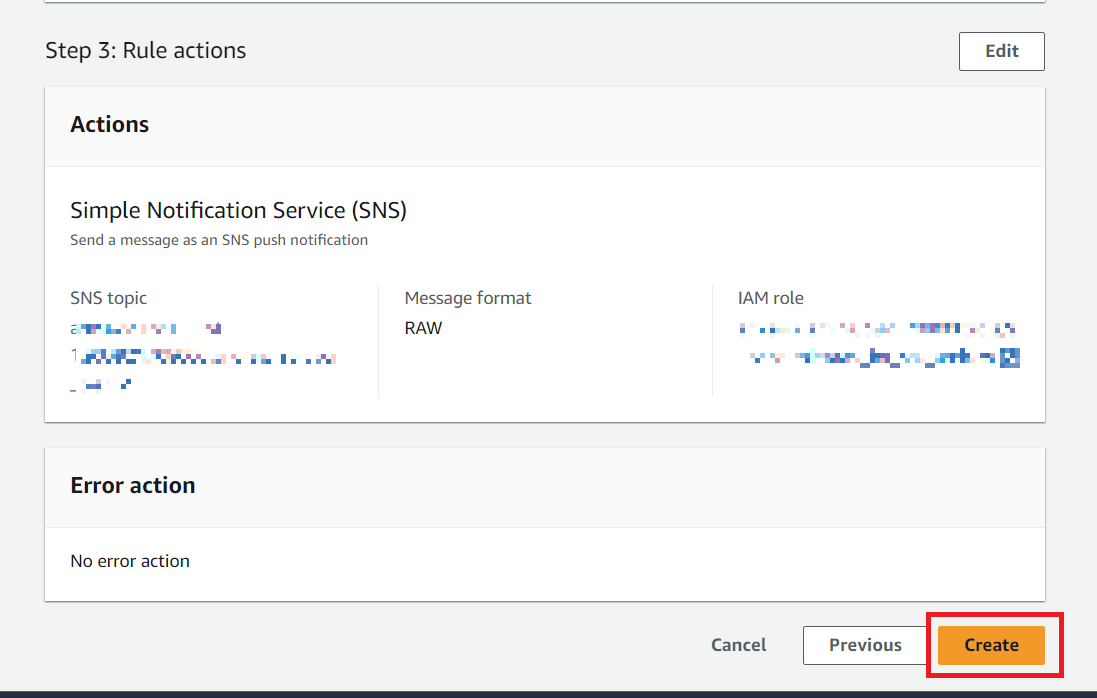
- If you can specify
aws_iot_snsfor IAM Role Name, click Update Role. Finally click the "Add Action" button. - When the setting of Action finishes, it returns to the first screen. Finally, clicking the "Create Rule" button completes the rule creation.

For instructions on creating rules, refer to the document of AWS.
- AWS Documentation: Configure and Test Rules
Our next step is to create the IAM role that will access IoT Core. On the AWS IAM Management Console, select an existing or create a new user and attach the policy.
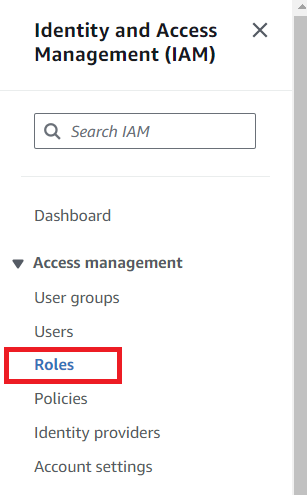
From the AWS IAM screen, select Roles
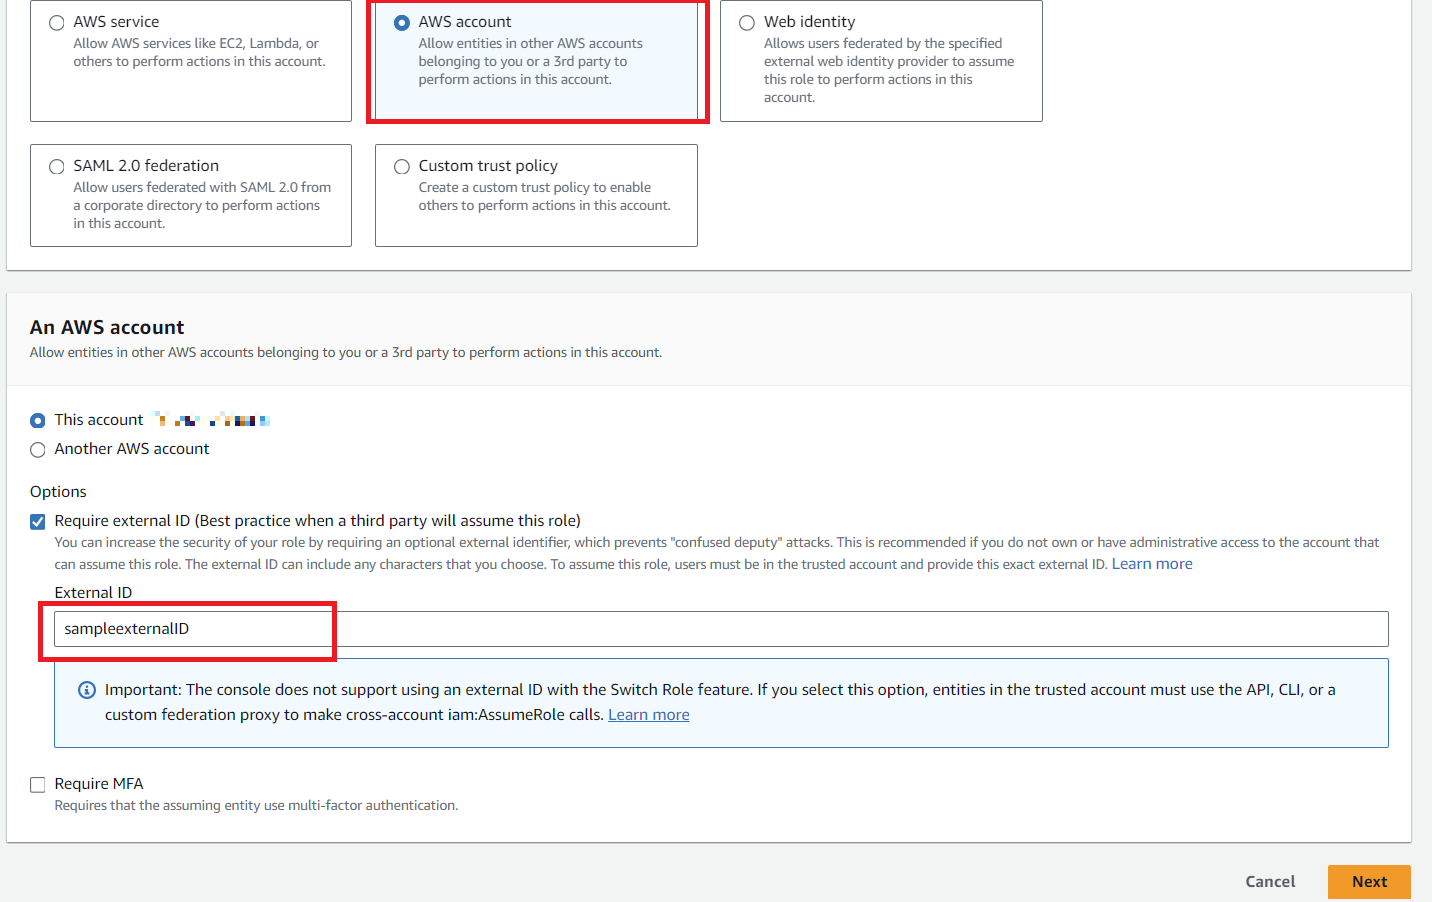
Creat a new role, selecting AWS Account and enable an External ID
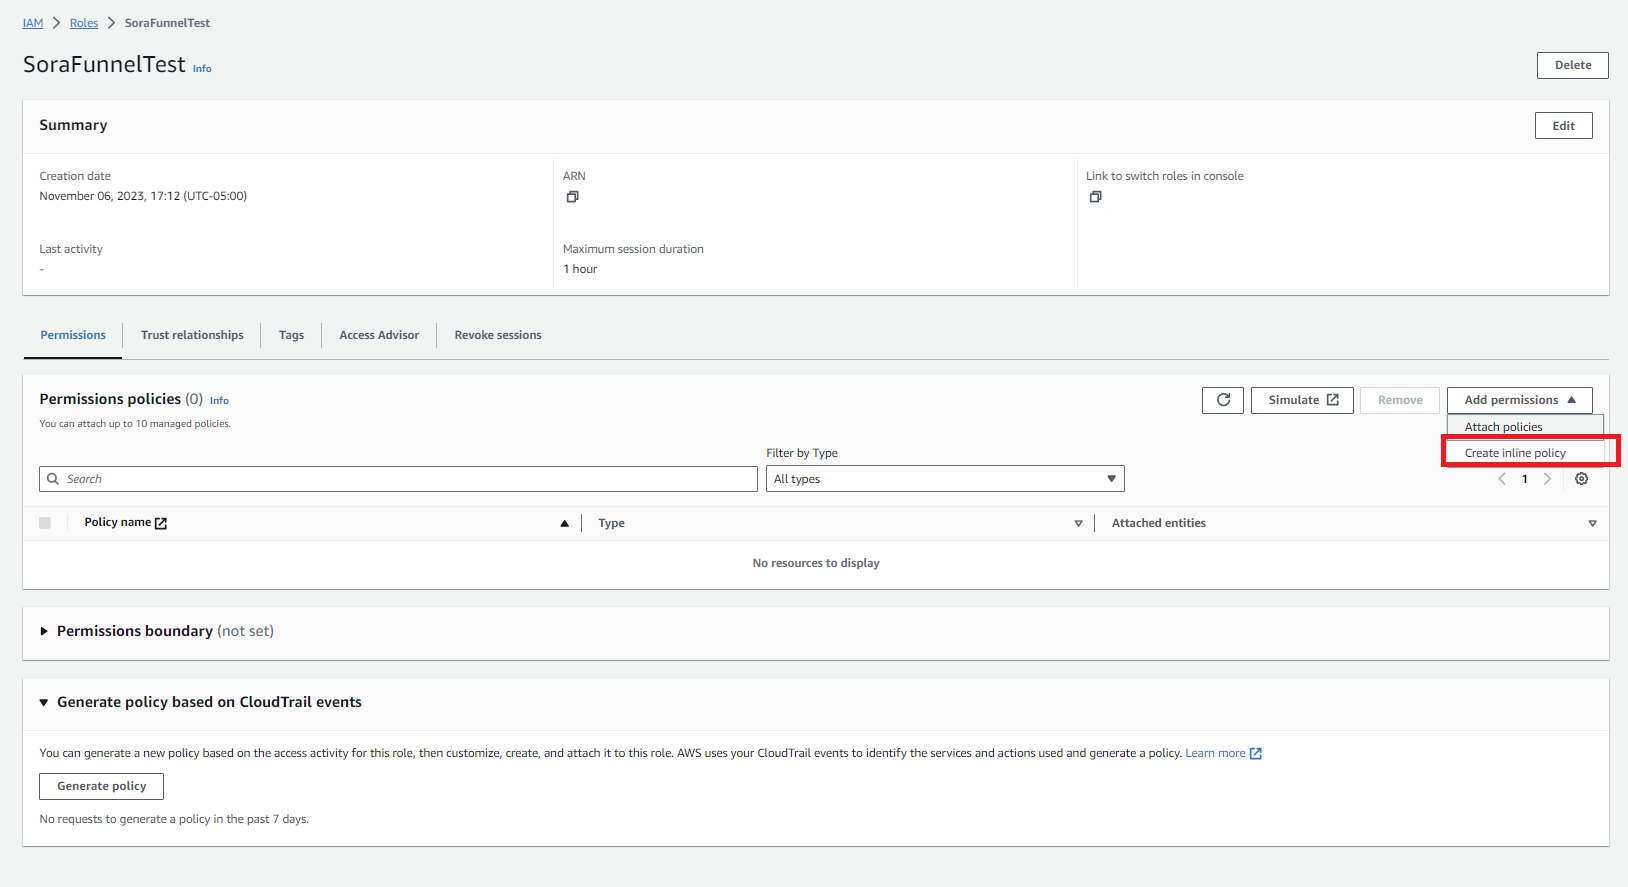
Create a name for the role, select to Create. Then open the role and select Create Inline Policy
Search for IoT, add the Publish permission. Also, select `Add ARN`` and input the ARN.
Within the details of your IAM role, you can view the ExternalID and ARN which will be necessary for setting credentials within the configuration of Funnel.
Set up Funnel
After setting up Amazon SNS and AWS IoT, we will move on to Soracom side setting.
Registration of Authentication Information
In Soracom, certificate and external cloud service authentication information etc. are registered within the Credential set and used for Beam and Funnel authentication.
- In the AWS management console, check the Role ARN and External ID (credentials) of your AWS account. For confirmation, refer to AWS Documentation: Using an external ID for third-party access .
- Log in to the Soracom User Console and go to the Security> Credential Information Store screen from the menu button on the upper left of the screen.
- When you click "Register authentication information" at the upper left of the screen, the registration screen of authentication information is displayed. Enter something easy to understand for the authentication information ID, select "AWS IAM Role Credentials" for the type, and enter the Role ARN and External ID of your AWS account.
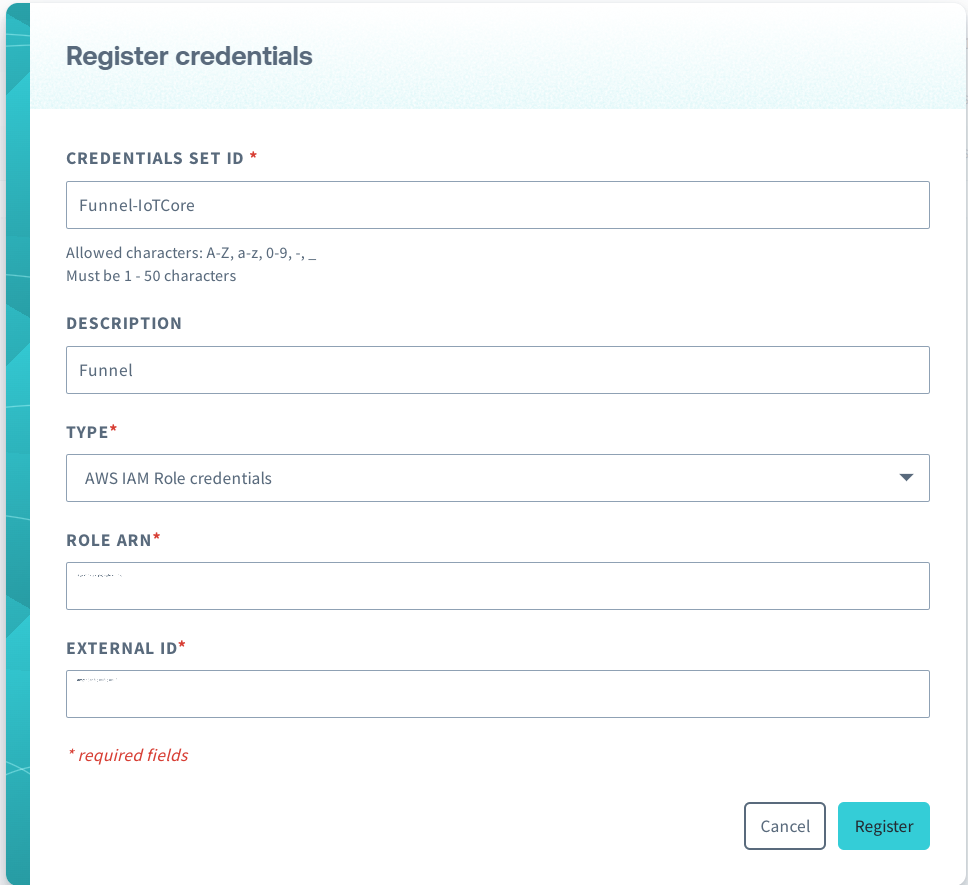
- Registration is completed by clicking the register button at the end.
SIM Group Setting
Funnel settings are done on a per SIM group basis. Follow the procedure below to transfer data to AWS IoT.
- Open the settings screen of the SIM group. (If you do not have one SIM group, create a new group.)
- Open the Funnel advanced settings and make the following entries
| Item | Setting contents |
|---|---|
| Enable/Disable switch | ON (enable) |
| Destination service | choose AWS IoT |
| Destination URL | {Endpoint assigned to your AWS account}/myTopic/#{imsi} |
| Authentication information | Designate what you registered in the previous step |
| Transmission data format | (do not specify) |
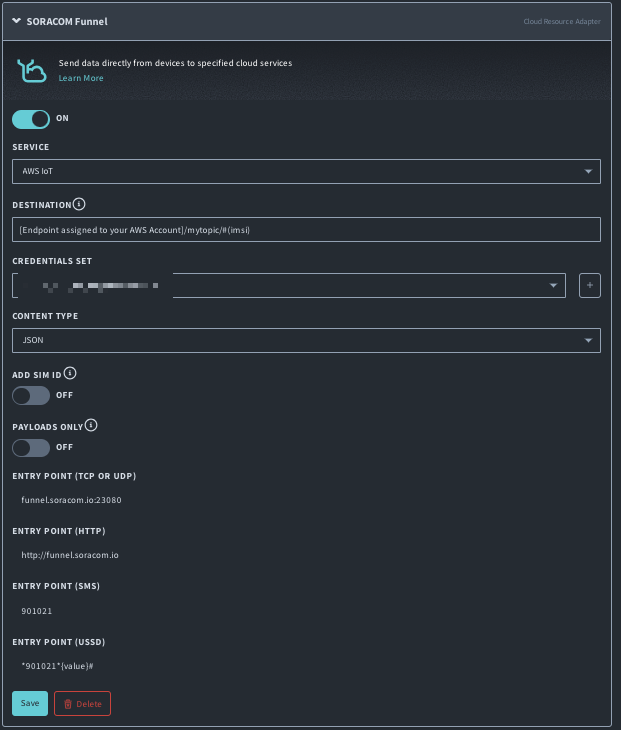
- After entering each item, click "Save" button to complete setting.
Placeholder
You can use placeholder for the forwarding URL of the funnel. Placeholders are automatically replaced by IMSI, IMEI, and LoRa device IDs. The available placeholders are as follows. Be aware that what can be used depends on the communication method.
- Communicate with IoT SIM: #{IMSI} #{IMEI}
- Communicate with LoRaWAN: #{deviceId}
Send Data
With the procedure so far, you are ready to transfer data from Funnel to AWS IoT and send notification via SNS. Finally we will check the operation.
To confirm the operation of this time, use the device communicating with an IoT SIM and the MQTT client of AWS IoT.
Open the AWS IoT management console, select "Test" from the menu on the left side of the screen, and open the MQTT client. On this screen, you can test to receive and transmit data to AWS IoT. For details, refer to the AWS documentation.
- AWS Documentation: Configure and Test Rules
When accessing the MQTT client for the first time, it may take a while for the operation to become ready. In that case, wait a while and access it.
When the MQTT client is displayed, type myTopic / # in the Subscribe to a topic section. This will allow you to receive all messages delivered under a topic named myTopic.

The environment for checking the data reception status is now in place. Next, we send data from the device that can communicate via an IoT SIM cellular connection to Funnel.
Let's try to send the following JSON format data as HTTP request body this time.
{
    "deviceid": "iot123",
    "temp": 54.98,
    "humidity": 32.43,
    "coords": {
        "latitude": 47.615694,
        "longitude": -122.3359976
    }
}
Below is an example of request and response when Raspberry Pi sends data via HTTP. If 204 No Content is returned as a response, data transmission is successful. If another HTTP response code is returned, check the format of the transmission data based on the error code.
curl -v \
|  -H 'Content-Type: application/json'
|  -d '{
|        "deviceid": "iot123",
|        "temp" : 54.98,
|        "humidity": 32.43,
|        "coords": {
|          "latitude": 47.615694,
|          "longitude": -122.3359976
|        }
|      }' \
|  funnel.soracom.io
>
>* Rebuilt URL to: funnel.soracom.io/
>* Hostname was NOT found in DNS cache
>*   Trying 100.127.65.43...
>* Connected to funnel.soracom.io (100.127.65.43) port 80 (#0)
>> POST / HTTP/1.1
>> User-Agent: curl/7.38.0
>> Host: funnel.soracom.io
>> Accept: */*
>> Content-Type:application/json
>> Content-Length: 156
>>
>* upload completely sent off: 156 out of 156 bytes
>< HTTP/1.1 204 No Content
>< Date: Thu, 30 Mar 2017 11:12:43 GMT
>< Connection: keep-alive
><
>* Connection #0 to host funnel.soracom.io left intact
At this time, on the MQTT client of AWS IoT Management Console, the message is displayed as follows. Also, if rules are set correctly, mail will also be sent from SNS. If both can be confirmed, operation confirmation is completed.
If you can not receive a message or if you do not receive the e-mail check the following points.
- Whether the setting of the rule is as per the sample
- Refer to Troubleshooting AWS IoT for the point of confirmation. Logging with CloudWatch Logs helps troubleshoot.
- E-mail address is registered in SNS topic
- Whether the transfer destination URL registered in the Funnel setting is in accordance with the sample
Application Example
The advantage of Funnel's AWS IoT adapter is that it only transmits the data sent from the device to the entry point of Funnel, which enables AWS IoT to cooperate with various AWS services. It also supports TCP / UDP / HTTP protocols and can communicate with protocols that match device and system requirements. In addition, you can embed # {imsi}, # {imei} as a variable in the path of the URL in the setting item of Funnel as the transfer destination URL. By using this function, it is possible to automatically set SIM's IMSI and IMEI as topic names, and it is easy to do with a specific SIM or device.
Specific examples of usage are as follows.
- Filter by IWT with IMSI as a keyword and process data with Lambda Function when receiving data from a specific SIM.
- Data from the sensor is aggregated into AWS IoT and accumulated in AWS DynamoDB.
Funnel is specialized in uploading data to cloud services, and it does not support downlink communication to devices. Use Soracom Beam when using the AWS IoT Thing Shadow feature.