Provisioning with Amazon Cognito
By enabling Krypton for Amazon Cognito, you can easily request temporary credentials from a Cognito Identity Pool. Krypton implements the Enhanced Authflow Identity Pool Authentication Flow detailed in the Amazon Cognito Developer Guide documentation.
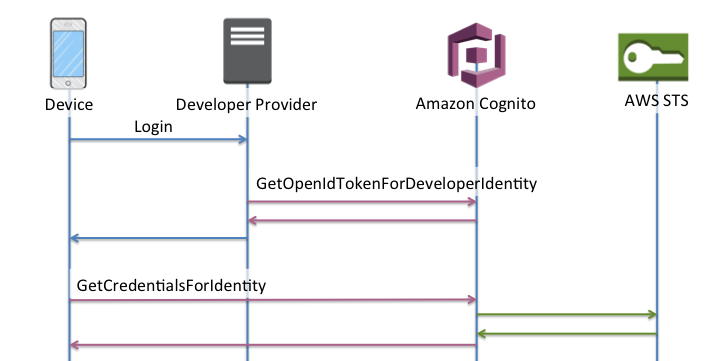
Krypton uses SIM authentication to call Amazon Cognito's GetOpenIdTokenForDeveloperIdentity API to receive an OpenID token. Krypton then uses the token with the GetCredentialsForIdentity API in order to request temporary AWS credentials.
After temporary credentials have been issued, your device will be able to securely access AWS services such as Amazon S3, without having to install credentials on the device beforehand. Moreover, credentials issued by Cognito through Krypton are valid for any network connection, allowing you to utilize ethernet or Wifi as a primary backhaul, and utilize the Soracom Air cellular connection as a backup.
Configuring Amazon Cognito
In order to enable Amazon Cognito integration, your AWS account must be configured to provide Krypton with programmatic access to Amazon Cognito. This process only needs to be performed once, and involves the following steps:
- Create and configure an Amazon Cognito Identity Pool.
- Create an IAM User with access for issuing OpenID tokens, and generate an Access key ID and Secret access key credential set.
- Register the credential set on Soracom, and configure Krypton.
Creating a Cognito Identity Pool
-
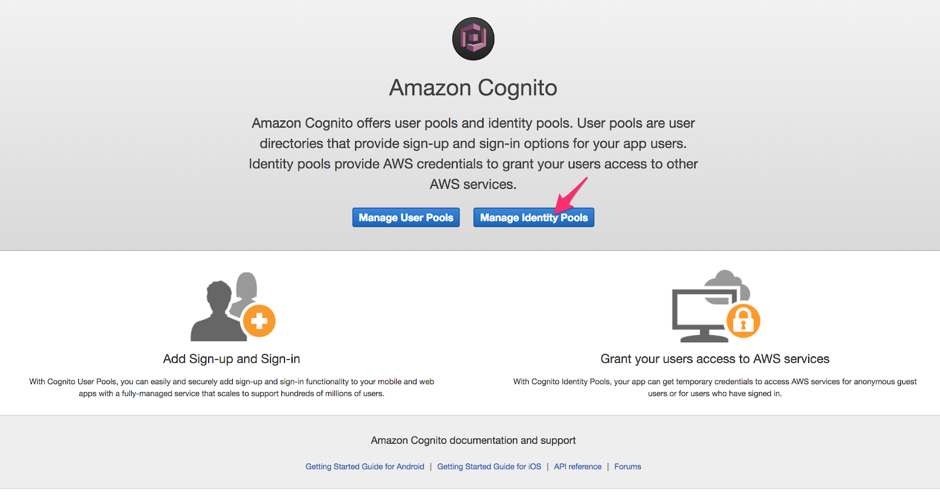
Sign in to the AWS Management Console. From the Services menu, open the Cognito dashboard.

-
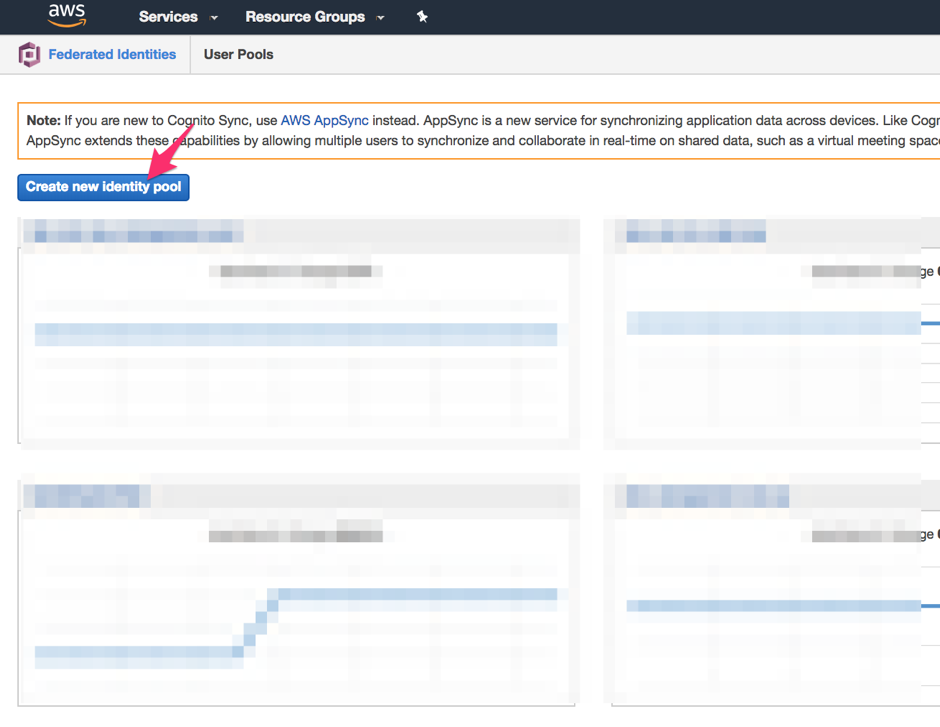
Click the Manage Identity Pools button.
-
Click the Create new identity pool button.
-
Enter an Identity pool name. Then set a Custom Authentication provider, and set the Developer provider name as
krypton.soracom.io.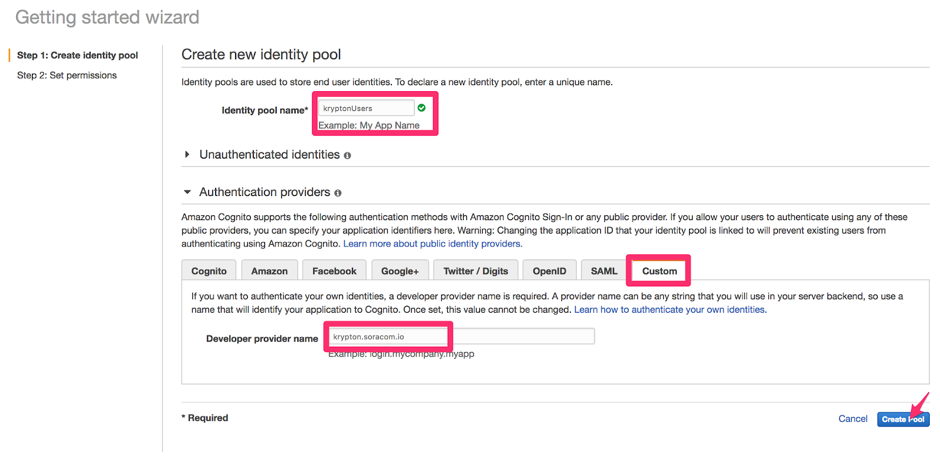
-
Click the Create Pool button.
-
Cognito will give you the option of choosing which policies are applied to a device when it successfully authenticates using the identity pool. By default, Cognito will create new IAM roles to use with the identity pool, however you can specify a different role, or edit the role later if needed.
Click the Allow button to finish creating the identity pool.
Once the identity pool has been created, Amazon Cognito will display its details. Make a note of the Identity pool ID, as it is required when configuring Krypton.

Creating an IAM User
-
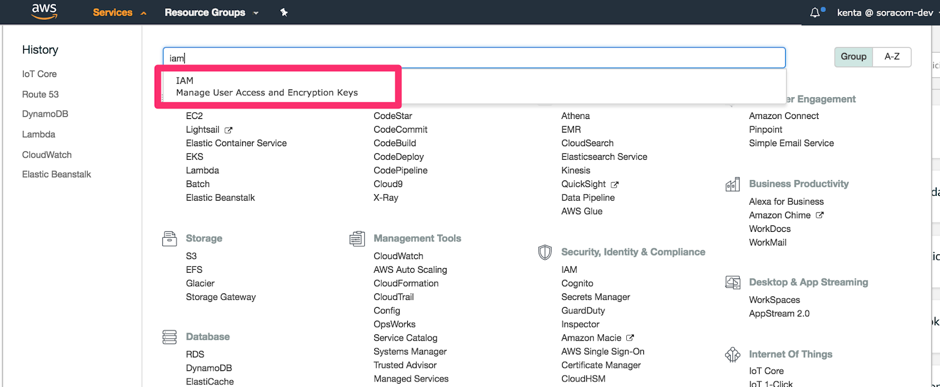
From the AWS Services menu, open the IAM dashboard.
-
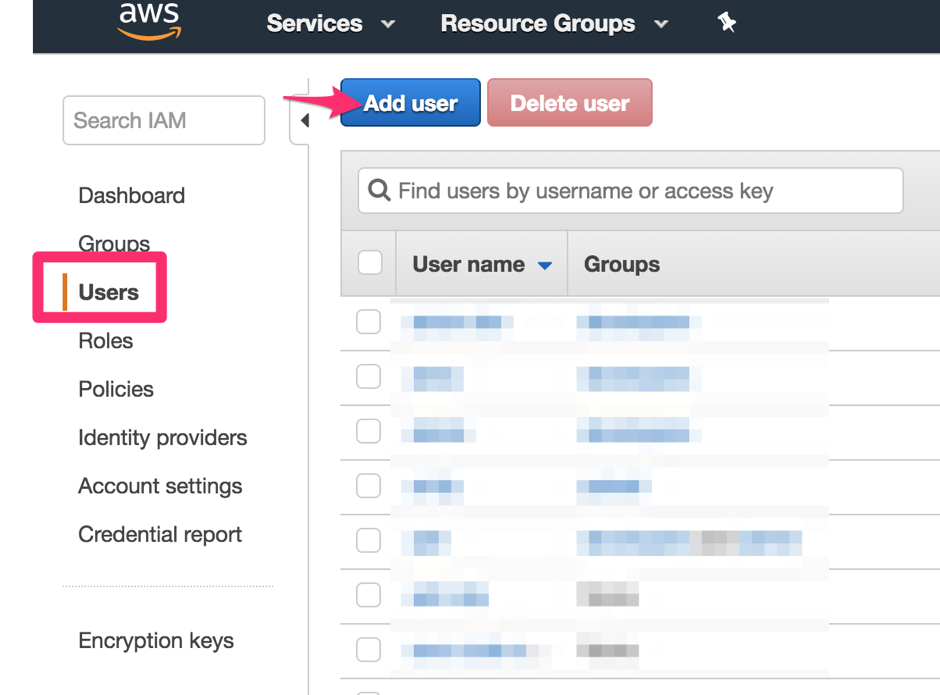
Click the Users section, then click the Add user button.
-
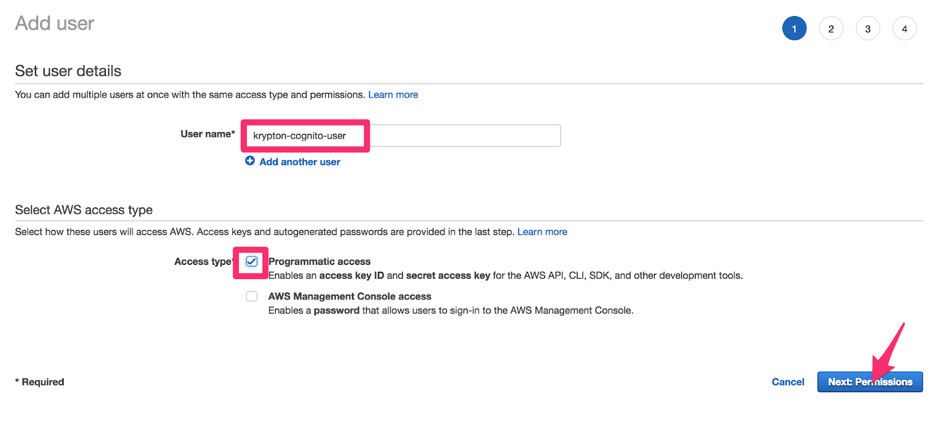
Enter a User name, and enable Programmatic access. Then click the Next: Permissions button.
Our IAM user reqiures permission in order to utilize Cognito. This permission is provided by an AWS policy, which we will attach to our user:
-
Under the Set permission section, click Attach existing policies directly.
-
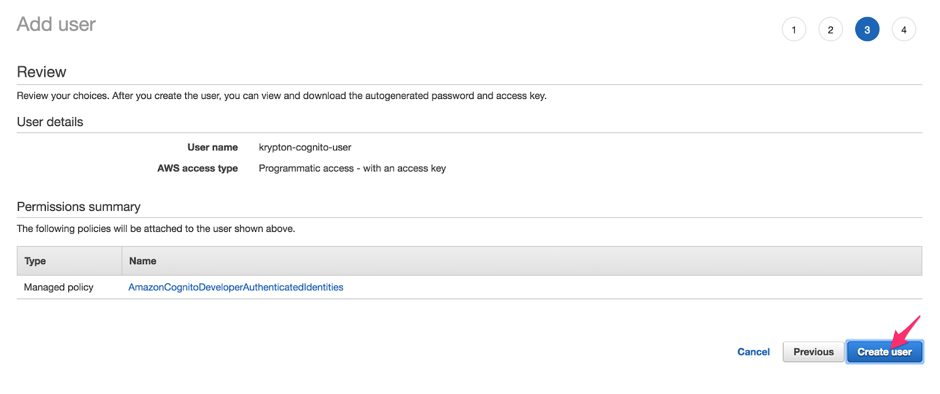
Search for the
AmazonCognitoDeveloperAuthenticatedIdentitiespolicy and click its to attach it to the new user.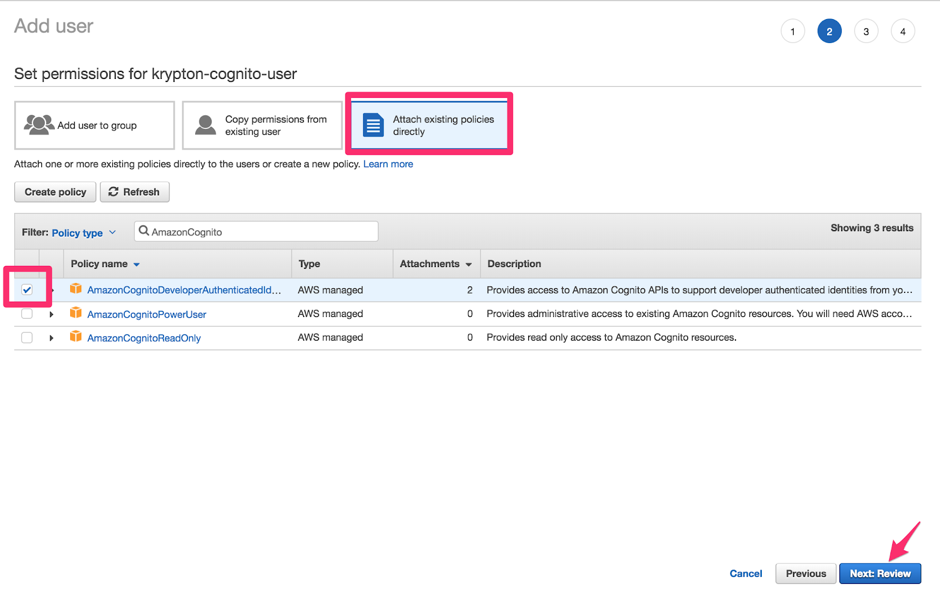
-
Continue the Add user wizard by clicking the Next buttons, keeping the default values for the remaining sections. Then click Create user to complete the wizard.
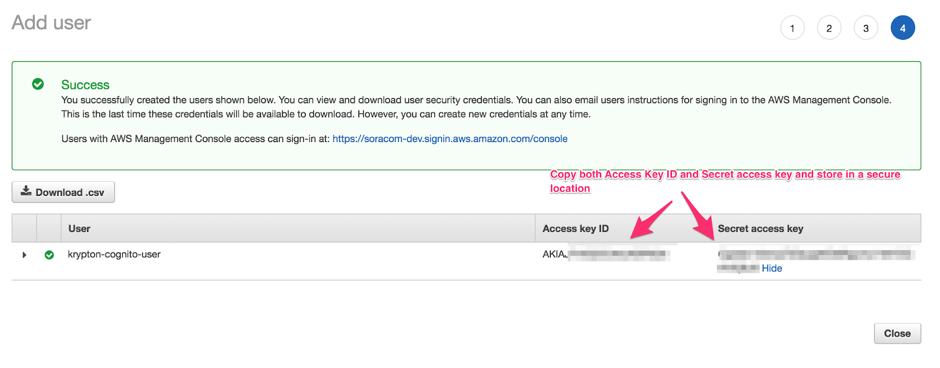
Once the new user has been created, it will appear along with its Access key ID and Secret access key. Save these keys in a secure location.
Configuring Krypton
Once your AWS account has been configured using the above steps, you will have the following information:
- Amazon Cognito Identity pool ID
- IAM user Access key ID and Secret access key
You can then use this information to configure Krypton using the Krypton Configuration documentation, following the instructions for integrating Krypton with Amazon Cognito.
Once Krypton has been configured, your devices can begin using Krypton's provisioning service.
Example Provisioning Process
The following NodeJS project demonstrates the typical bootstrap process utilizing Krypton to request temporary credentials from Amazon Cognito in order to access Amazon S3.
Requirements:
- NodeJS 8.10 or higher
Project Installation
Download the Krypton Example Project for NodeJS to your device and extract it. This will create a /kryptonExamples directory containing an cognito-auth.js NodeJS project file.
Open the /kryptonExamples directory and install package dependencies:
npm installAuthentication Method
The cognito-auth.js file expects a krypton-cognito script which will perform device authentication. Our example project includes the following authentication scripts:
- krypton-cognito-cellular - Authenticate using Soracom Air for Cellular
- krypton-cognito-endorse-go - Authenticate using Soracom Endorse and Krypton Client for Go
- krypton-cognito-endorse-java - Authenticate using Soracom Endorse and Krypton Client for Java
Let's make a symlink for one of these scripts:
ln -sf krypton-cognito-cellular krypton-cognitoIf using Air authentication, ensure that your modem is connected.
If using Endorse authentication, you will also need to download and extract the corresponding Krypton Client to the same /kryptonExamples directory. Refer to the Krypton Overview documentation and Krypton Client repositories for installation requirements and instructions.
Bootstrap
Now let's run the cognito-auth.js script:
node cognito-auth.jsAs the script runs, it will perform the following:
- Perform device authentication using Soracom Air or Soracom Endorse.
- Provision using Krypton and receive temporary credentials from Amazon Cognito.
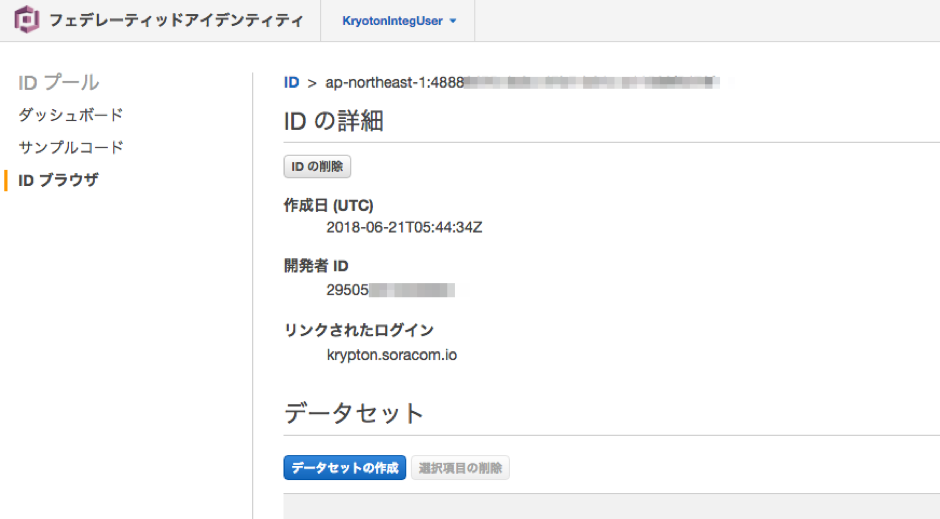
Once the device has received credentials from Amazon Cognito, the NodeJS script will output Successfully obtained AWS credentials. You can also verify that the subscriber IMSI appears in in the Cognito identity pool by using the Amazon Cognito Identity Browser.
Accessing AWS Resources
The cognito-auth.js script can be quickly modified to begin accessing AWS resources using the temporary credentials provided through Soracom Krypton and Amazon Cognito.
For example, to access the list of objects in an S3 bucket in your AWS account, edit the cognito-auth.js script to enable the following section:
initializeCredentials().then(() => {
  console.log("Successfully obtained AWS credentials");

  const s3 = new AWS.S3();

  s3.listObjects({Bucket: 'my-s3-bucket'}, (err, data) => {
    if (err) console.error(err);
    console.log(data);
  });
});
Make sure to replace my-s3-bucket with the name of your bucket. The IAM role attached to the device must also have the appropriate AWS policy for accessing S3 resources. Then simply re-run the script from your device to test that your device can successfully retrieve the list of objects.