Order Management
The Orders screen allows you to purchase devices and IoT SIMs directly from Soracom and manage your order history.
To open the Orders screen, first click the Menu button, then click Orders.
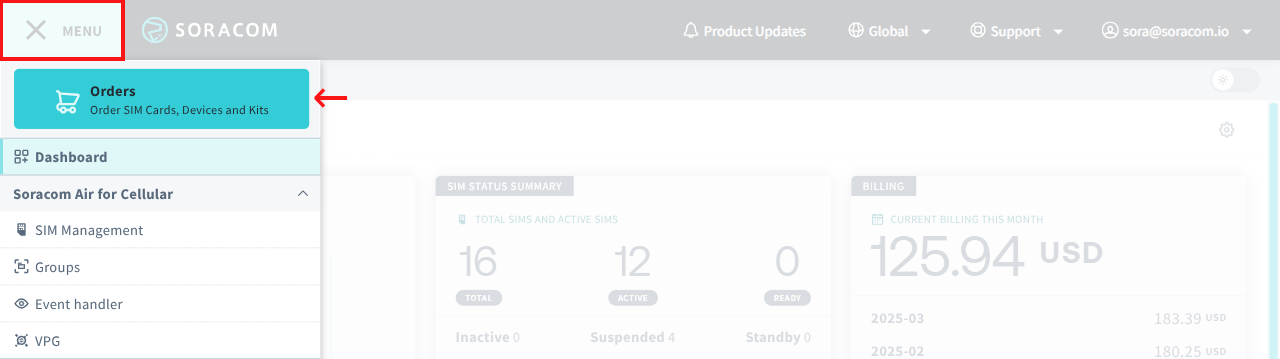
From here, you can view all orders associated with your account.
For ordering eSIM Profiles, see the eSIM Profiles documentation.
Placing a New Order
-
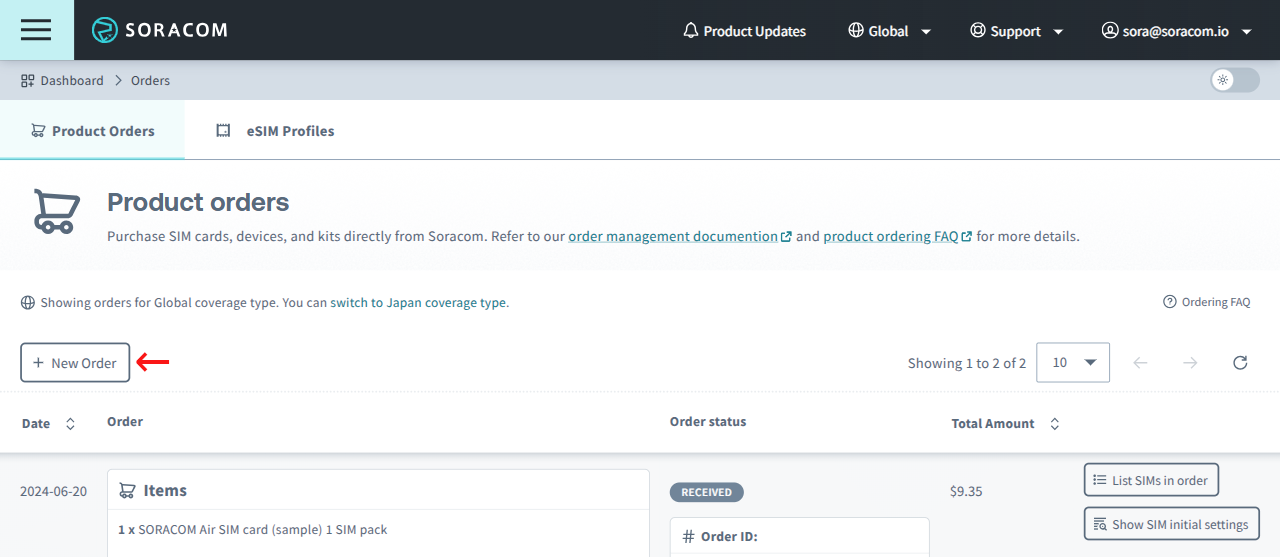
From the Product Orders tab, click New Order to begin making a purchase.
We recommend ordering IoT SIMs from the Soracom account that will use them.
IoT SIMs ordered from the User Console are automatically associated with the Soracom account used to place the order.
To use IoT SIMs with a different Soracom account, you must transfer the SIMs to that account. The transfer process depends on the SIM status at the time of transfer. Fees may apply, or you may not be able to transfer the SIMs at your preferred timing. For more information, refer to Transferring Soracom IoT SIMs.
If you purchase a product that includes a Soracom platform coupon, the coupon is associated with the Soracom account used to place the order. Coupons cannot be transferred.
-
Set the quantity of products you would like to purchase on the SIM Cards, Devices and Misc. (kits, etc.) tabs and click Next.
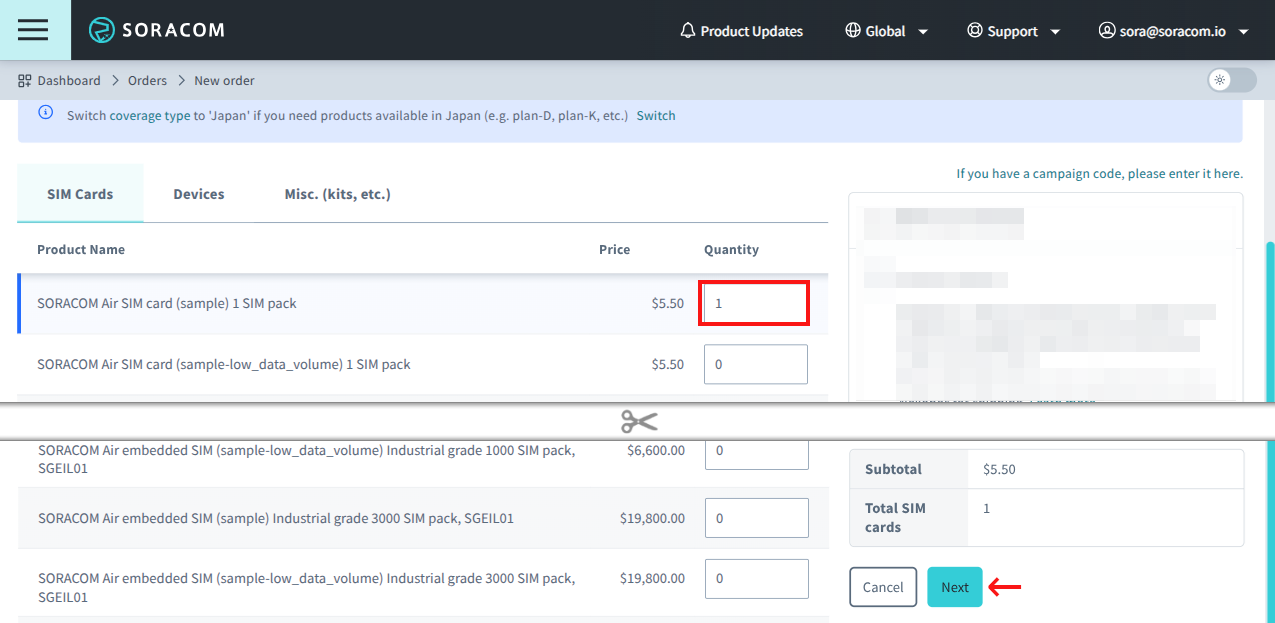
When purchasing from the User Console, there is a limit on the number of items that can be purchased at a time. If you would like to purchase more than the limit, create multiple orders or contact our sales team.
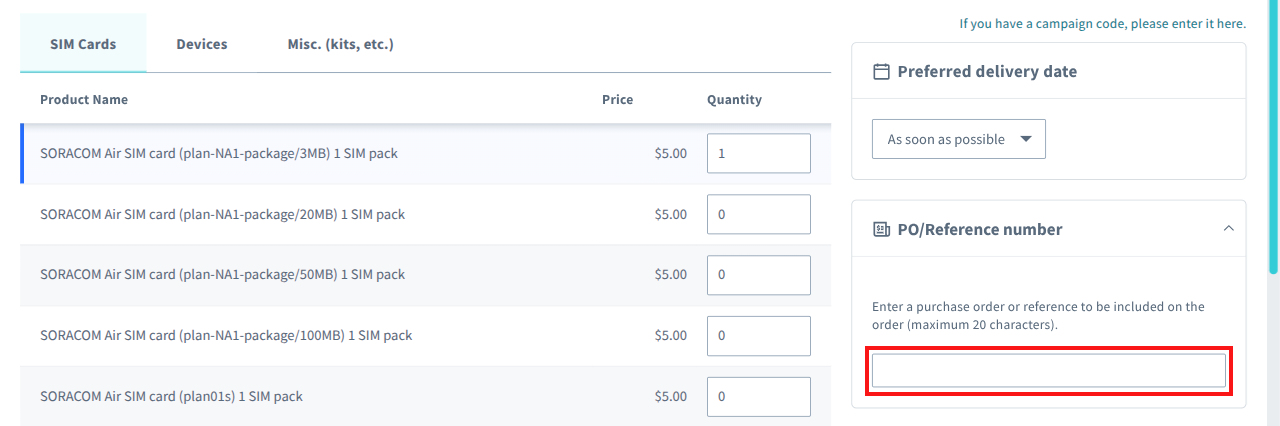
Note that you can optionally insert a purchase order number or reference number in the PO/Reference number field. Doing so will ensure the number appears on your invoice and on the delivery statement. This can be helpful when placing multiple orders or for accounting purposes.
Some products may not be available in your region. If an item you are trying to order is not shown, contact Soracom Support to inquire about availability.
Select Soracom IoT SIMs are also available on Amazon. In some cases, purchasing from Amazon may be cheaper even with shipping included.
-
Select a shipping address registered in your Soracom account and click Next.
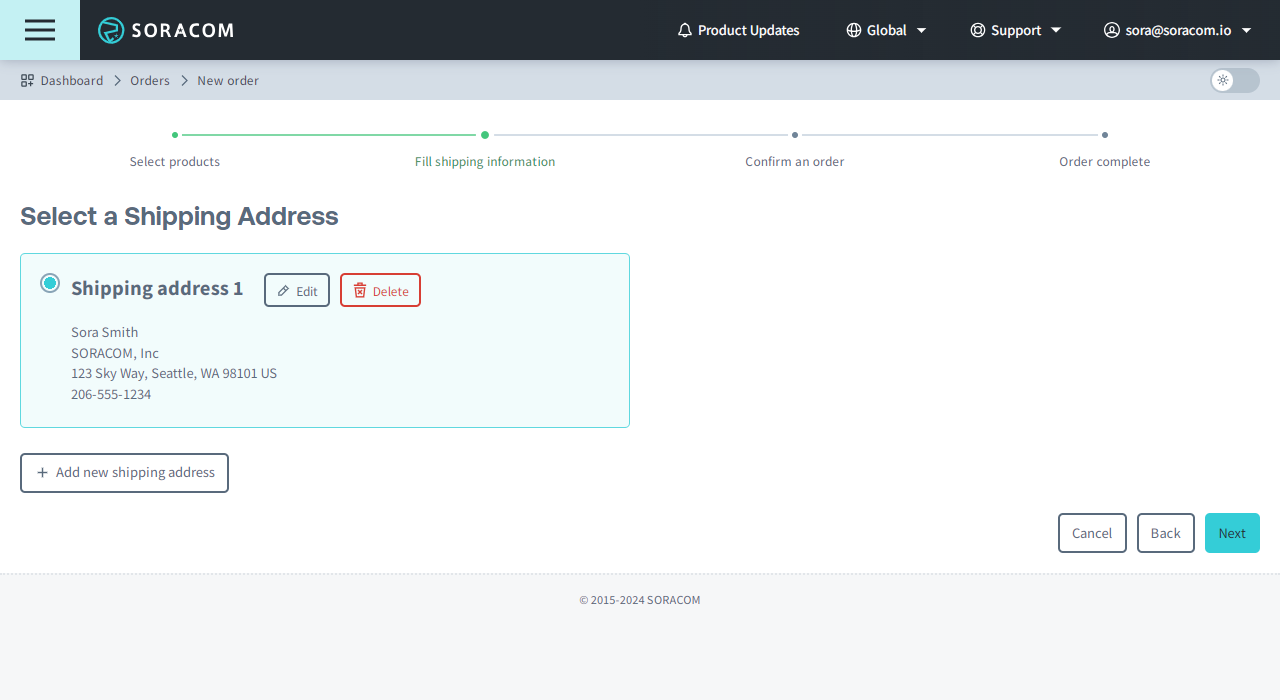
In certain cases, an order may not be deliverable to a particular country due to availability or other restrictions. If you are unable to select a country where you would like your order to be delivered, contact Soracom Support for assistance.
Depending on your location and shipping address, additional shipping options may be available. You may select one of these options according to your shipping preferences.
-
Read and confirm the information by checking the under agreements such as Precautions, Product sales terms & conditions, and Important Notes for SIM Subscription Plans, then click Complete order to submit your order.
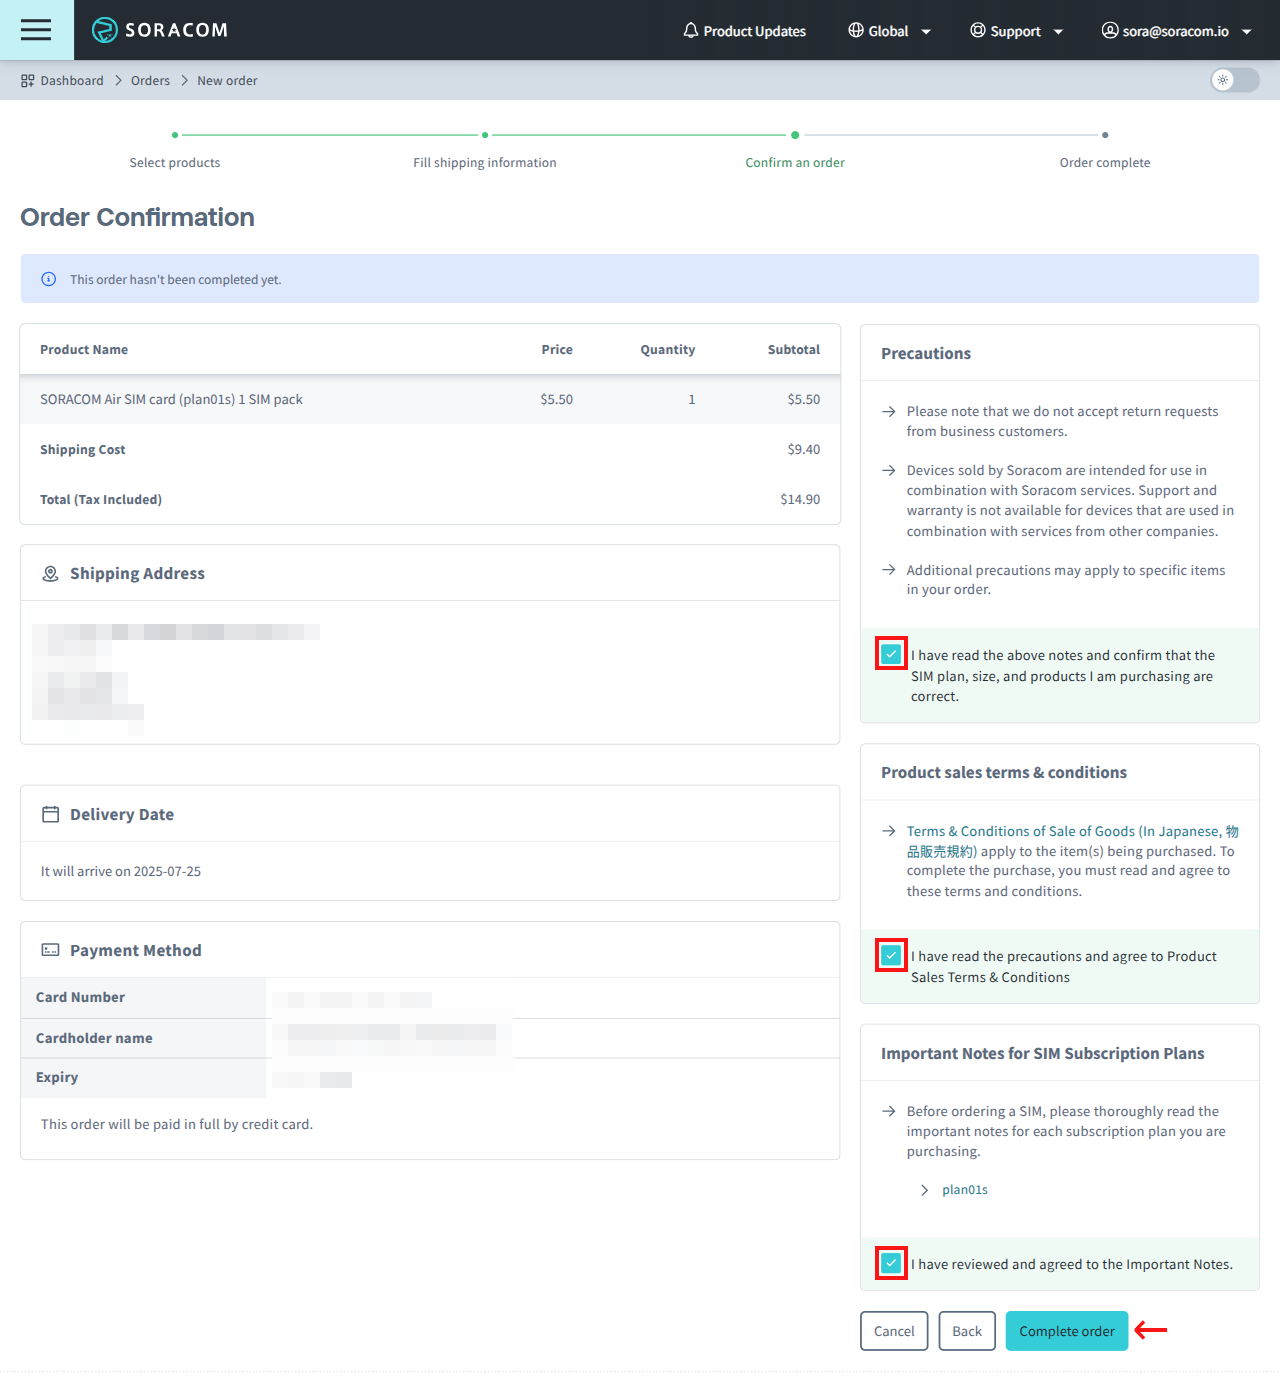
Once you have completed your order, it will be sent to our fulfillment teams for processing. Orders will typically take 1-2 business days to process.
Your credit card will be charged once your order ships.
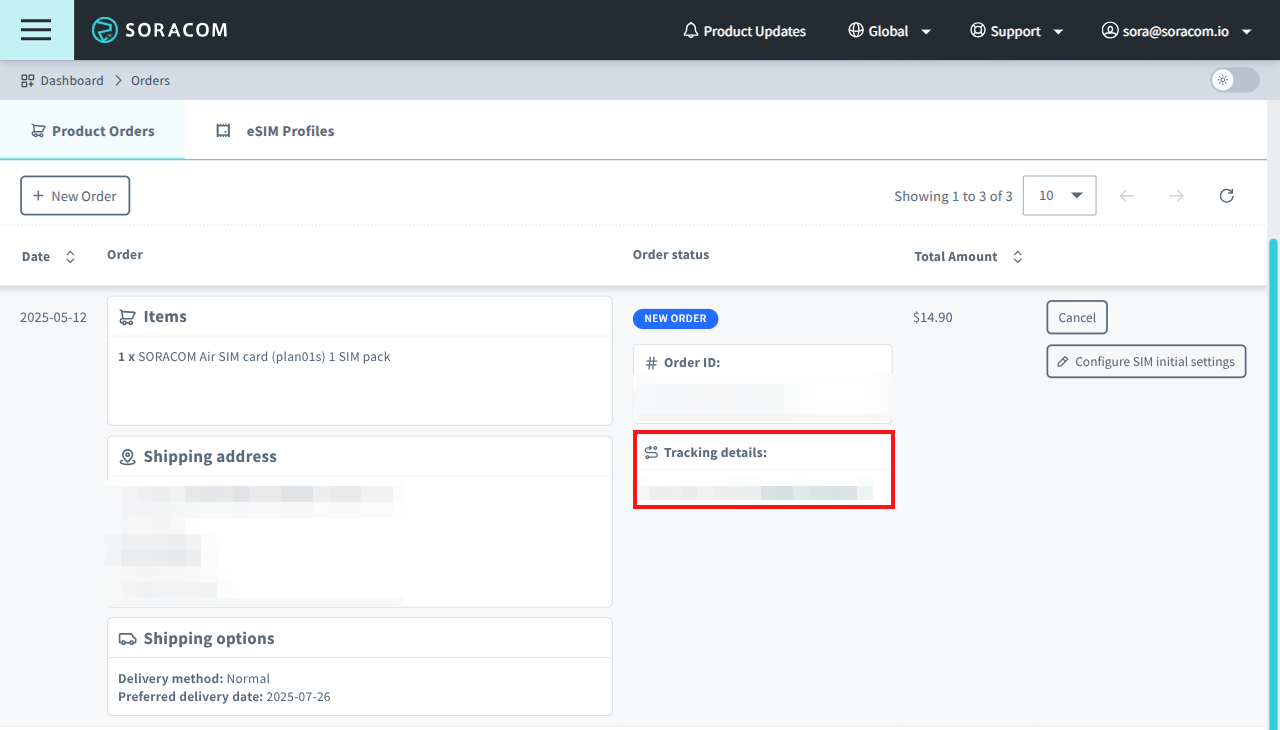
Once an order has been shipped, order tracking details will become visible on the Product Orders tab. These details will include the name of the delivery company and tracking number(s), and clicking the delivery company link will take you to the delivery company's shipment status inquiry page, where you can enter the tracking number to check the delivery status.
If you need to modify your order, cancel your existing order and create a new order.
Configuring Initial SIM Settings
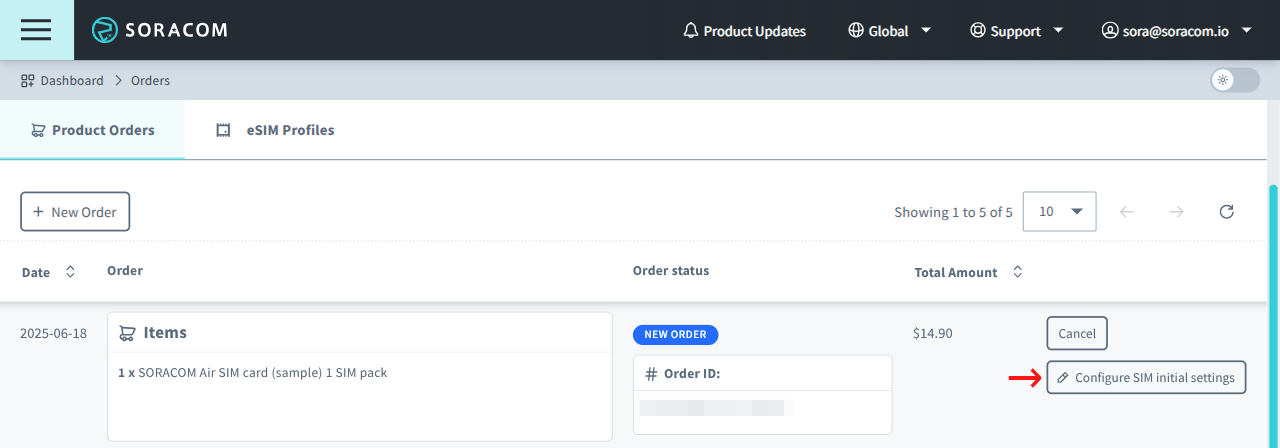
Optionally, you can pre-configure initial settings for Soracom IoT SIMs before the order has been shipped.
To set initial settings from an order:
- Click Configure SIM initial settings.
-
Assign settings.
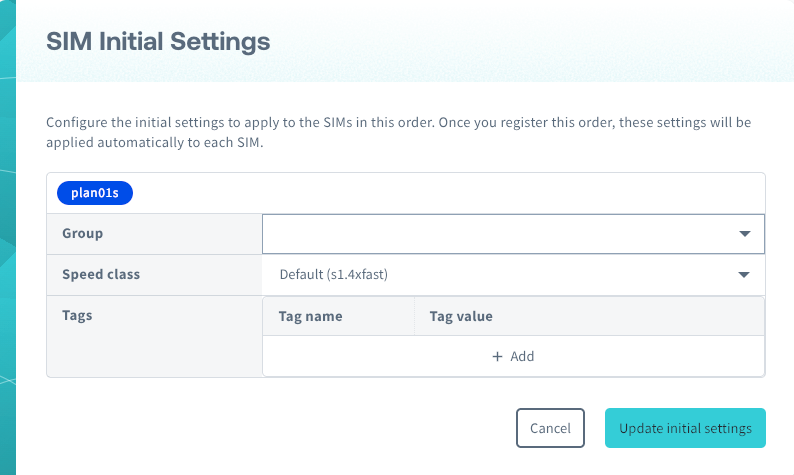
- Group: Assign the IoT SIMs to a Group.
- Speed class: Select a Speed class.
- Tags: Add tag Name and Value pairs (Tags).
You can also configure the same settings from the SIM Management screen.
Canceling an Order
To cancel an order that has not yet started processing, click the Cancel button next to the order from the Product Orders tab.
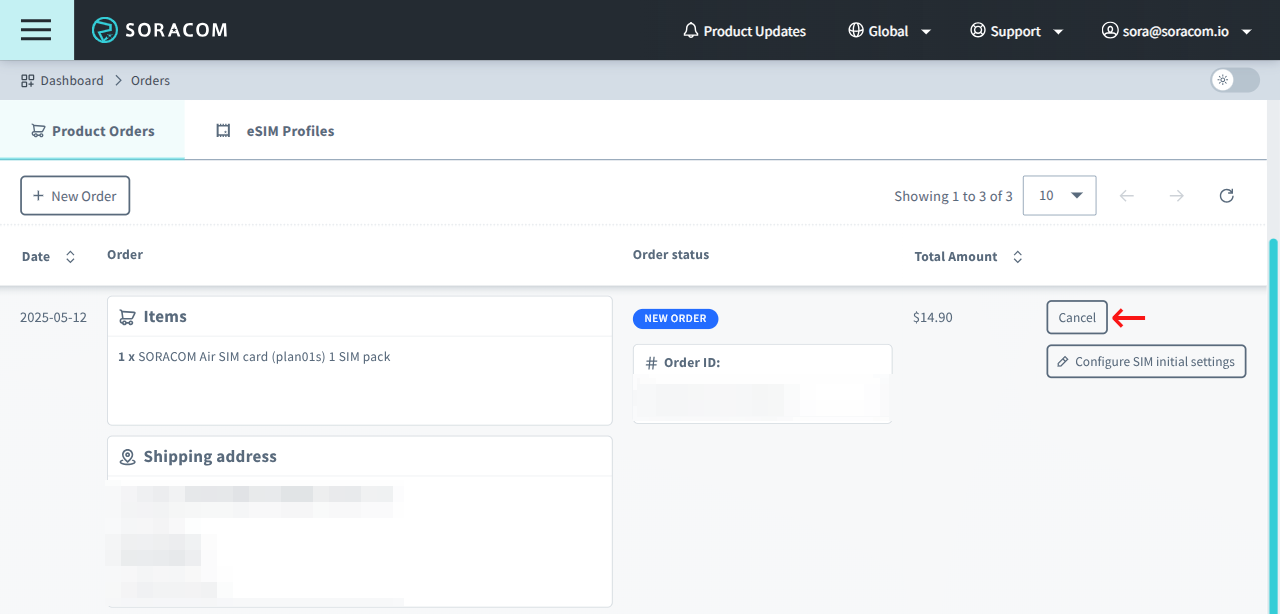
Orders can only be canceled before processing begins. If you need to cancel an order that has already entered processing, contact Soracom Support as soon as possible.
Registering an Order
If your order contains IoT SIM cards or Sigfox devices, they will be pre-registered to your account. Pre-registration simply associates each IoT SIM card or Sigfox device to your account; however, registration will not be finalized and your IoT SIM cards or Sigfox devices will not appear in your account until registration is complete.
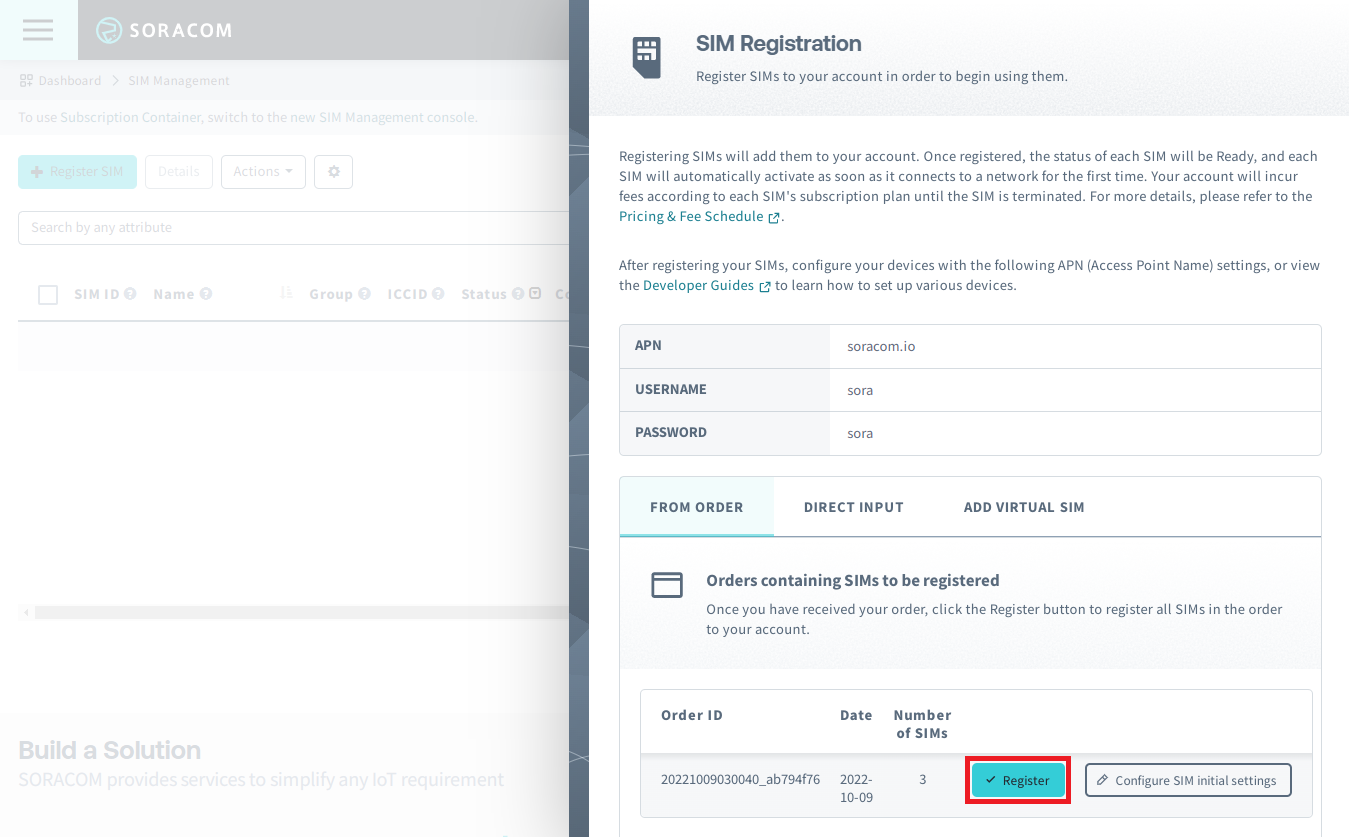
By finalizing your registration, all IoT SIM cards and Sigfox devices in your order will automatically be registered to your account. This process allows you to register large quantities of IoT SIM cards or devices without the need to enter the registration information separately for each item.
For more information on registering SIM cards or Sigfox devices to your account, refer to the Registering Soracom IoT SIMs and Sigfox Device Registration documentation.
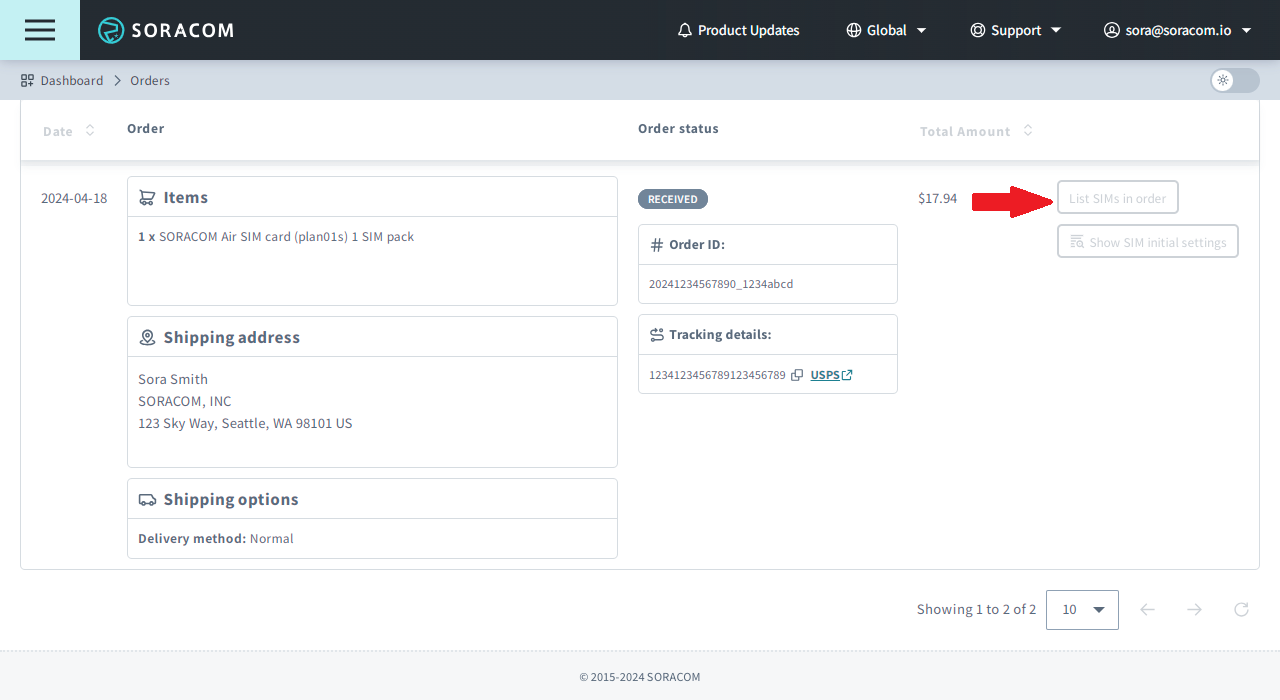
Downloading IoT SIMs in an Order
You may find it helpful to download a list of all IoT SIMs or subscribers that were included in a specific order for use in a database or for viewing in an application. You can download a CSV file containing a list of all subscribers that were included in a particular order.
To download a CSV file containing a list of IoT SIMs included in an order:
-
Sign in to the User Console. From the Menu, open the Orders screen.
-
From the list of orders, find the order that contains the IoT SIMs you want to download, and click the List SIMs in order button.
You can also download a list of all SIMs or subscribers in your account from the SIM Management screen. For more information, refer to the Registration: Downloading a List of Registered SIMs instructions.
Downloading an Order Invoice
Order invoices containing the details of orders placed through your Soracom account are available for download from the User Console.
To download an order invoice:
-
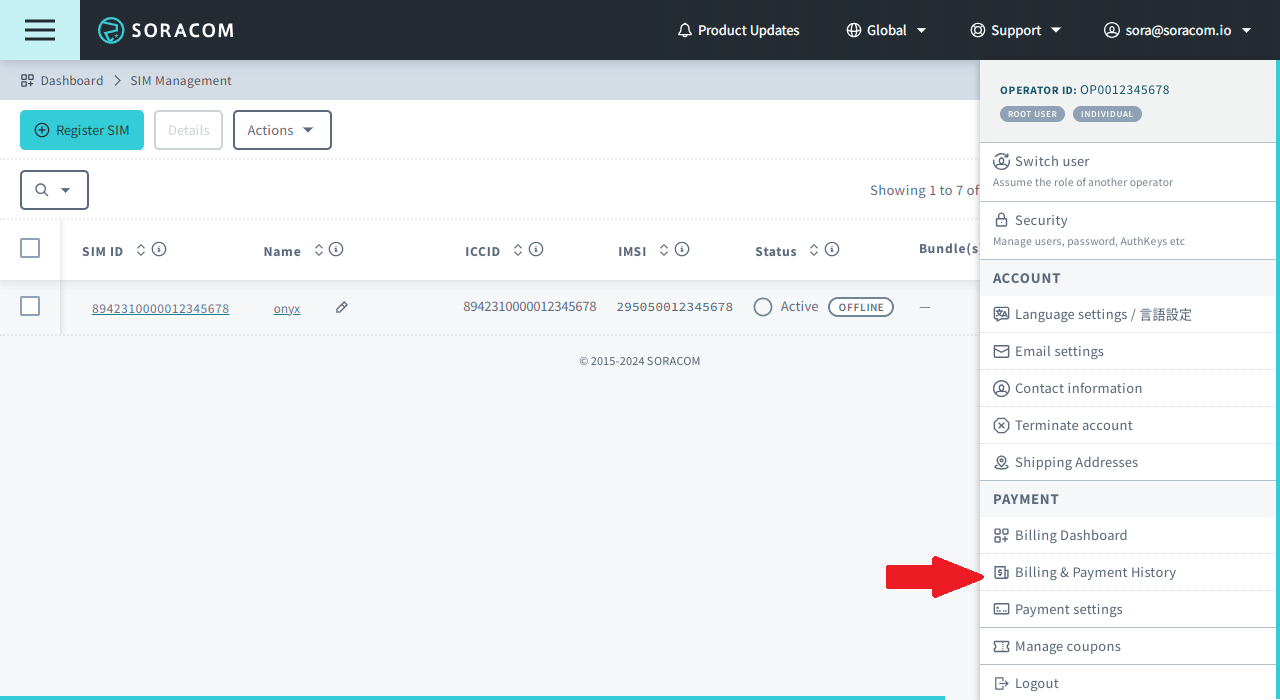
Sign in to the User Console. Click your account menu, then select Billing & Payment History.
-
Locate your order.
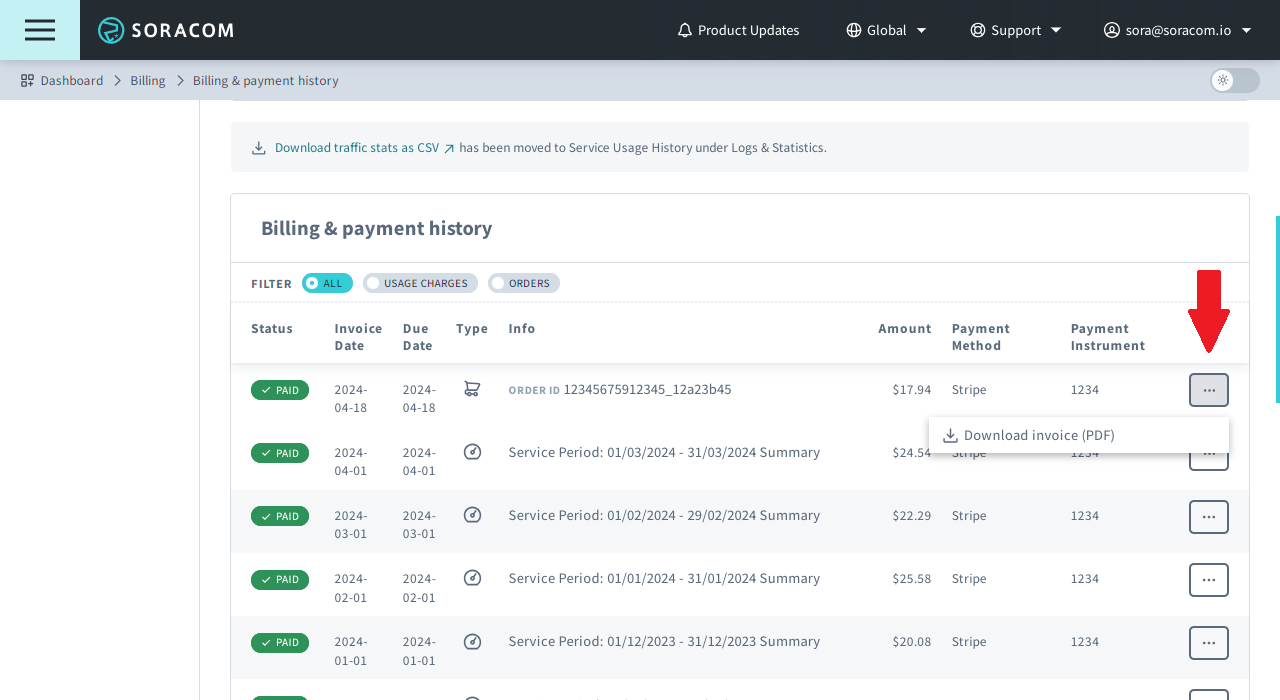
- Click Download invoice for the order you want to view.
Invoices will be available for download for the past 18 months
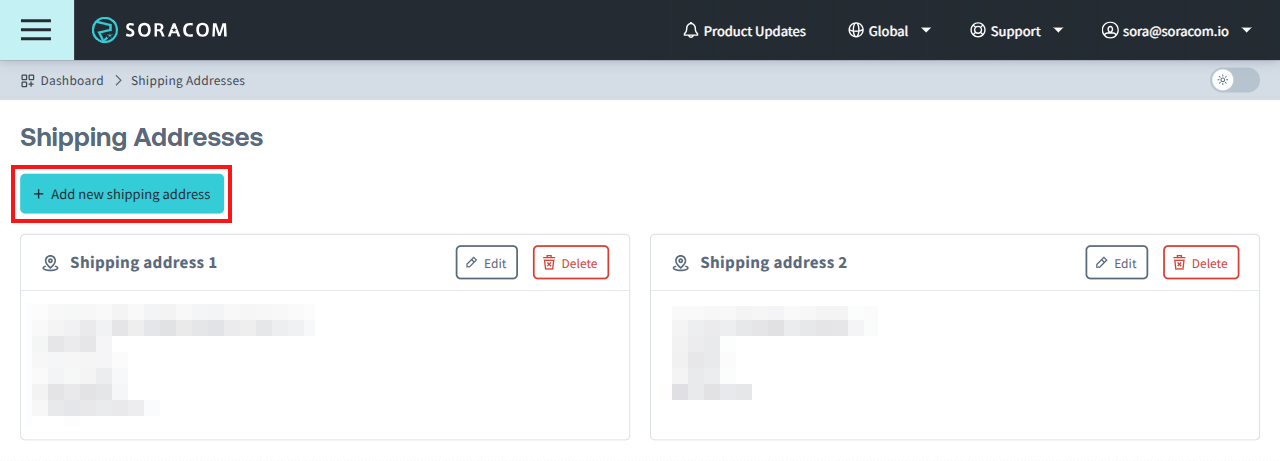
Shipping Address
The Shipping Addresses screen allows you to add, remove, or update shipping addresses tied to your account for future orders.
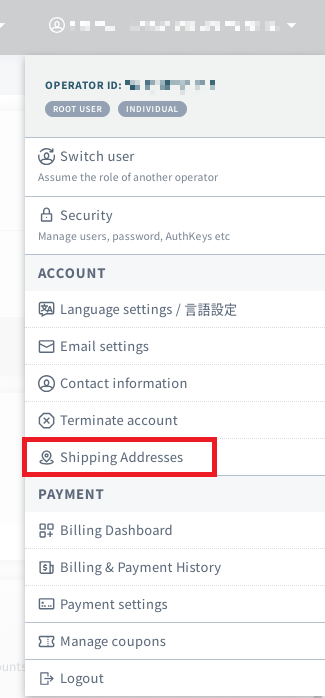
Click Add new shipping address to add additional addresses that will be selectable when placing a new order.
Programmatic Usage
You can also use the Soracom API and Soracom CLI to place orders and register SIMs from orders.
Orders placed using the Soracom API or Soracom CLI are associated with the Soracom account used for authentication. Before placing an order programmatically, make sure you are using credentials for the account that will use the IoT SIMs and pay the monthly usage fees.
Placing an order programmatically requires the following steps:
- Get product codes - Call the
listProductsAPI to get a list of available products and their product codes. - Get shipping address ID - Call the
listShippingAddressesAPI to get a list of shipping addresses and their IDs. - Create a quotation - Call the
createQuotationAPI to generate a draft order and receive anorderId. - Confirm the order - Call the
confirmOrderAPI with theorderIdto place the order. - Register the order - If your order contains SIM cards, call
registerOrderedSimwith theorderIdto register them to your account.
Soracom API
To access the Soracom API, first use the auth API to obtain an API Key and Token. Refer to the API Usage Guide for instructions on how to use the API Key and Token in API requests.
Step 1: Get Product Codes
Use the listProducts API to get a list of available products. The response will include the productCode for each product.
curl -X GET \
|  -H 'X-Soracom-API-Key: <MY-API-KEY>' \
|  -H 'X-Soracom-Token: <MY-TOKEN>' \
| https://g.api.soracom.io/v1/productsStep 2: Get Shipping Address ID
Use the listShippingAddresses API to get a list of shipping addresses. The response will include the shippingAddressId for each address.
If you have not yet created a shipping address, use the createShippingAddress API to create one, or add a shipping address from the User Console.
curl -X GET \
|  -H 'X-Soracom-API-Key: <MY-API-KEY>' \
|  -H 'X-Soracom-Token: <MY-TOKEN>' \
| https://g.api.soracom.io/v1/operators/<OPERATOR-ID>/shipping_addressesStep 3: Create a Quotation
Use the createQuotation API to create a new order quotation (i.e., a draft order). You will need to provide the product codes and quantities, as well as a shipping address ID.
curl -X POST \
|  -H 'X-Soracom-API-Key: <MY-API-KEY>' \
|  -H 'X-Soracom-Token: <MY-TOKEN>' \
|  -H 'Content-Type: application/json' \
|  -d '{
|        "shippingAddressId": "<SHIPPING-ADDRESS-ID>",
|        "orderItemList": [
|          {
|            "productCode": "<PRODUCT-CODE>",
|            "quantity": 10
|          }
|        ],
|        "shippingOptions": [
|          {
|            "useExpeditedShipping": false
|          }
|        ]
|      }'
| https://g.api.soracom.io/v1/ordersThe response will include an orderId that you will use in the following steps.
Creating a quotation does not submit the order for processing. You must complete the next step to confirm and submit the order.
If you need to make corrections to a quotation (such as changing products or the shipping address), simply create a new quotation. Unsubmitted quotations are automatically deleted, so there is no need to manually delete old ones.
Expedited shipping is only available for orders being shipped within the United States
Step 4: Confirm the Order
Use the confirmOrder API with the orderId to confirm and submit the order for processing:
curl -X PUT \
|  -H 'X-Soracom-API-Key: <MY-API-KEY>' \
|  -H 'X-Soracom-Token: <MY-TOKEN>' \
| https://g.api.soracom.io/v1/orders/<ORDER-ID>/confirmOrders must be confirmed within one month of being created. If one month has elapsed, the order will be automatically deleted and you will need to create a new order.
Canceling an Order
If you need to cancel an order before processing begins, use the cancelOrder API:
curl -X PUT \
|  -H 'X-Soracom-API-Key: <MY-API-KEY>' \
|  -H 'X-Soracom-Token: <MY-TOKEN>' \
| https://g.api.soracom.io/v1/orders/<ORDER-ID>/cancelOrders can only be canceled before processing begins. If you need to cancel an order that has already entered processing, contact Soracom Support as soon as possible. For more information, see Canceling an Order.
Step 5: Register the Order
If your order contains IoT SIM cards, eSIMs, or products bundled/integrated with SIMs, use the registerOrderedSim API to register all SIMs in the order to your account:
This step is only required for orders that contain SIM cards, eSIMs, or products bundled/integrated with SIMs. Orders containing only non-SIM products (such as devices or accessories) do not require registration.
Soracom CLI
To use the Soracom CLI, you must first configure it to authenticate with your account information, authorization key, or SAM user credentials.
Step 1: Get Product Codes
Run the following command to get a list of available products. The response will include the productCode for each product.
Step 2: Get Shipping Address ID
Run the following command to get a list of shipping addresses. The response will include the shippingAddressId for each address.
If you have not yet created a shipping address, use the soracom shipping-addresses create command to create one, or add a shipping address from the User Console.
Step 3: Create a Quotation
Run the following command to create a new order quotation (i.e., a draft order):
soracom orders create --coverage-type g --body '{
  "shippingAddressId": "<SHIPPING-ADDRESS-ID>",
  "orderItemList": [
    {
      "productCode": "<PRODUCT-CODE>",
      "quantity": 10
    }
  ],
  "shippingOptions": [
    {
      "useExpeditedShipping": false
    }
  ]
}'The response will include an orderId that you will use in the following steps.
Creating a quotation does not submit the order for processing. You must complete the next step to confirm and submit the order.
Step 4: Confirm the Order
Run the following command to confirm and place the order:
Canceling an Order
If you need to cancel an order before processing begins, run the following command:
Orders can only be canceled before processing begins. If you need to cancel an order that has already entered processing, contact Soracom Support as soon as possible. For more information, see Canceling an Order.
Step 5: Register the Order
If your order contains IoT SIM cards, run the following command to register all SIMs in the order to your account:
This step is only required for orders that contain SIM cards. Orders containing only non-SIM products (such as devices or accessories) do not require registration.