IMEI Lock
The IMEI Lock option provides a straightforward method for securing your IoT SIM, ensuring that in the case that your IoT SIM is stolen, it cannot be used inside another device resulting in unwanted data usage charges.
When an IoT SIM card attempts to connect to the network using an IMEI that does not match the one registered with the IMEI Lock configuration, an error with the following format will be shown in the Error Logs:
Subscriber {IMSI} is not allowed to create session: Device IMEI {IMEI} does not match configured IMEI {IMEI}
If you enable or change IMEI lock for an IoT SIM that is already online, the existing session will still remain active. The updated IMEI lock settings will only apply when a new data session is established. To enforce the IMEI lock immediately, delete the current session or restart your device to initiate a new session.
Enabling IMEI Lock
You can set an IMEI Lock for multiple IoT SIMs simultaneously by clicking the for each SIM you want to configure before proceeding with the steps below. Each SIM will be locked to the IMEI number of the device it was most recently associated with.
-
Sign in to the User Console. From the Menu, open the SIM Management screen.
-
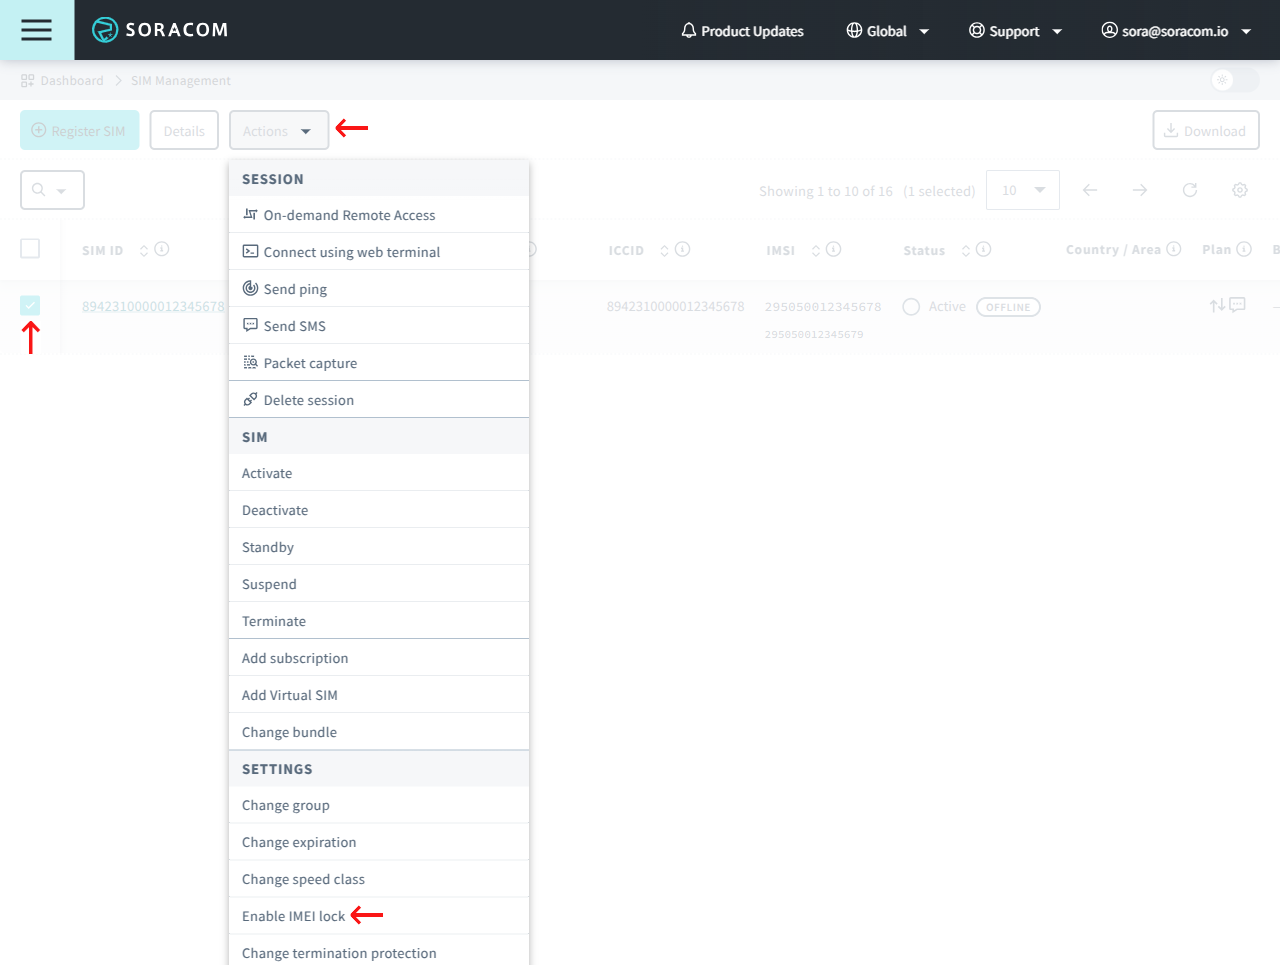
From the list of subscribers, click the for the SIM you want to modify.
-
Click the Actions menu, then select Enable IMEI lock.
-
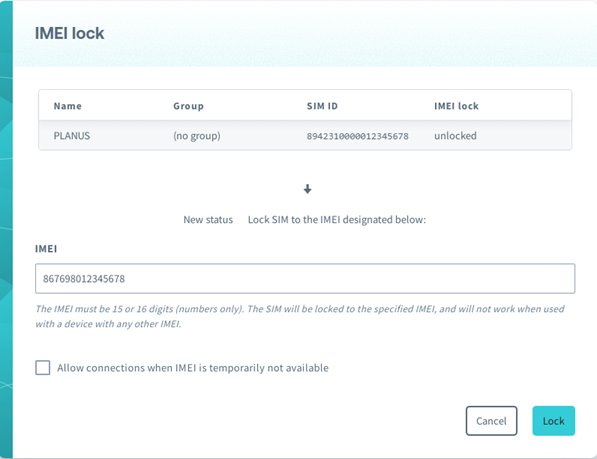
In the dialog, enter the IMEI number (International Mobile Equipment Identity) of the device the SIM should be locked to, then click Lock.
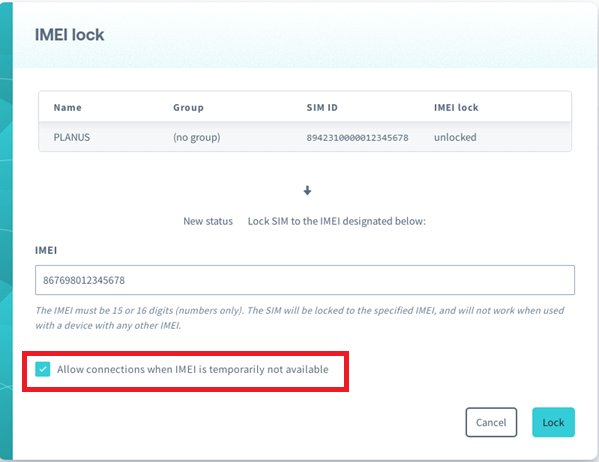
If a local network that the SIM is connected to does not report the IMEI of the device, with IMEI Lock enabled, Soracom will block the connection by default, which may result in unexpected downtime. To enable IMEI Lock, but still allow connections when a local network is not reporting the IMEI information, check the box to Allow connections when IMEI is temporarily not available
Removing IMEI Lock
You can remove an IMEI Lock for multiple IoT SIMs simultaneously by clicking the for each SIM you want to remove before proceeding with the steps below. The IMEI Lock will be removed for each selected SIM, regardless of its session status.
-
Sign in to the User Console. From the Menu, open the SIM Management screen.
-
From the list of subscribers, click the for the SIM you want to modify.
-
Click the Actions menu, then select Remove IMEI Lock.

-
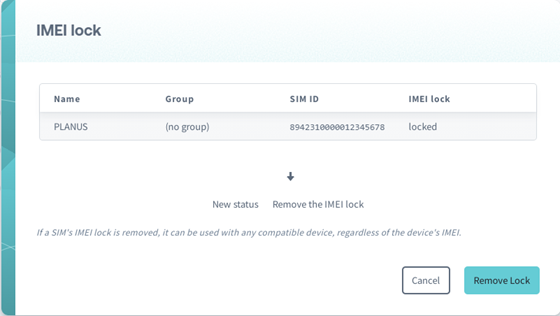
In the dialog, click Remove Lock to confirm that you want to remove the IMEI Lock.
Programmatic Usage
You can also use the Soracom API, Soracom CLI, and Metadata Service to enable or disable IMEI Lock.
Soracom API
To access the Soracom API, first use the auth API to obtain an API Key and Token. Refer to the API Usage Guide for instructions on how to use the API Key and Token in API requests.
Then, use the setSimImeiLock API to enable IMEI Lock on an IoT SIM:
curl -X POST \
|  -H 'X-Soracom-API-Key: <MY-API-KEY>' \
|  -H 'X-Soracom-Token: <MY-TOKEN>' \
|  -H 'Content-Type: application/json' \
|  -d '{
|        "imei": "860000012345678"
|      }' \
| https://g.api.soracom.io/v1/sims/<SIM-ID>/set_imei_lockIf the subscriber is online, you can omit the payload in order to lock the subscriber to the current IMEI.
To remove the IMEI Lock from an IoT SIM, use the unsetSimImeiLock API:
Soracom CLI
To use the Soracom CLI, you must first configure it to authenticate with your account information, authorization key, or SAM user credentials.
Run the following command to enable the IMEI lock on an IoT SIM:
soracom sims set-imei-lock --sim-id <SIM-ID> --imei "860000012345678" --coverage-type gIf the subscriber is online, you can omit the --imei flag in order to lock the subscriber to the current IMEI.
To remove the IMEI Lock from an IoT SIM, use following command: