VPG Type-F Configuration
Creating a VPG Type-F
Creating a VPG will incur fees. Once created, it will be billed according to its runtime, regardless of actual usage. Billing will continue until the VPG is terminated. Refer to the Pricing & Fee Schedule for more information.
-
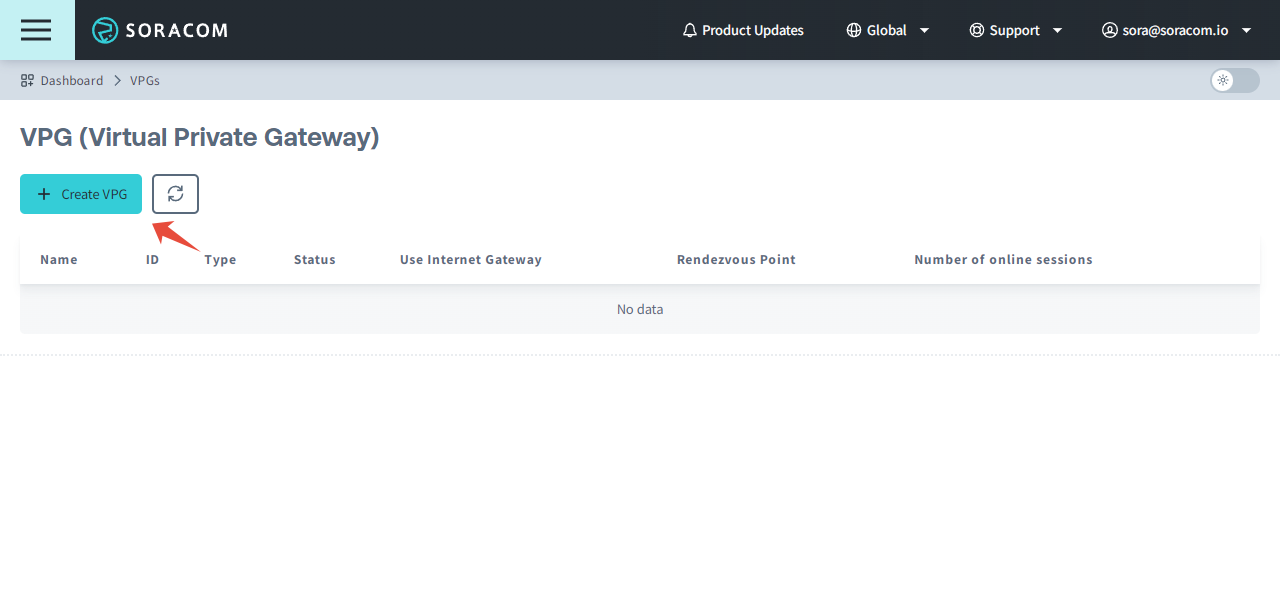
Sign in to the User Console. From the Menu, open the VPG screen.
-
Click the Create VPG button.
-
Enter a name and configuration settings for the VPG.
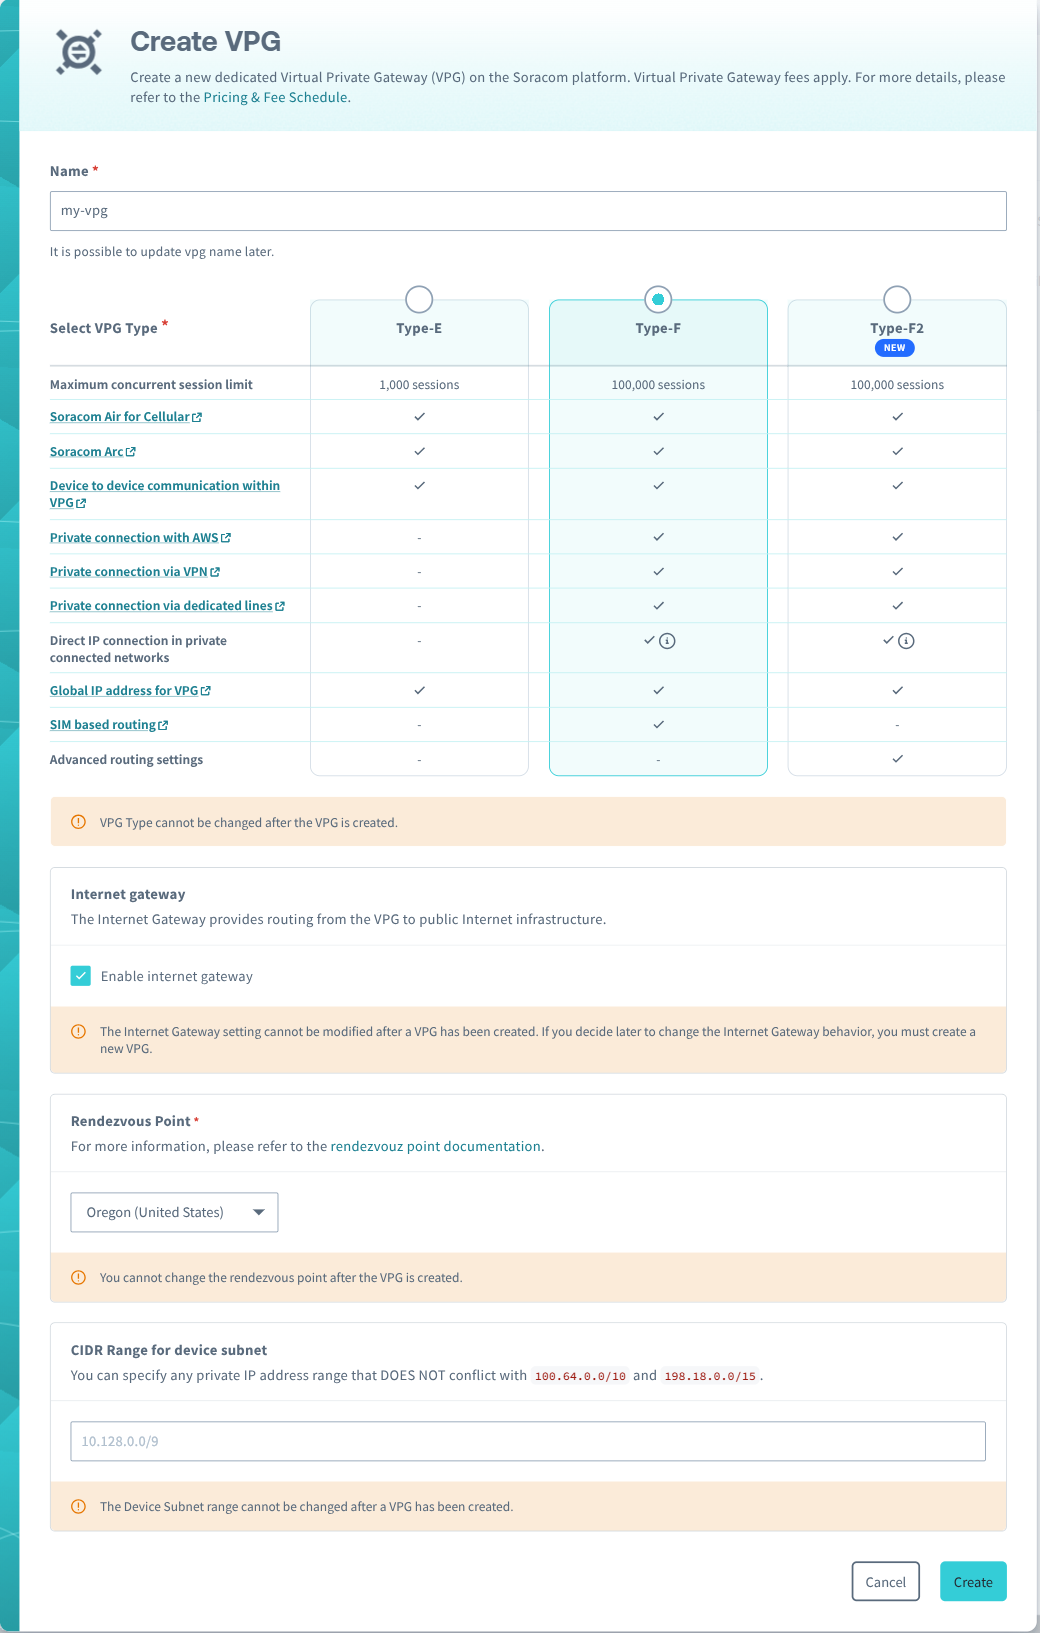
- Name (required) - Any name used to identify this VPG.
- Select VPG Type (required) - Select Type-F.
- Internet Gateway (required) - Enables or disables internet access for Air and Arc devices connected to this VPG.
- Rendezvous Point (required) - The region where the VPG will be located.
- CIDR Range for device subnet (optional) - The CIDR block of IP addresses assigned to Air and Arc devices that connect to this VPG. If left blank, a default block of
10.128.0.0/9will be used. Manually specified Device Subnets must be within the10.0.0.0/8,172.16.0.0/12, or192.168.0.0/16CIDR ranges and have a subnet mask of/24or larger.
Once created, the Internet Gateway, Rendezvous Point, and CIDR Range settings cannot be changed.
Then click Create.
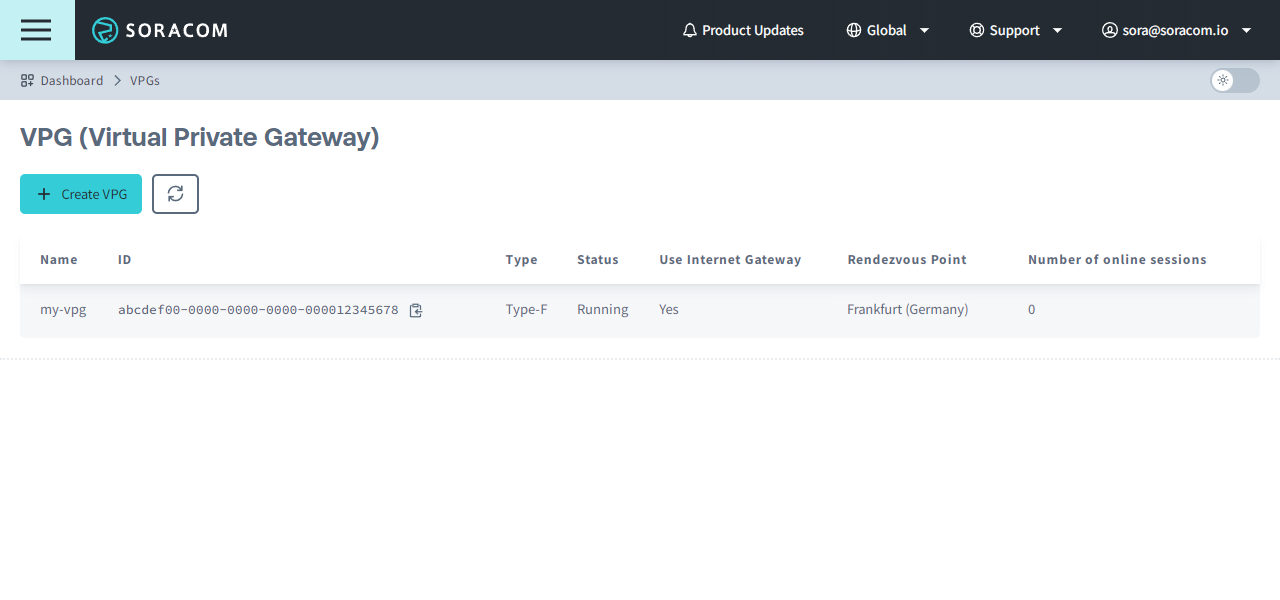
Once you click the Create button, the VPG will appear in the list of VPGs. Its status will show Creating while it is being configured, a process that will typically take 3–5 minutes. Once the VPG is ready, its status will change to Running.
Configuring VPG Settings
To configure your VPG:
-
From the list of VPGs, click the name of the VPG you want to configure to open its settings page.
From here, you will see the overview of VPG details along with individual settings tabs below.
Overview

- ID - The unique identifier of the VPG.
- Name - The name of your VPG. Click the icon to edit the name.
- Status - The VPG's current state, corresponding to one of the following:
- Creating - The VPG is currently being prepared.
- Running - The VPG has been created and is ready for use.
- Type - The VPG's type.
- Rendezvous Point - The Rendezvous Point where the VPG is located.
- Device Subnet IP Range - The CIDR range used to assign private IP addresses to Air and Arc devices connecting to the VPG. Assigning a specific IP address to a device can be done using IP Address Mapping.
- VPG IP Address Range - The CIDR range assigned to the VPG for the underlying network infrastructure.
- Use Internet Gateway - Whether or not the Internet Gateway is enabled and Air or Arc devices connecting to the VPG can access the Internet.
- Global IP Address - The public IP address of your VPG that is used for outbound communication over the Internet Gateway, corresponding to one of the following:
- Fixed - The Fixed Global IP option is enabled, and the listed public IP addresses can be used to allow traffic through a firewall.
- Dyanmic - The Fixed Global IP option is disabled.
- None - The Internet Gateway is disabled.
- Number of Online Sessions - The number of Soracom IoT SIMs and Soracom Arc Virtual SIMs that are connected to the VPG and online, along with the time that the number of online sessions was last updated.
Basic Settings
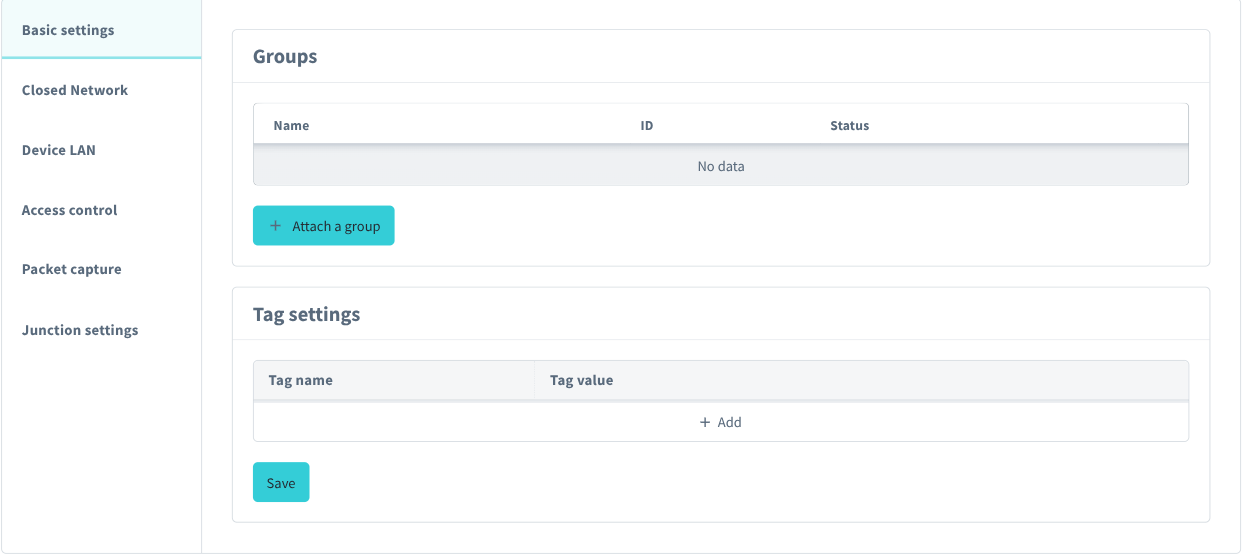
Groups
The Groups panel shows which Soracom Air and Soracom Arc device groups are configured to connect using this VPG. You can view which groups are attached to the VPG and manage them from this panel.
You can also attach a group to a VPG from the group's settings page. Refer to the Group Settings documentation.
Tag Settings
The Tag Settings panel lets you add optional tags to the VPG, such as to describe its role, owner, project, or other values.
Closed Network
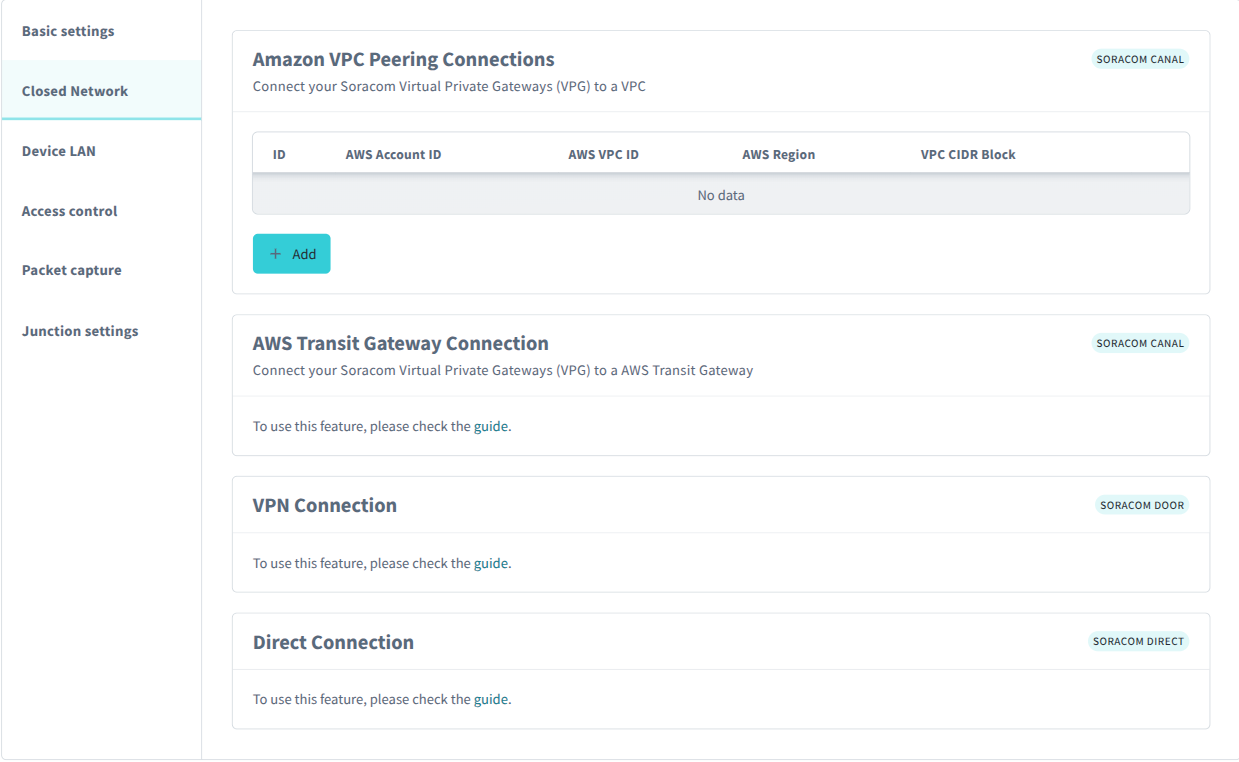
Amazon VPC Peering Connections
The Amazon VPG Peering Connections panel lets you add and manage AWS Peering Connections between the VPG and your AWS VPC. For more information, refer to the Soracom Canal: VPC Peering Connection Configuration documentation.
AWS Transit Gateway Connections
The AWS Transit Gateway Connections panel lets you view connections between the VPG and your AWS Transit Gateway. For more information, refer to theSoracom Canal: Transit Gateway Connection Configuration documentation.
VPN Connection
The VPN Connection panel lets you view VPN connection details between the VPG and your VPN environment. For more information, refer to the Soracom Door documentation.
Direct Connection
The Direct Connection panel lets you view VIF connection details between the VPG and your direct connected network environment. For more information, refer to the Soracom Direct documentation.
Device LAN
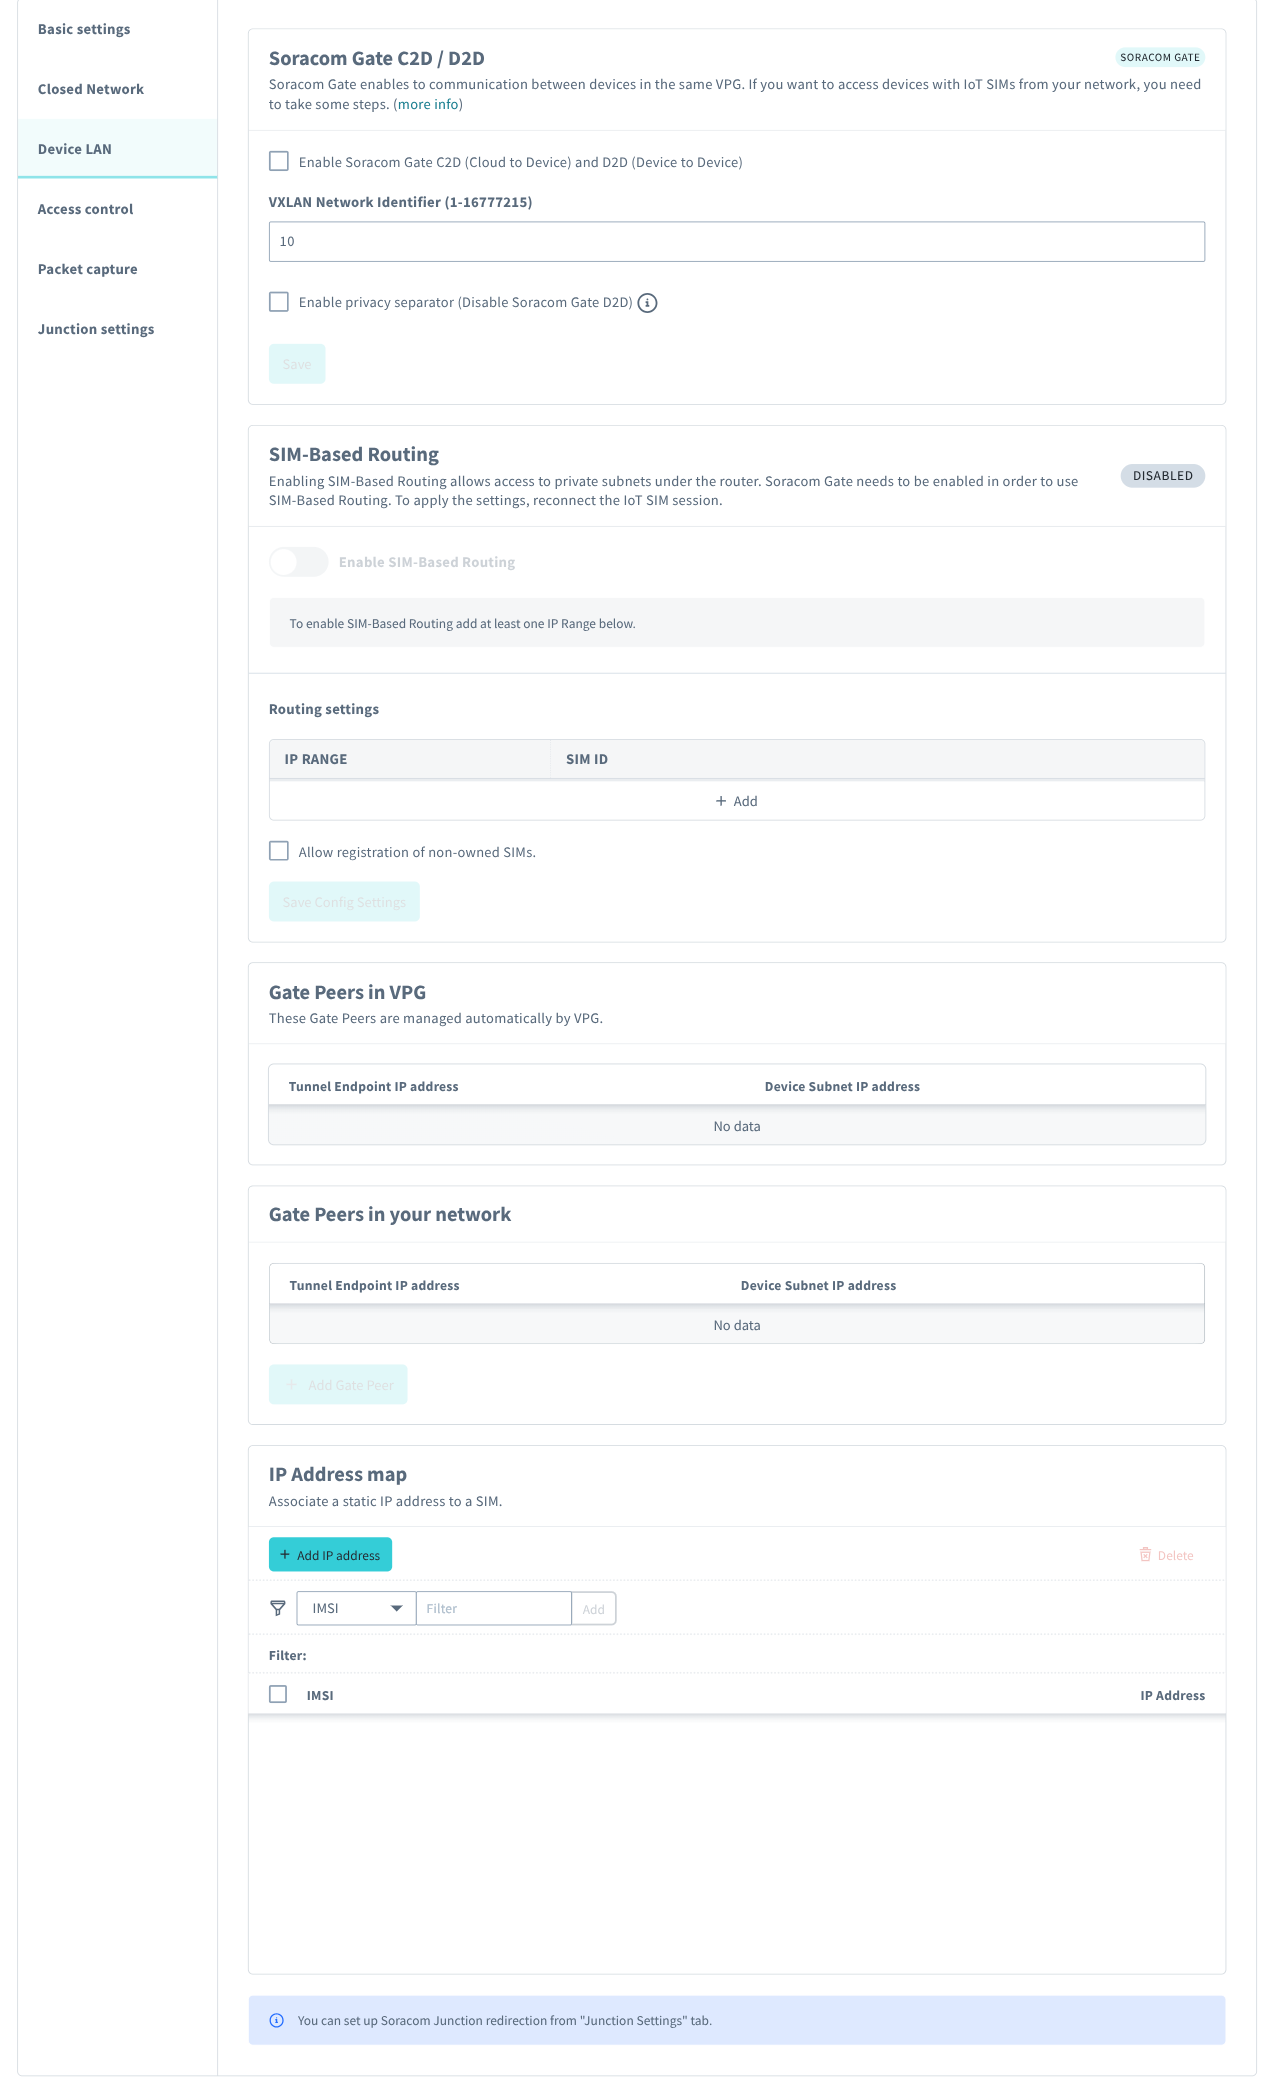
Soracom Gate C2D / D2D
The Soracom Gate panel lets you enable or disable Soracom Gate and configure its settings. For a Type-F VPG, enabling Gate will allow devices within the VPG to communicate with each other using their private IP addresses and will allow you to remotely access devices from your private network. Enabling the privacy separator option will allow remote device access from your private network while disabling device-to-device communication. For more information, refer to the Soracom Gate documentation.
SIM-Based Routing
The SIM-Based Routing panel lets you enable or disable SIM-Based Routing and configure its settings. SIM-based routing allows you to link SIM cards with their router's Local Area Network (LAN) IP range. This allows the SIM itself to be set as the routing destination when using Soracom Gate, reducing the time and cost of network maintenance for inter-site connection equipment and IoT gateways. For more information, refer to the SIM-Based Routing documentation.
Gate Peers in VPG
When a VPG is created, two Gate Peers are automatically configured within the VPG. Their networking configuration is required to configure Soracom Gate for remote device access. For more information, refer to the Soracom Gate: Gate Peer Configuration documentation.
Gate Peers in Your Network
When configuring Soracom Gate for remote device access, this panel is used to manage Gate Peers in your private network. For more information, refer to the Soracom Gate: Gate Peer Configuration documentation.
IP Address Map
By default, a VPG will automatically assign IP addresses to Soracom Air and Soracom Arc devices from the VPG's Device Subnet CIDR block of IP addresses. Once an IP address is assigned to an IMSI, that IP address is permanently reserved for that IMSI and will not be reassigned to other devices. You can also manually assign specific IP addresses to devices from the IP Address Map panel. For more information, refer to the IP Address Mapping documentation.
Access Control
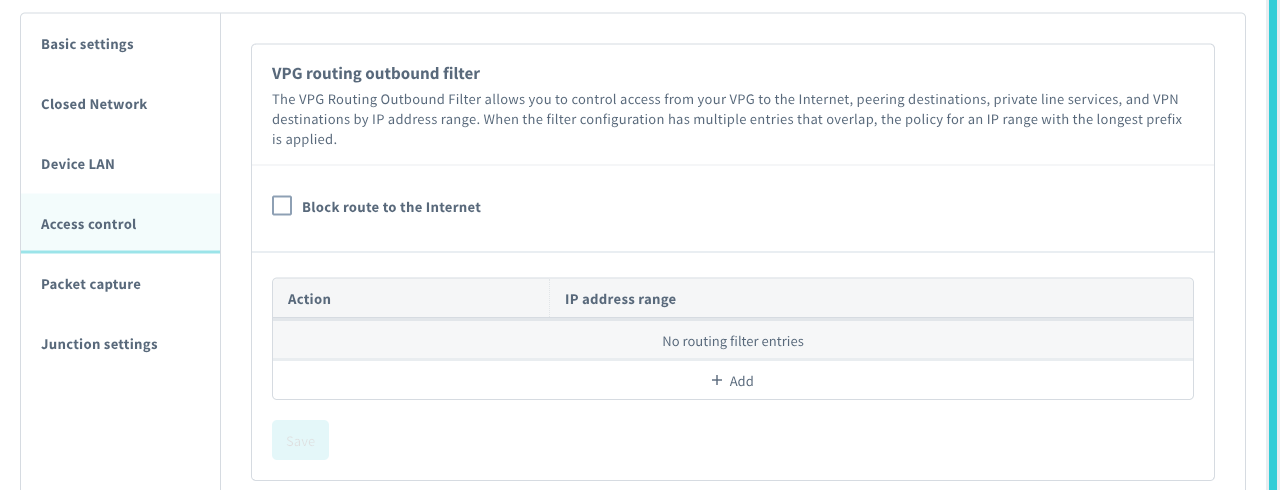
VPG Routing Outbound Filter
The VPG Routing Outbound Filter panel lets you define custom routing rules in order to allow access to certain IP addresses while blocking access to others. For more information, refer to the Outbound Filter documentation.
Packet Capture
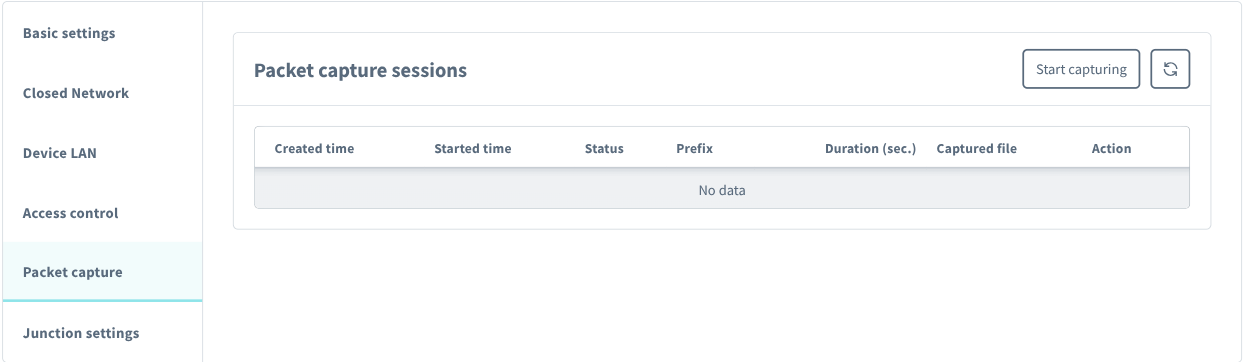
The Packet capture sessions panel lets you create, view, and download Soracom Peek packet capture sessions. For more information, refer to the Soracom Peek documentation.
Junction Settings
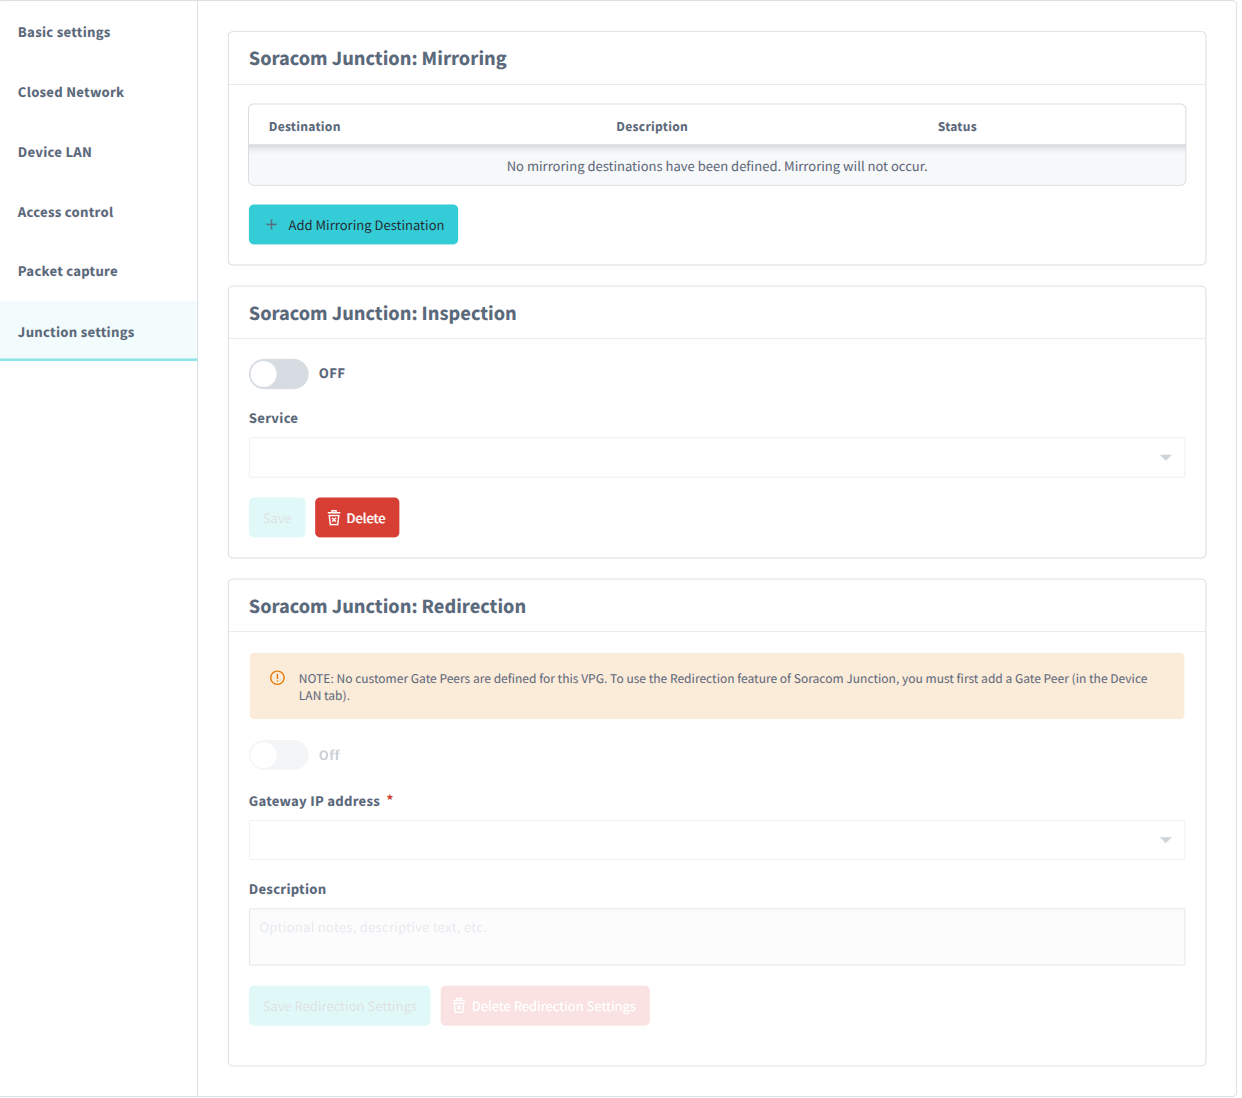
Soracom Junction: Mirroring
This panel lets you enable and configure the destination of Soracom Junction Mirroring mode. For more information, refer to the Soracom Junction: Mirroring documentation.
Soracom Junction: Inspection
This panel lets you enable and configure the Soracom Junction Inspection mode. For more information, refer to the Soracom Junction: Inspection documentation.
Soracom Junction: Redirection
This panel lets you enable and configure the destination of Soracom Junction Redirection mode. For more information, refer to the Soracom Junction: Redirection documentation.
Terminating a VPG
If a Soracom Direct or Soracom Door connection exists in association with this VPG, contact Soracom Support for assistance in deleting it before terminating the VPG
A VPG cannot be terminated while any of it's associated SIM cards are in an active cellular session. Therefore, before terminating a VPG, any associated SIMs will have to be dissociated from the VPG and have their active sessions terminated. This can be achieved by performing steps 1-5 below, or by taking all SIM cards associated with the VPG offline before executing the termination.
-
Sign in to the User Console. From the Menu, open the Groups screen.
-
Select the Group associated with your VPG.
-
In the Basic settings tab, select the Soracom Air for Cellular section and disable the Virtual Private Gateway setting.
-
From the Menu, open the SIM Management screen.
-
From the list of subscribers, click the for the SIMs associated with the Group from steps 2 and 3.
-
Click the Actions menu, then select Delete session.
-
From the Menu, open the VPG screen.
-
From the list of VPGs, click the VPG you want to terminate to open its settings page.
-
From the VPG settings page, click the Terminate button.

Programmatic Usage
You can also use the Soracom API and Soracom CLI to create and manage VPGs.
Soracom API
To access the Soracom API, first use the auth API to obtain an API Key and Token. Refer to the API Usage Guide for instructions on how to use the API Key and Token in API requests.
Then, use the createVirtualPrivateGateway API to create a VPG:
curl -X POST \
|  -H 'X-Soracom-API-Key: <MY-API-KEY>' \
|  -H 'X-Soracom-Token: <MY-TOKEN>' \
|  -H 'Content-Type: application/json' \
|  -d '{
|        "type": 15,
|        "placement": {
|          "region": "eu-central-1"
|        },
|        "deviceSubnetCidrRange": "10.128.0.0/9",
|        "useInternetGateway": true
|      }' \
| https://g.api.soracom.io/v1/virtual_private_gatewaysTo configure VPG settings, refer to the corresponding service configuration:
Soracom CLI
To use the Soracom CLI, you must first configure it to authenticate with your account information, authorization key, or SAM user credentials.
Then, run the following command to create a VPG: