Soracom LTE-M Button Harvest Data Tutorial
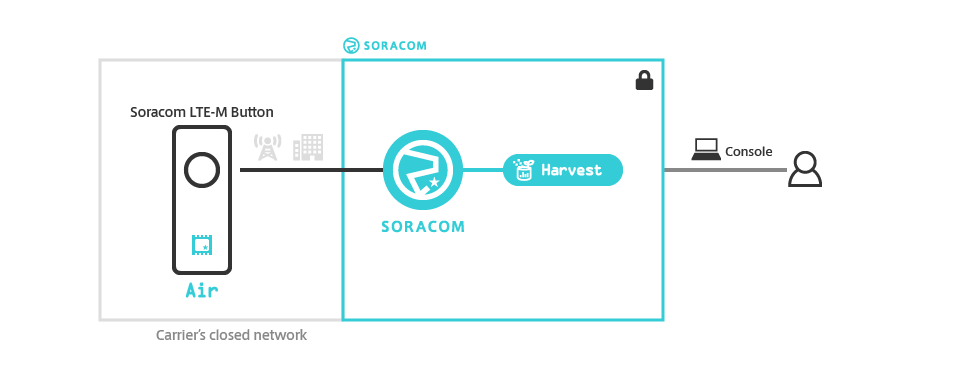
In this tutorial, we will use Soracom Harvest Data to capture and store messages sent by the Soracom LTE-M Button directly in Soracom. Although the Harvest Data service will simply store the data, it allows us to easily view the data sent by our button and confirm that it is working correctly, without having to set up other services.
Overview
We will perform the following steps to set up Harvest Data for the Soracom LTE-M Button:
- Enable Soracom Harvest Data for our Soracom LTE-M Button group
- Click the button to send a message to Harvest Data
- View the data captured by Harvest Data
- Disable Harvest Data after we're done
Prerequisites
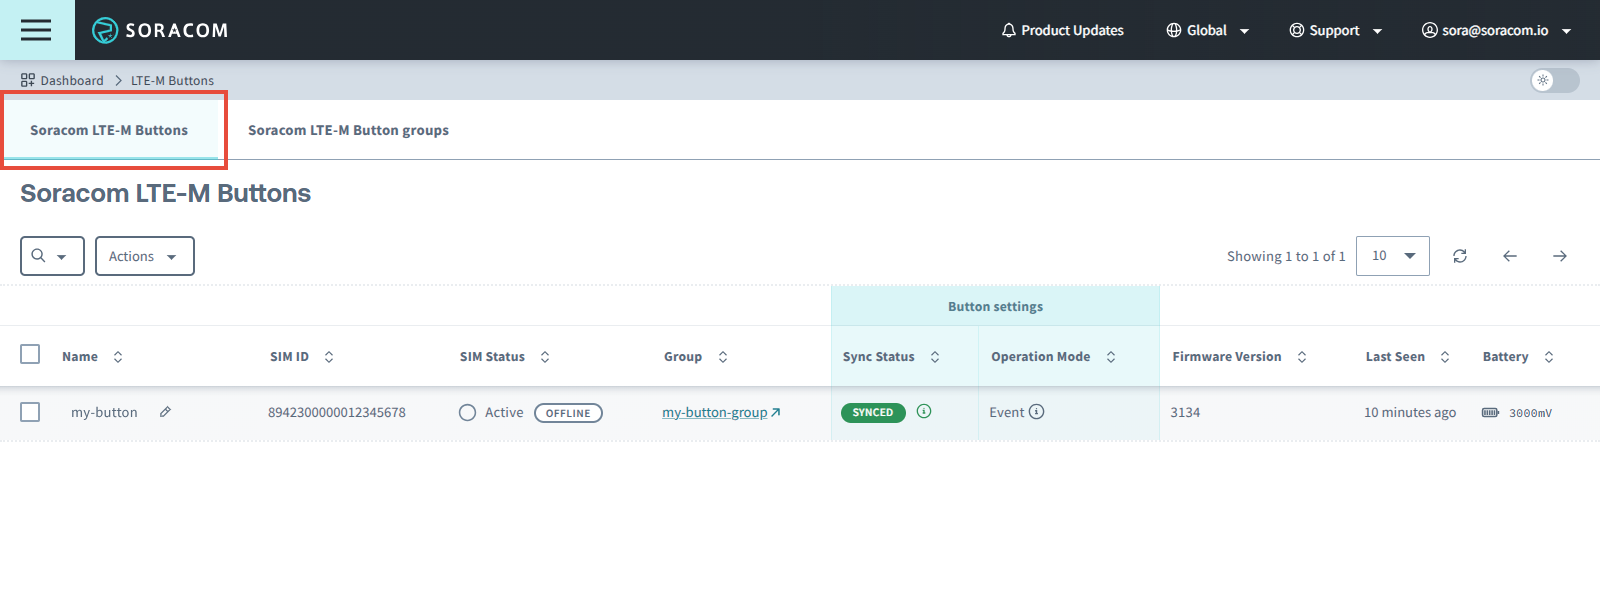
Before proceeding, make sure you have finished setting up your Soracom LTE-M Button using the Getting Started instructions. From the Menu > Gadgets > Soracom LTE-M Button screen, you should be able to see your button in the list of buttons, and its status should be Synced:
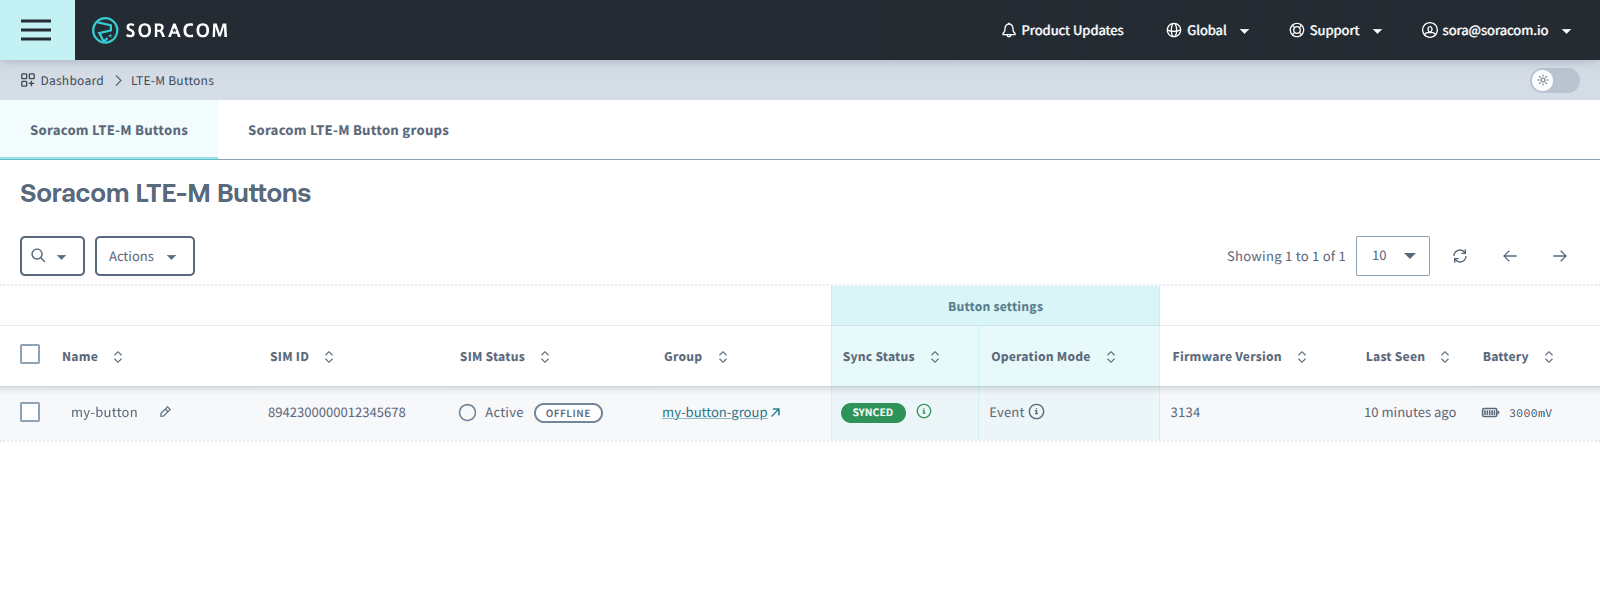
To make following this tutorial easier, your button's operation mode should also be configured as one of the following:
If your button's operation mode is configured as Timer, you can still follow this tutorial, however you will need to wait until your button sends a message based on its configured Uplink frequency before you will be able to view the data in Harvest Data.
Enable Soracom Harvest Data
Soracom Harvest Data is a paid service. A free tier is available, which you can use to capture data sent by your Soracom LTE-M Button in order to verify that it is working correctly.
If Harvest Data is enabled for multiple buttons, you might exceed the free tier. If you have no need to store button data on Soracom after confirming that everything is working correctly, we recommend turning off the Harvest Data service to avoid unwanted charges.
Also note that regardless of the free tier, sending and receiving data over the cellular network will still incur data usage fees.
-
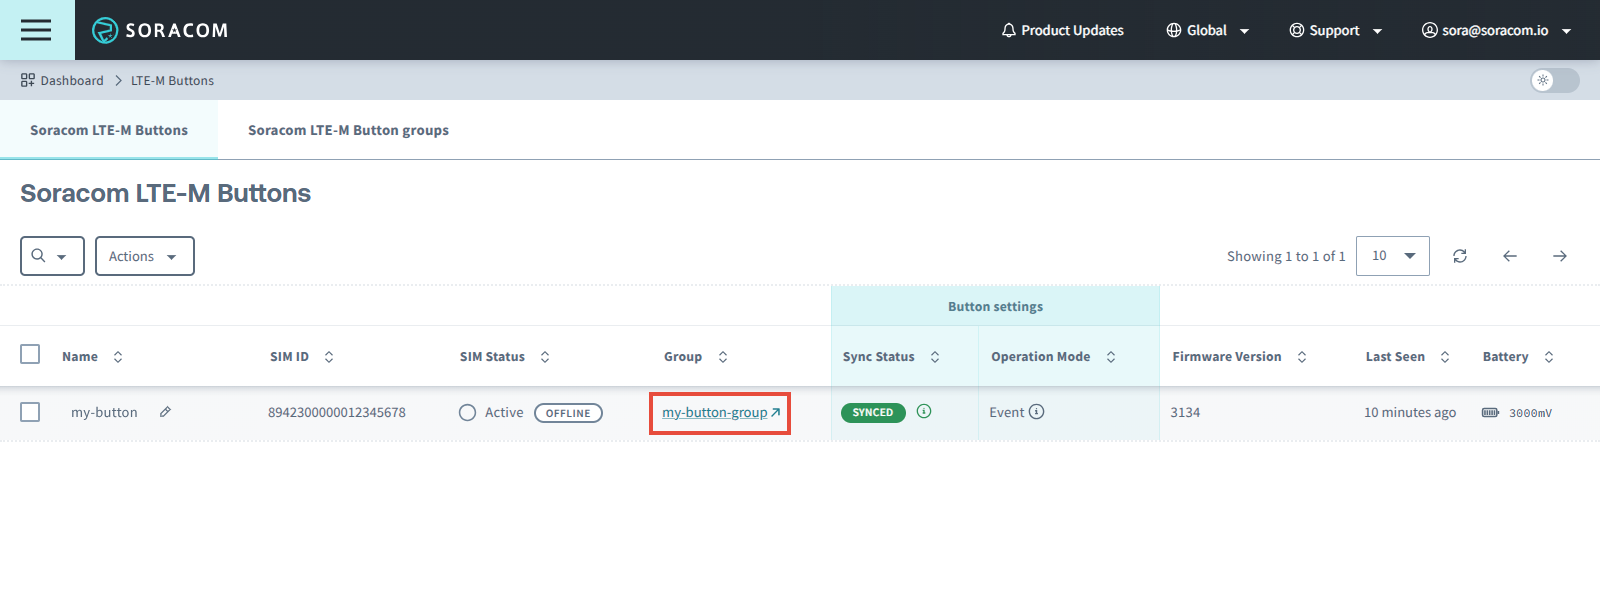
Find your button in the Soracom LTE-M Buttons list and click the link for the group:
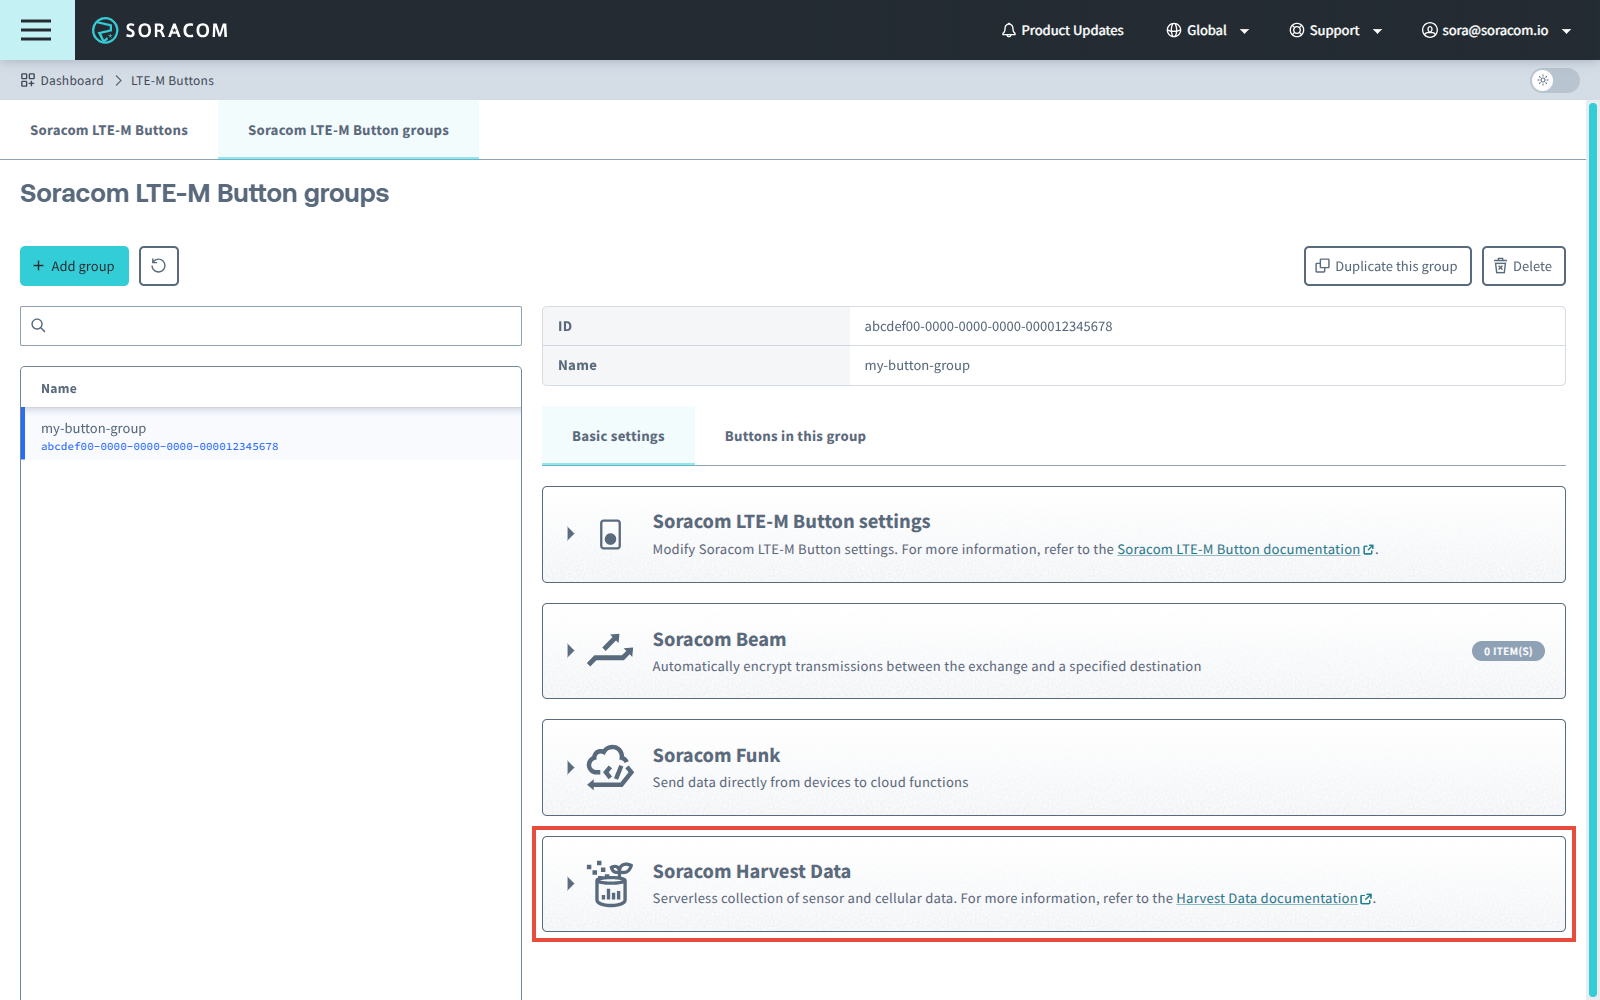
-
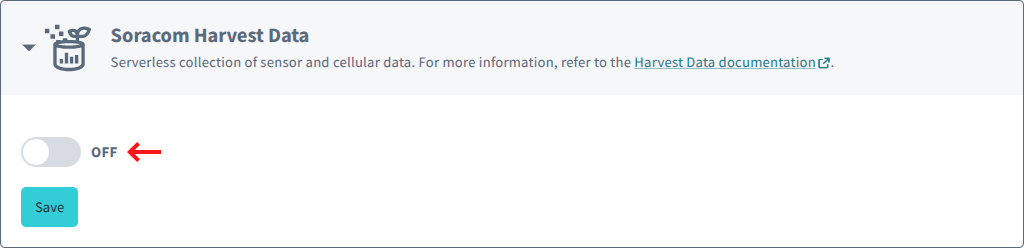
In the group configuration screen, click the Soracom Harvest Data panel to show its settings.
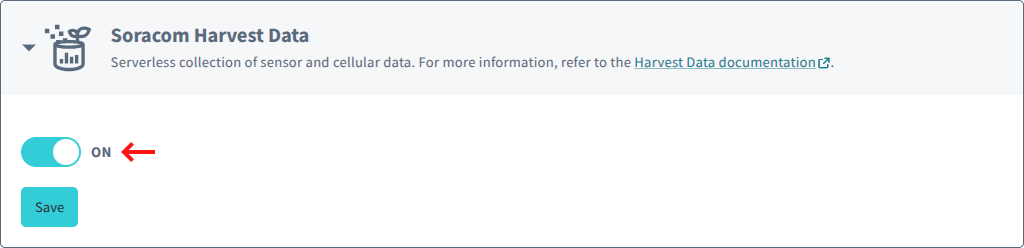
-
Click the toggle switch to enable Harvest Data collection, then click Save.
Click the Button
Now that Soracom Harvest Data is enabled, it's time to test a button click.
-
Click the button once.
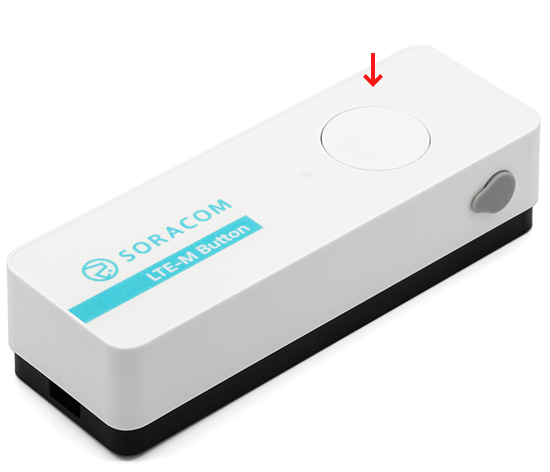
After a second, the LED on the button will begin to blink green ☀──☀──☀── (1 blink per second). This indicates that the button is in the process of connecting to a cellular network.
Once the button has connected to the cellular network, it will automatically send a message containing the click details to Unified Endpoint.
If the transmission was successful, the LED will turn solid green for 2 seconds ☀────────, and the button will automatically turn off. We can now go back to the User Console and verify the data that was sent by the button.
If the LED turns red ☀──────── during this process, it indicates that the button was unable to find a suitable network, or that the network connection failed. Refer to the Troubleshooting section for details.
Verify the Data
Finally, let's head back to the User Console to check out the test data online.
-
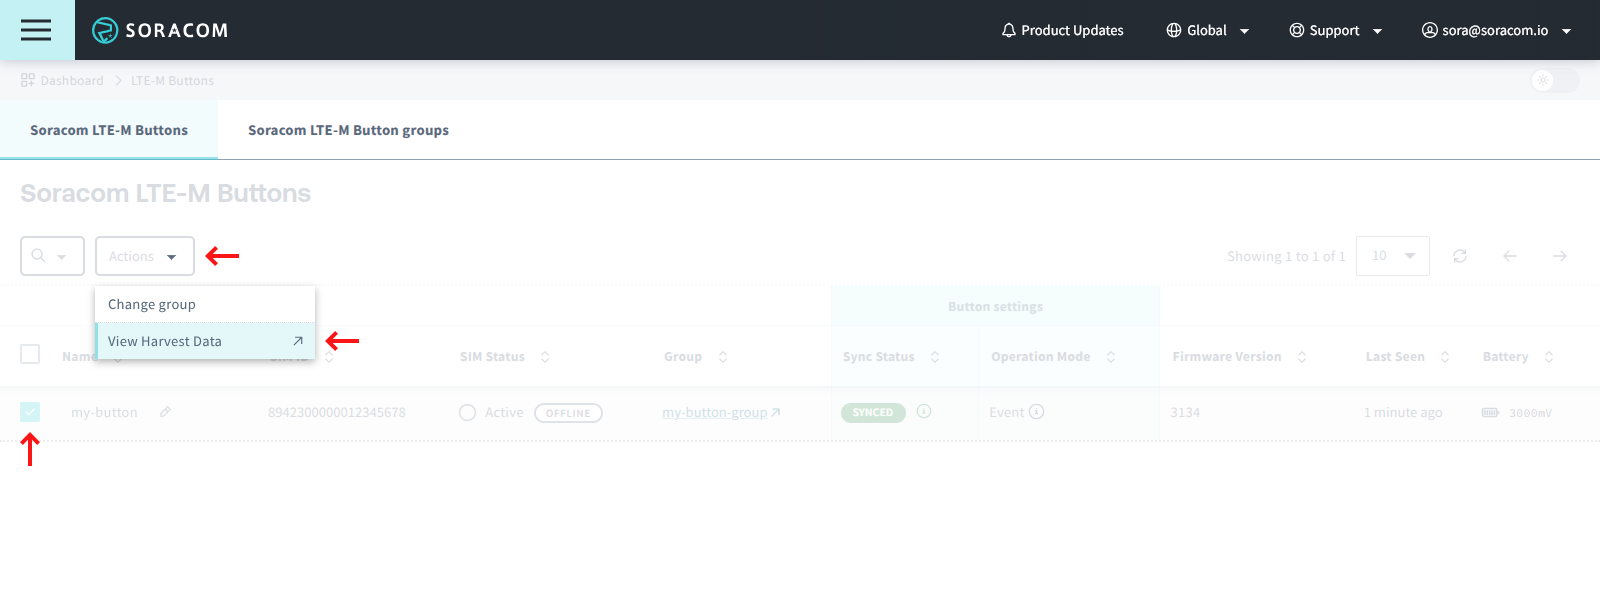
Go back to the Soracom LTE-M Buttons list.
-
Click the checkbox next to your button. Then click the Actions menu and select View Harvest Data.
We can now see the data sent from the button to Unified Endpoint, which was then converted from binary to JSON, and then forwarded to Soracom Harvest Data and stored:
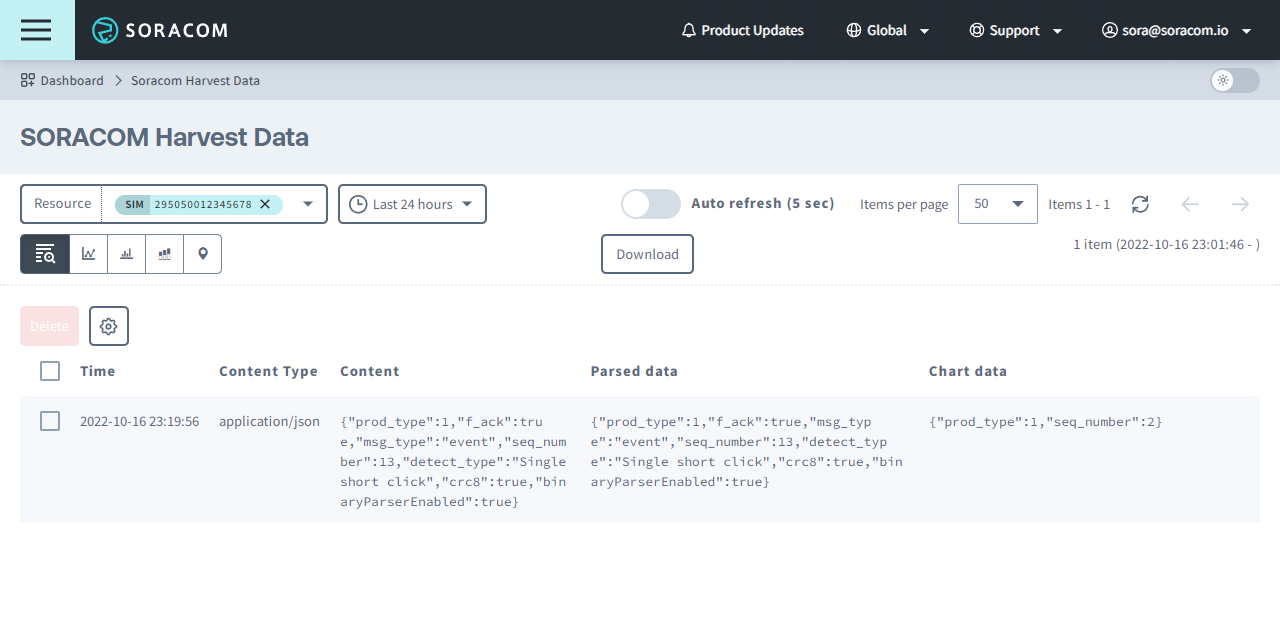
If you see data similar to the above, congratulations! You have just sent a button click message from your Soracom LTE-M Button to the cloud!
Taking a closer look at the Content, we can see the binary data that was decoded into JSON by Binary Parser. For more information on the message contents, refer to the Message Examples documentation.
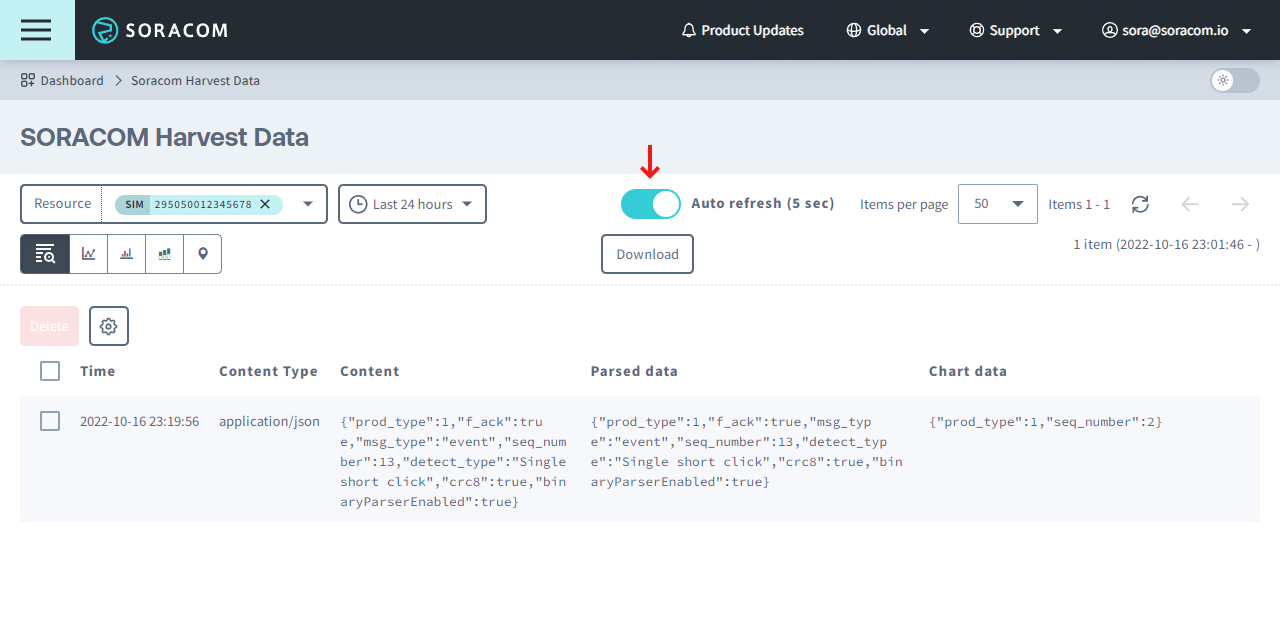
While we're here, we can also test out the double click and long click events, and even see the data appear in almost real time:
-
From the Soracom Harvest Data screen, click the Auto refresh toggle to automatically check for new data as it arrives in Harvest Data.
-
Click the button again, this time testing another click type:
- Double short click - Press and release the button twice within 2 seconds.
- Single long click - Press and hold the button for more than 2 seconds and up to 6 seconds, and then release it.
Once again, the LED will begin blinking green as the button reconnects to the cellular network, and will turn solid green when the data has been successfully sent.
You should also be able to see the additional clicks show up in Harvest Data as they are received, with the
detect_typevalue confirming the type of click.
For additional information on using Harvest Data, refer to the Harvest: Configuration and Harvest: Viewing Data documentation.
If you are able to see different button click events show up in Harvest Data, then your button and its cloud connectivity are fully operational!
However, Soracom Harvest Data only stores the data sent by the button and does not perform any other actions — For that, we need to set up Soracom Beam or Soracom Funk, which are covered in the next tutorials:
Of course, some button applications may not have any need to perform further actions besides simply recording the button click events. If your application can utilize just the click event data that is stored, you can also enable Soracom Lagoon, a dashboard and data visualization service that sits on top of Harvest Data and lets you build interactive dashboards for viewing button click events.
Next Steps
Operation Modes
With the Soracom LTE-M Button up and running, you can now test its different operation modes or attach accessories to the external I/O port in order to trigger messages from other sensors. Check out the Soracom LTE-M Button documentation for more details.
Soracom Lagoon
For applications where you only need to store the button click history and do not need to perform additional actions when the button is clicked, you can add Soracom Lagoon on top of Soracom Harvest Data.
Lagoon provides powerful dashboard and data visualization tools which you can use to, for example, track the history of individual button clicks over time based on click type, or identify the time of day when the button is clicked most often.
While Lagoon's data visualization capabilities work best with devices that collect types of variable sensor data (such as temperature, humidity, accelerometer, and so on), you can still use it to build a functional dashboard for keeping track of button clicks. And because Lagoon integrates directly with Harvest Data, there are no servers or configurations to set up. Simply turn on Soracom Lagoon and start building your dashboards.
Disable Soracom Harvest Data
Once you are done testing and verifying the data coming from the Soracom LTE-M Button, you can disable the Soracom Harvest Data service if you have no need for storing the data on Soracom.
-
Open the group configuration screen again, and click the Soracom Harvest Data panel to show its settings.
-
Click the toggle switch to disable Harvest Data collection, then click Save.