Getting Started
Your Soracom LTE-M Button comes with all the hardware set up and ready to go: no need to connect it to a computer, program its internal software, or write any code — just register the built-in embedded SIM (eSIM), add your button to a group, insert batteries, and start clicking.
Box Contents
In the box, you will find the following contents:
- One (1) Soracom LTE-M Button
- One (1) 3.5mm to 2-wire accessory cable (not pictured)
Button Setup
Before you can begin using your Soracom LTE-M Button, you will need to register the built-in eSIM, add the button to a button group, and install batteries. You will need the following items:
- A Soracom account, with a valid Payment Method registered
- A PH0 size Phillips screwdriver
-
Two (2) 1.5V alkaline AA batteries
Although rechargeable AA batteries will also fit, pay close attention to the voltage. Certain rechargeable batteries have a voltage rating higher than 1.5V and may cause permanent damage.
You should also be located in an area with LTE-M coverage supported by plan01s - LDV. To check if LTE-M coverage is available in your country, please refer to the Supported Carriers page.
In some countries, LTE-M coverage may not yet be available in all areas. If your Soracom LTE-M Button is unable to connect to a network, please refer to the Troubleshooting section.
Opening the Button
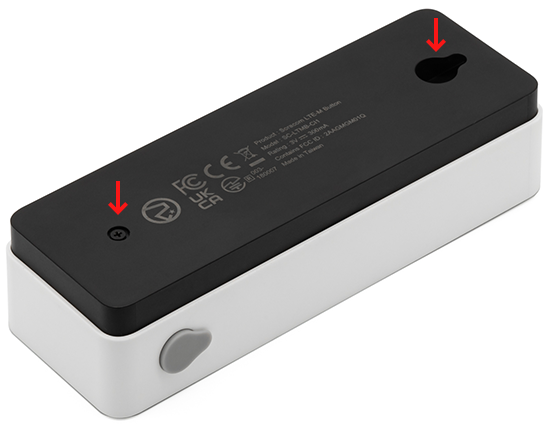
First, open the back cover to access the inside of the button.
-
Using a PH0 Phillips screwdriver, carefully unscrew the two screws from the back cover:
-
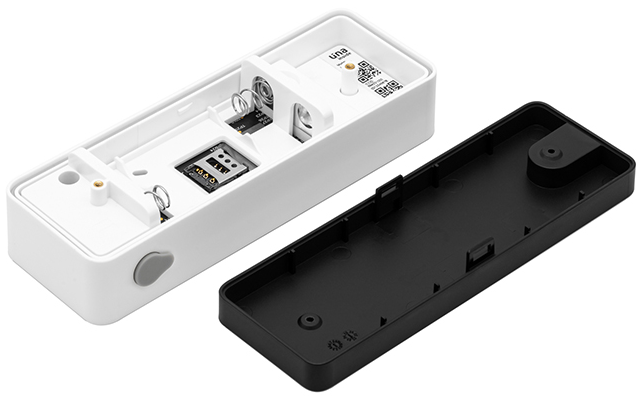
Gently separate the back cover from the main unit:
-
Inside you'll find a label containing a 19-digit ICCID number and an 8-digit PUK code. We'll refer to these numbers next.
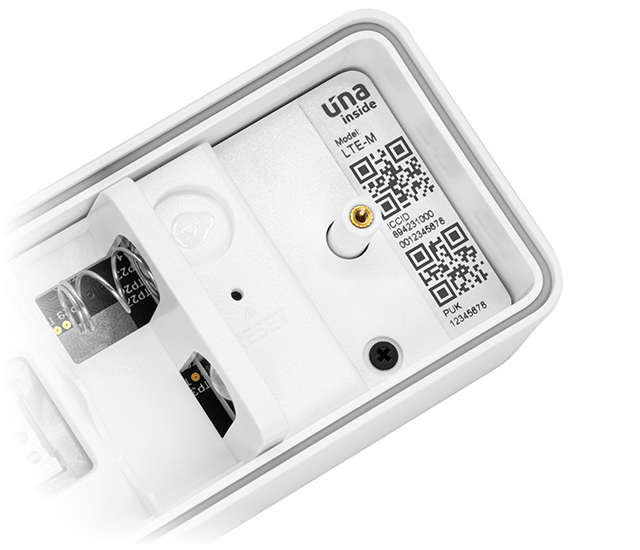
If the ICCID and PUK numbers are too small to read, QR codes for both are also printed on the label and can be scanned using a smartphone camera.
Registering the eSIM
Next, register the built-in eSIM.
-
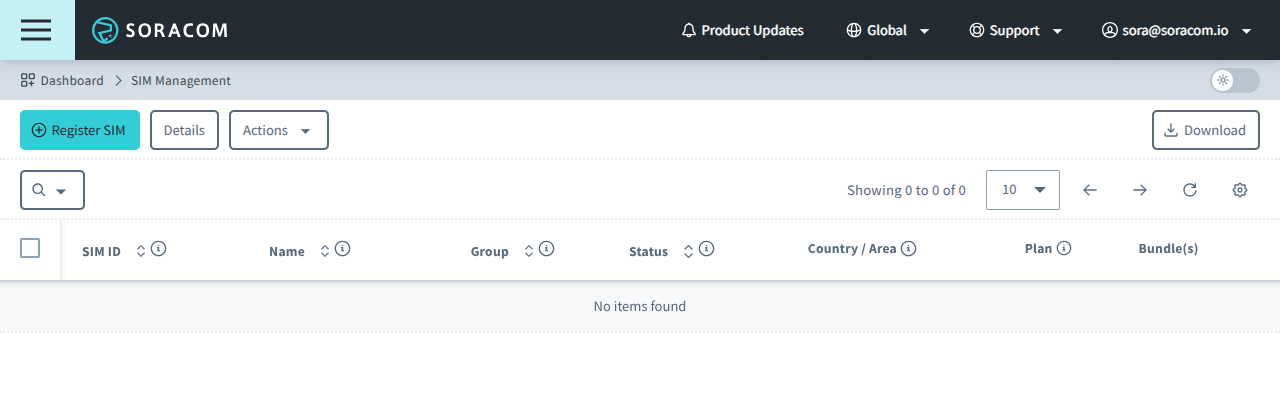
Sign in to the User Console. From the Menu, open the SIM Management screen.
-
Click Register SIM.
-
Register the eSIM using one of the following methods:
-
If you purchased your button directly from Soracom, click the From Order tab, then find your order and click the Register button:
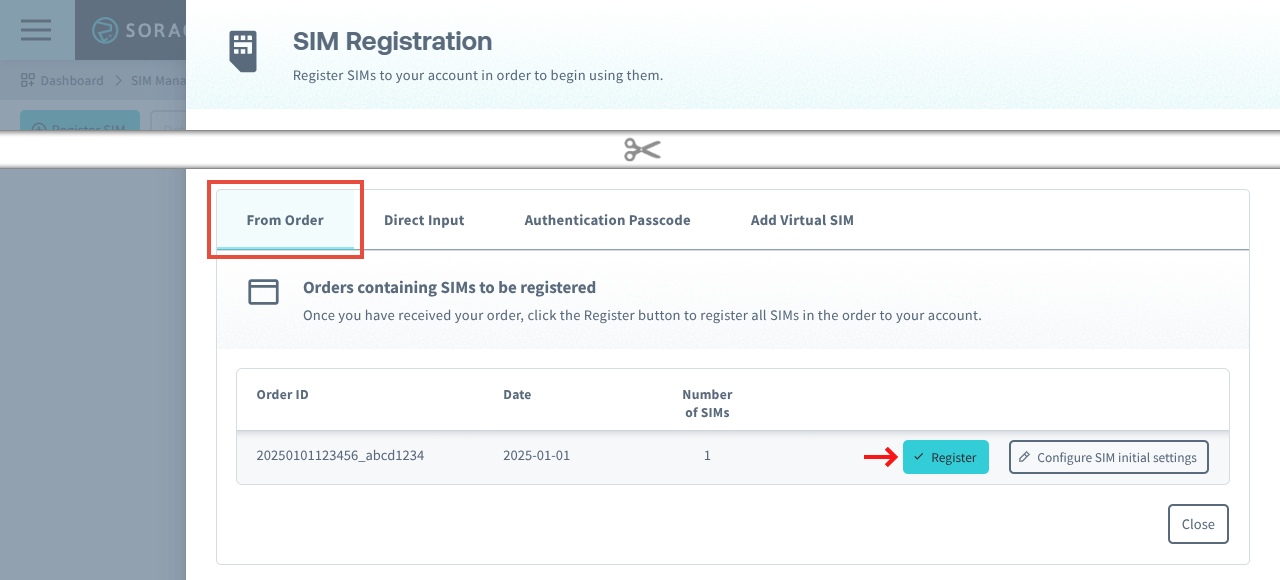
-
If you purchased your button elsewhere, click the Direct Input tab, enter the ICCID and PUK for your button, then click the Register button:
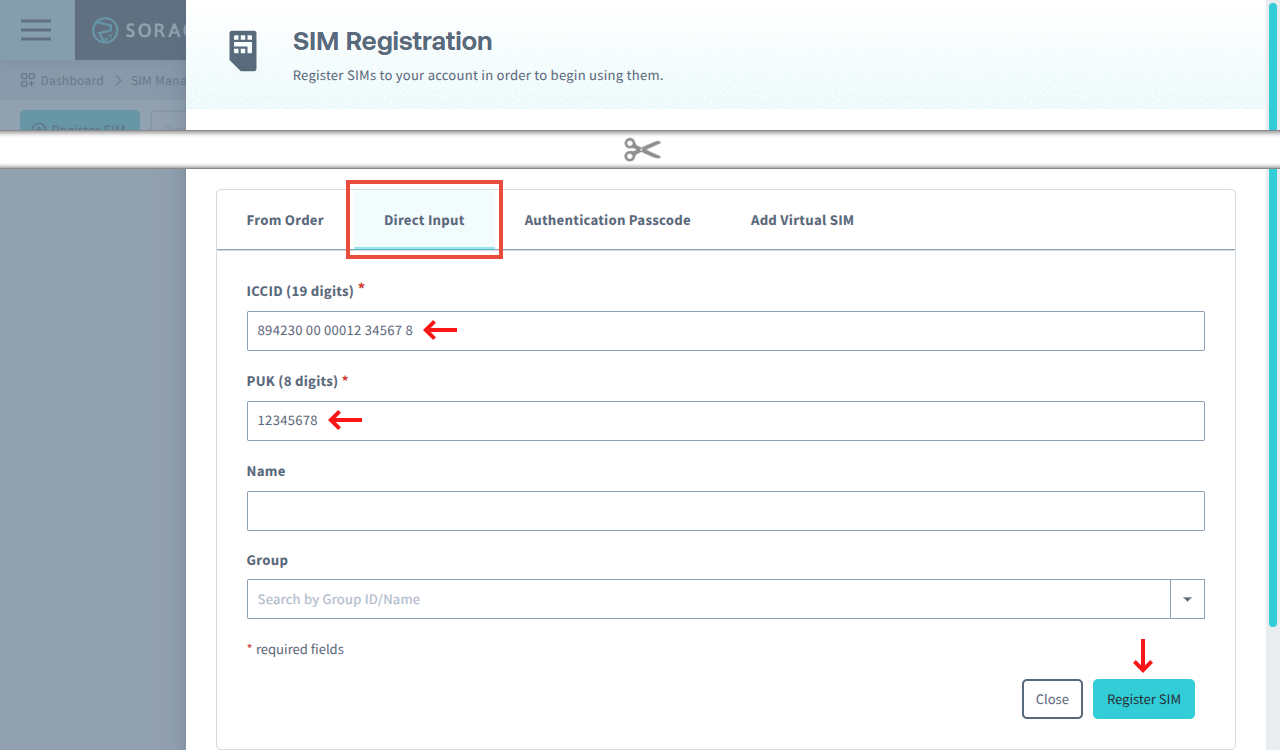
-
-
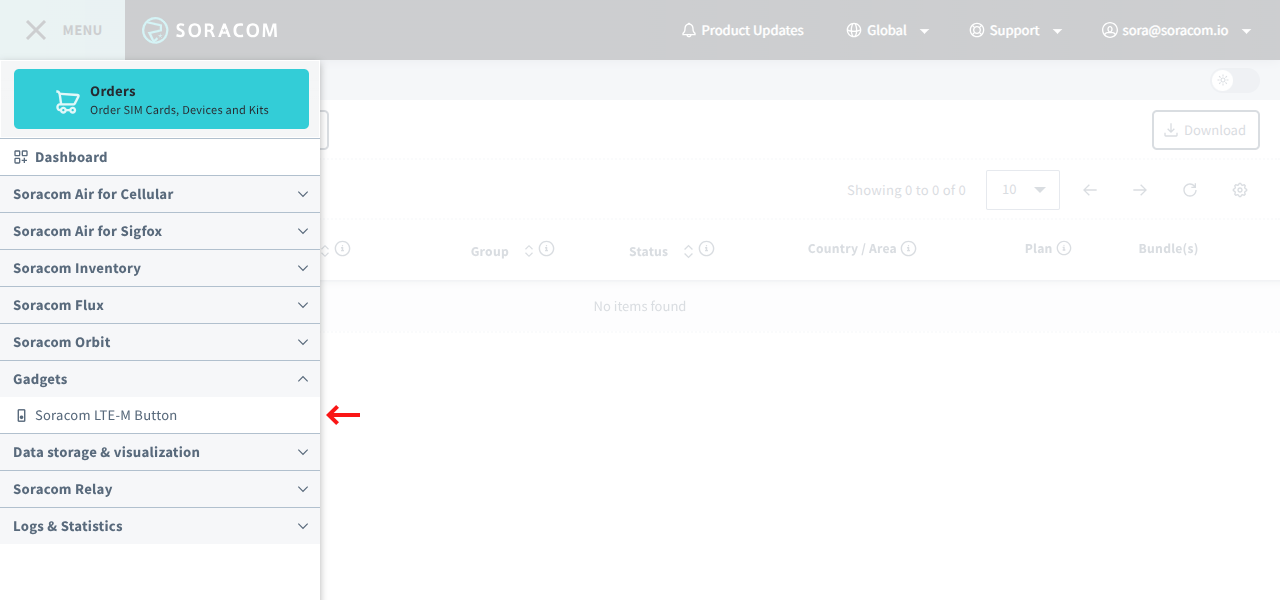
Next, from the Menu, expand Gadgets and select Soracom LTE-M Button.
You should see your button in the list of registered buttons. The Sync Status will show New indicating that the button is newly registered to your account but has not connected to a network yet.
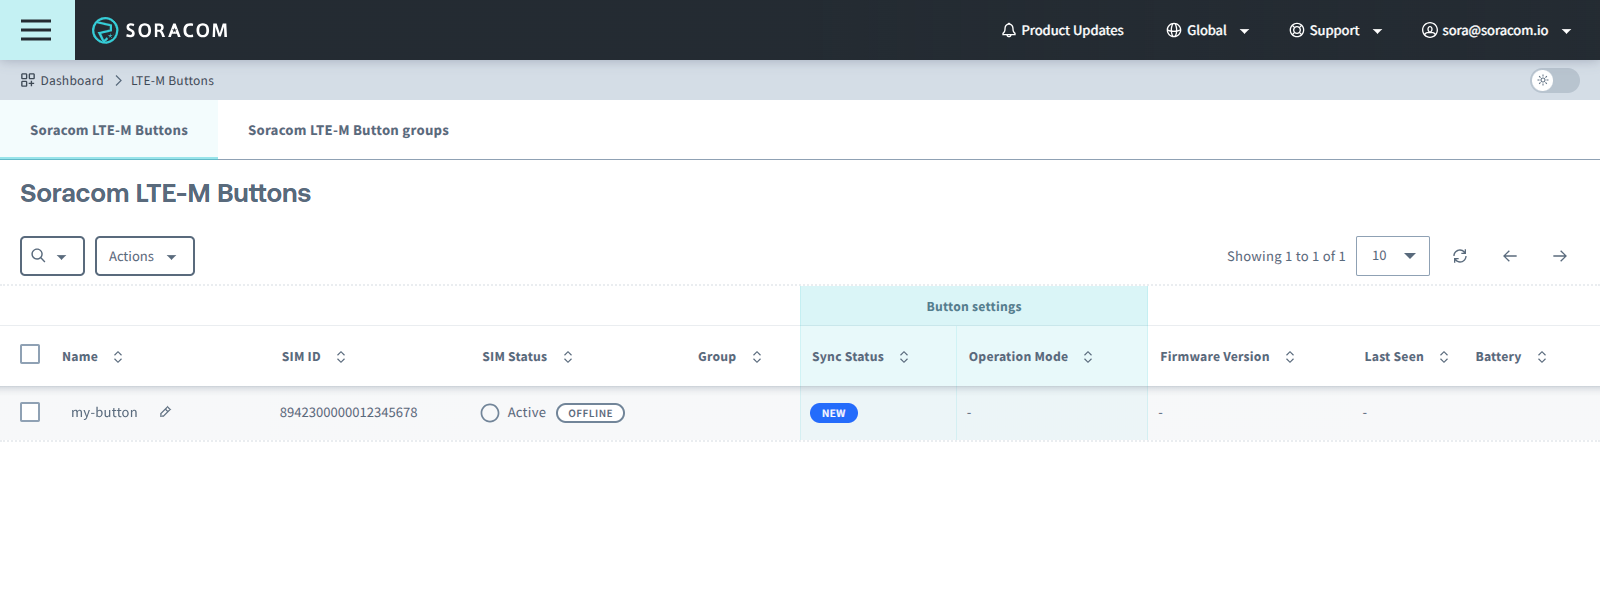
If you purchased and registered multiple Soracom LTE-M Buttons, you can identify which is which by checking the 19-digit ICCID number printed on the label inside the button. This number will match the SIM ID in the list of buttons.
Adding the Button to a Group
All of the settings needed to manage Soracom LTE-M Buttons are stored in Soracom LTE-M Button groups. Next, create a new group for the button, or add the button to an existing group.
-
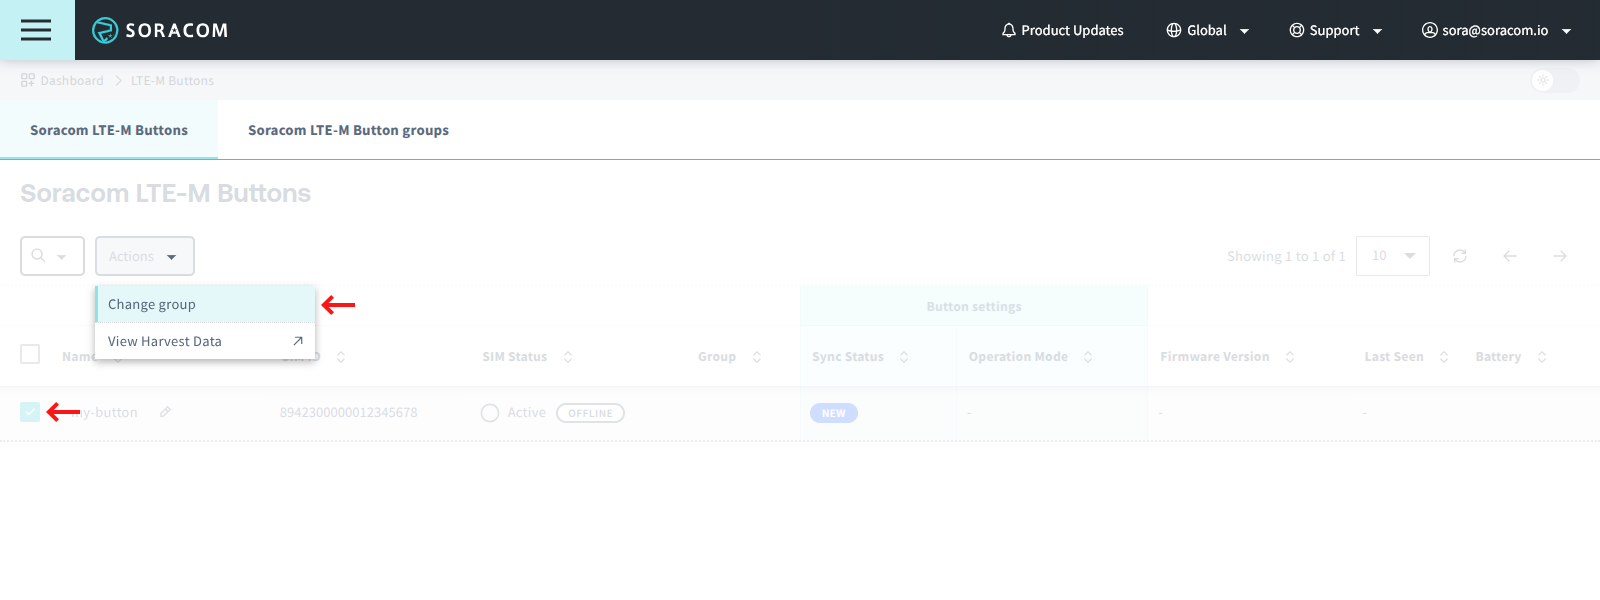
From the list of Soracom LTE-M Buttons, click the for your button, then click the Actions menu and select Change group.
-
If you already have a Soracom LTE-M Button group, you can select it and click Change group.
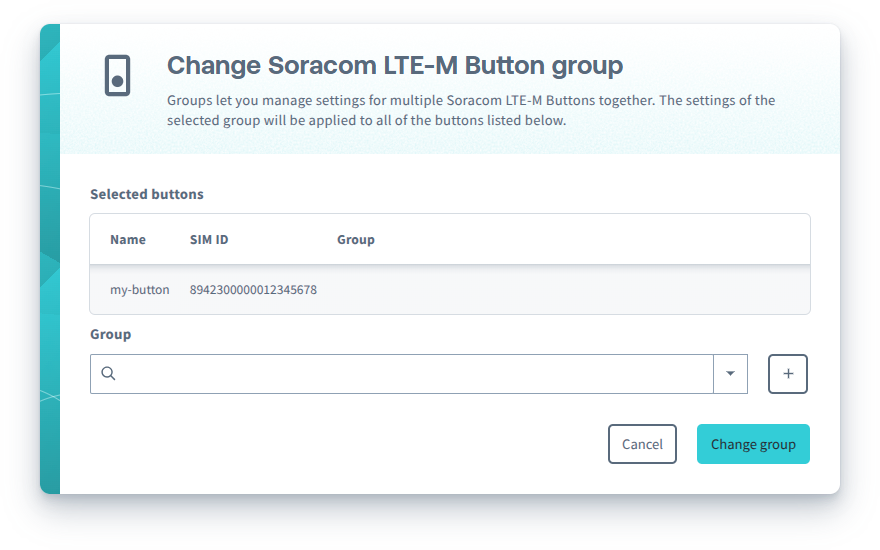
If you don't have a Soracom LTE-M Button group yet, or if you prefer to add your button to a new group, click the button, enter a name for the new group, and click Create. Then select the group you created and click Change group.
-
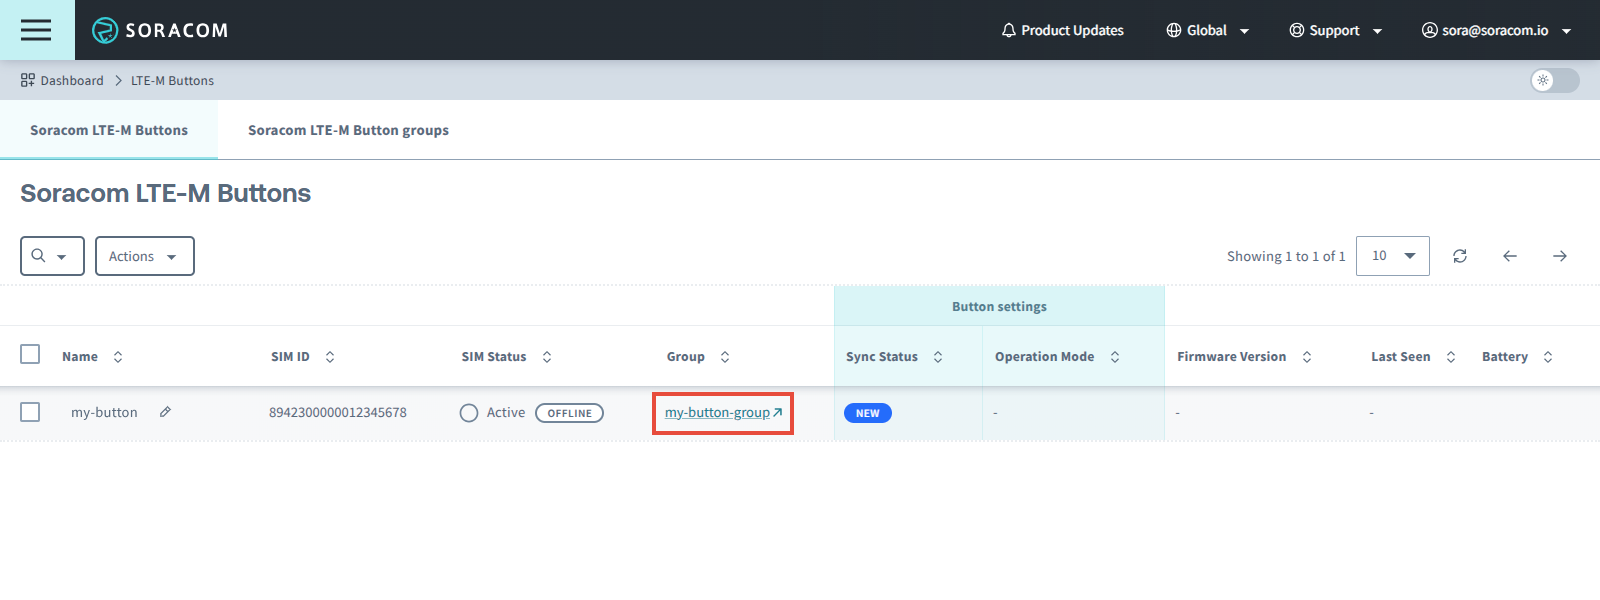
You should see that your button has been added to the group:
When setting up additional buttons, you can add them to an existing group during registration either by using the SIM initial settings option (for buttons purchased directly from Soracom) or by selecting a group when registering a button's eSIM using its ICCID and PUK (for buttons purchased elsewhere).
The Soracom LTE-M Button group is also where you can change your button's settings, such as its operation mode and external I/O mode.
Configuring your group's button settings is optional, however by configuring the settings in advance, your button will automatically sync its settings during its first network connection. This can be helpful if you want to set up multiple buttons with the same settings.
For more information, refer to the Configuration section.
Installing Batteries
With the eSIM registered and button added to a group, your button is now ready to be powered up for the first time.
-
Insert 2x AA alkaline batteries into the button, making sure to pay attention to the correct orientation for each battery:
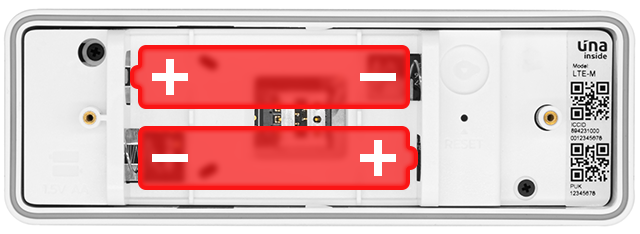
-
As soon as you insert the batteries, the Soracom LTE-M Button will power up and begin scanning for available LTE-M networks.
-
This initial scan may take up to 5 minutes, depending on how many networks are available in your area and the signal strength of each network. During this process, you will see the LED on the front of the button slowly blinking orange: ☀☀☀ (repeating)
-
Once the button successfully connects to a network, the LED will blink green ☀──────── and the button will sync with Soracom. The button will also cache the network information so that it can quickly reconnect to the same network without scanning for networks again.
- If the LED turns red ☀──────── during this process, it indicates that the button was unable to find a suitable network, or that the network connection failed. Refer to the Troubleshooting section.
-
-
Back in the User Console, you can click the button and check that the button has successfully connected and updated its status:
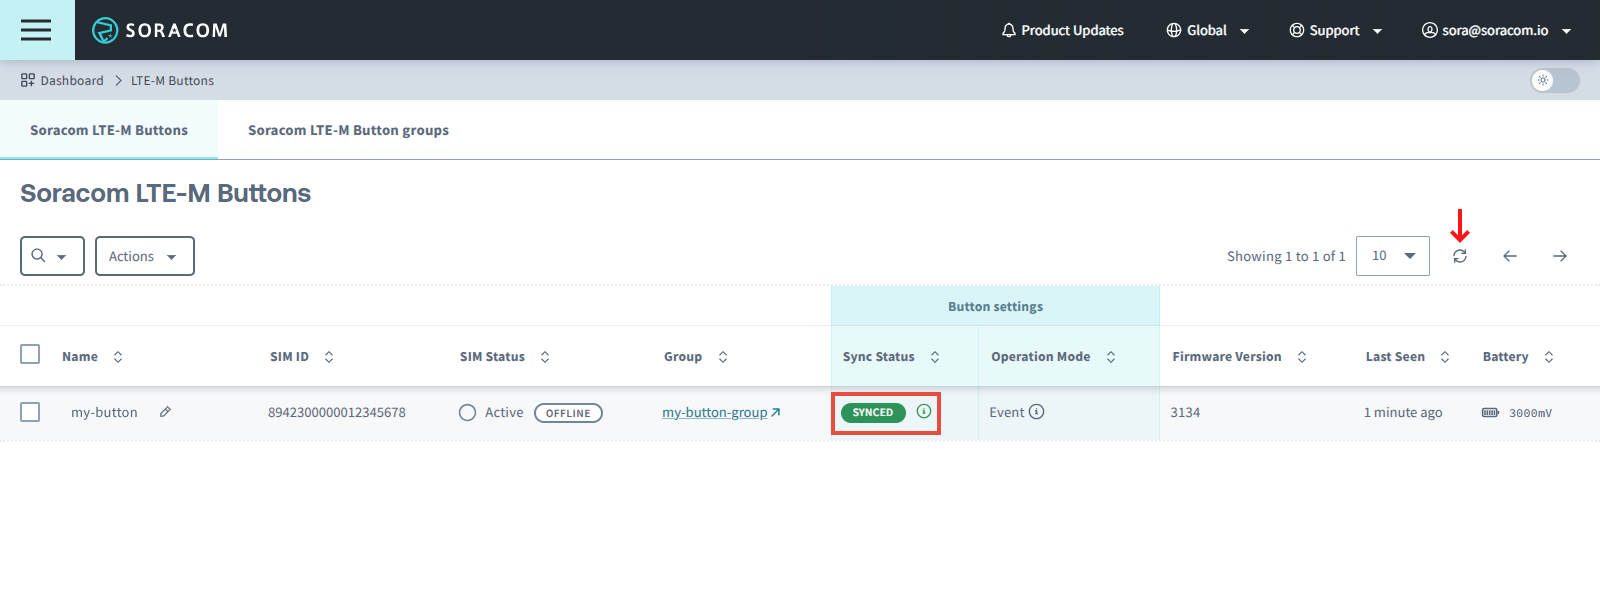
-
Finally, reinstall the rear cover and screws.
The screws are required for the button to achieve its IP54 rating.
Next Steps
With your Soracom LTE-M Button set up, you can now start building your application!
- To change your button's operation mode, external I/O mode, or other settings, refer to the Configuration section.
- Configure Soracom Beam, Soracom Funk, or Soracom Harvest Data to start sending button messages to your server or to services using a webhook, to a cloud function, or just store and view them inside Soracom.
- Refer to the following tutorials for examples with step-by-step instructions: