Using Door and Azure VPN Gateway to Connect Your Devices to an Azure Virtual Network
Introduction
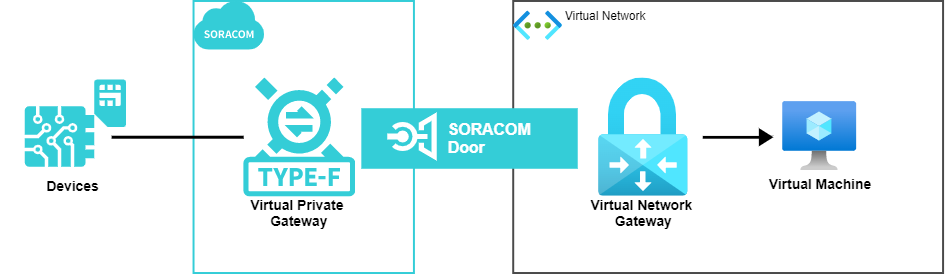
Soracom Door (“Door”) allows you to establish VPN connections between sites and Soracom. This guide will show how you can use Soracom Door to make a VPN connection from Microsoft Azure (“Azure”).
Prerequisites
- A Soracom account
- A Soracom IoT SIM
- A device that can connect to the internet using the Soracom IoT SIM, such as a Raspberry Pi and USB modem
- An Azure account
Step 1: Create a Virtual Network, a VPN Gateway, and a Virtual Machine on Azure
In this guide, you will use Soracom Door to connect securely to your own private network. To demonstrate this connection, you must first create your own network, gateway, and virtual machine on Azure.
Create an Azure Virtual Network
You must first create an Azure Virtual Network (VNet), which will house your Azure Virtual Machine (VM).
If you want to use an existing VNet, its CIDR needs to be within the following:
- 10.0.0.0/8 (For VPGs created in Japan coverage, the address space 10.21.0.0/16 is unavailable)
- 172.16.0.0/12
- 192.168.0.0/16
-
Sign in to the Microsoft Azure Portal.
-
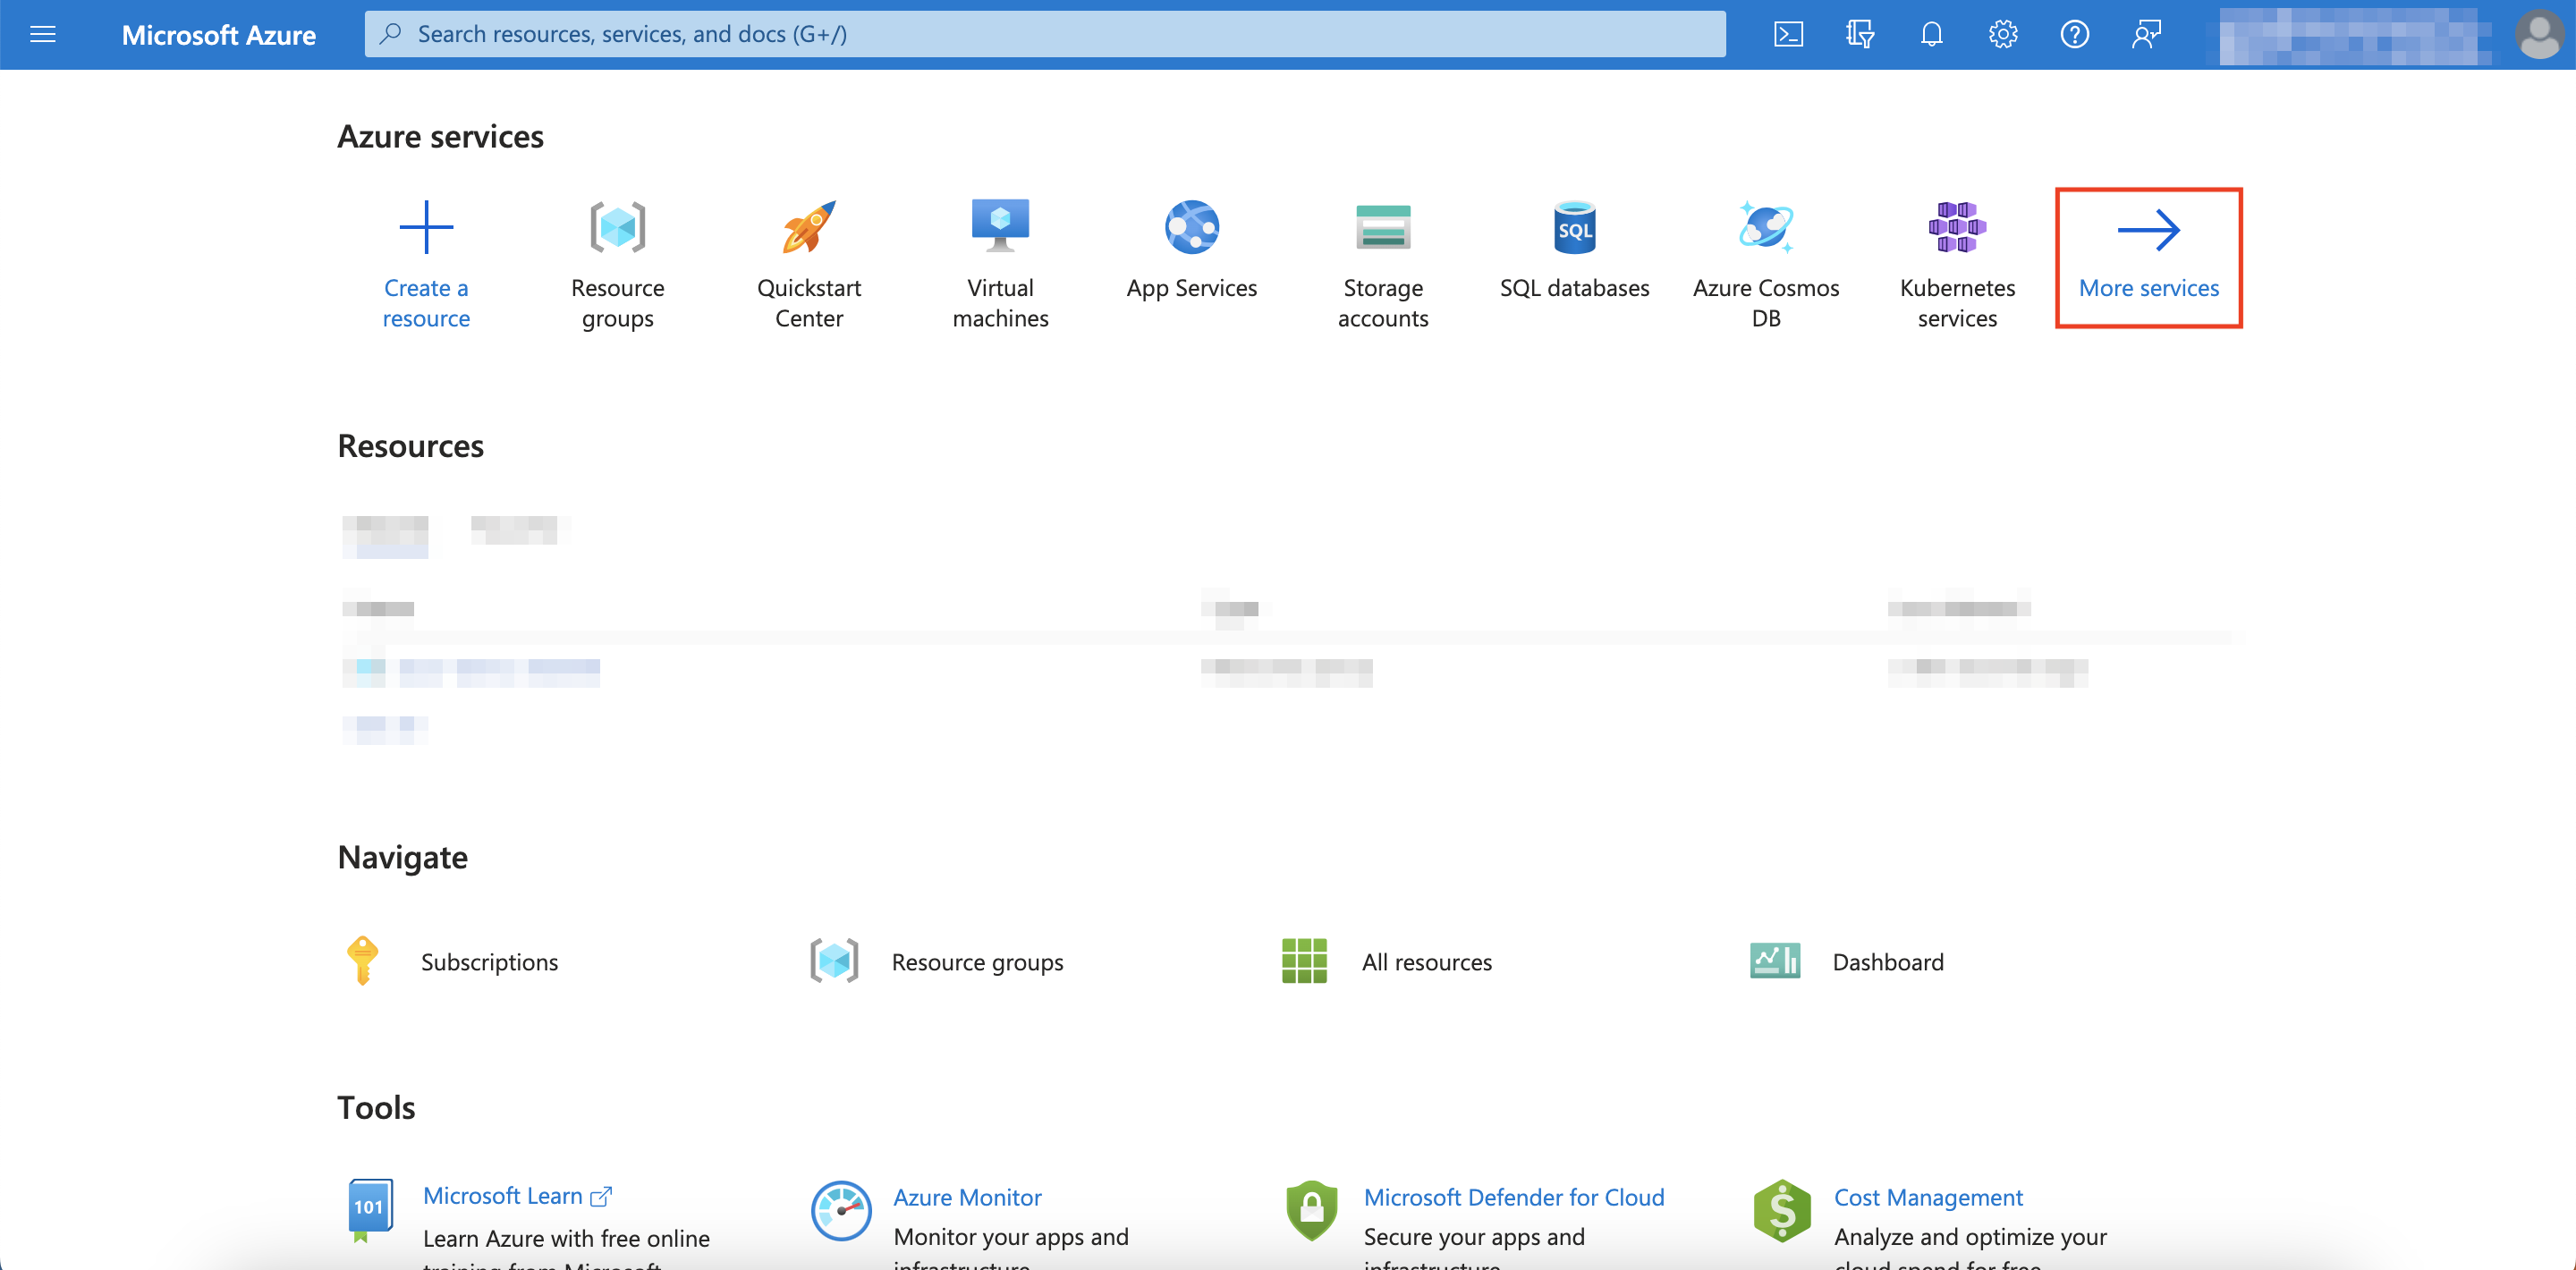
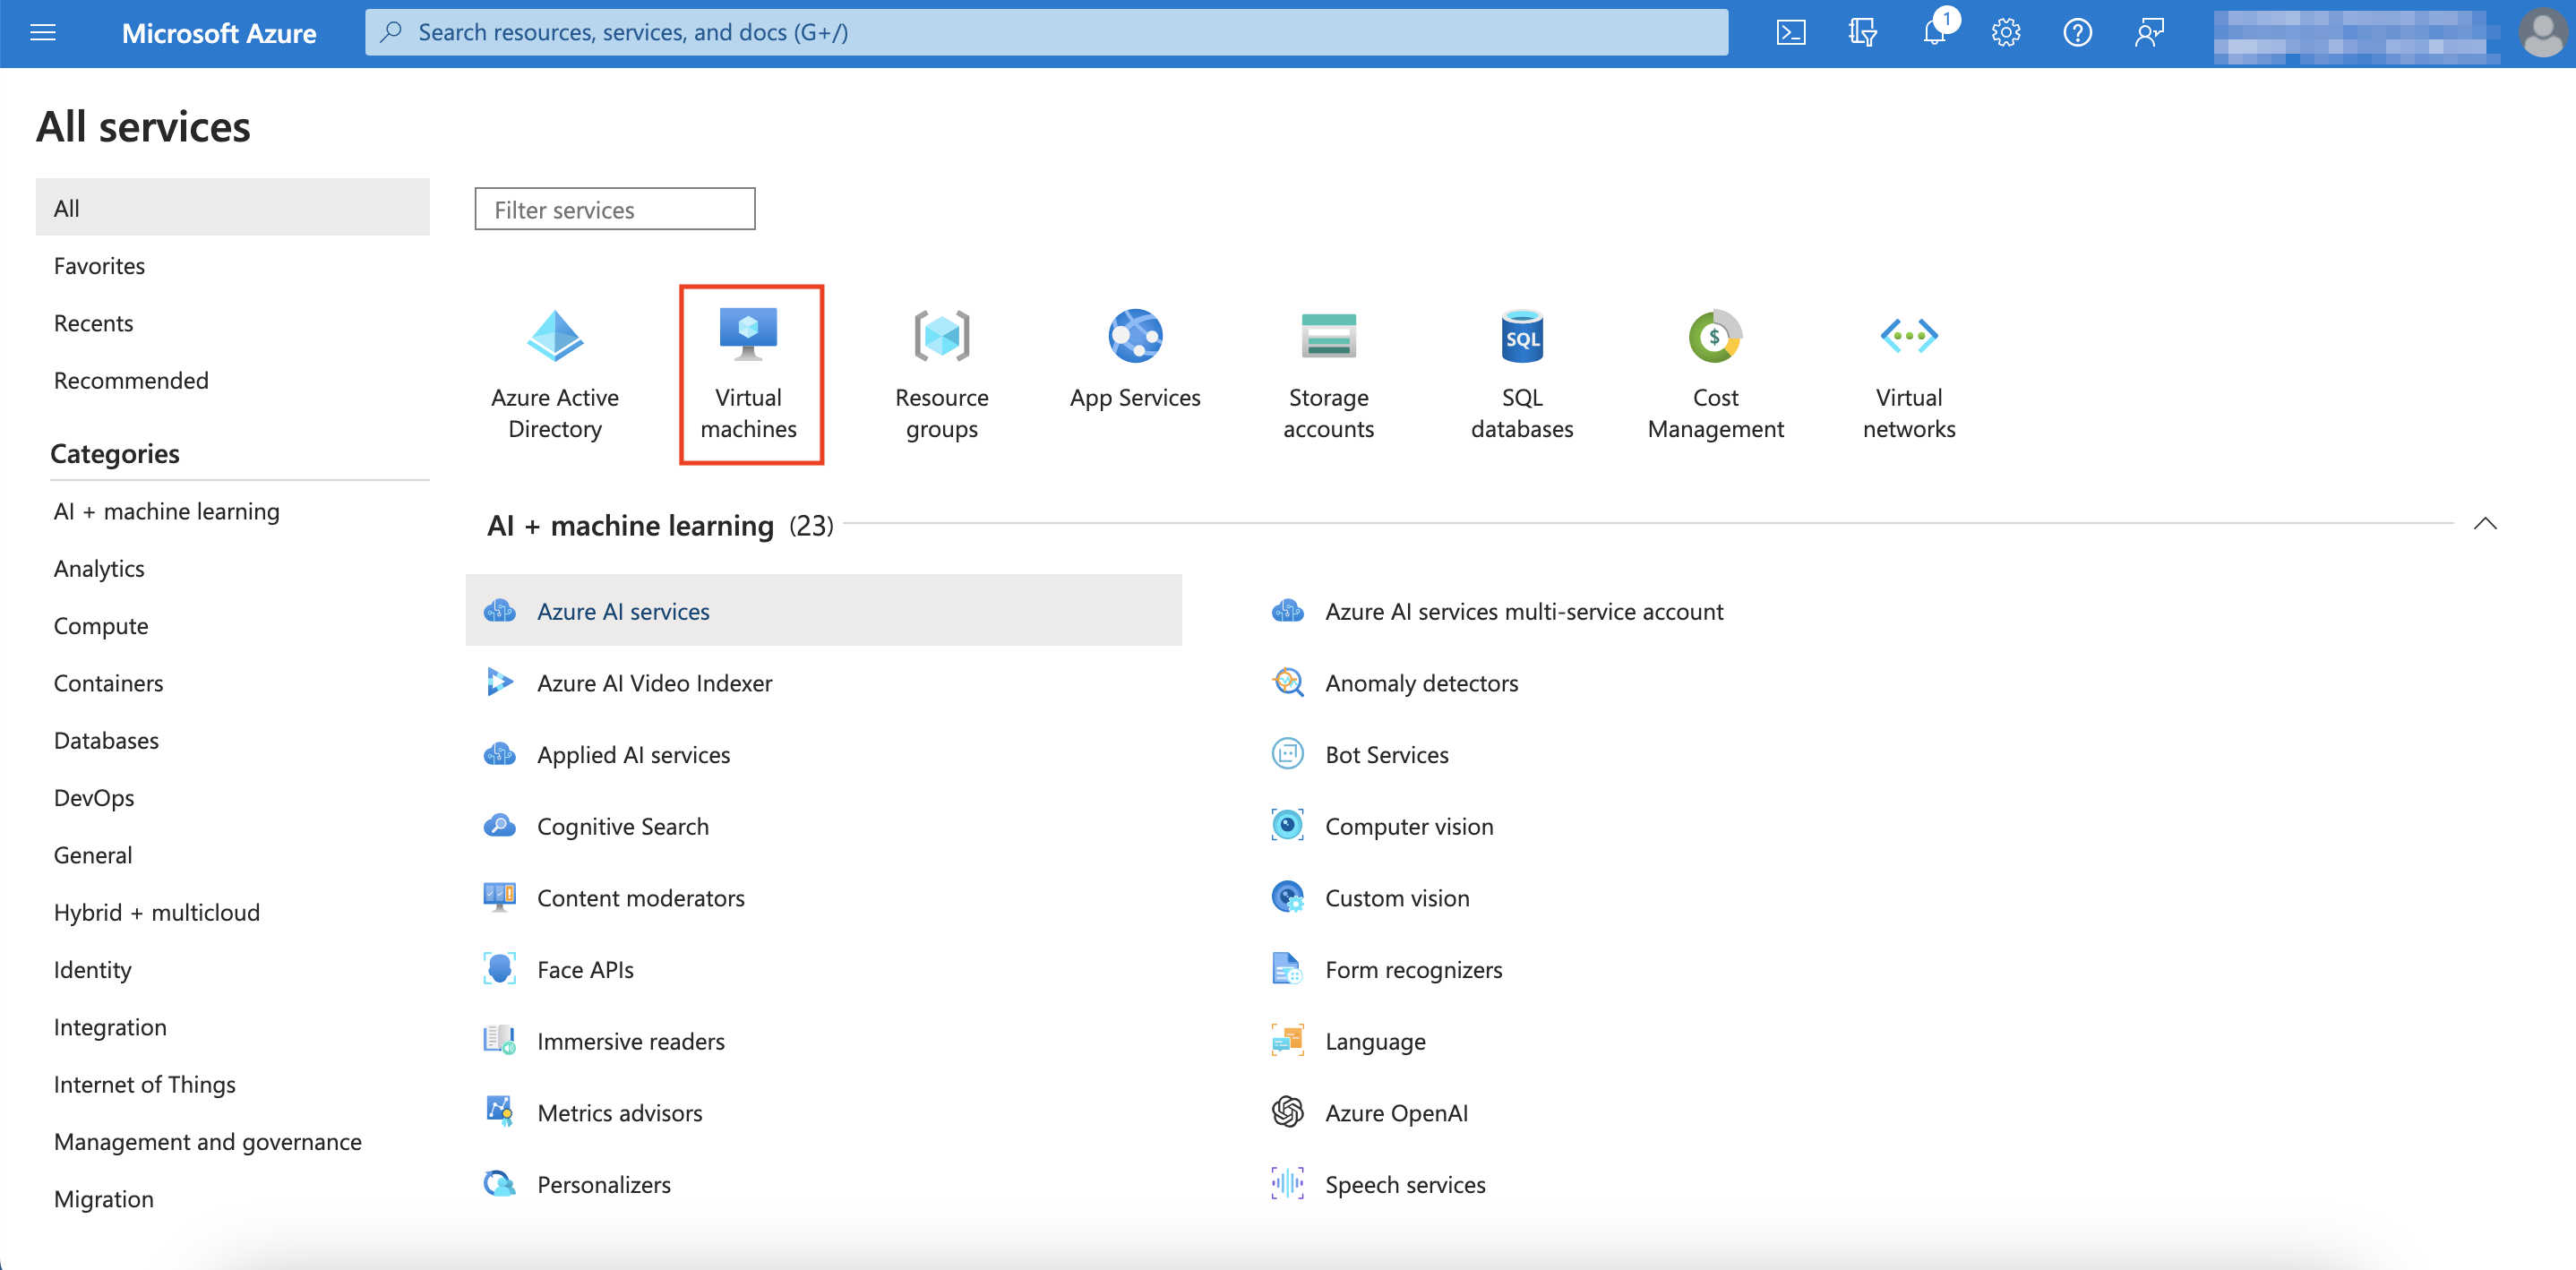
Click on More services to browse all Azure services.
-
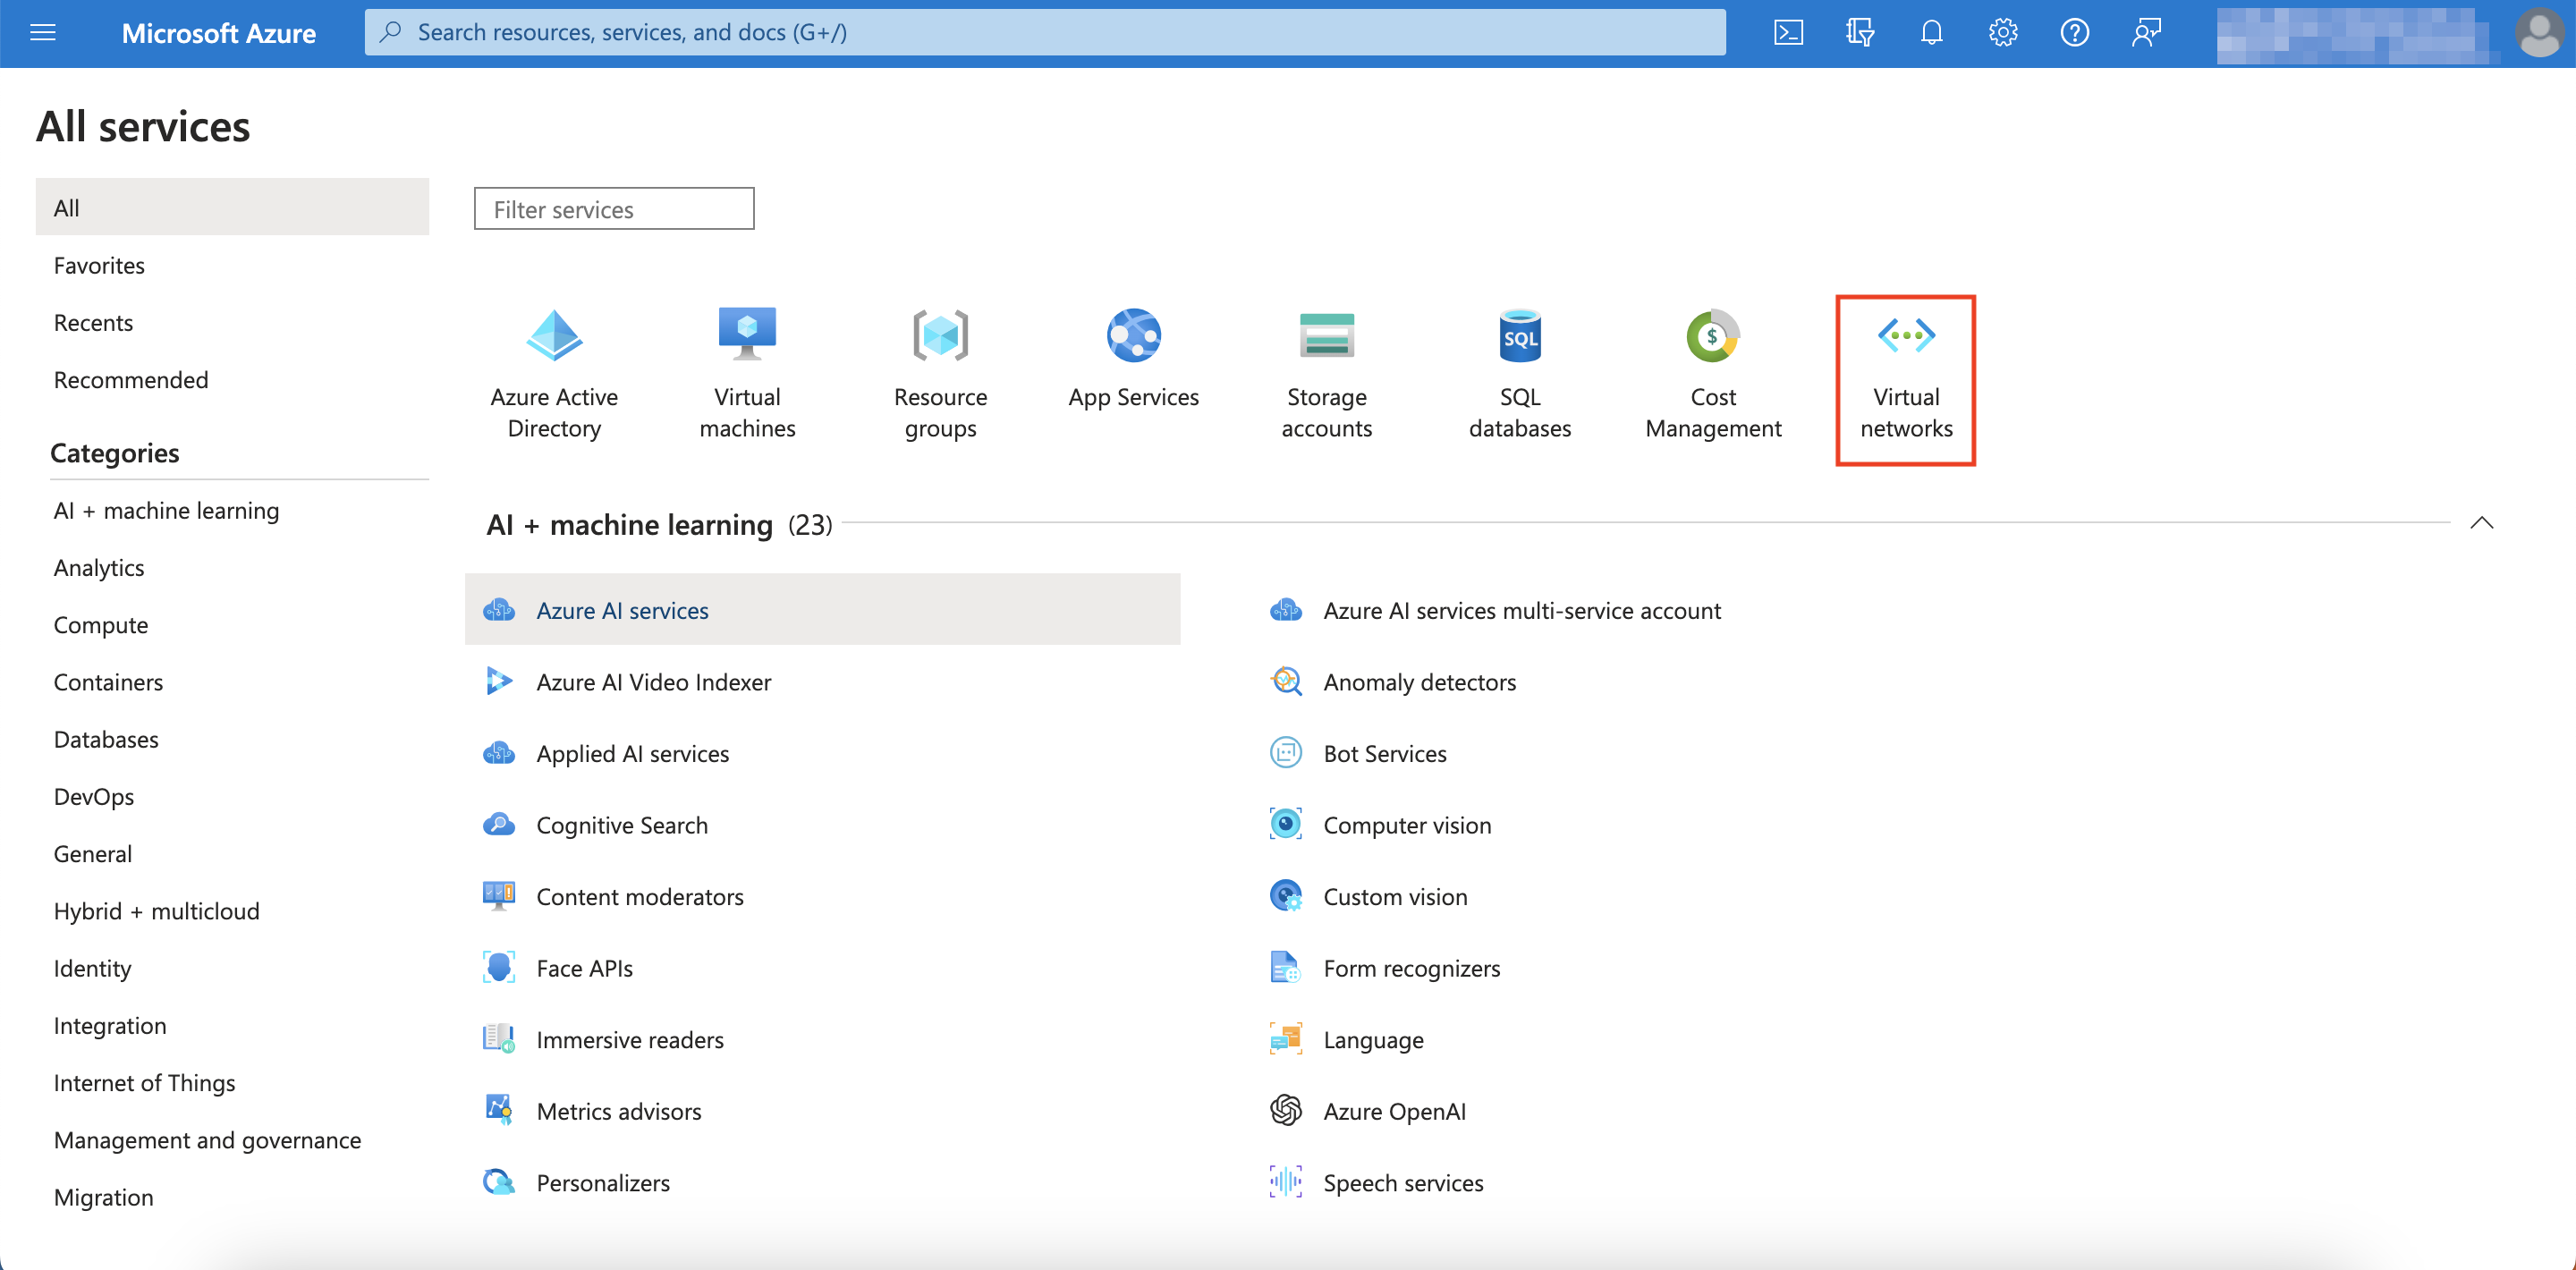
Click on Virtual networks.
-
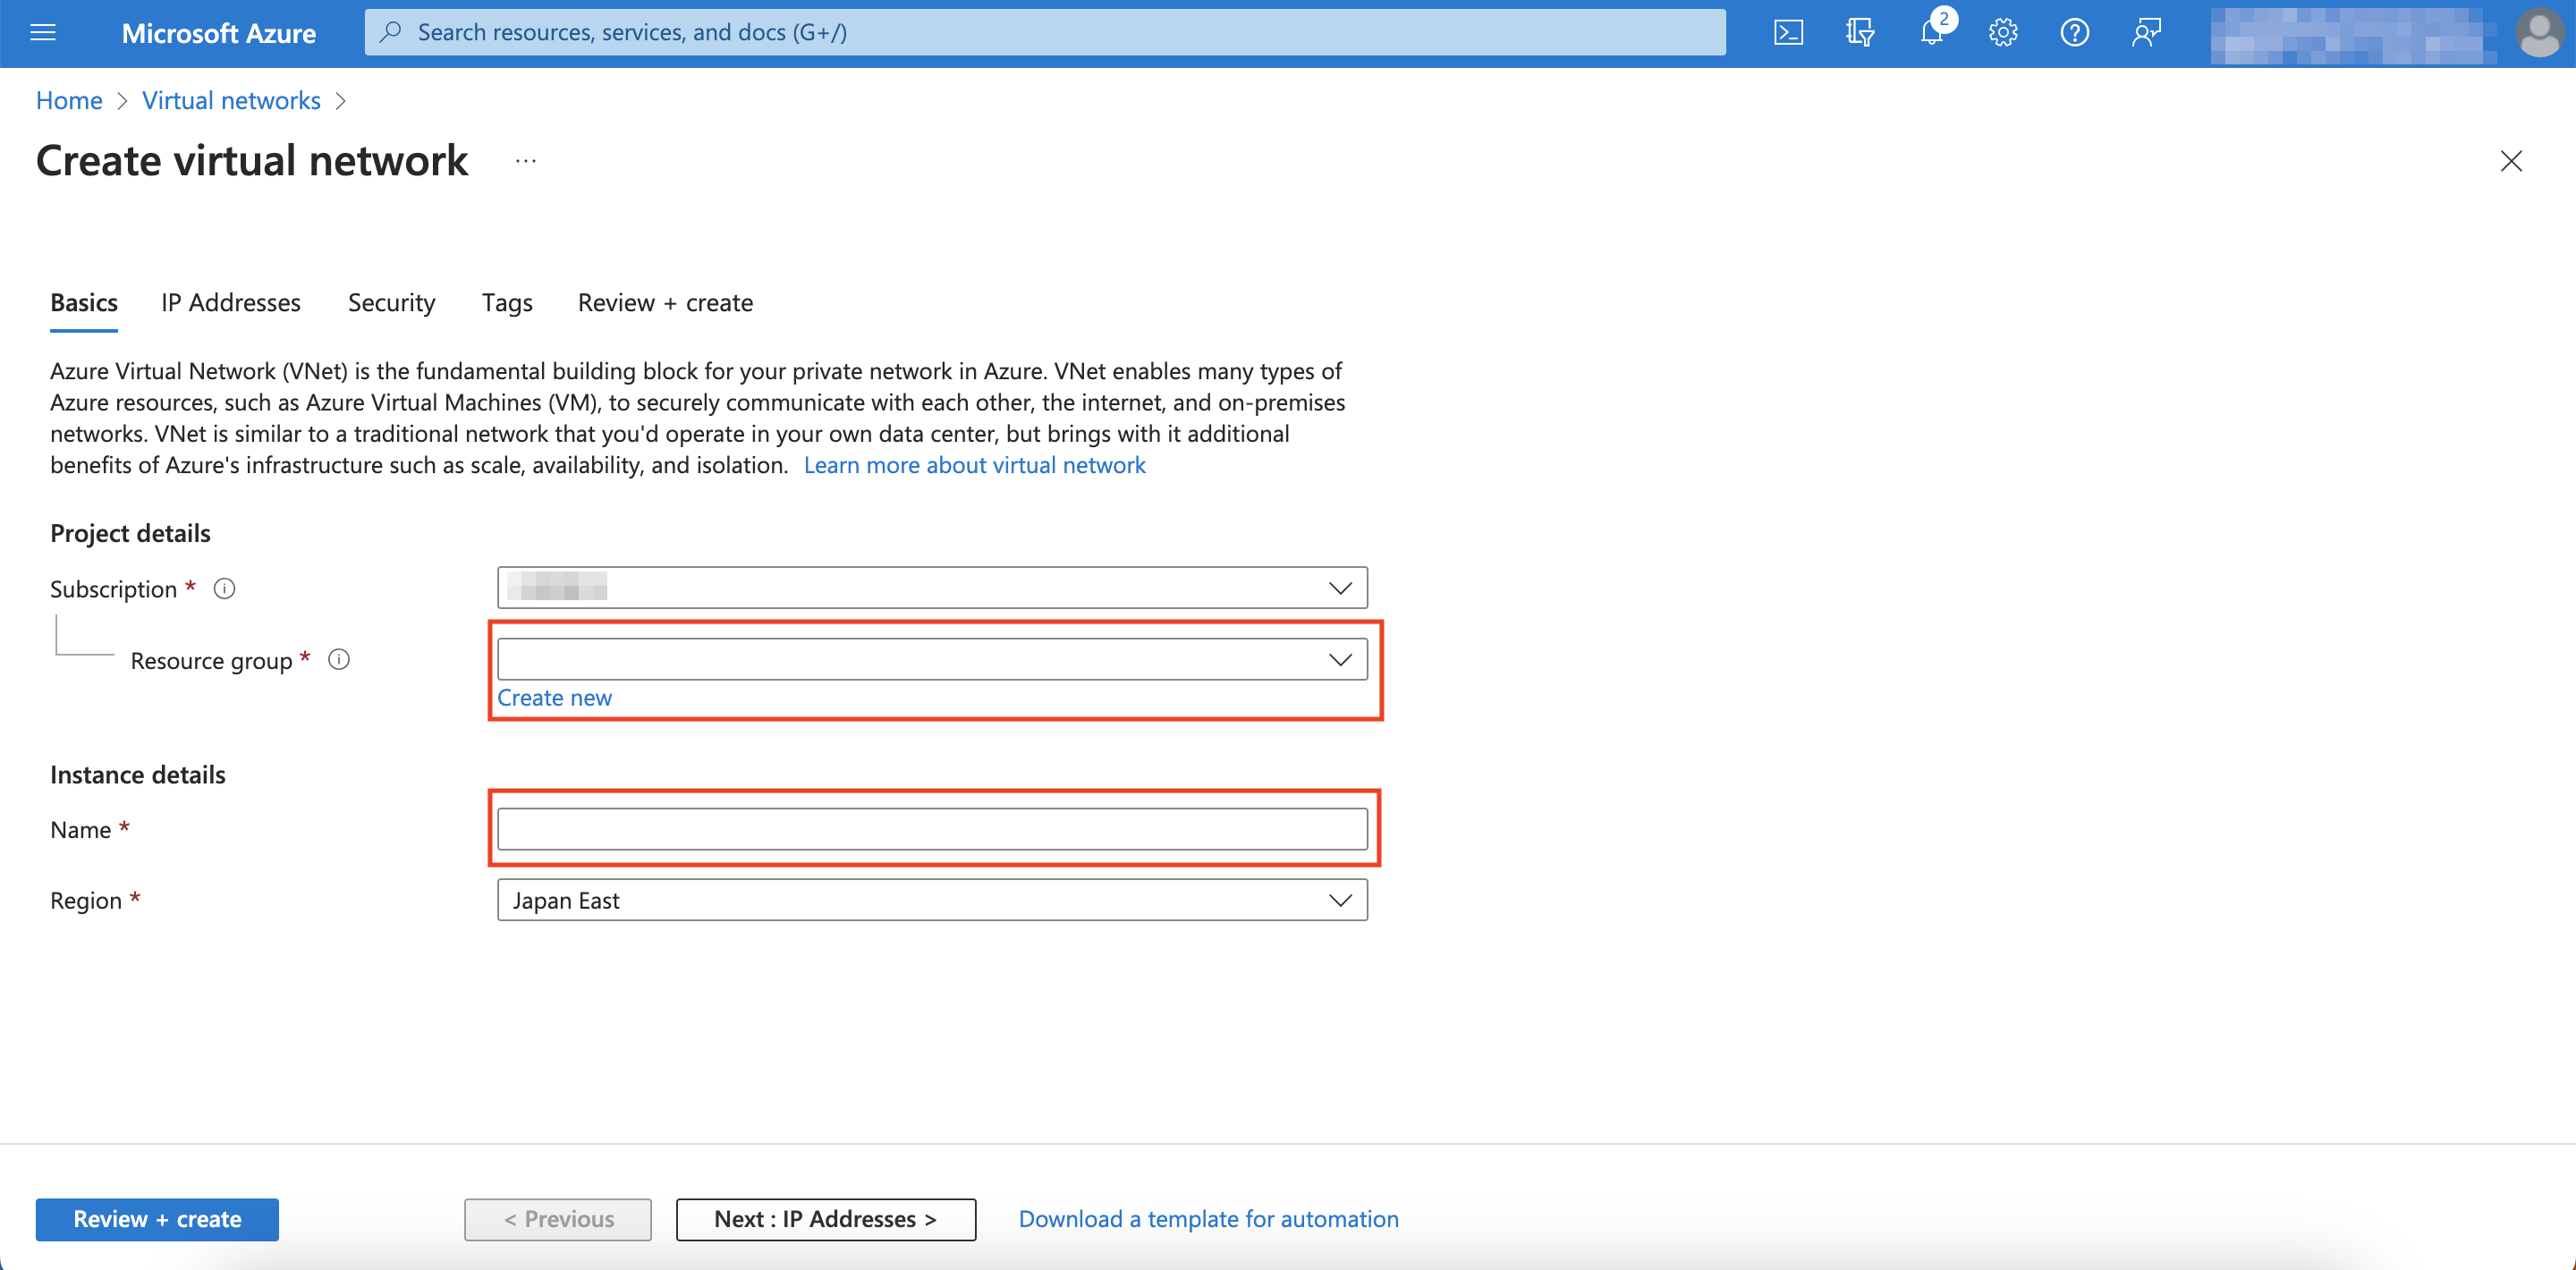
Click Create.

-
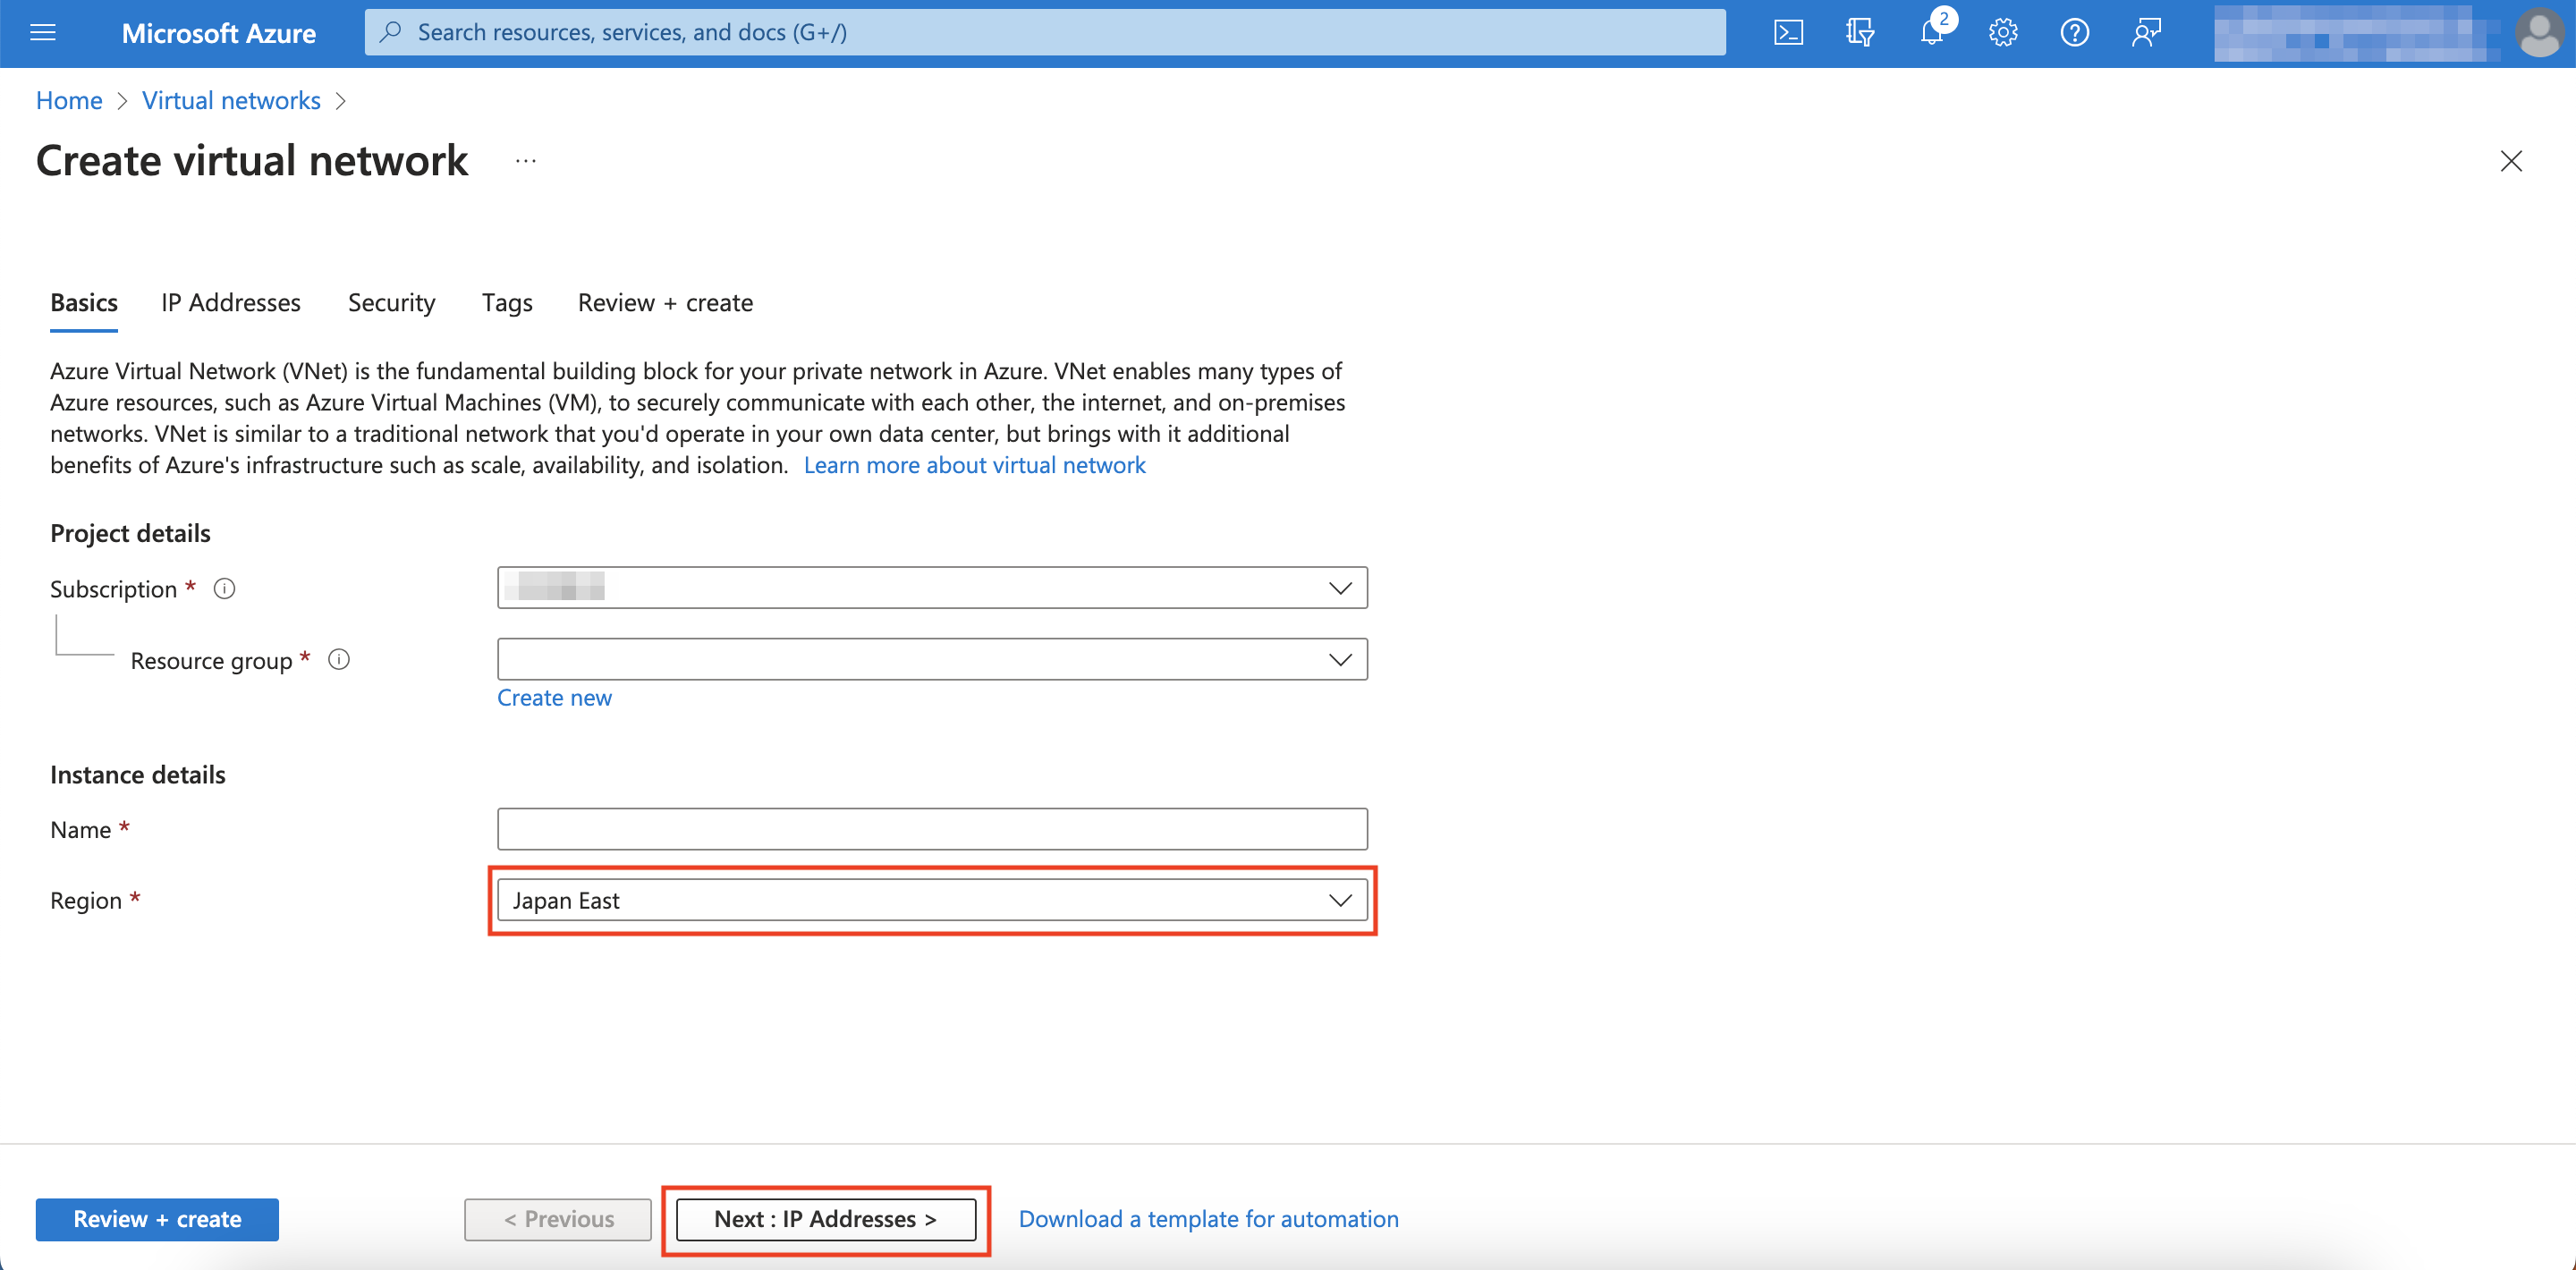
Give the VNet a name and configure it with a resource group if you have one; if not, create one.
-
Configure the VNet with a region of your choosing (in this example, we are using Japan East), then click Next: IP Addresses.
-
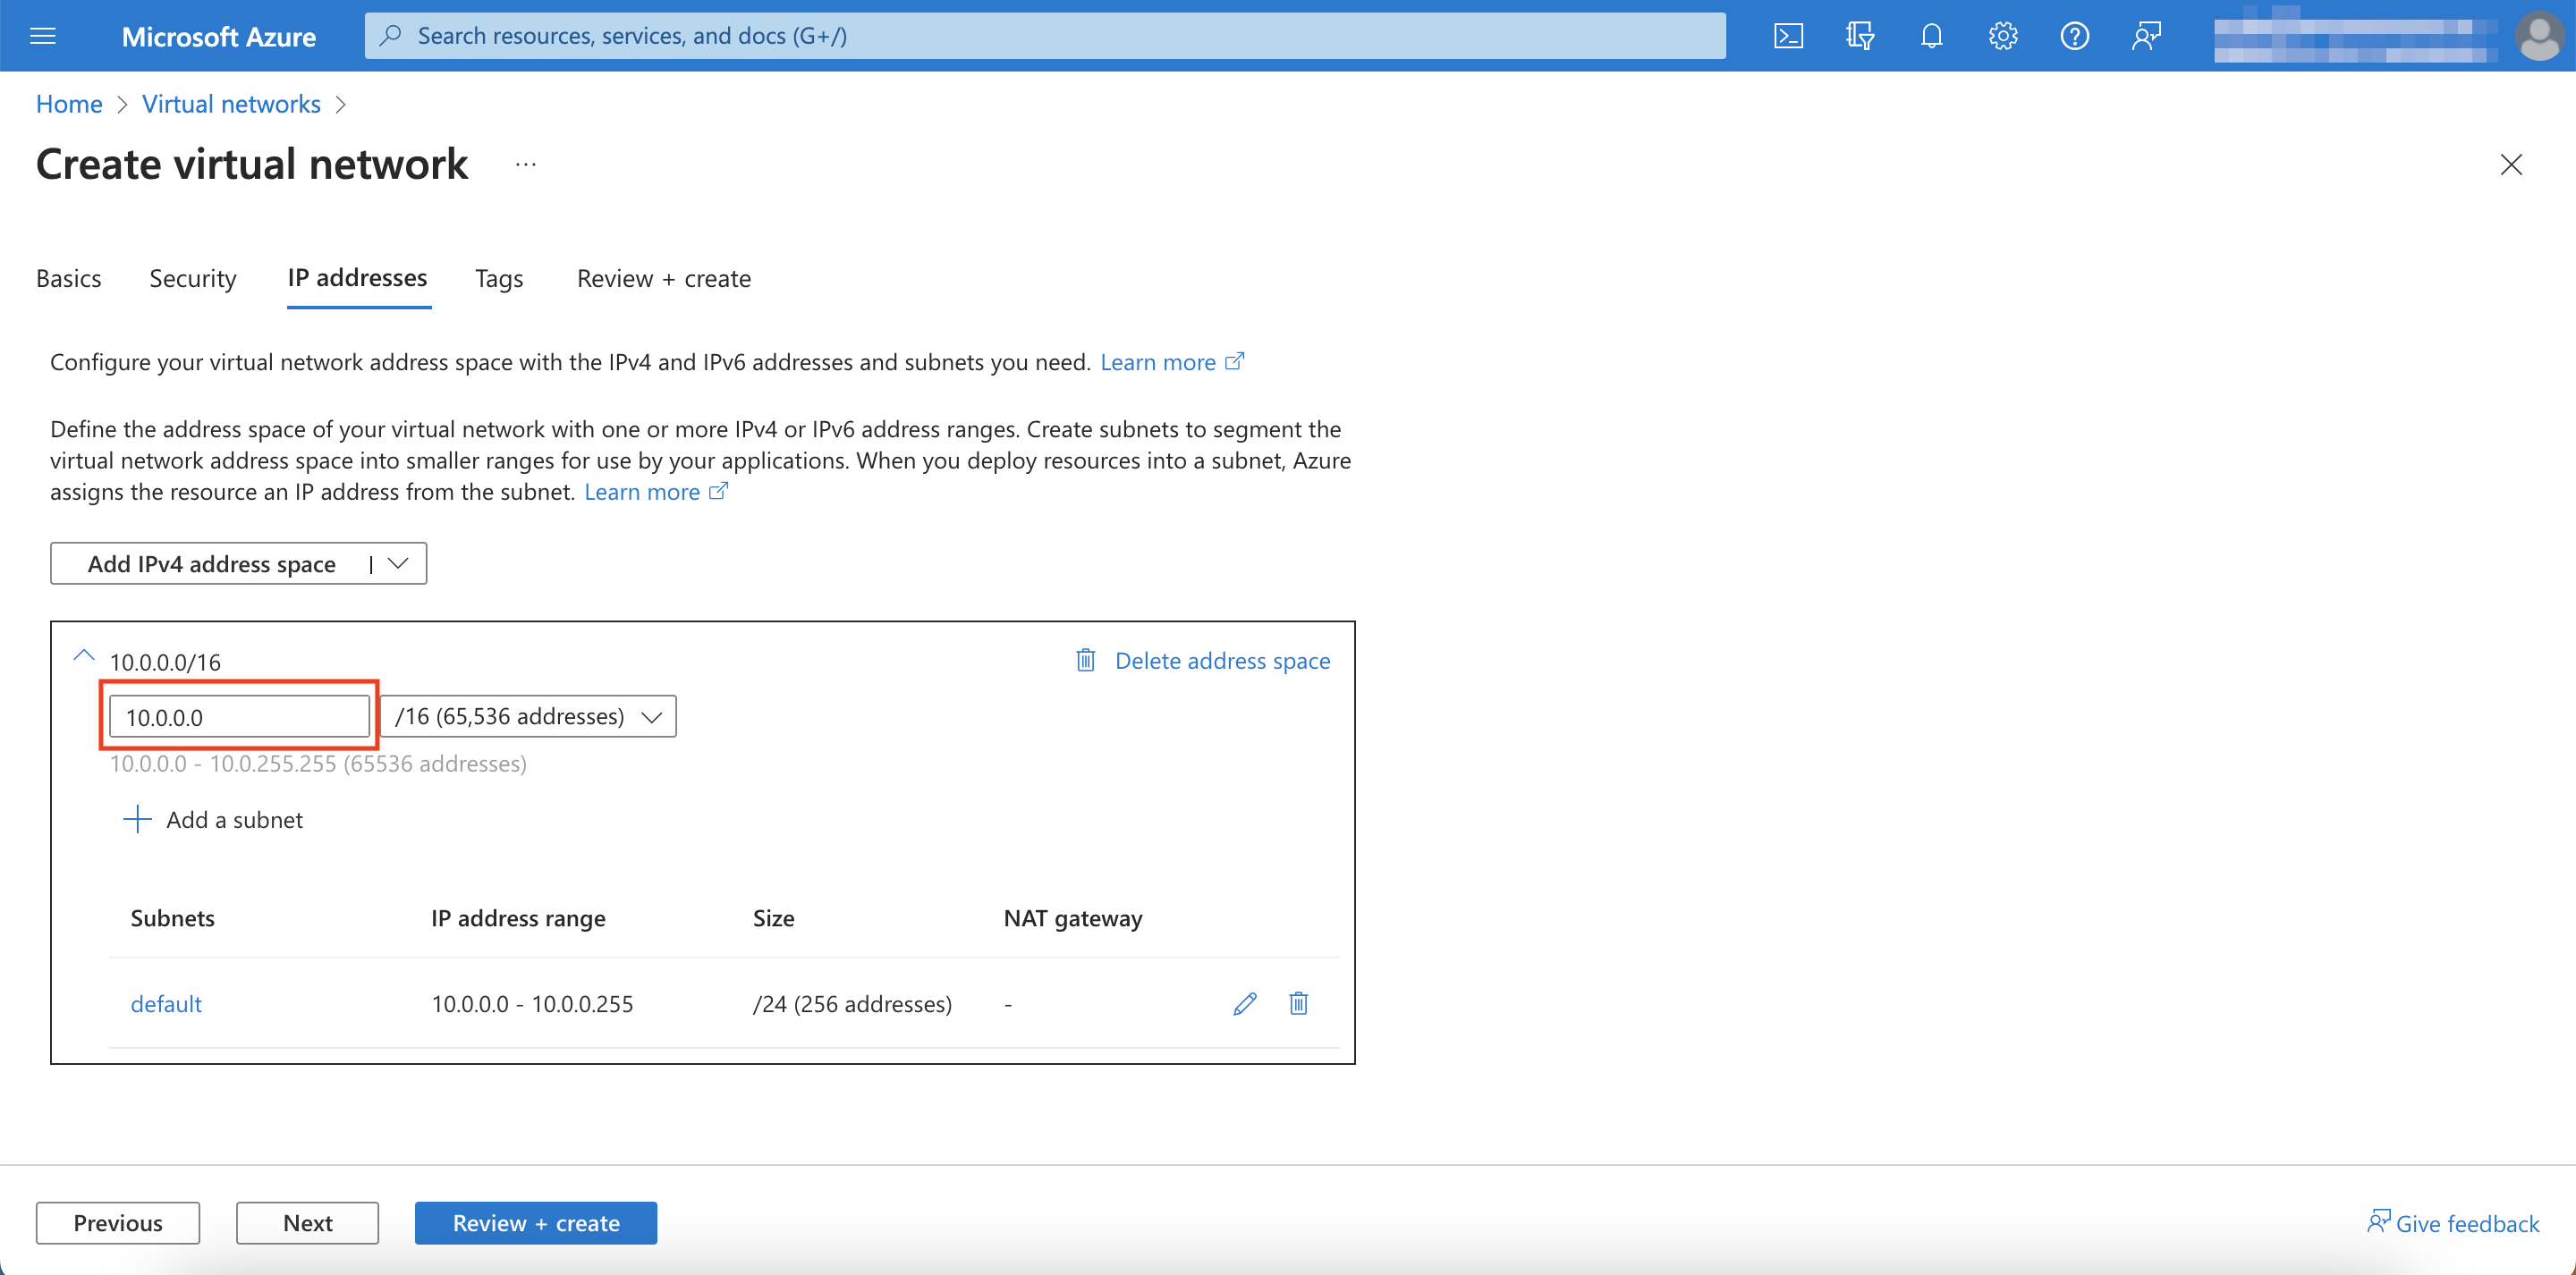
IPv4 address space: Specify the address space you would like to use (e.g., 10.0.0.0/16).
-
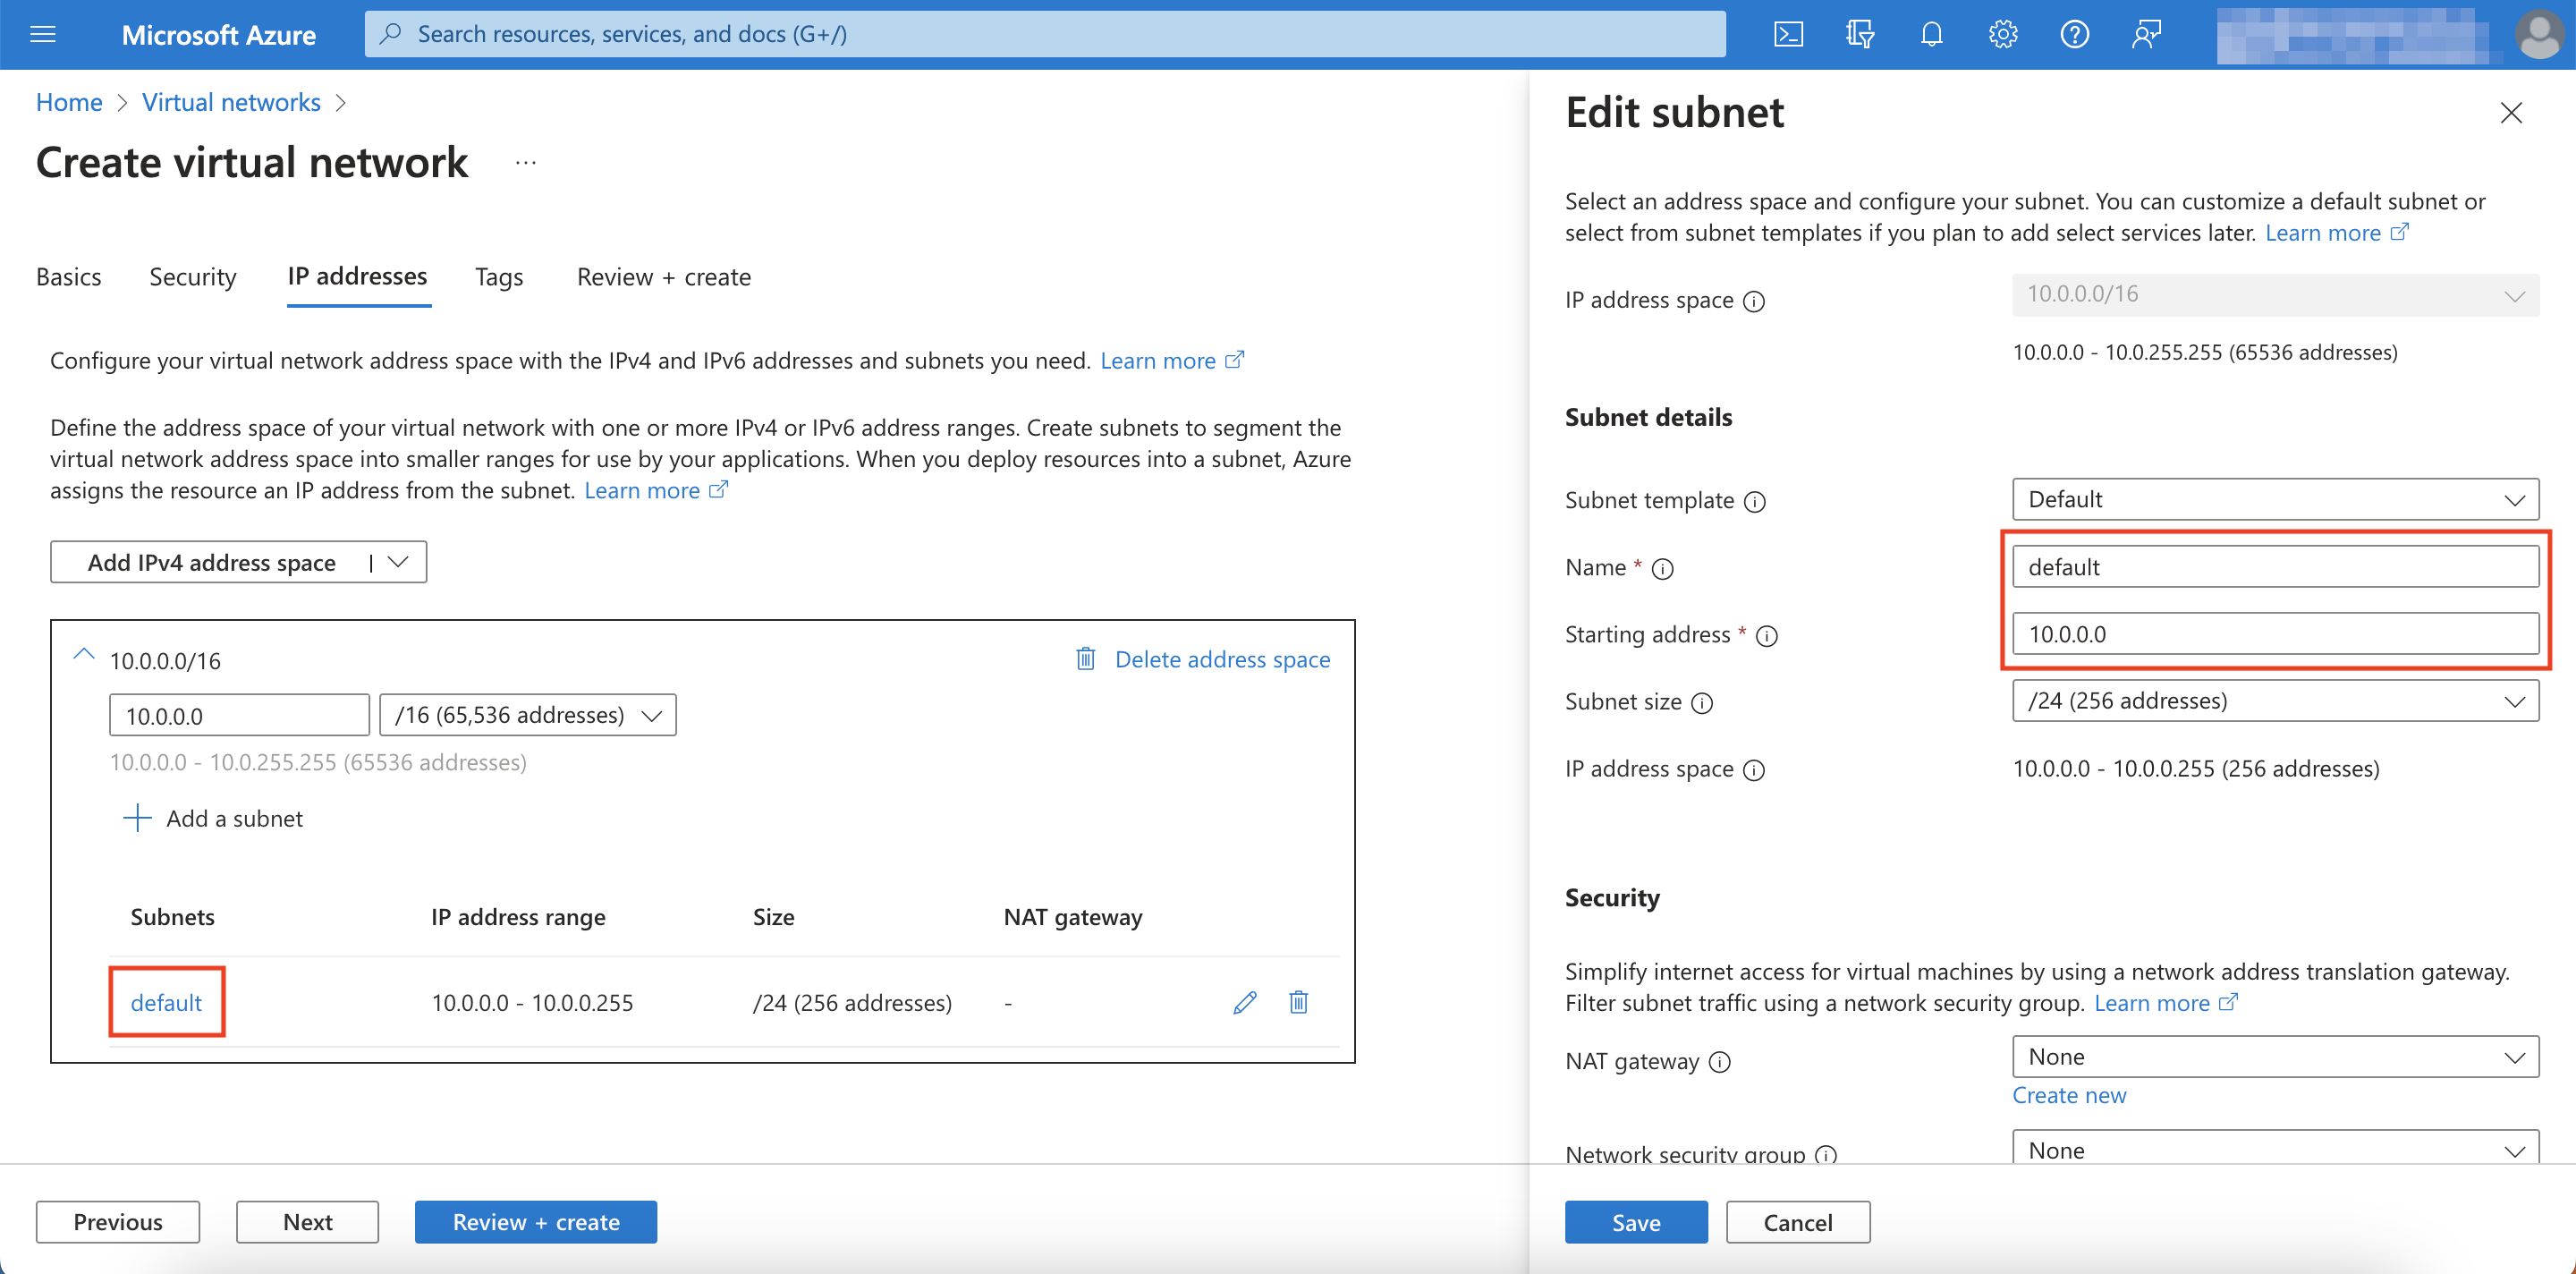
Click on default right under subnet name and configure the subnet's Name and Starting address (e.g., 10.0.0.0/24).
-
Click Save, then click Review + create.

-
Click Create.
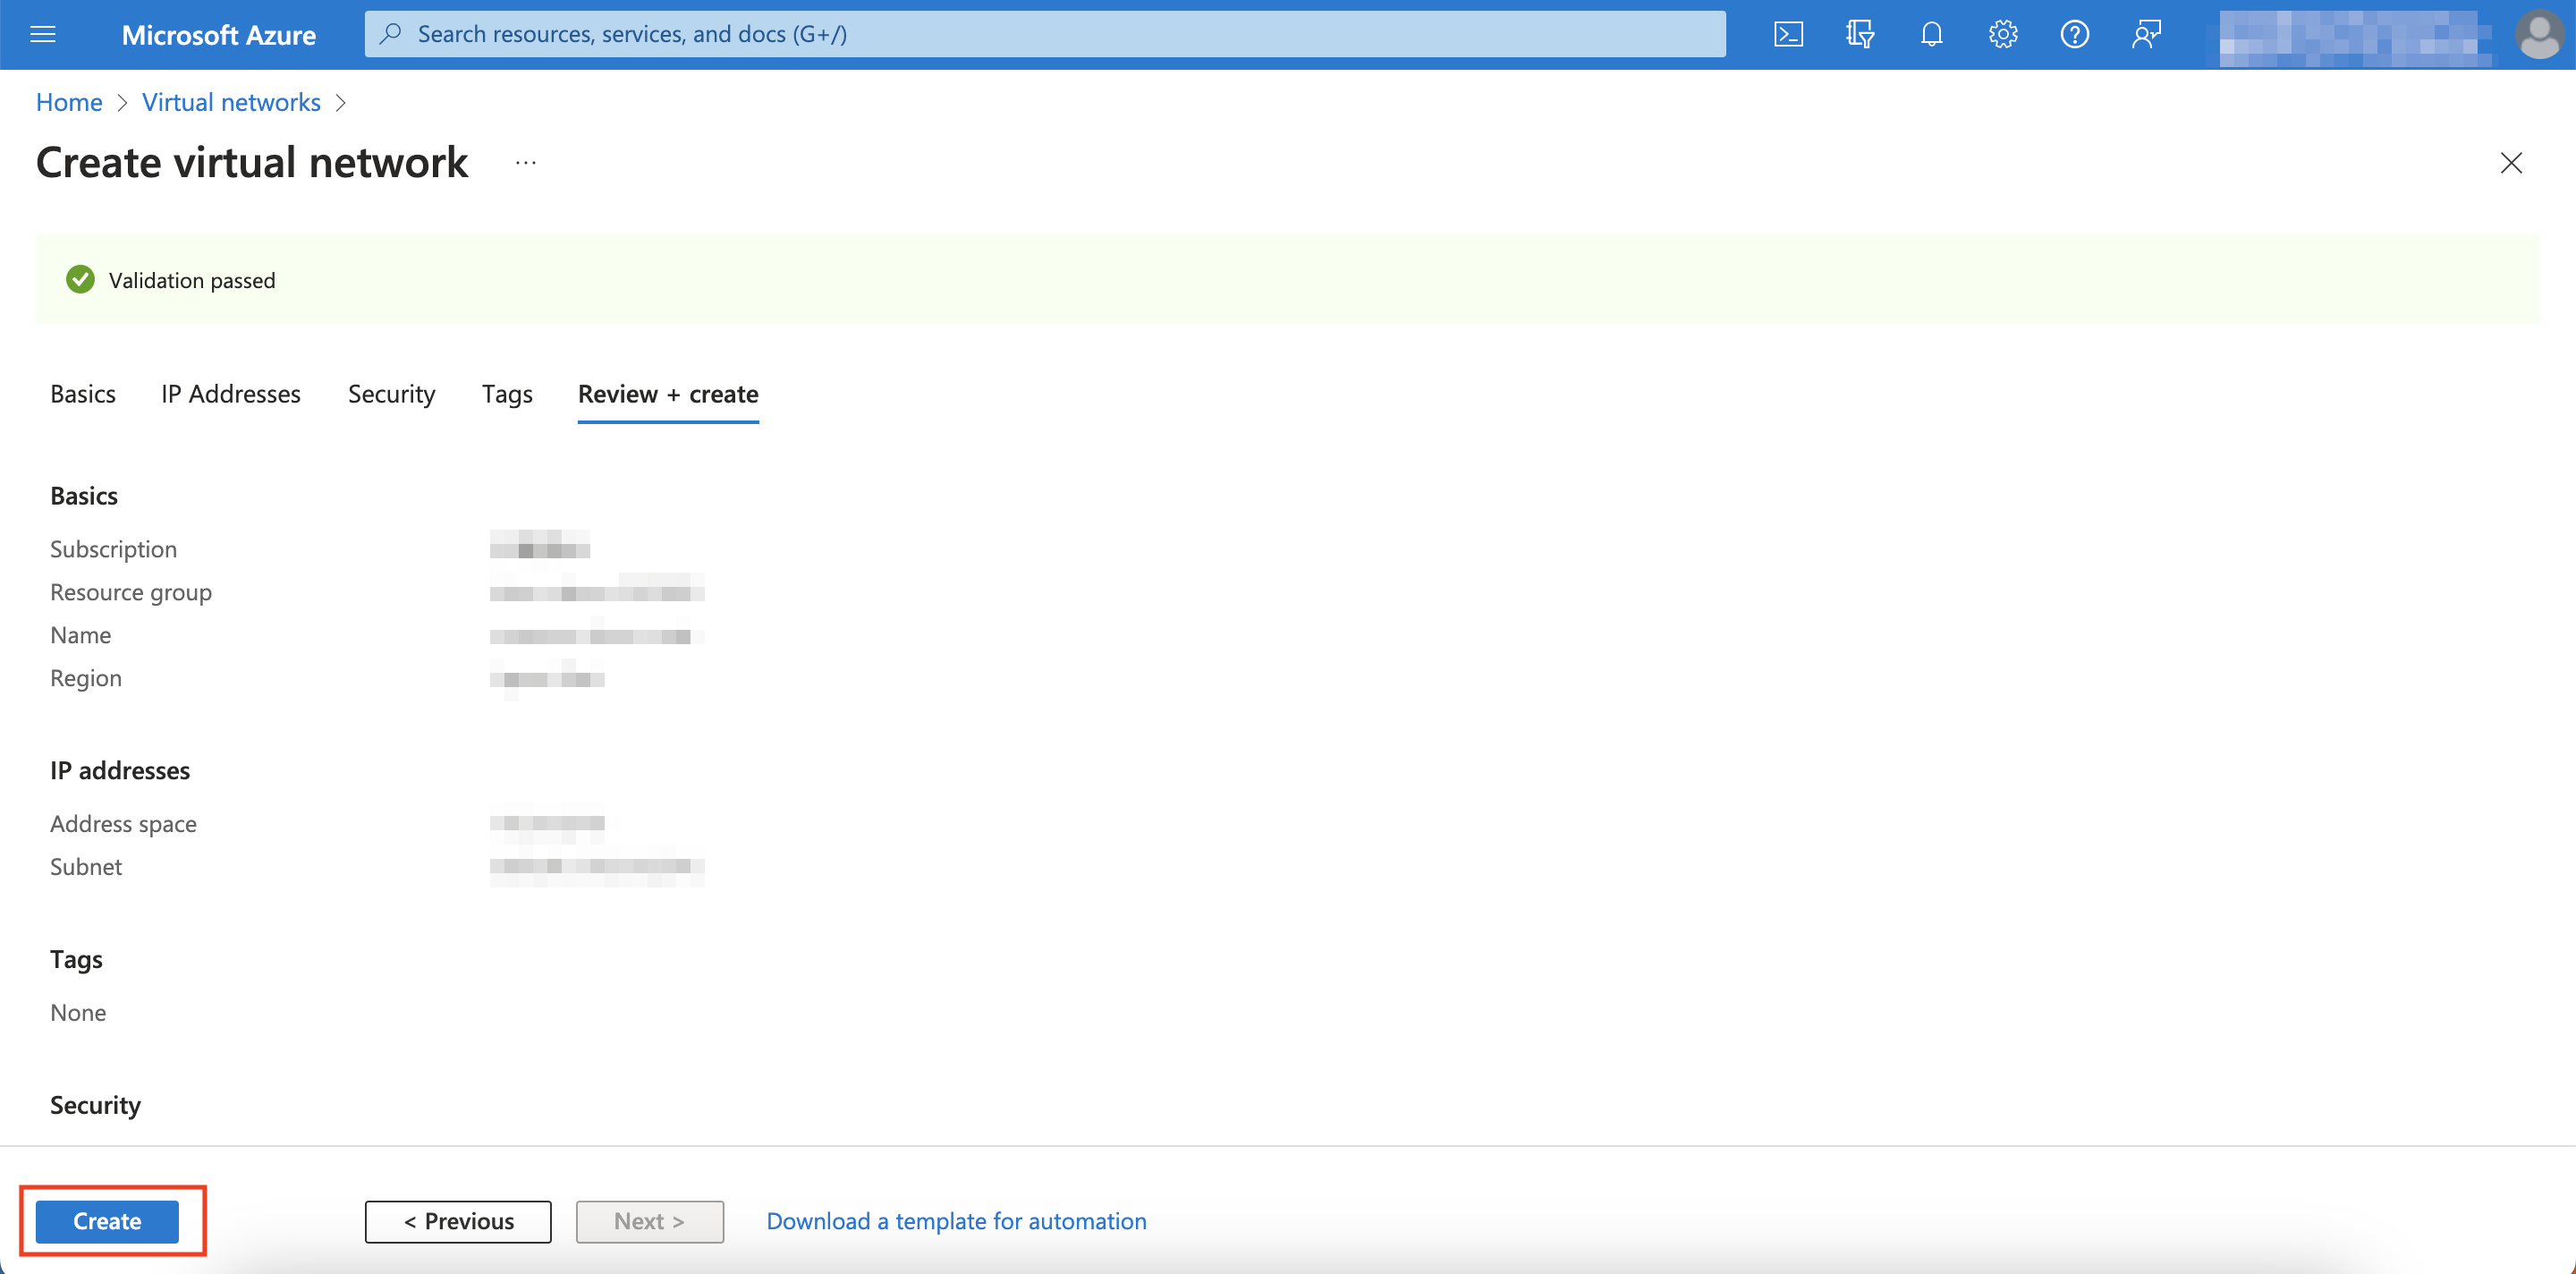
You have successfully created an Azure VNet!
Create an Azure VPN Gateway
Next, you will set up an Azure VPN Gateway for the VNet you just created.
-
Go back to the homepage of your Microsoft Azure Portal.
-
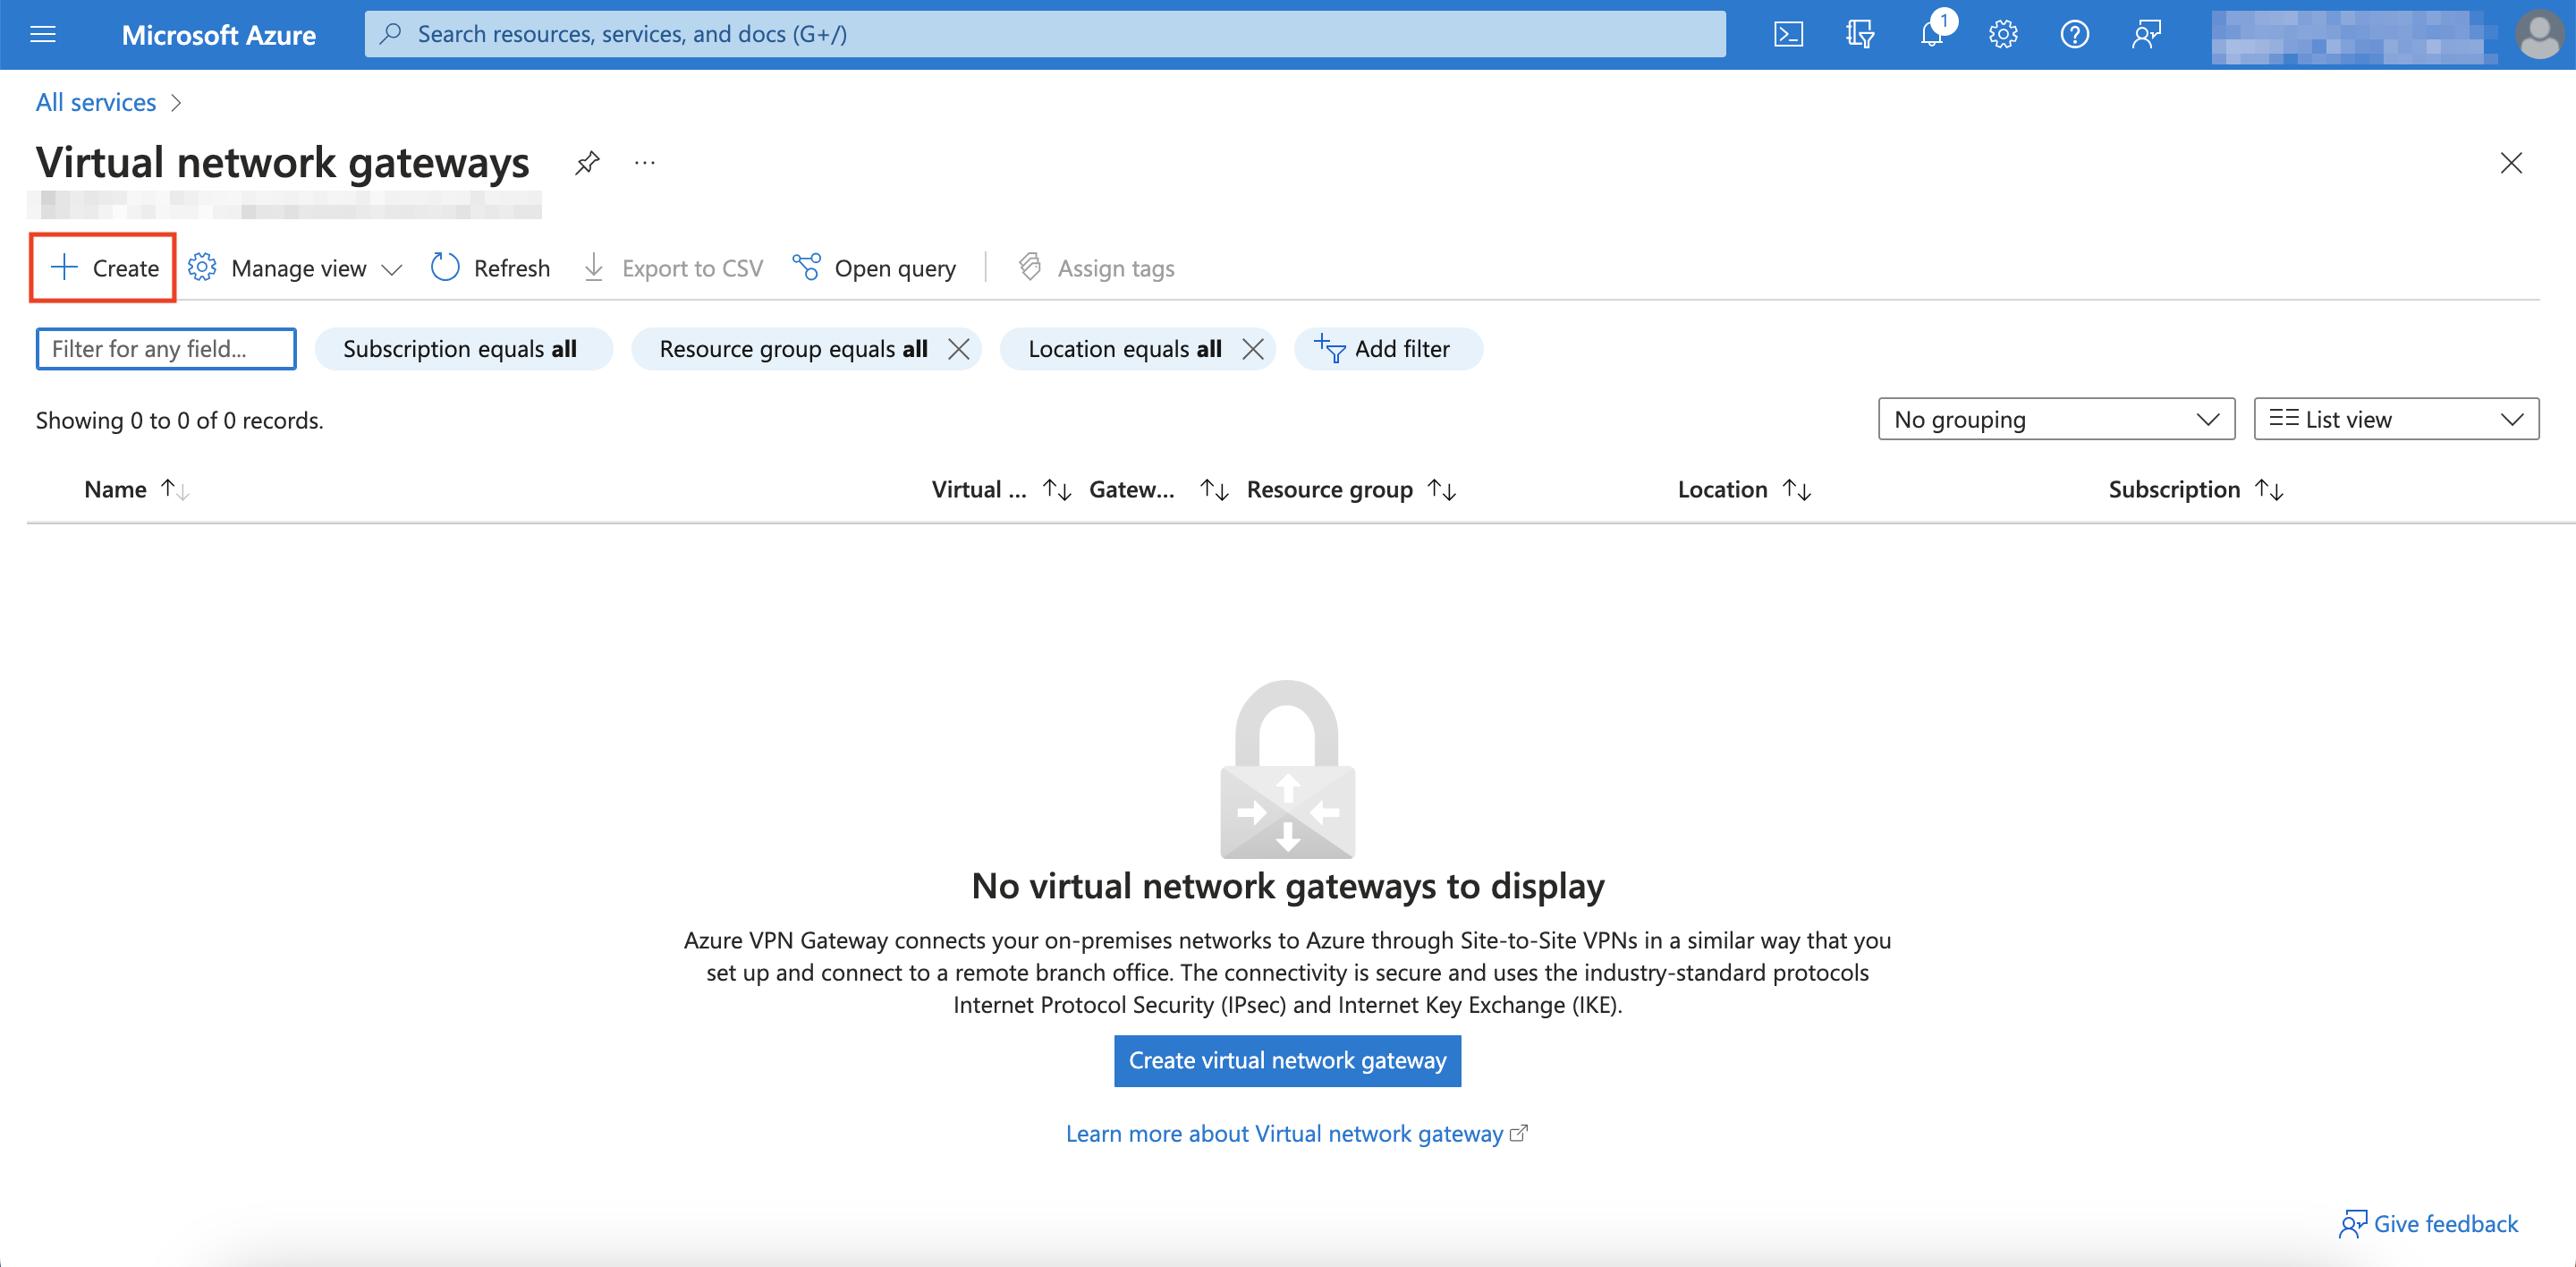
Browse and click Virtual network gateways.

-
Click Create.
-
Configure the gateway with the following and click Review + create.
Setting Configuration Resource Group Same Resource Group from when you created your VNet Name Enter any recognizable name Region Same region that you used for your VNet Gateway Type VPN VPN Type Route-based SKU VpnGw1 Generation Generation1 Virtual network Select the VNet you just created Gateway subnet address range Enter a subnet range that's within the range you specified for your VNet (e.g., 10.0.1.0/24) Public IP Address Type Standard Public IP address Create new Public IP address name Enter any recognizable name for your new IP address Assignment Static Enable active mode Disabled Configure BGP Disabled 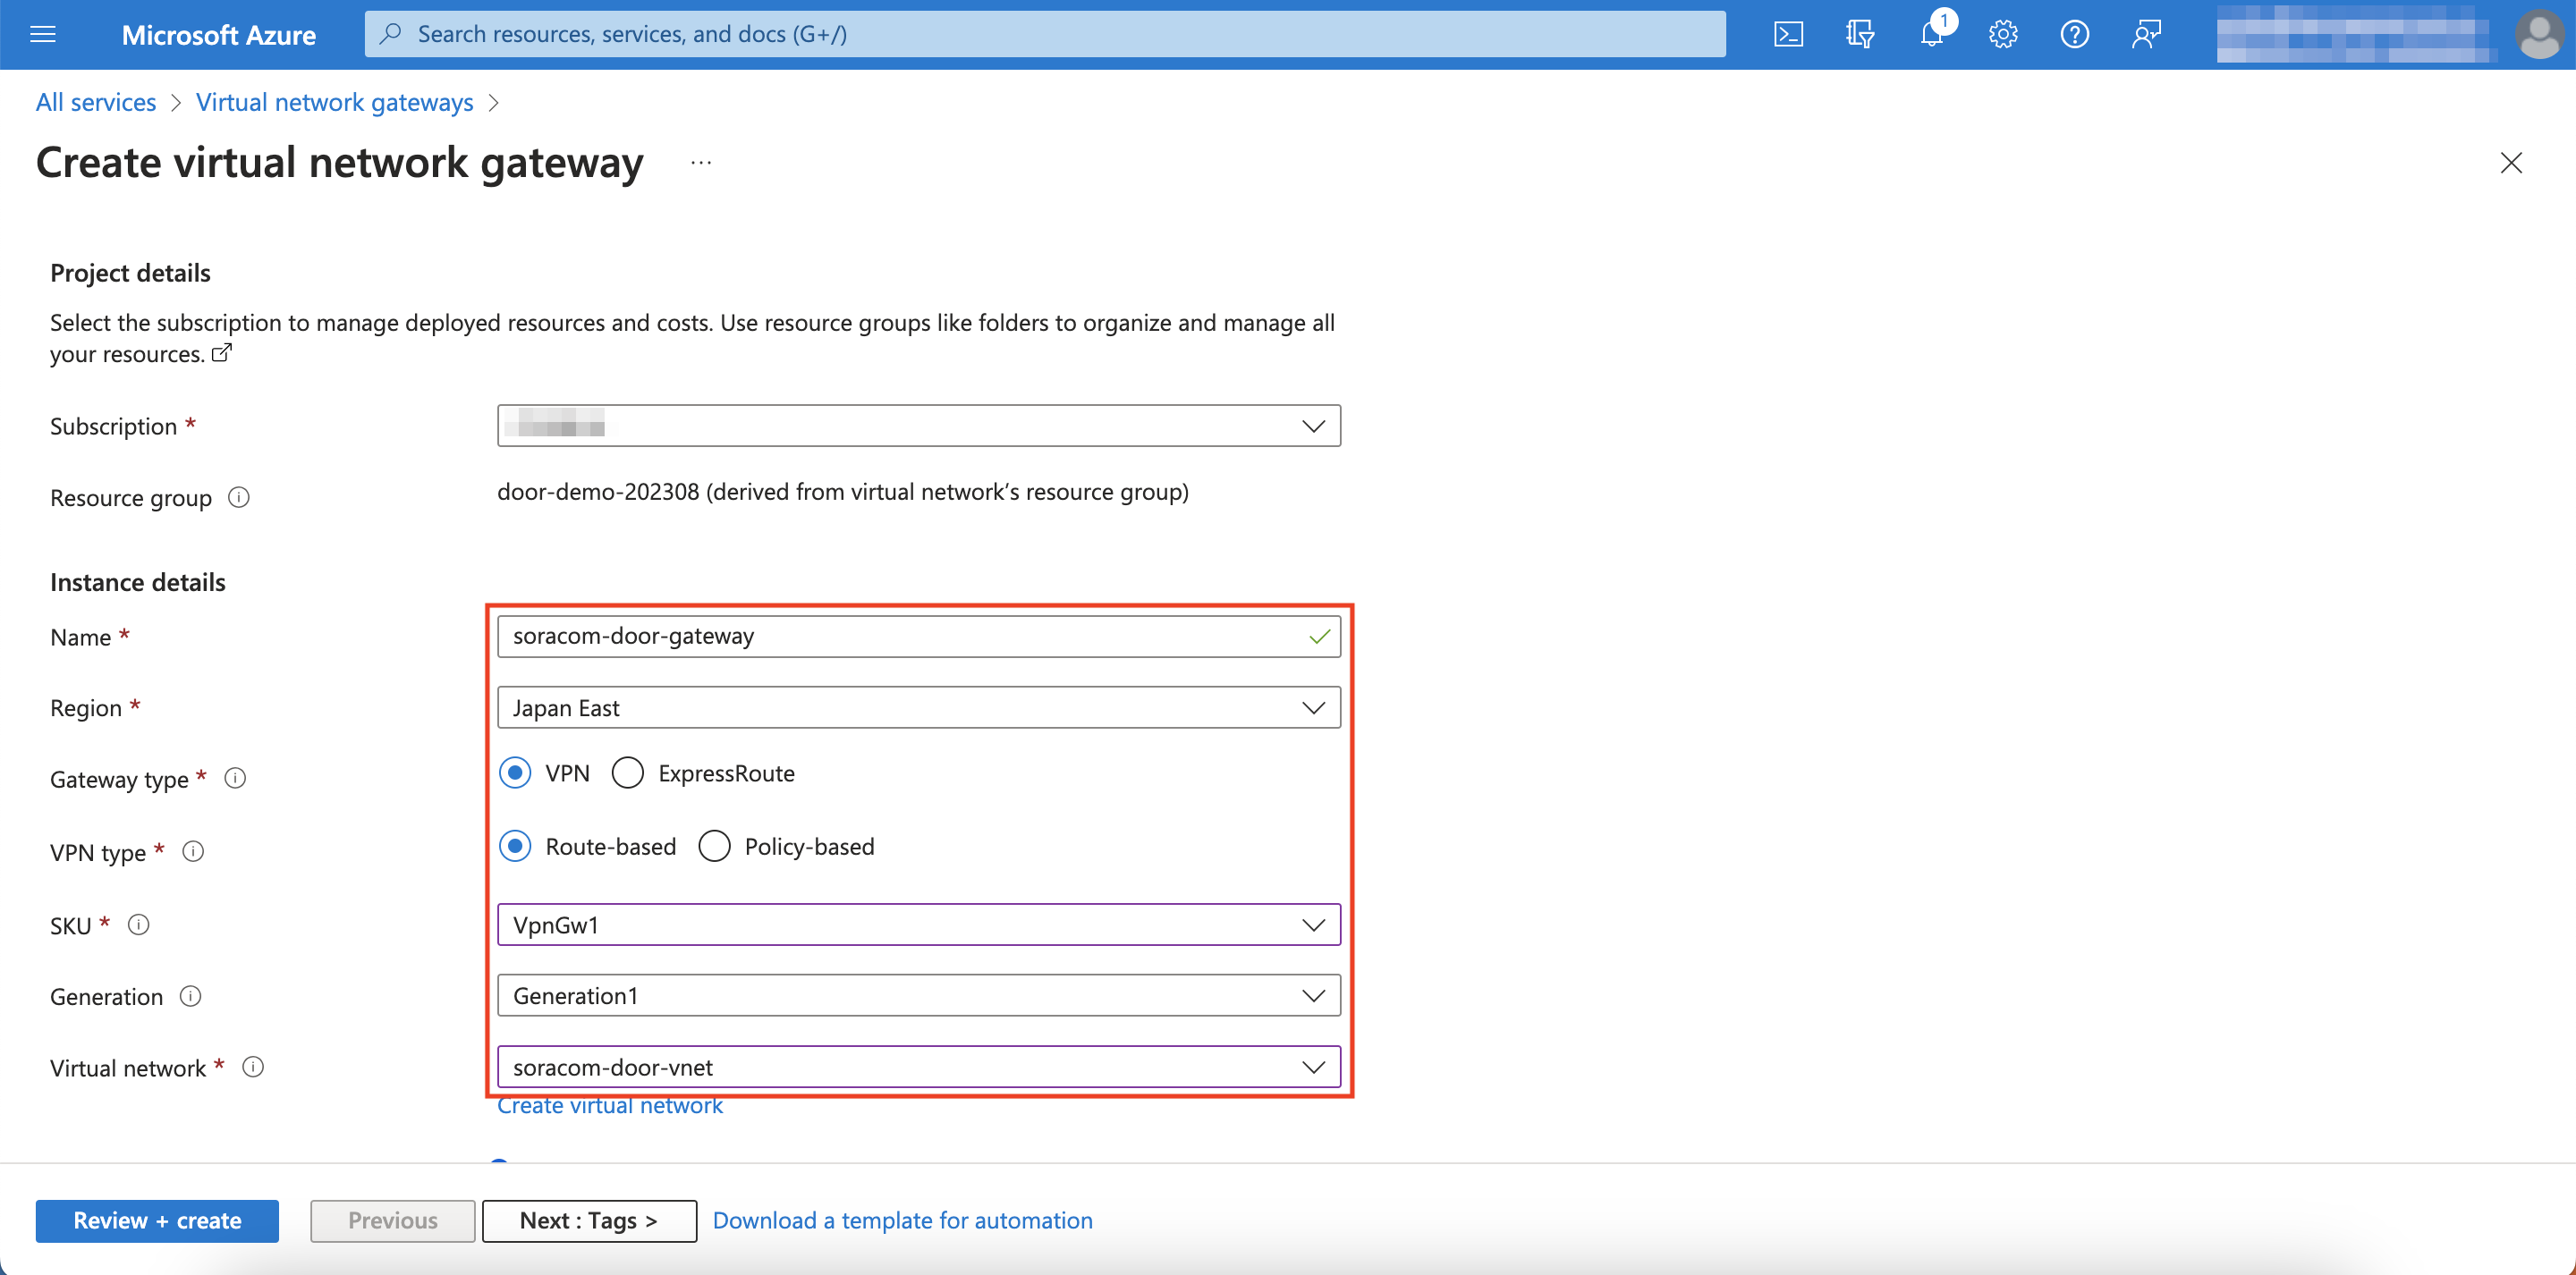
Scroll down
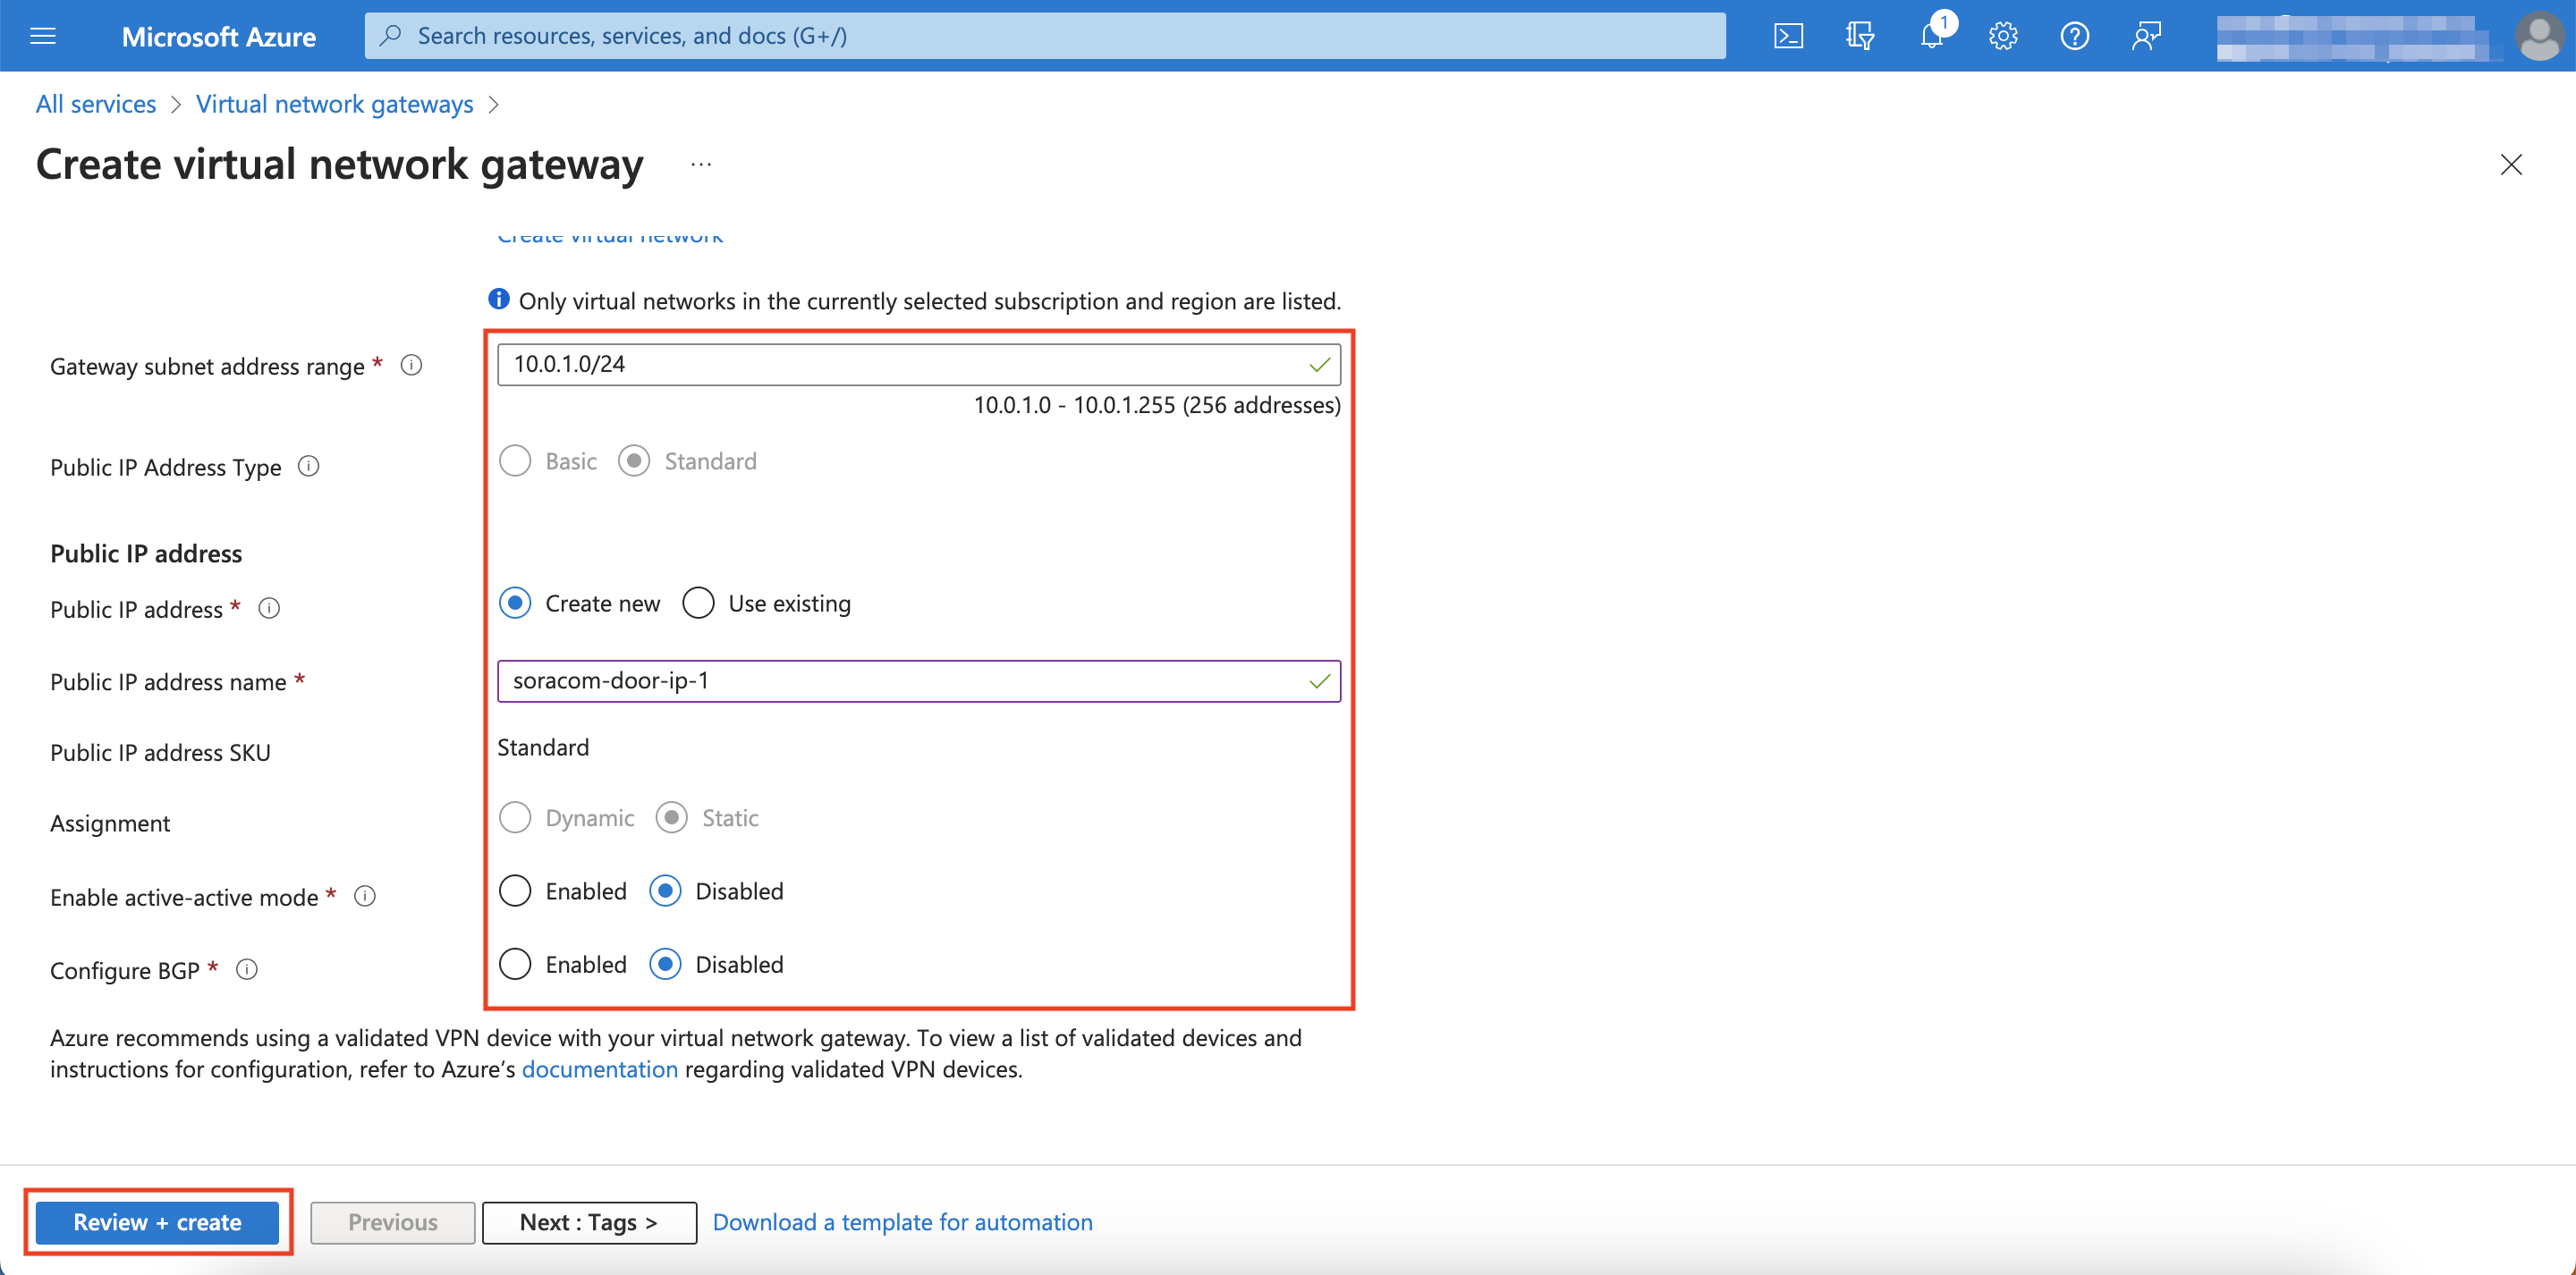
-
Click Create.
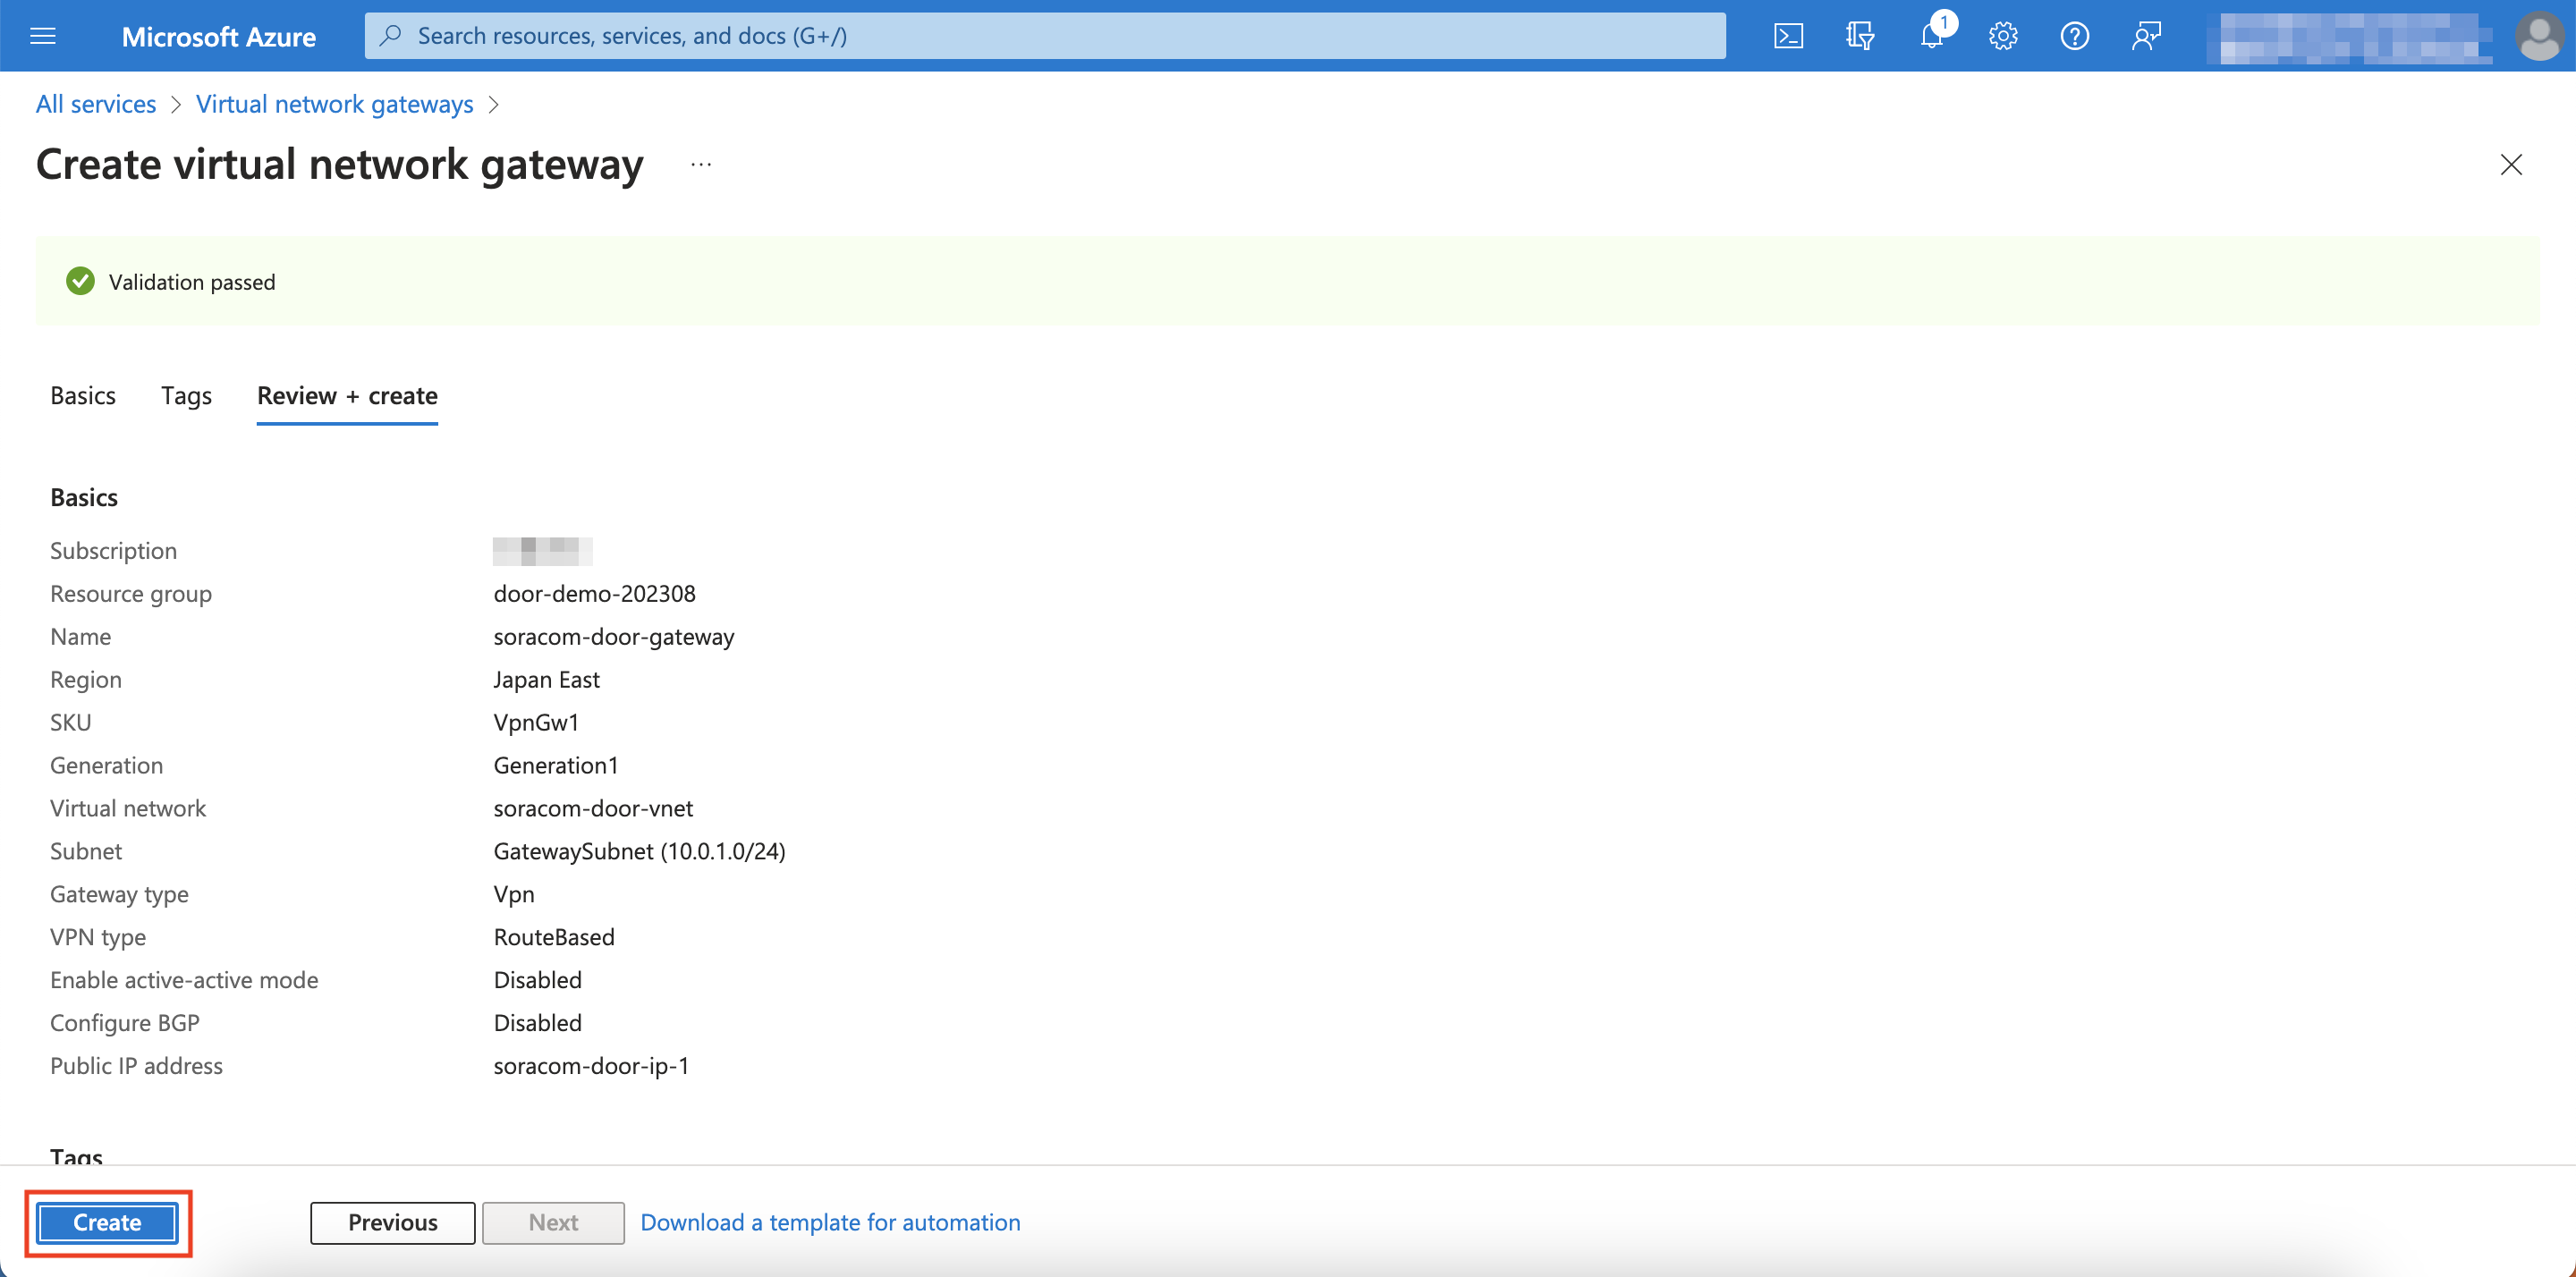
You have successfully created an Azure VPN Gateway!
Creating an Azure Virtual Machine
You will now create an Azure VM within your newly created VNet. In this guide, connecting your device to this VM securely with VPN is the end goal.
-
Go back to the homepage of your Microsoft Azure Portal.
-
Browse and click Virtual machines.
-
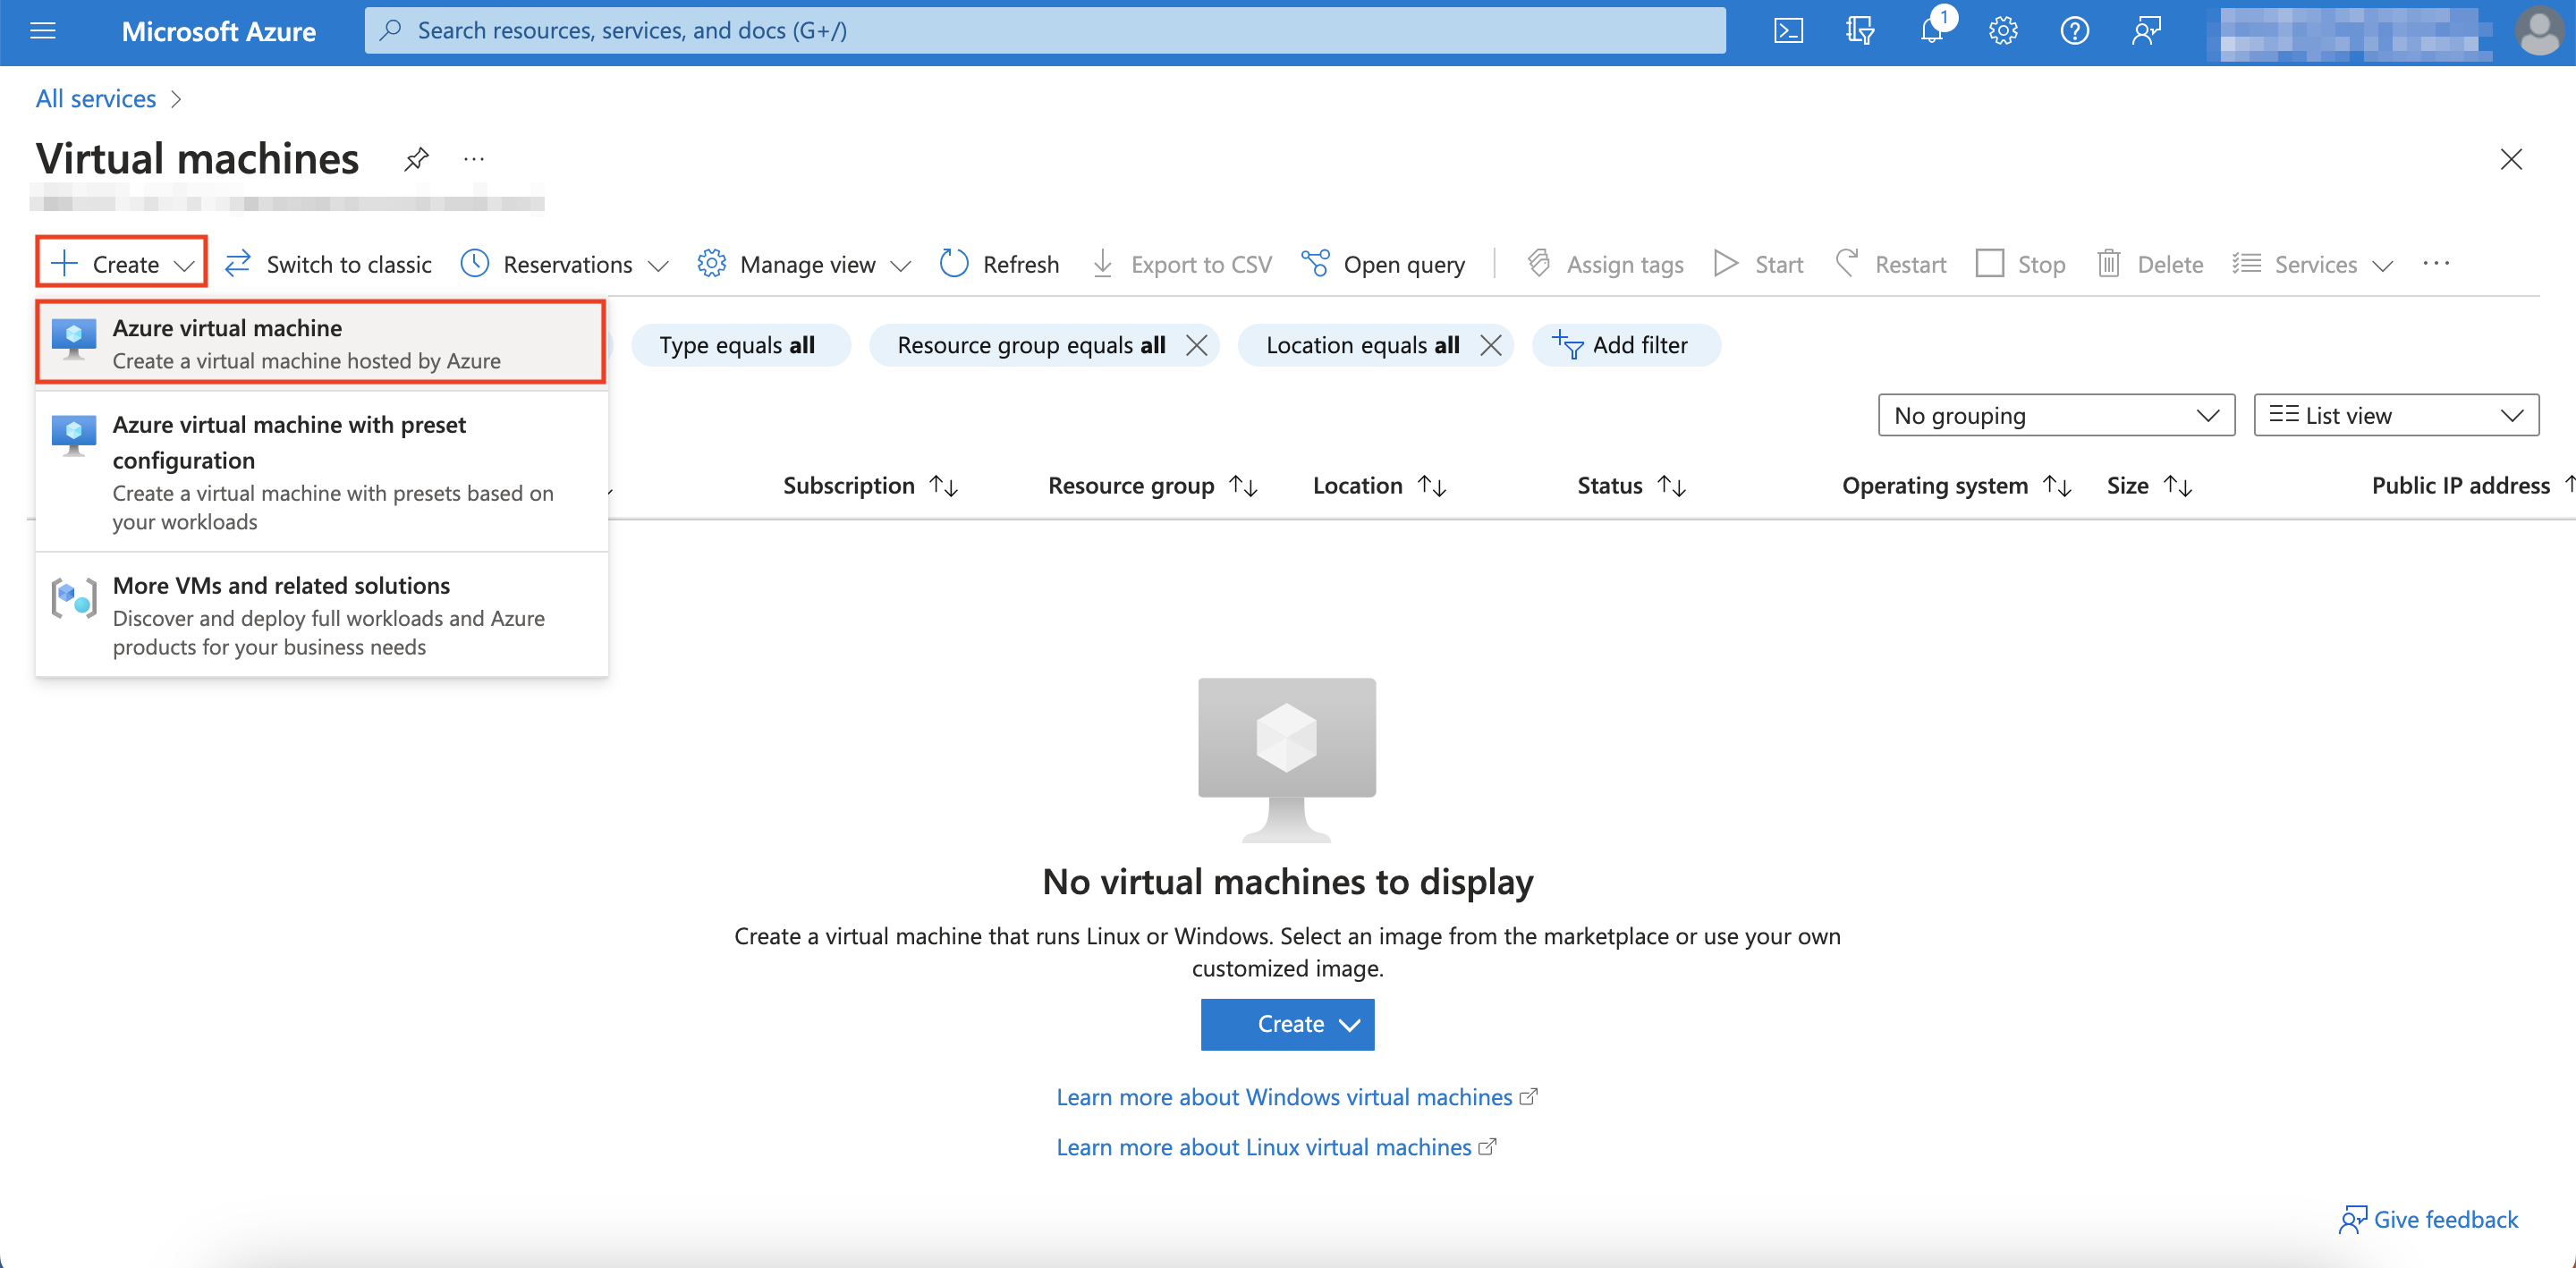
Click Create then click Azure virtual machine.
-
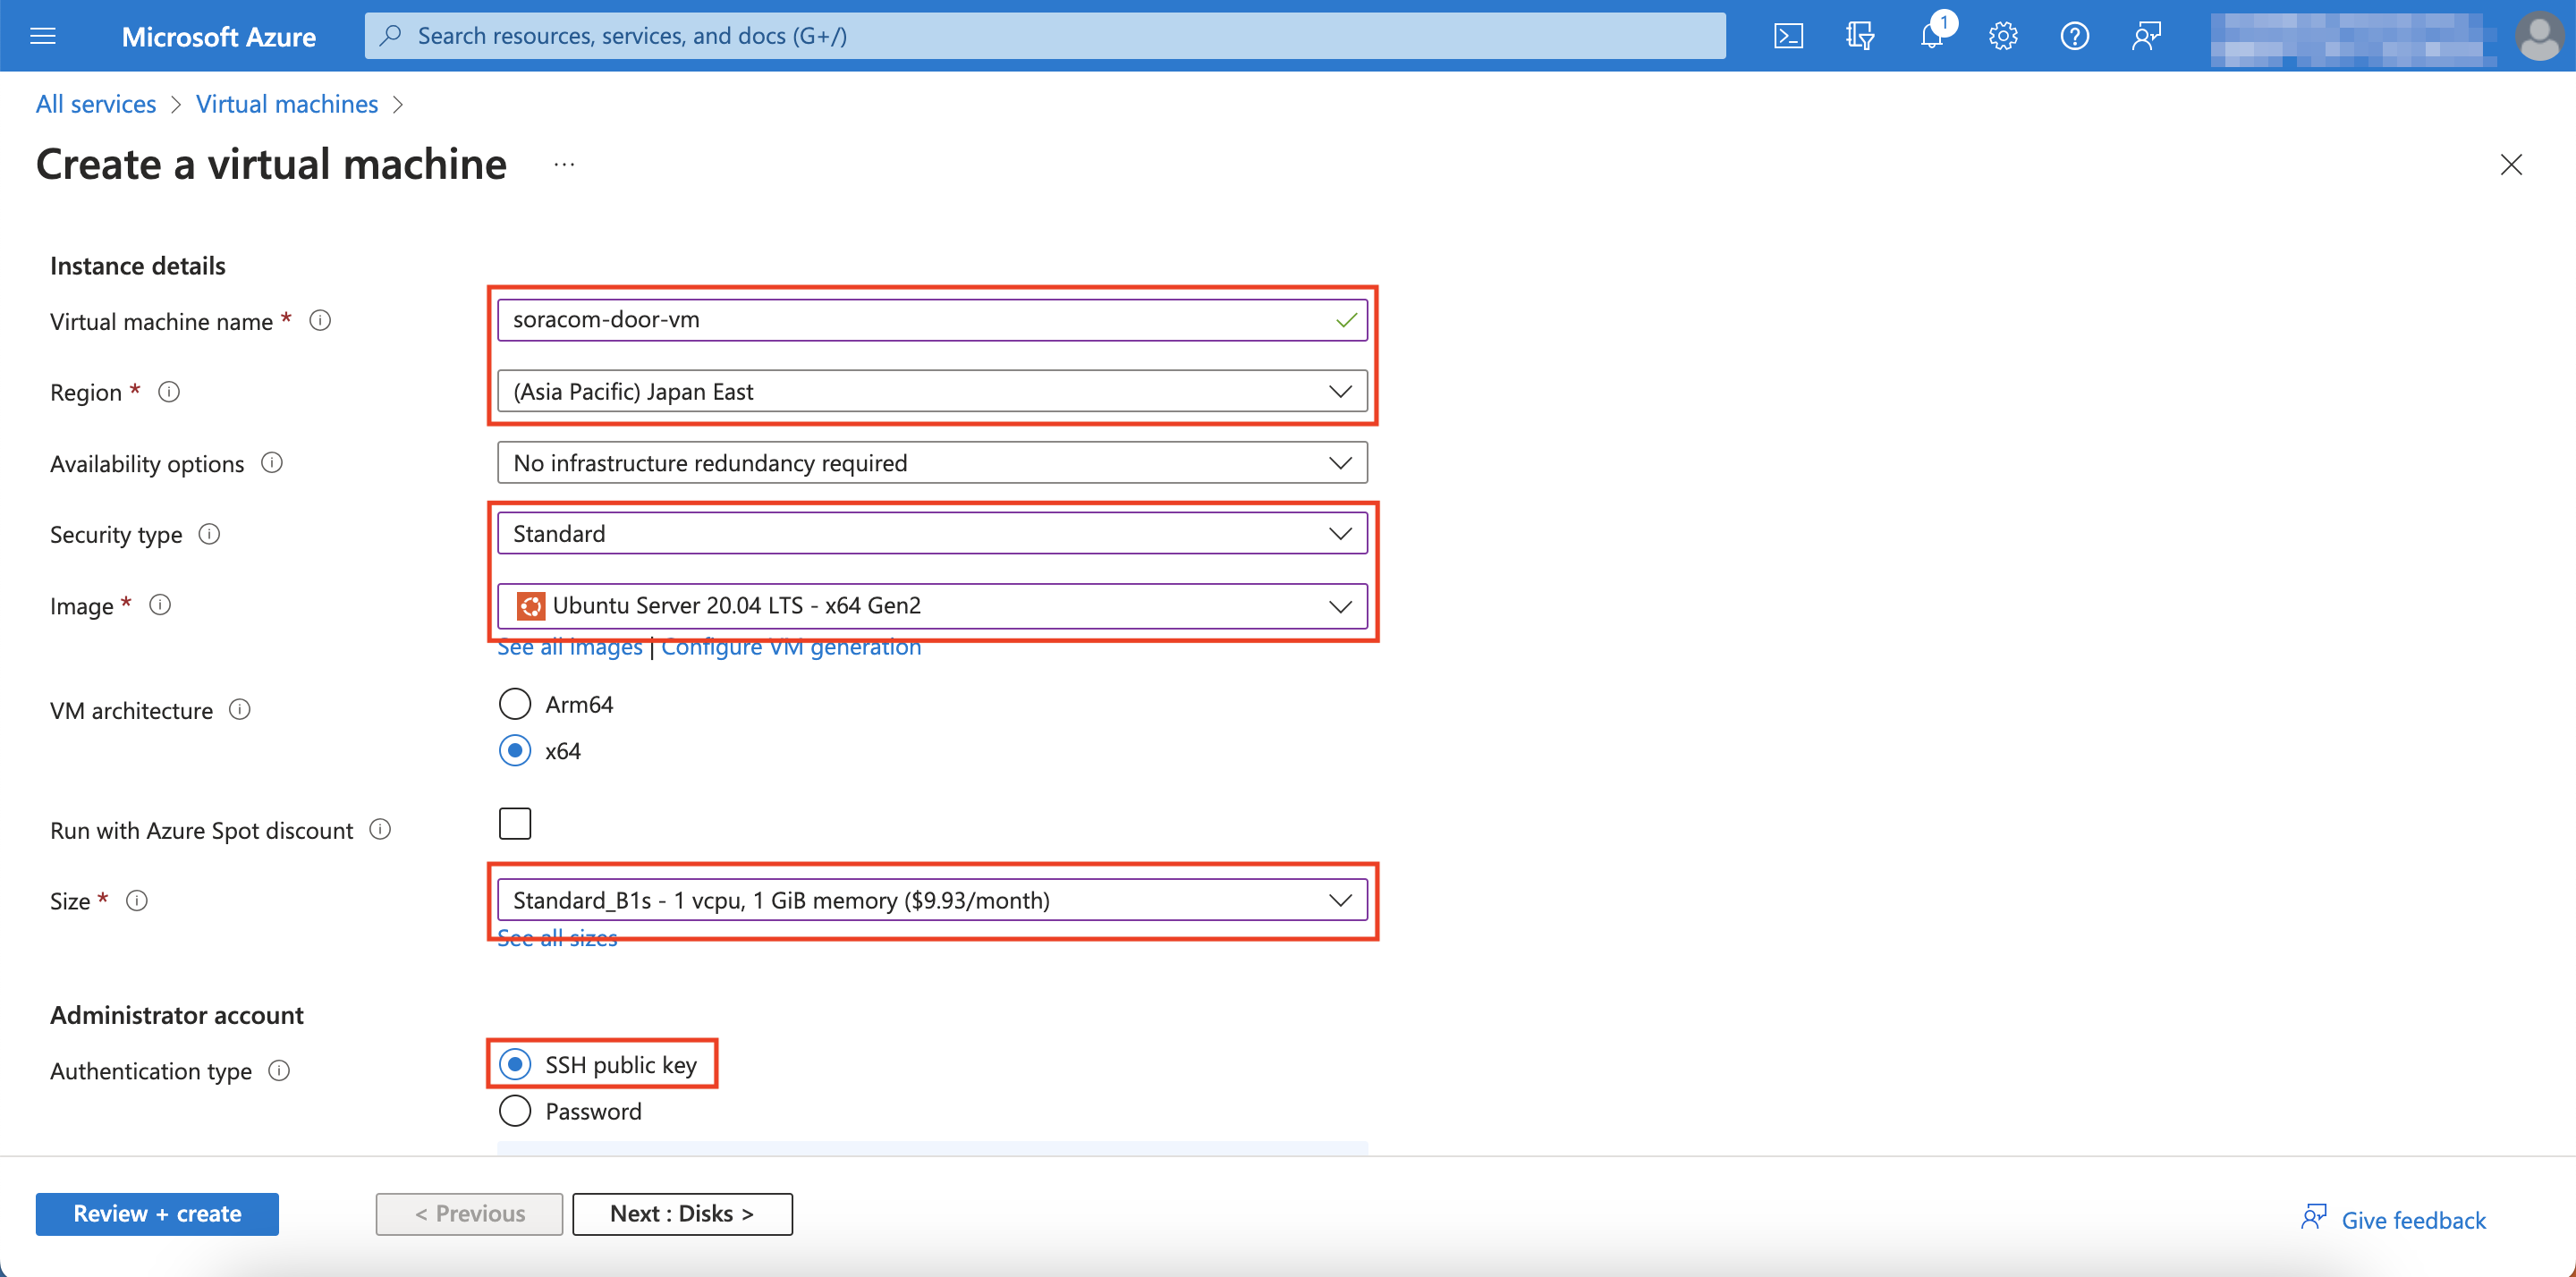
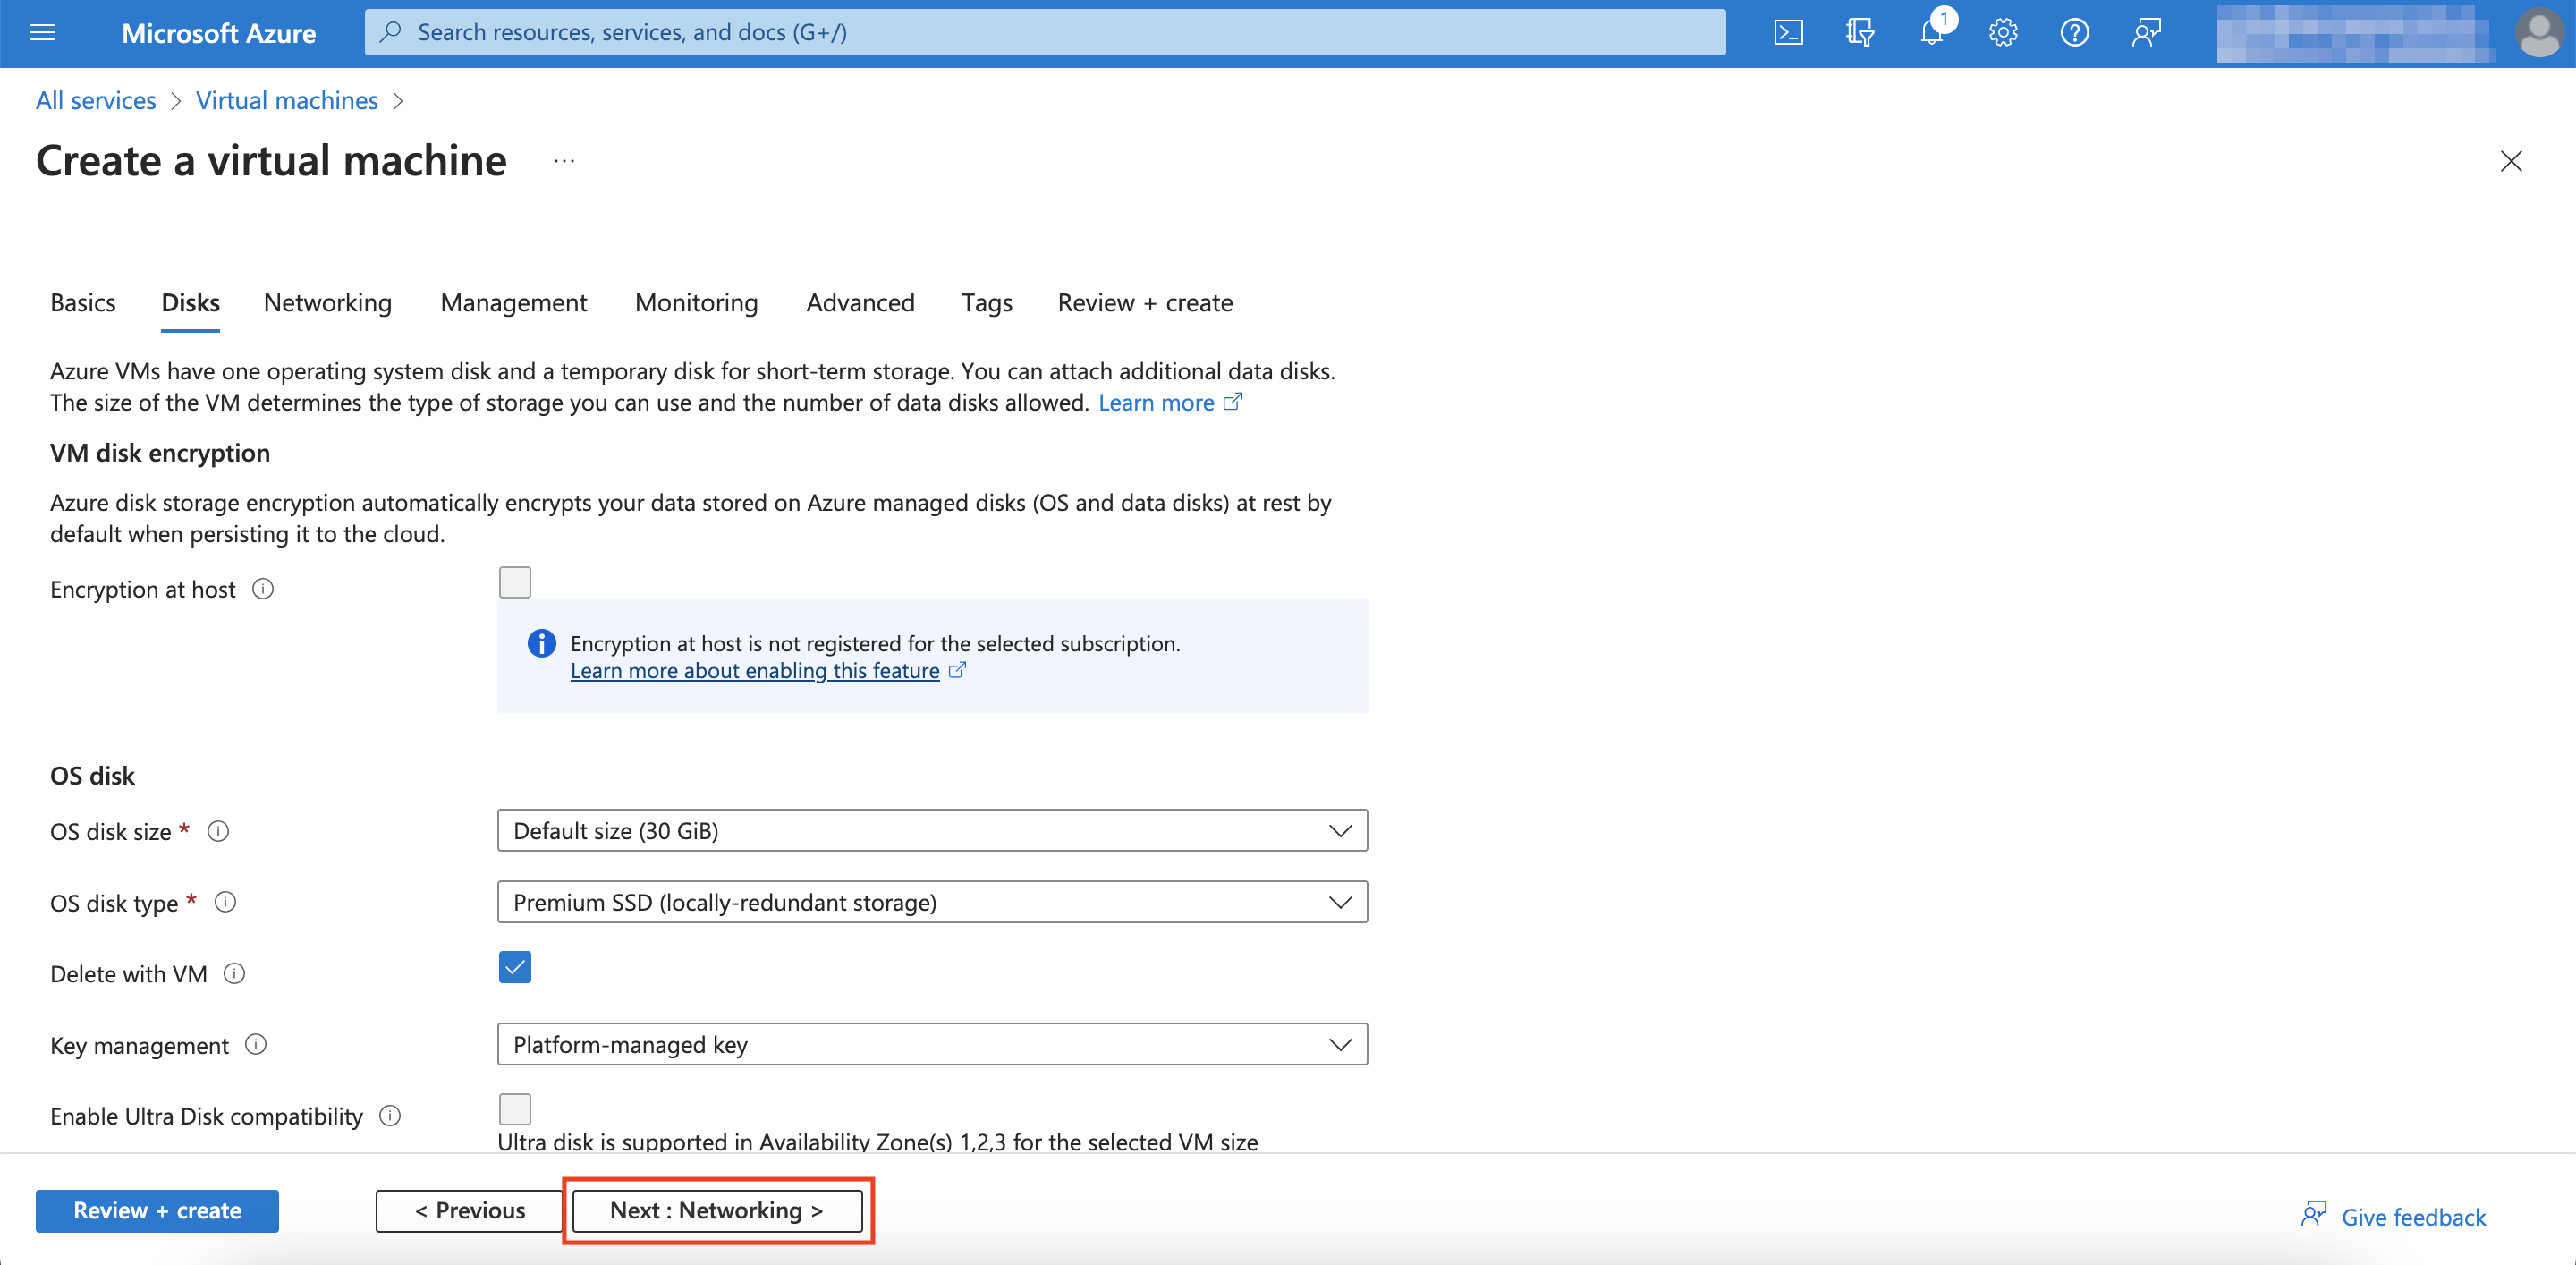
Fill out all the configurations as listed below, then click Next: Disks.
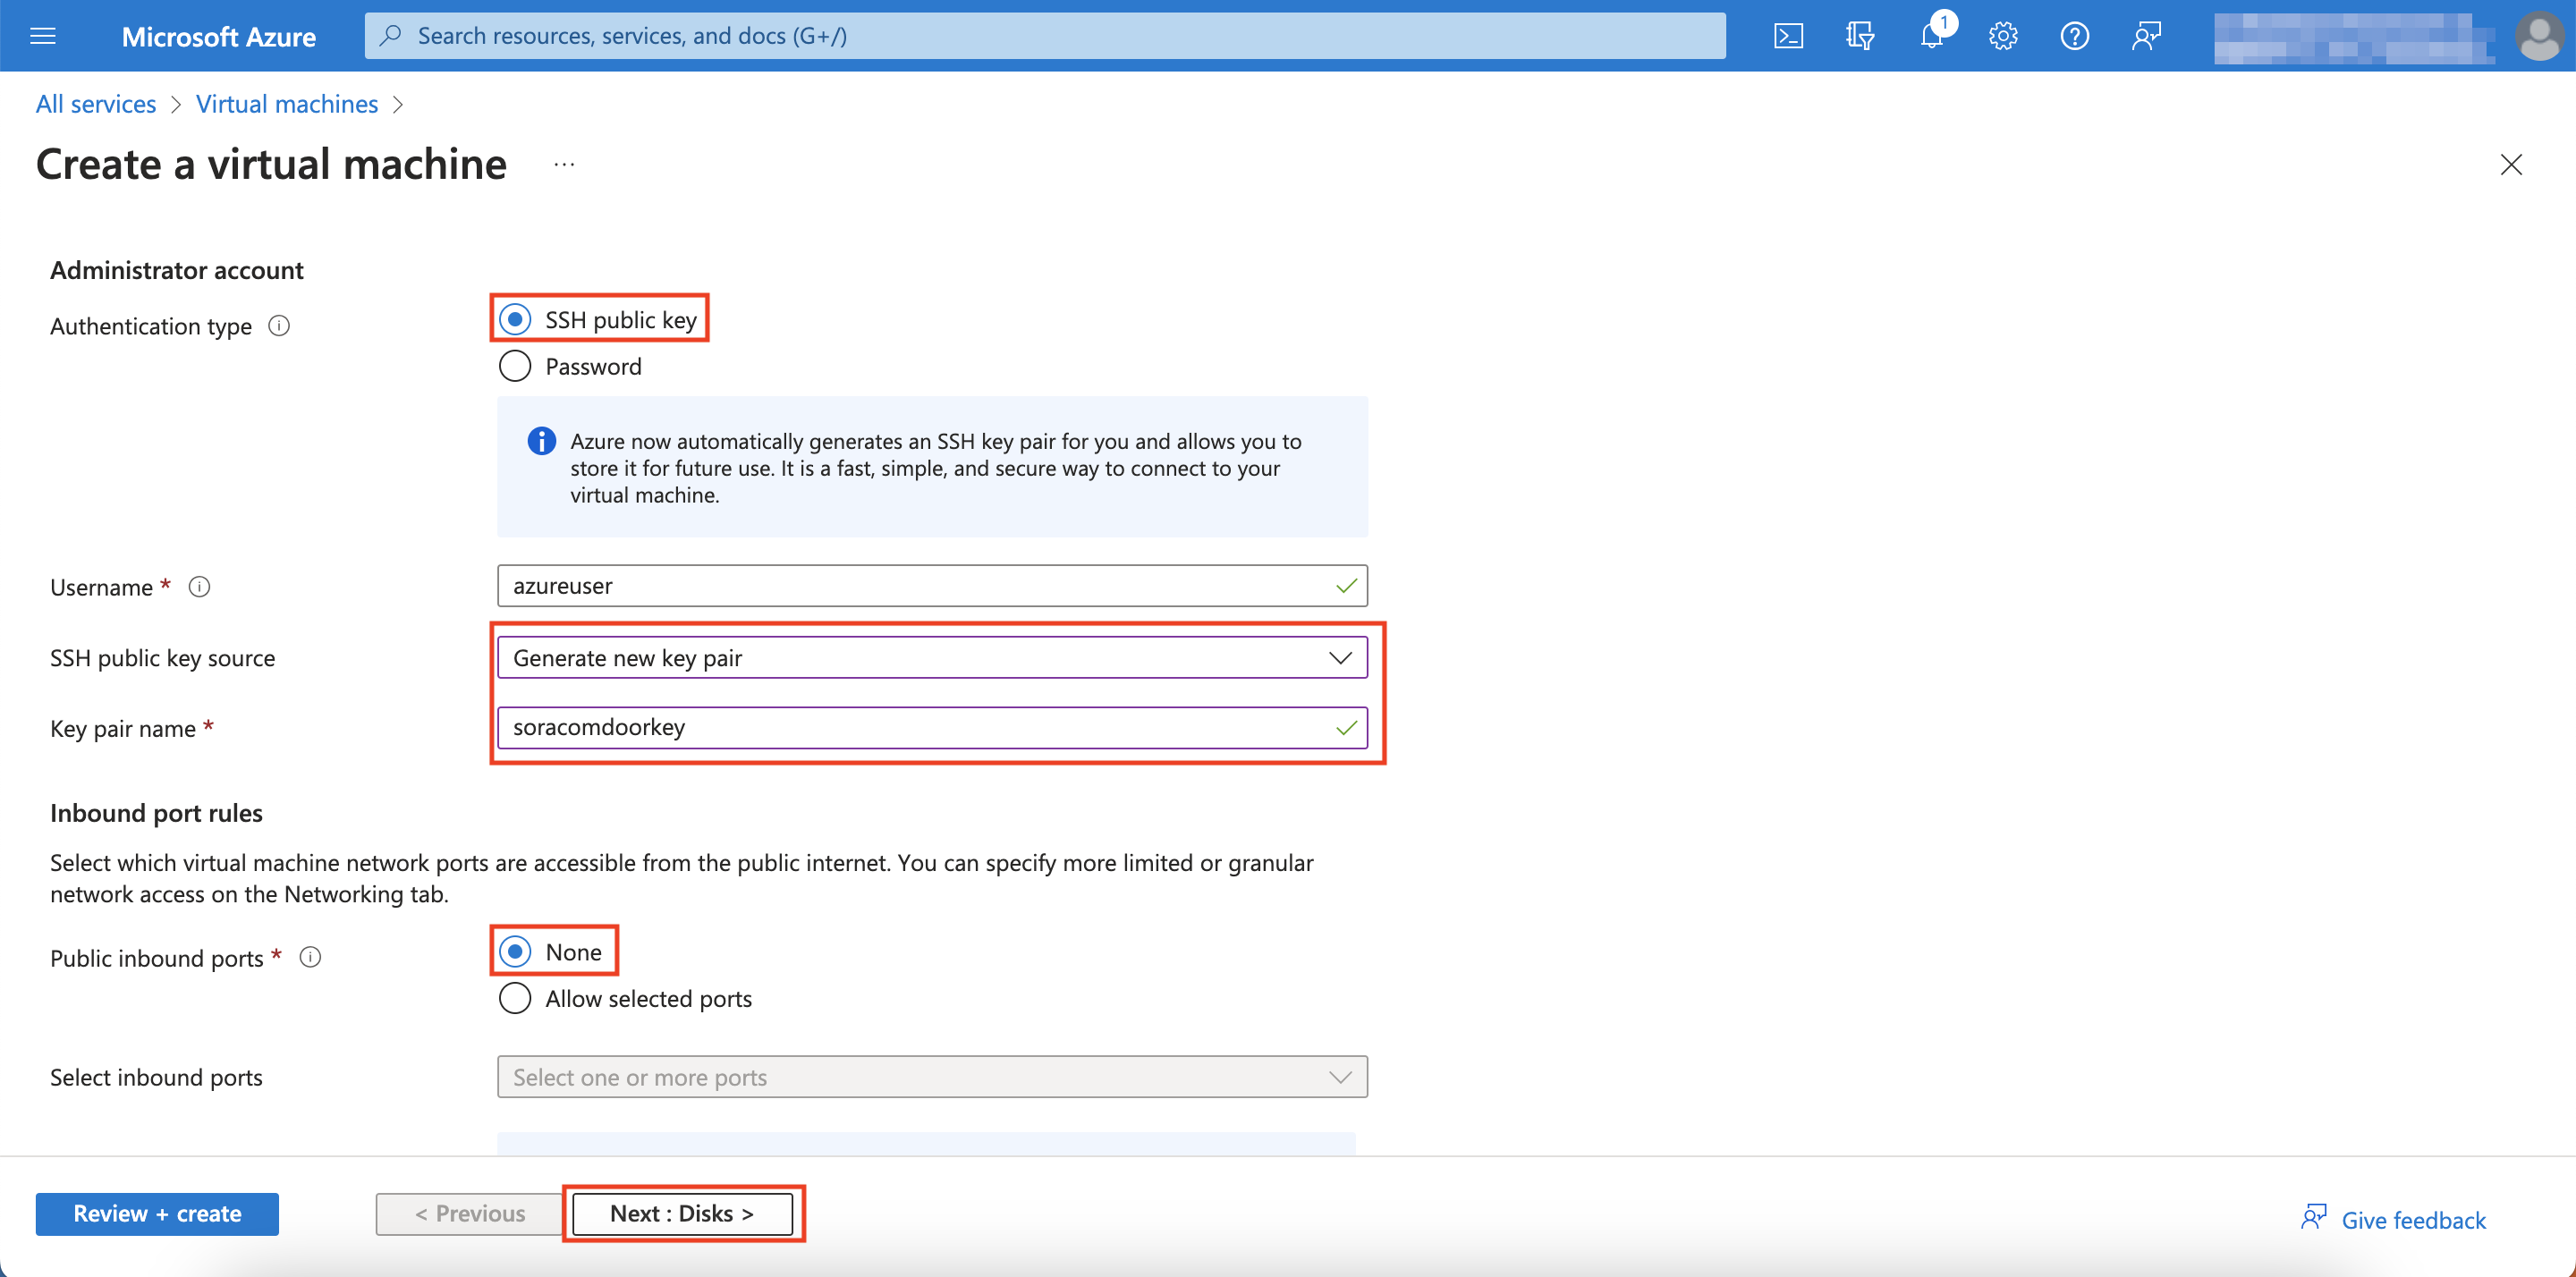
Setting Configuration Resource Group Same Resource Group from when you created your VNet Virtual machine name Enter any recognizable name Region Same region that you used for your VNet Size Standard_B1s Authentication Type SSH public key SSH public key source Generate new key pair If you already have a key pair that you'd like to use here, select Use existing key stored in Azure Key pair name If you selected Generate new key pair, name it however you like. Public inbound ports None Leave unmentioned settings as is.
Scroll down
-
Click Next: Networking.
-
Virtual network and Subnet: Select the VNet you made and the subnet you specified earlier.
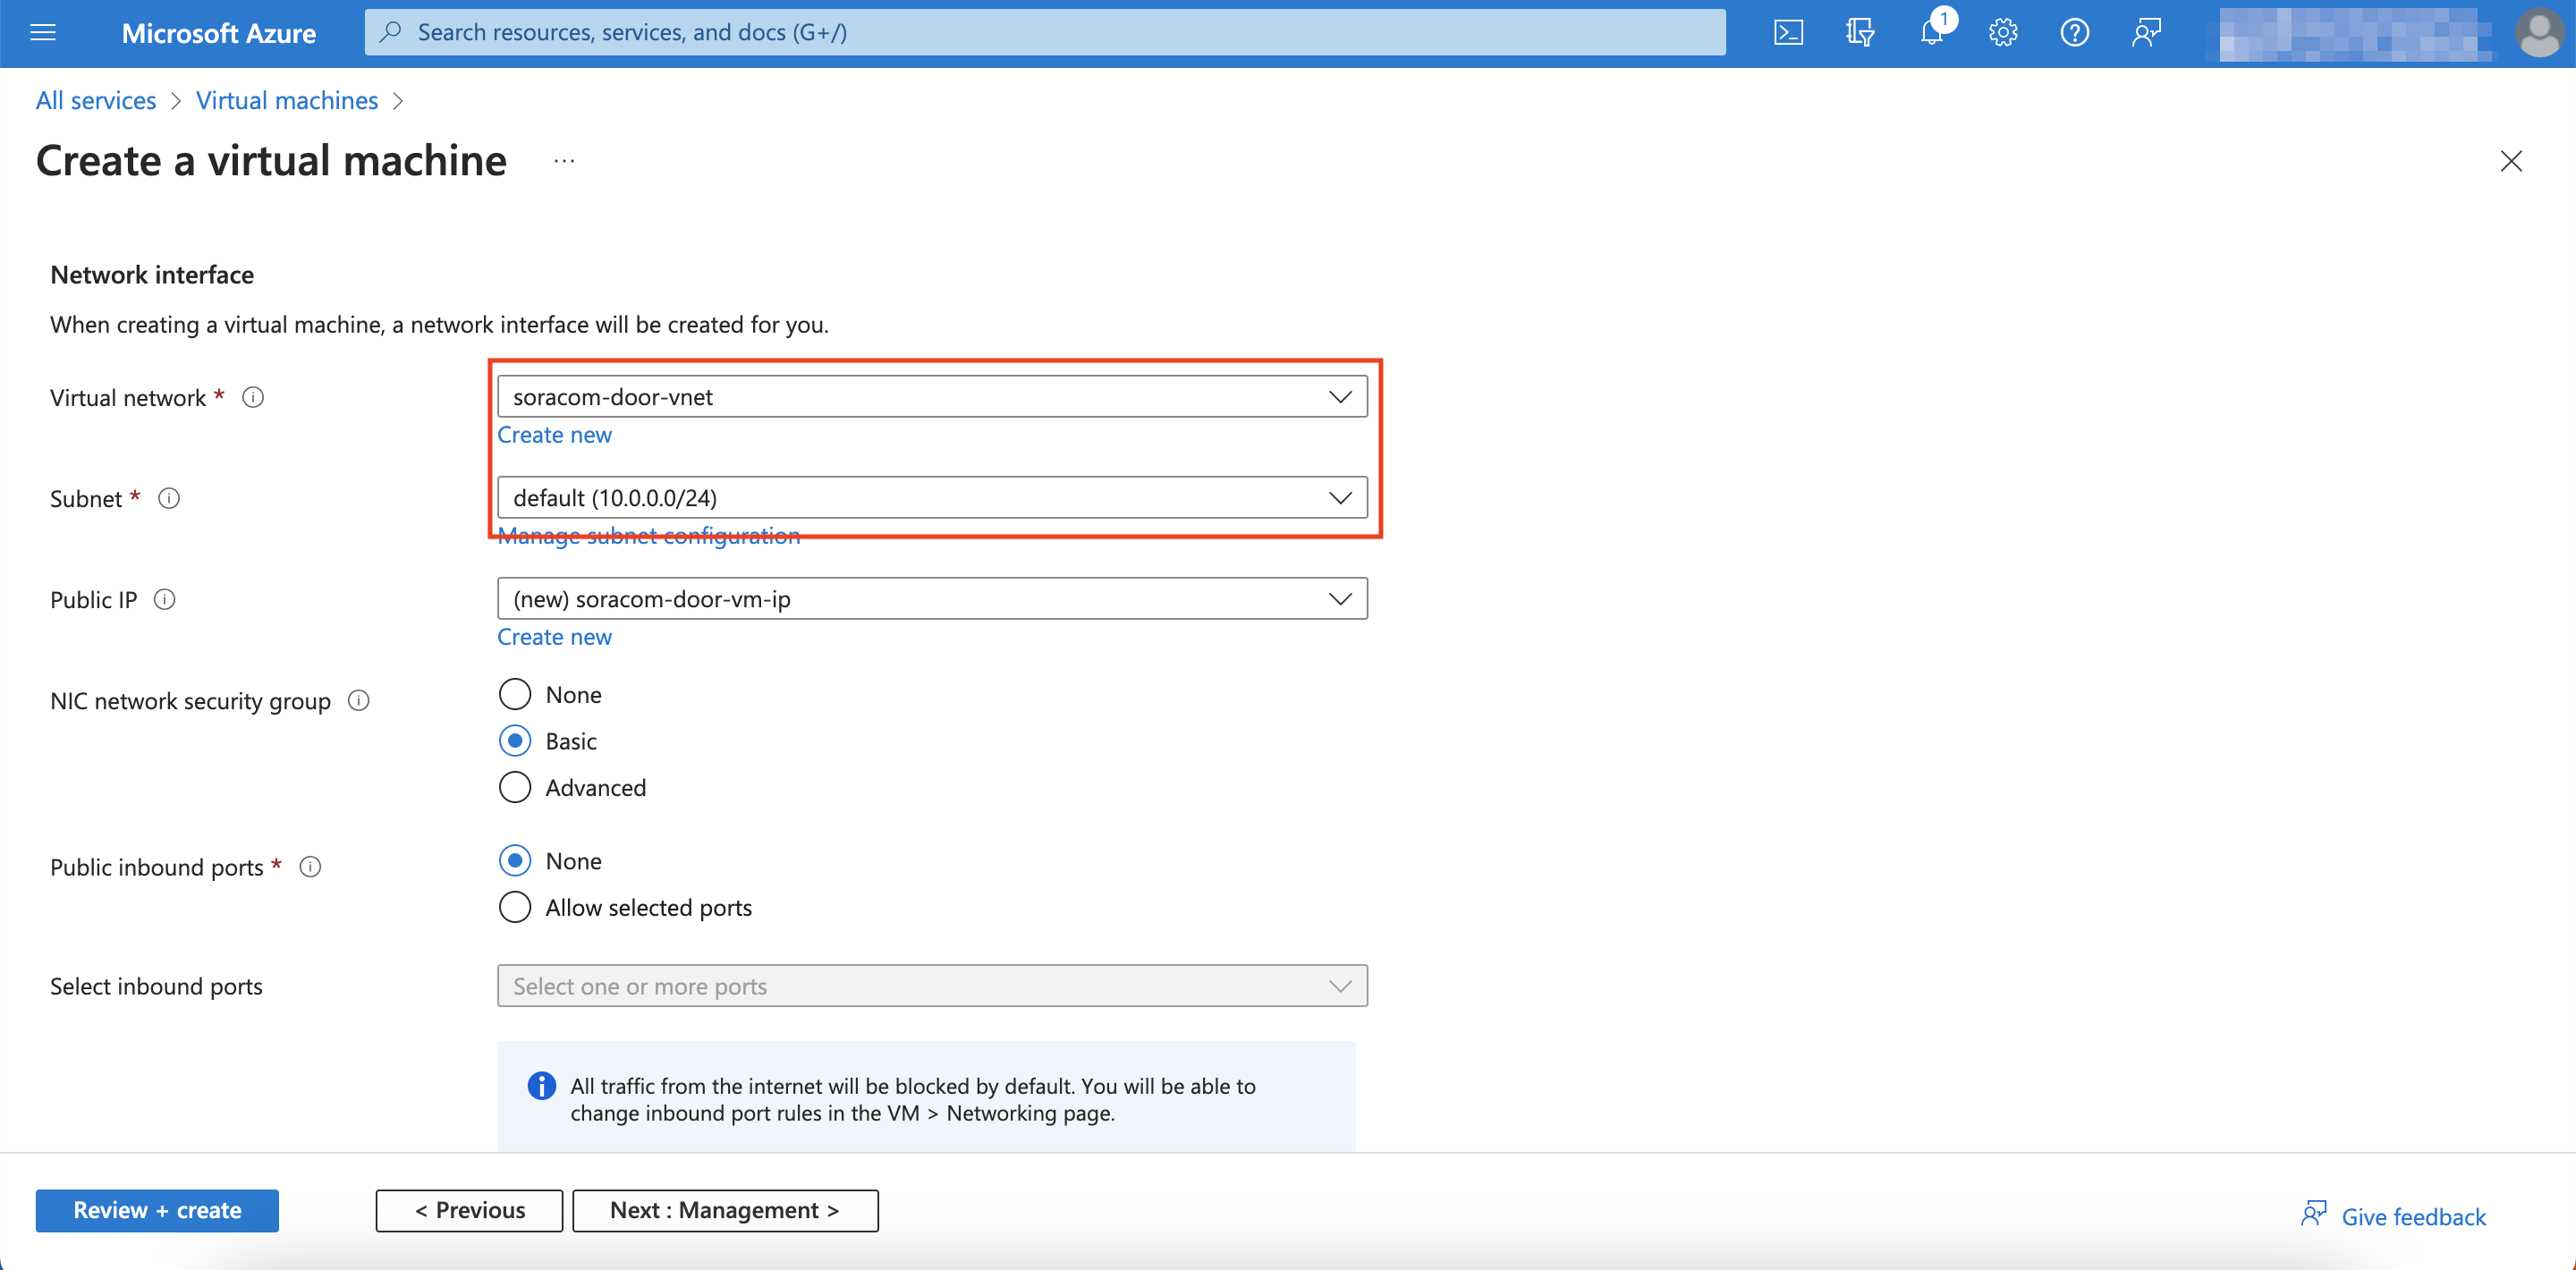
-
Scroll down and click the checkbox for Delete public IP and NIC when VM is deleted, then click Review + create.
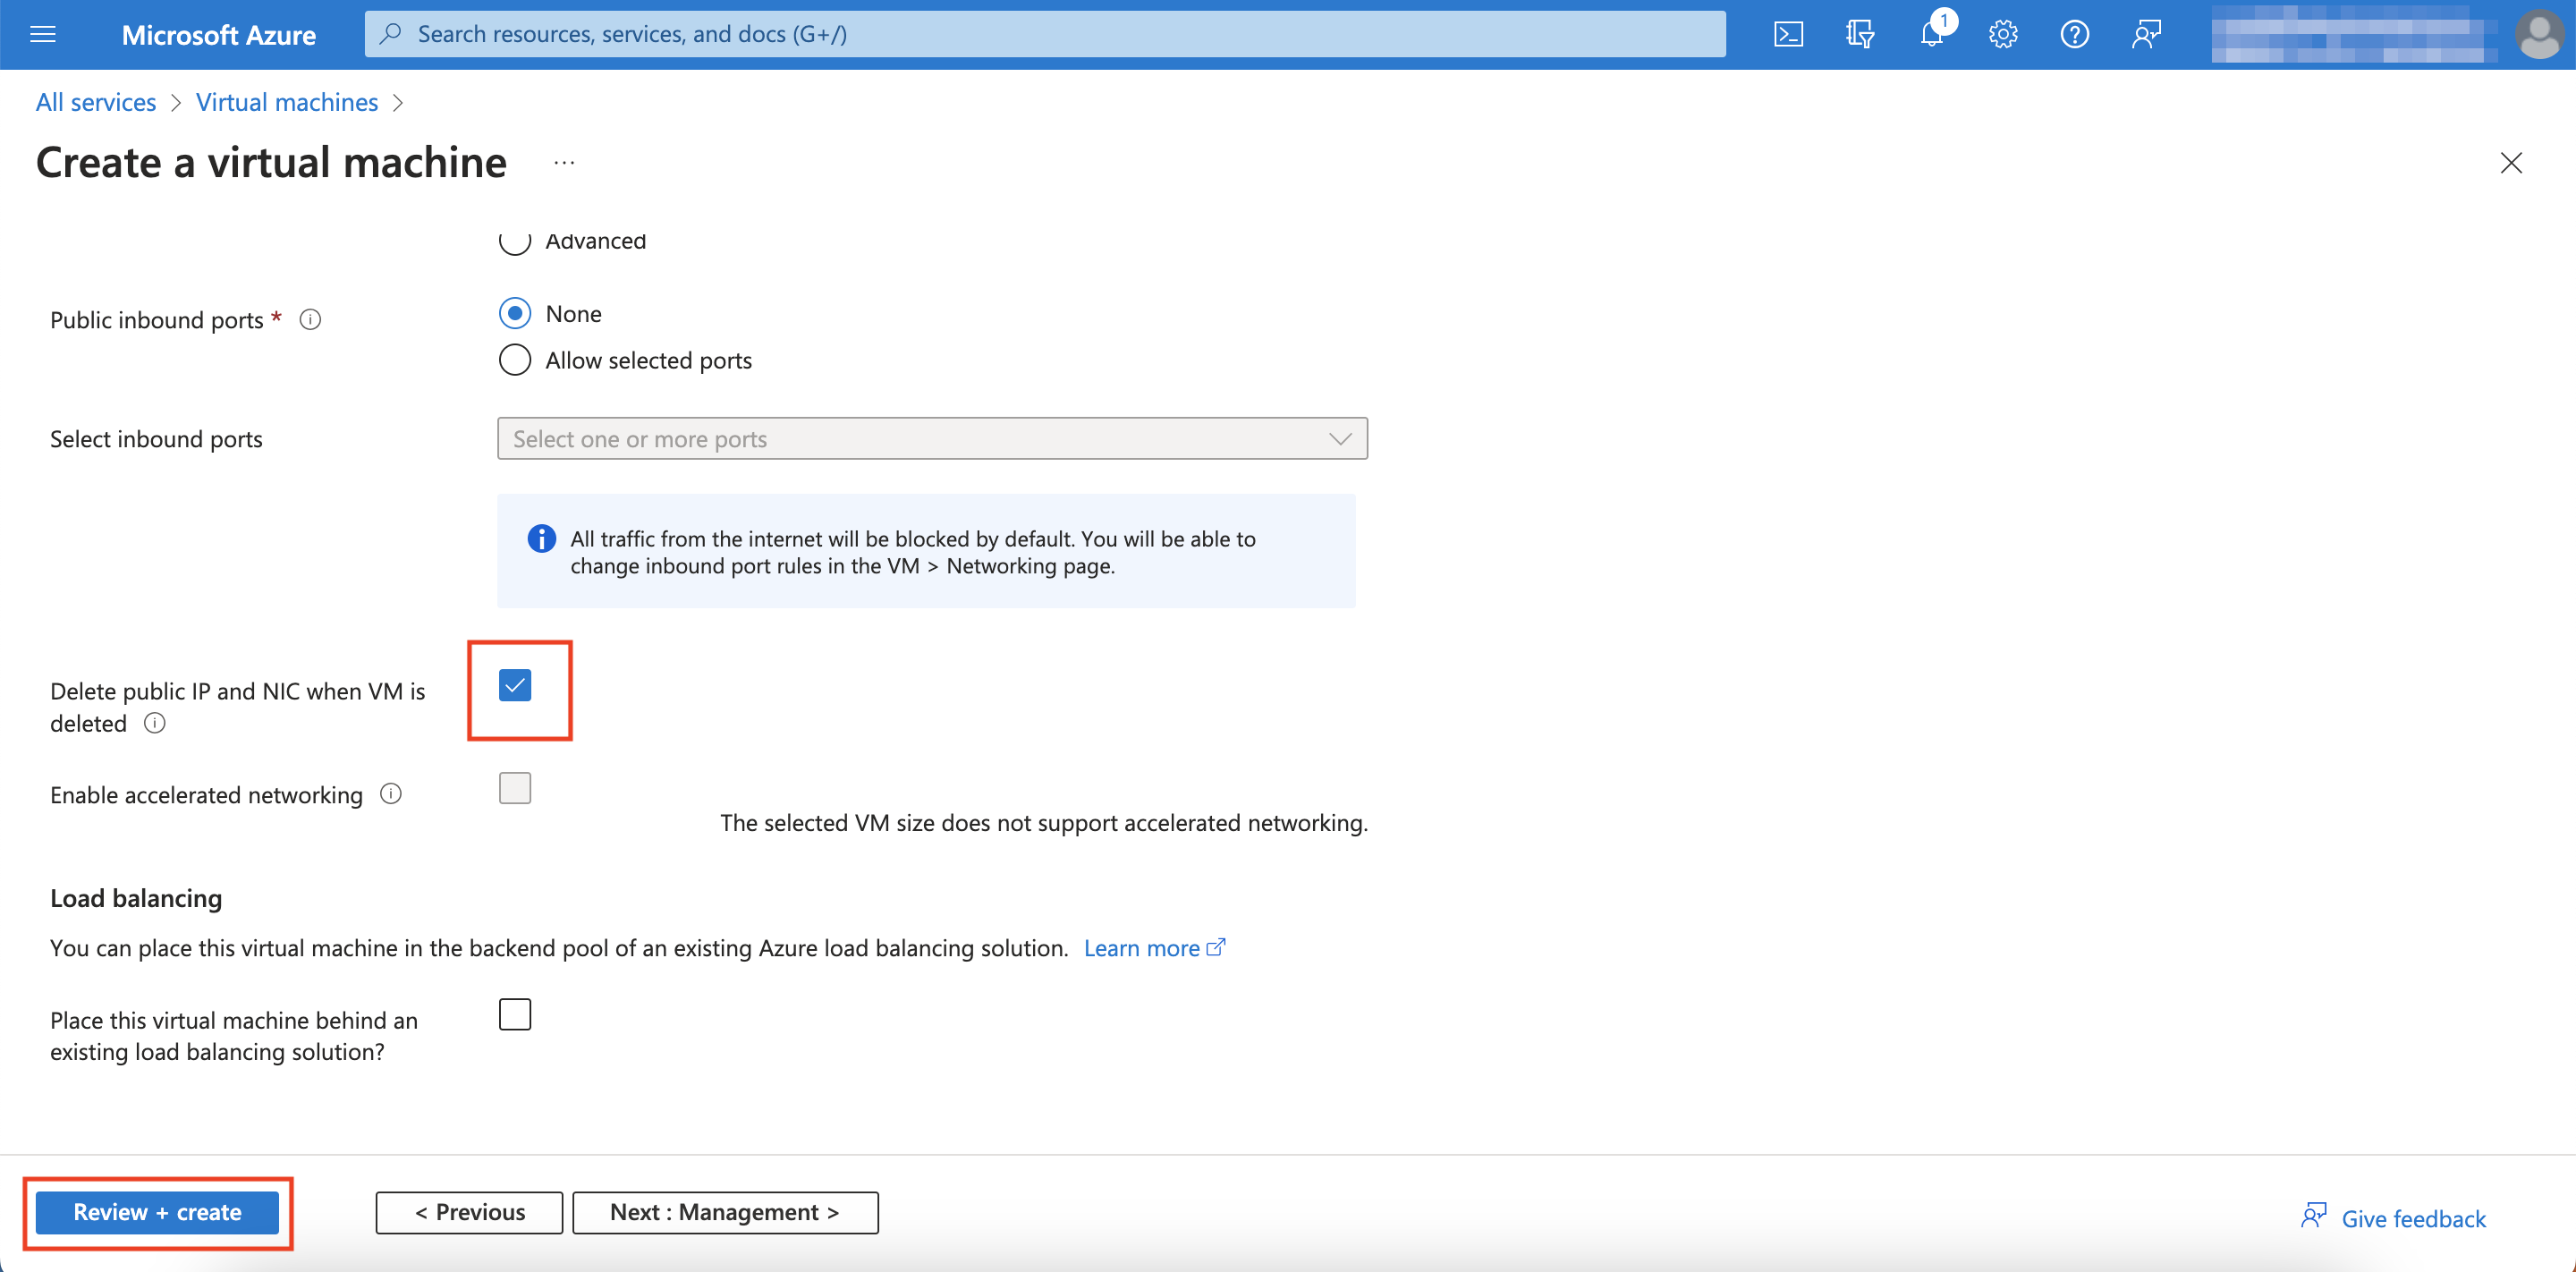
-
Click Create.
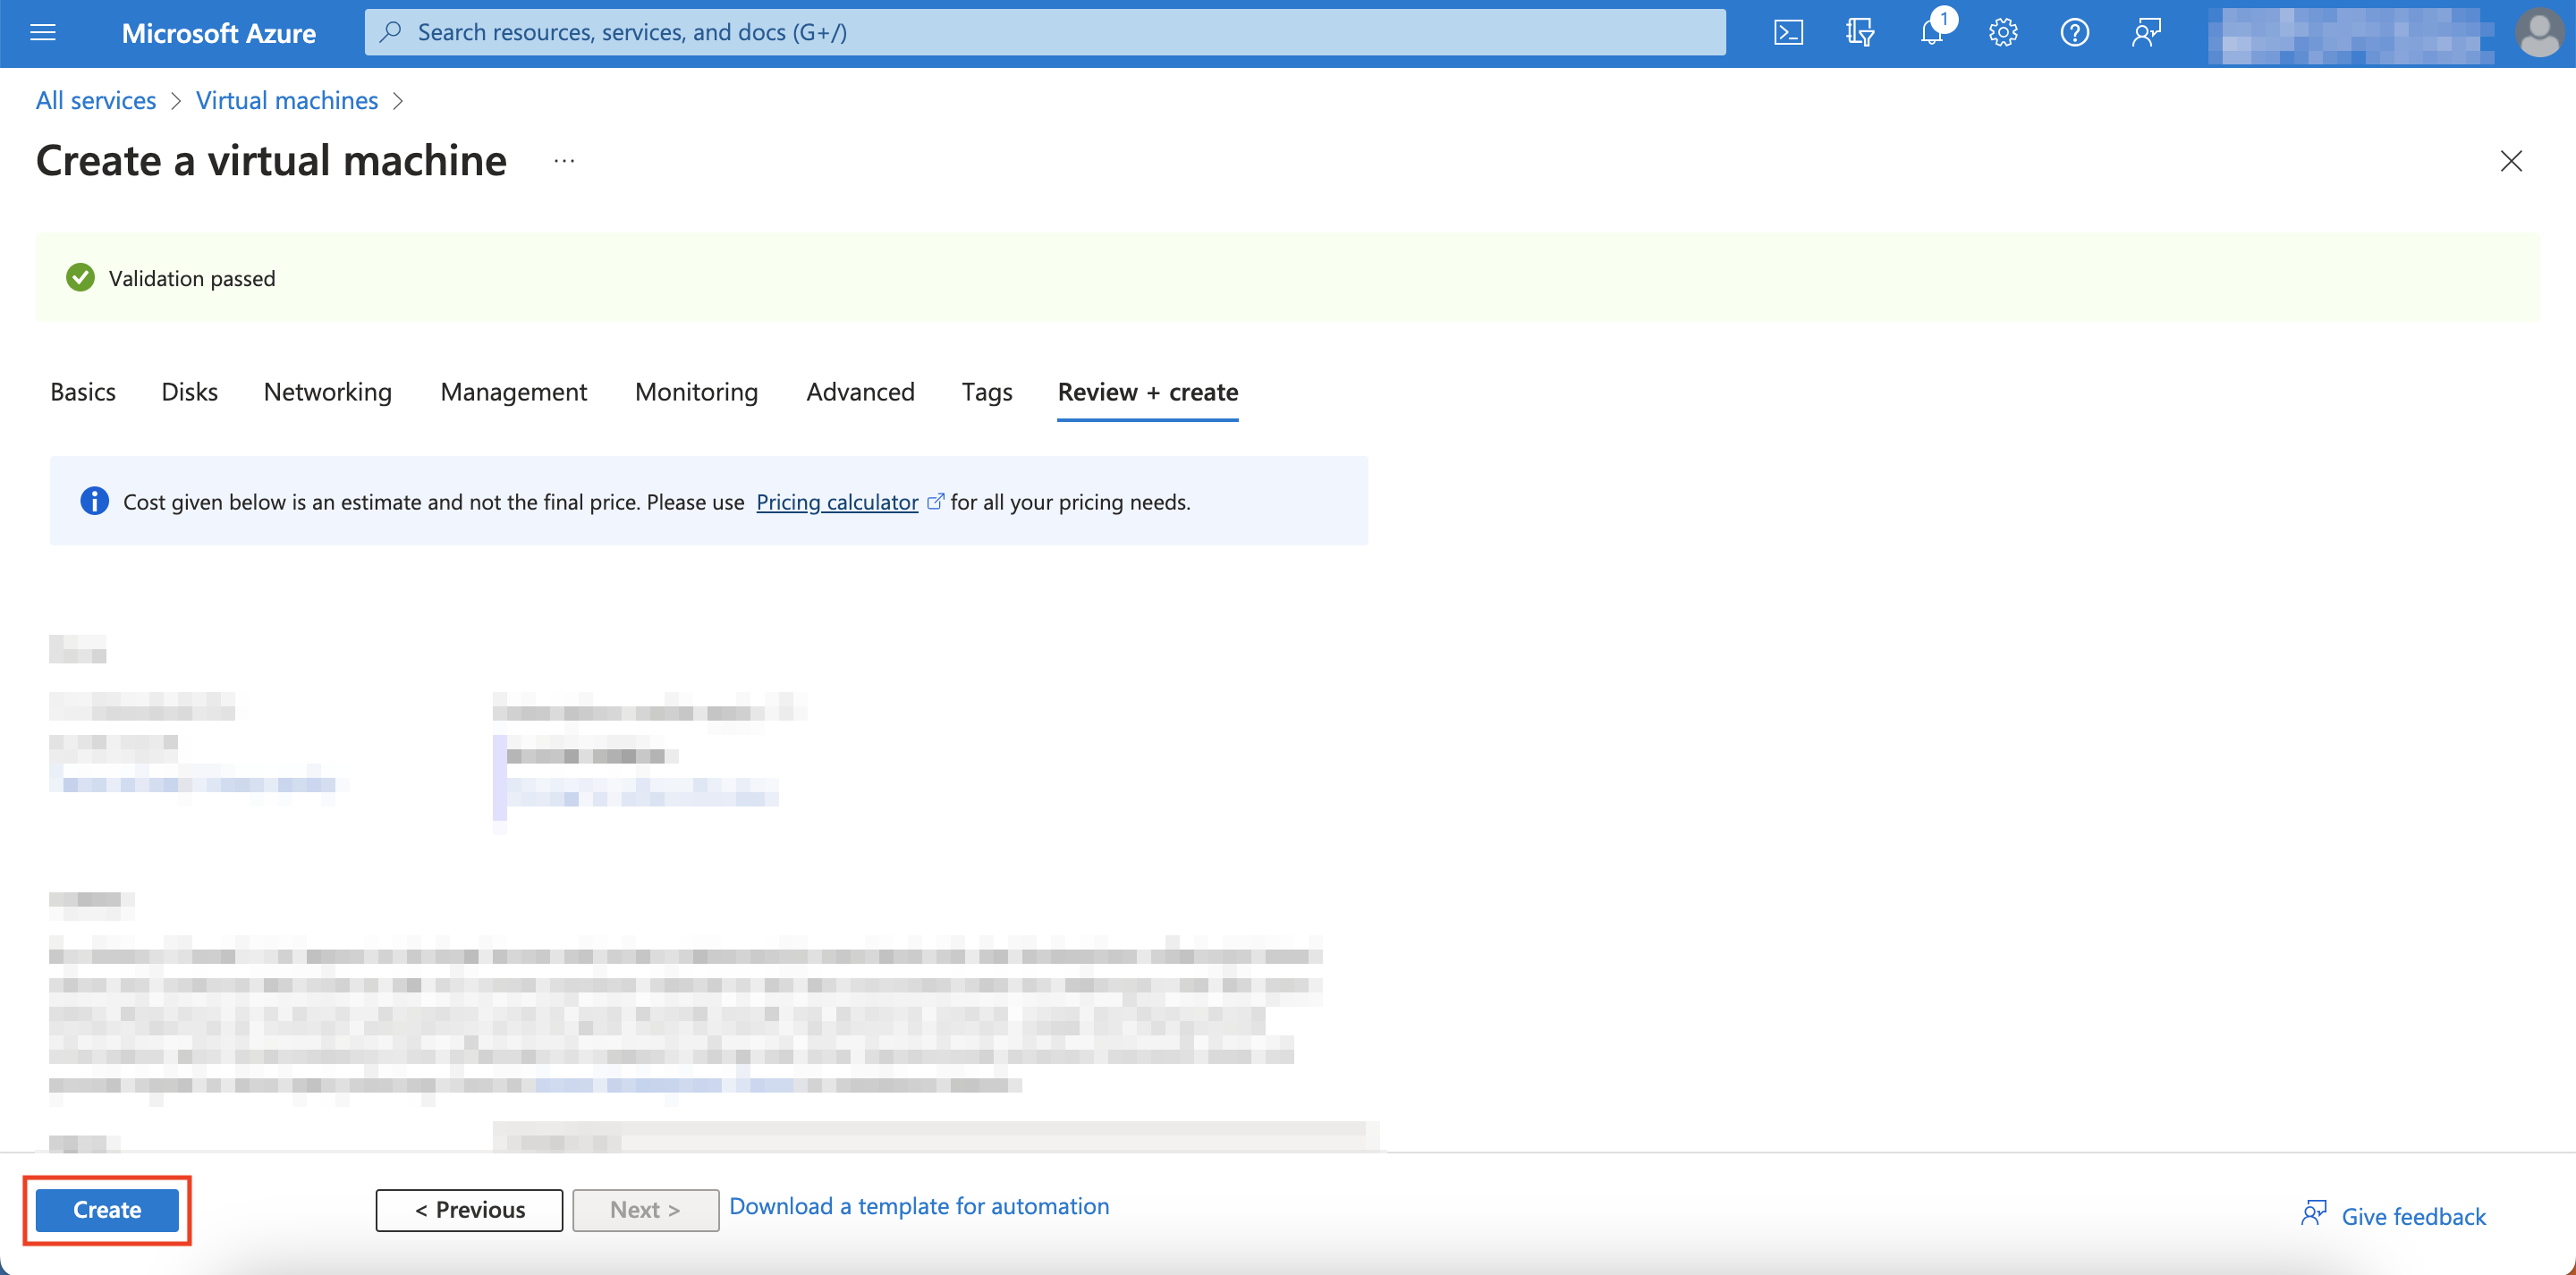
A pop-up will appear asking you about whether or not to download a key pair.
-
Click Download private key and create resource.
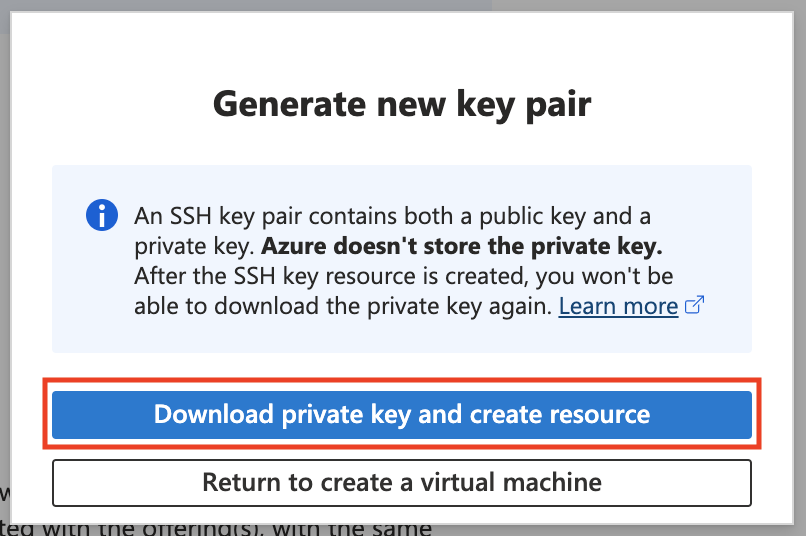
Make sure you keep this key pair where you can find it later.
You have successfully created a Virtual Machine on Azure.
Step 2: Create a VPG
Now that you have created all the necessary Azure components, to link them to Soracom, you must create a Type-F Virtual Private Gateway (VPG). Soracom's VPG option lets you create and manage your own dedicated gateway on the Soracom platform.
If you are using a Type-F2 VPG, follow the VPG Type-F2 Configuration guide to create your VPG, then return to Step 3 of this guide. You will need your VPG's Device Subnet IP address range (visible on the VPG settings page) for Step 4.
-
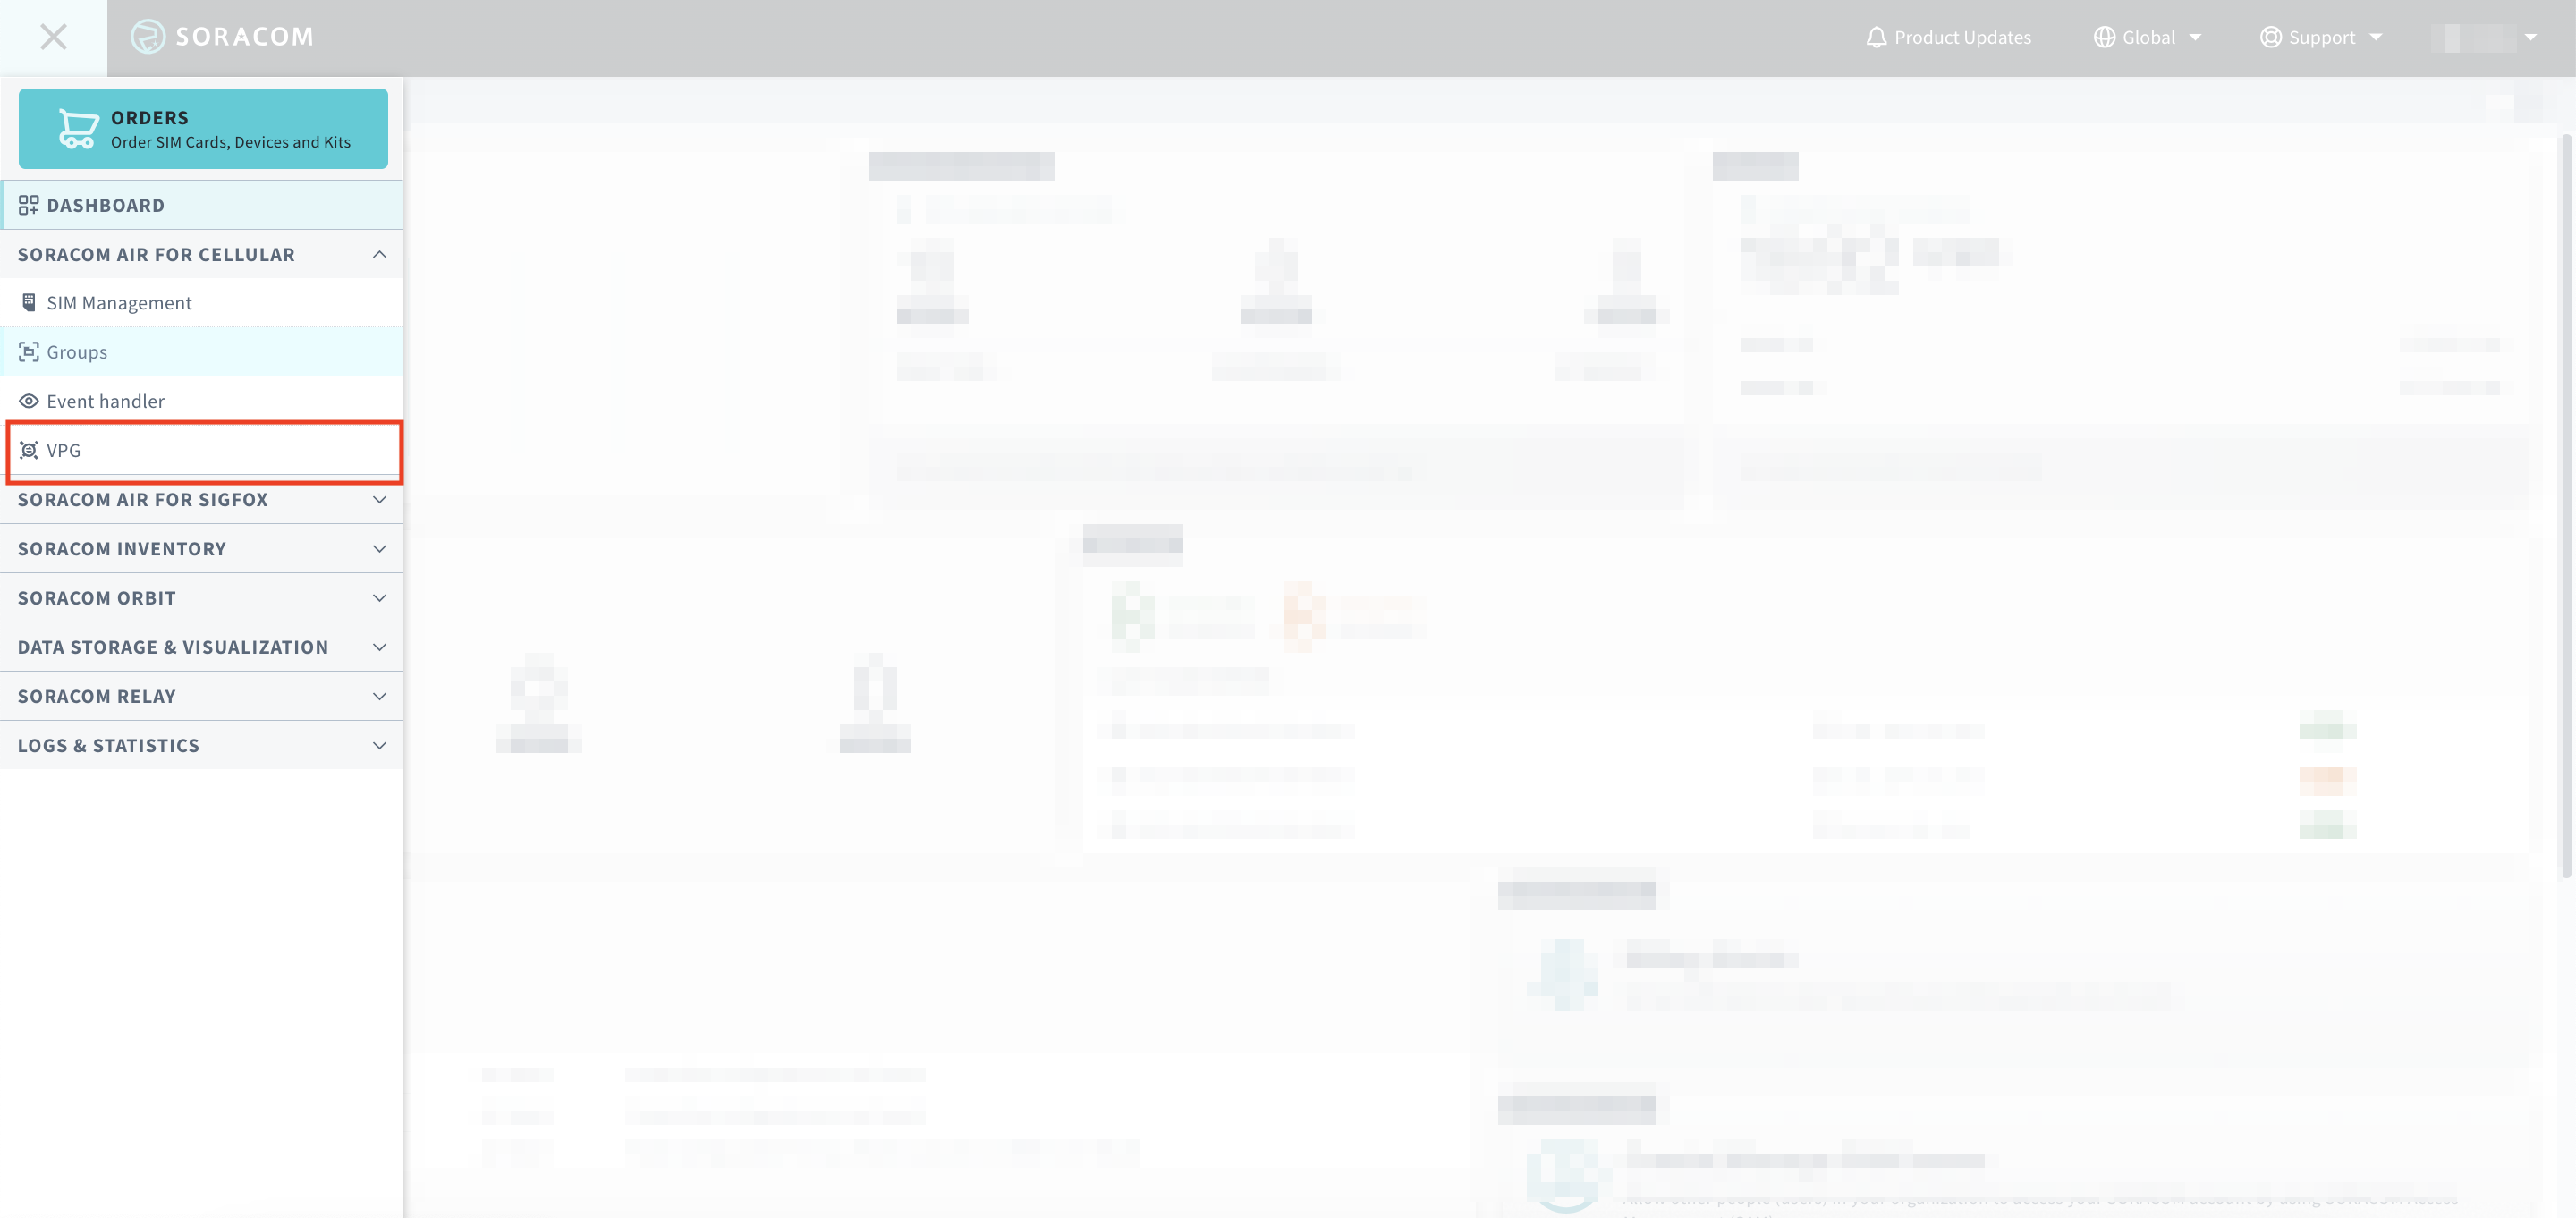
Sign in to the User Console. From the Menu, open the VPG screen.
-
Click the Create VPG button.
-
Enter a name to identify the VPG, then select Type-F.
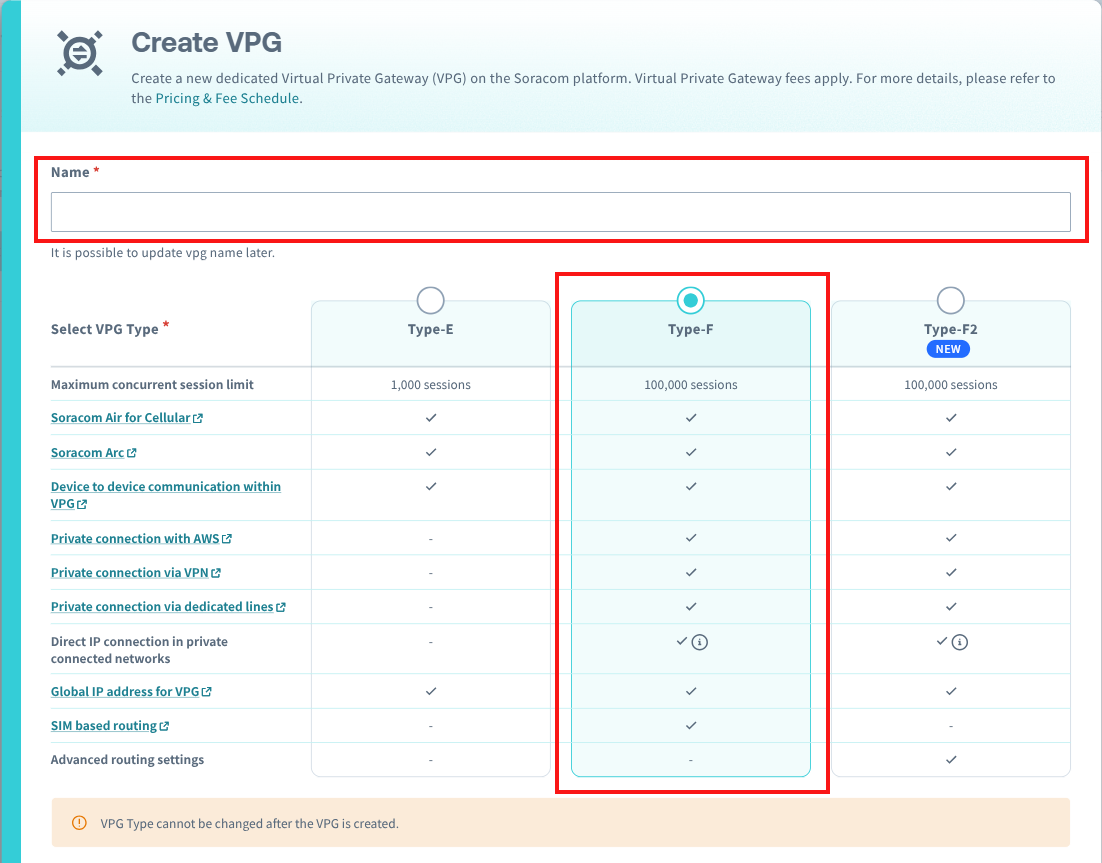
Once created, the Internet Gateway, Rendezvous Point, and CIDR Range settings cannot be changed.
-
Select a rendezvous point.
For more information, refer to the Rendezvous point documentation.
The rendezvous point you choose here can differ based on what your IoT SIM's subscription is and the region your device is located in.
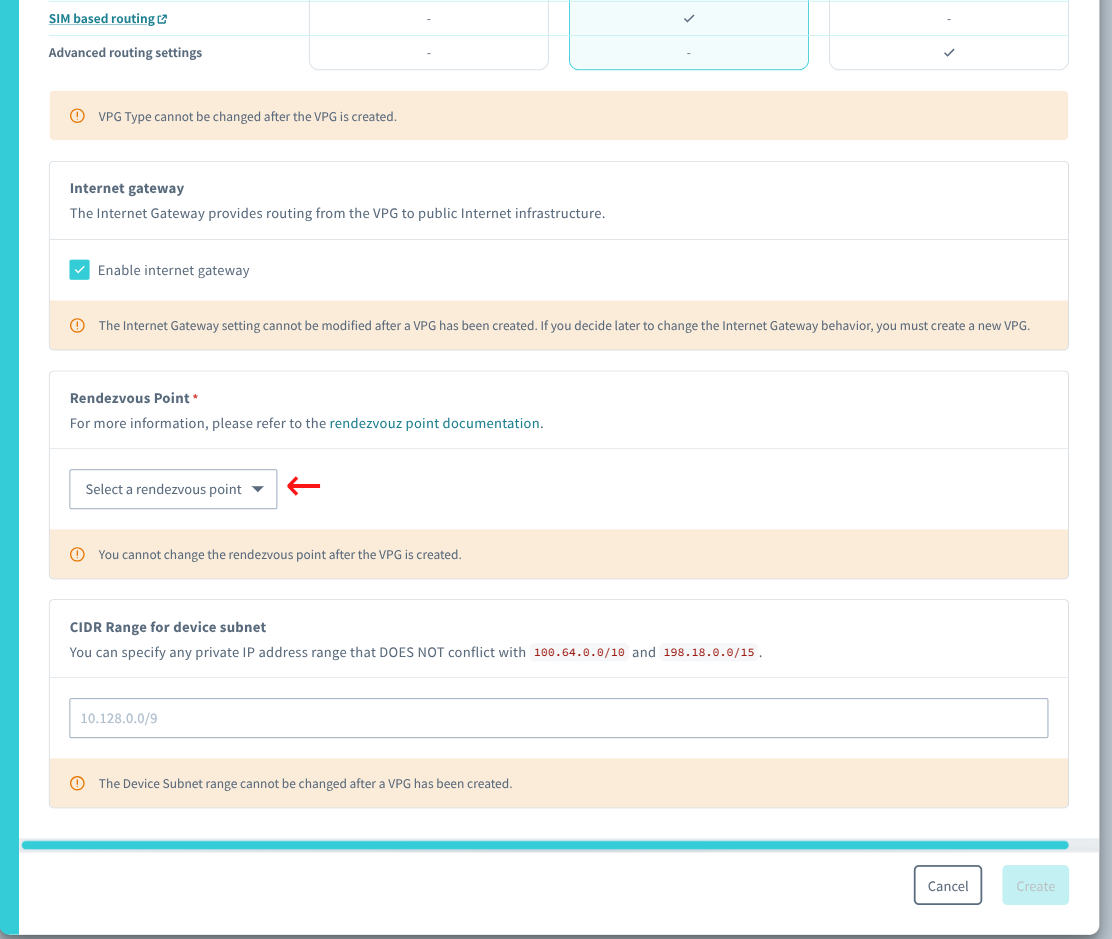
-
Click Create.
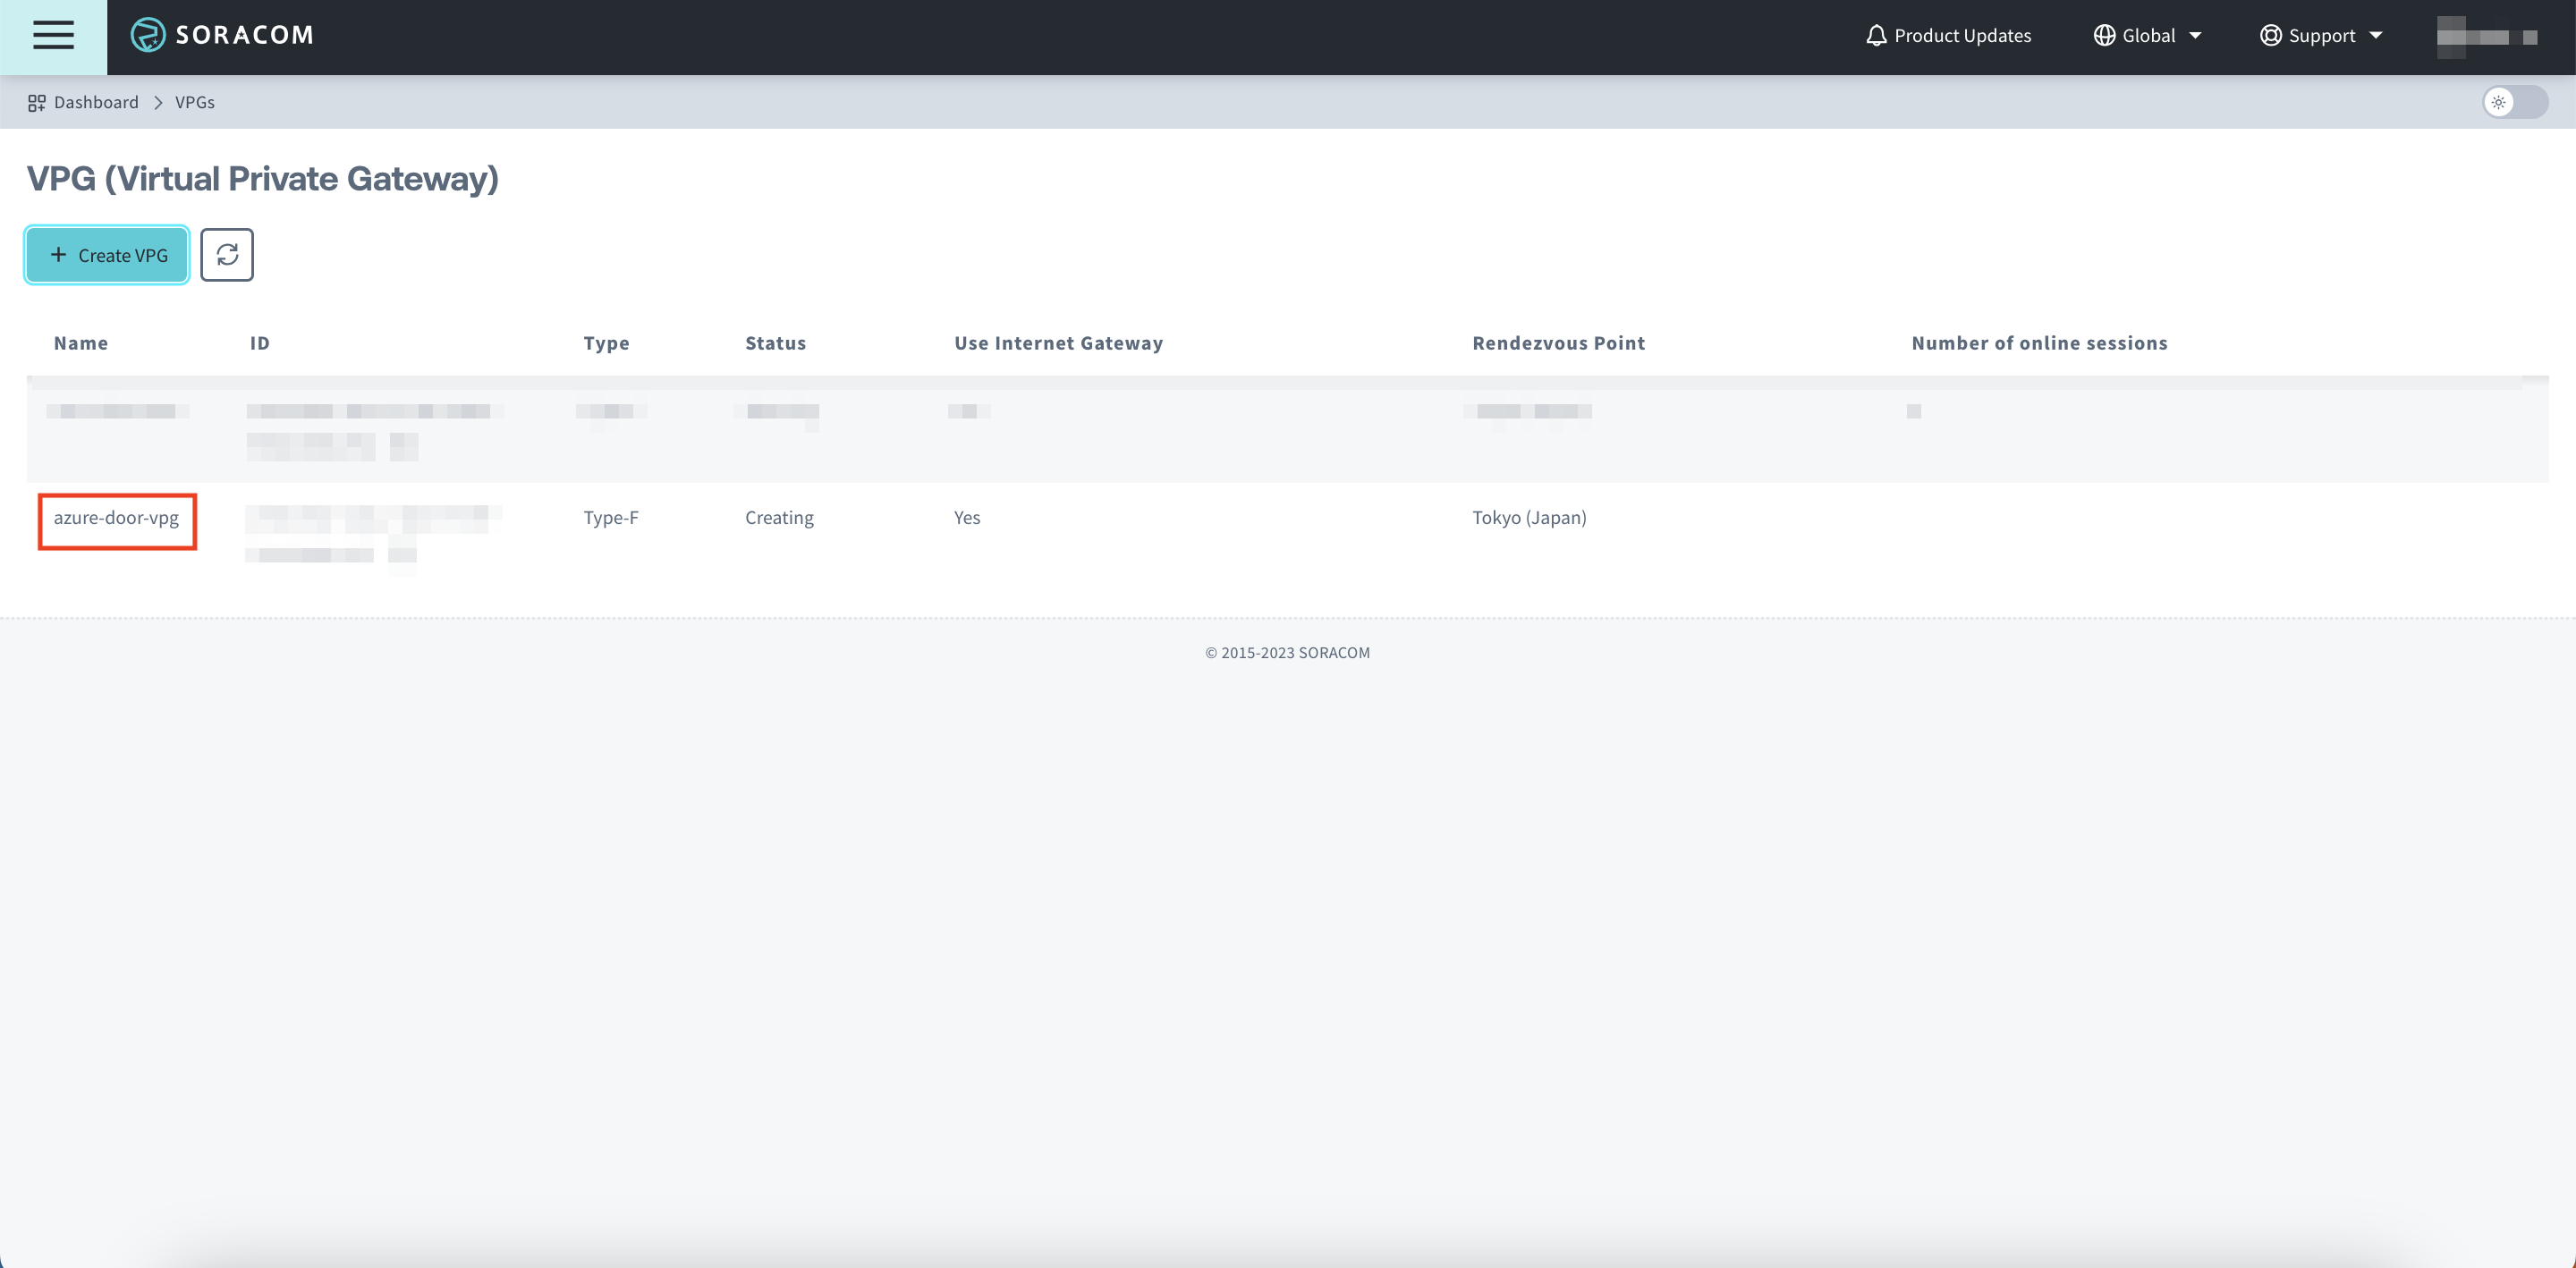
You have successfully created a Type-F VPG.
Now you will need to get the VPG's IP address in preparation for the next steps.
-
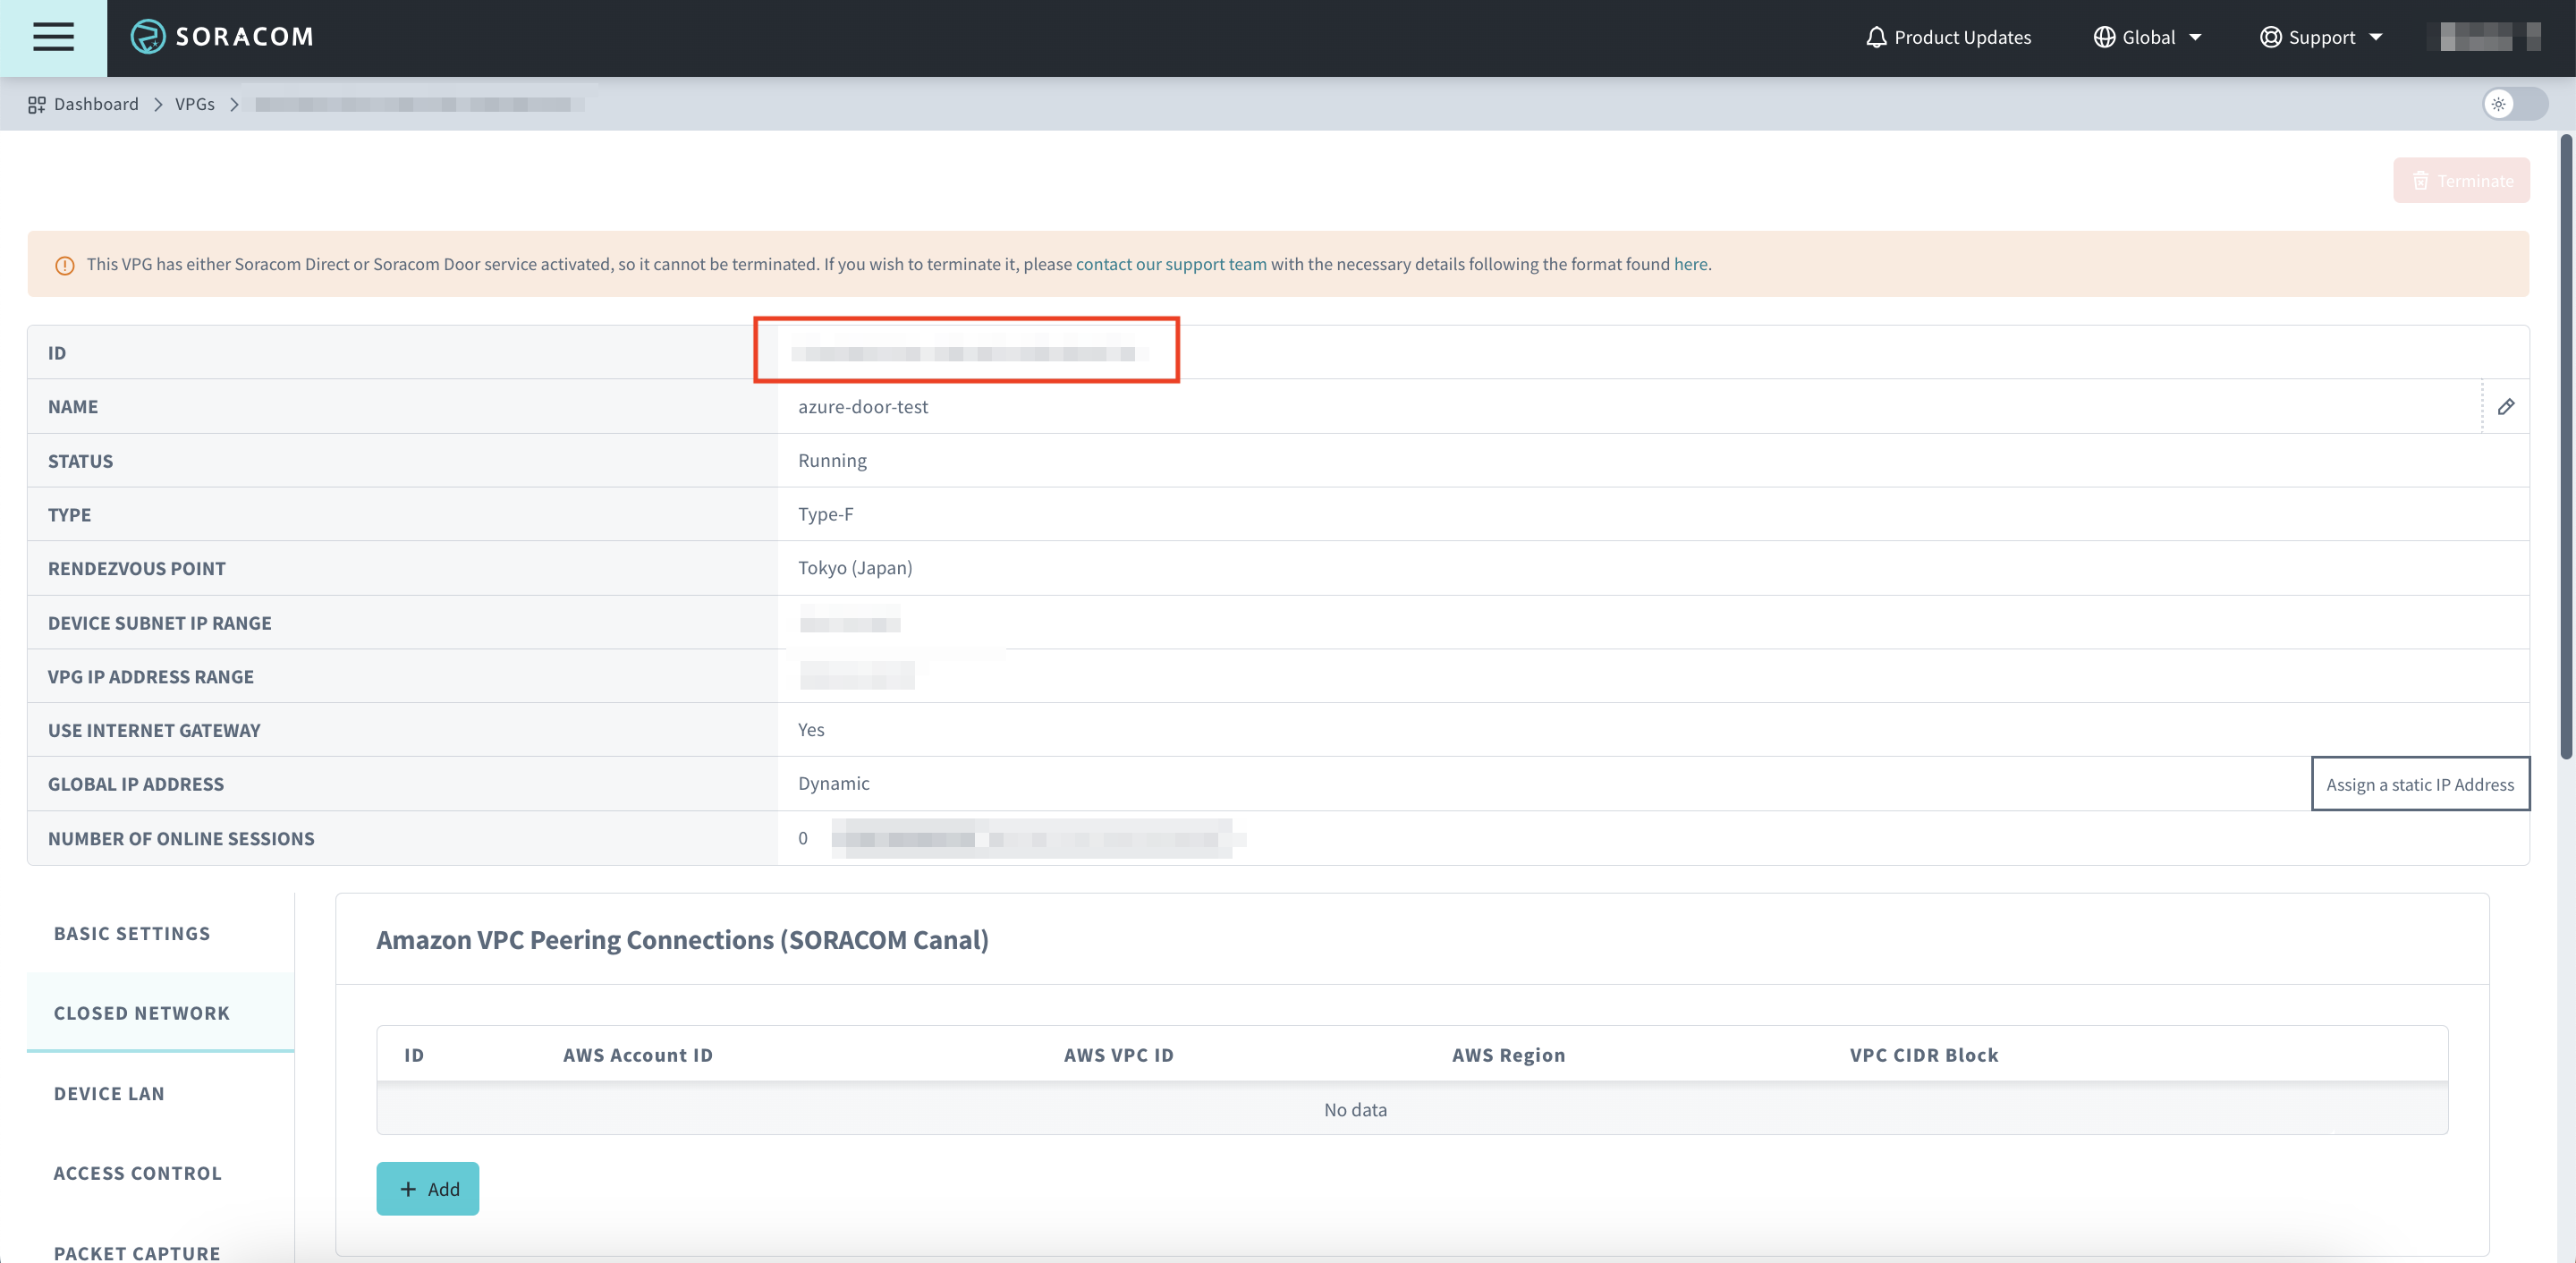
Click on your newly created VPG.
-
Copy down the VPG IP ADDRESS RANGE for use later.

Step 3: Apply to Use Soracom Door
Next, to apply for access to Soracom Door,
submit a support ticket
and select I want to apply for a Soracom Door connection from the Which category best describes your inquiry? dropdown menu.
Provide the following information required by the form:
| Field | Information to Enter |
|---|---|
| Company Name and Address | Provide your company's name and address |
| Door Use Case | Describe your use case and why it requires a VPN connection |
| VPG ID for Door Connection | Provide the ID of the VPG created in Step 2 |
| The Router or Cloud Provider You Are Using | Enter Azure VPN Gateway |
| Your Router or Cloud Instance's Global IP Address | Enter the IP address that was configured for the Azure VPN Gateway created in Step 1 |
| Routing Type | Select Static |
| IP Address Range | Enter the IP address range of your Azure Virtual Network that was created in Step 1 |
Applications are approved on a conditional basis. In some cases, we may not be able to approve access to Soracom Door due to technical limitations or unsuitable use cases.
Step 4: Configure Azure VPN Gateway
Now that you can use Soracom Door, you must create two local network gateways for the Soracom VPG endpoints, then add two IPsec connections to your VPN Gateway.
A couple of days after completing Step 3, you should receive an email from Soracom. Open it to see more details about your VPN connection.
Retrieve Your VPG's IP Address and Pre-Shared Key
-
Open the email you received from Soracom regarding Soracom Door.
-
Open the attached file and use Cmd F or Ctrl F to find Outside IP Addresses (there should be two locations).
-
Copy the two addresses that follow Virtual Private Gateway : and save them somewhere.
Both of these addresses should look like the following
Outside IP Addresses: - Customer Gateway : XX.XX.XX.XX - Virtual Private Gateway : XX.XX.XX.XX <- save this address -
Use Cmd F or Ctrl F again to find the two locations with Pre-Shared Key.
-
Copy the two Pre-Shared Keys and save them somewhere.
It should look like the following
- IKE version              : IKEv2
- Authentication Method    : Pre-Shared Key
- Pre-Shared Key           : xxxxxxxxxxxxxxxxxxxxx <- save this key
- Authentication Algorithm : sha1
...
Make sure you know which Pre-Shared Key corresponds to which IP Address. The first IP will correspond to the first Pre-Shared Key and the second IP will correspond to the second Pre-Shared Key. Your memo should look something like the following:
- First Connection
- Outside IP: XX.XX.XX.XX
- Pre-Shared Key: xxxxxxxxxxxxx
- Second Connection
- Outside IP: XX.XX.XX.XX
- Pre-Shared Key: xxxxxxxxxxxxx
Create Local Network Gateways
Now you will create a local network gateway for each connection.
-
Sign in to the Microsoft Azure Portal.
-
Browse and click Local network gateways.
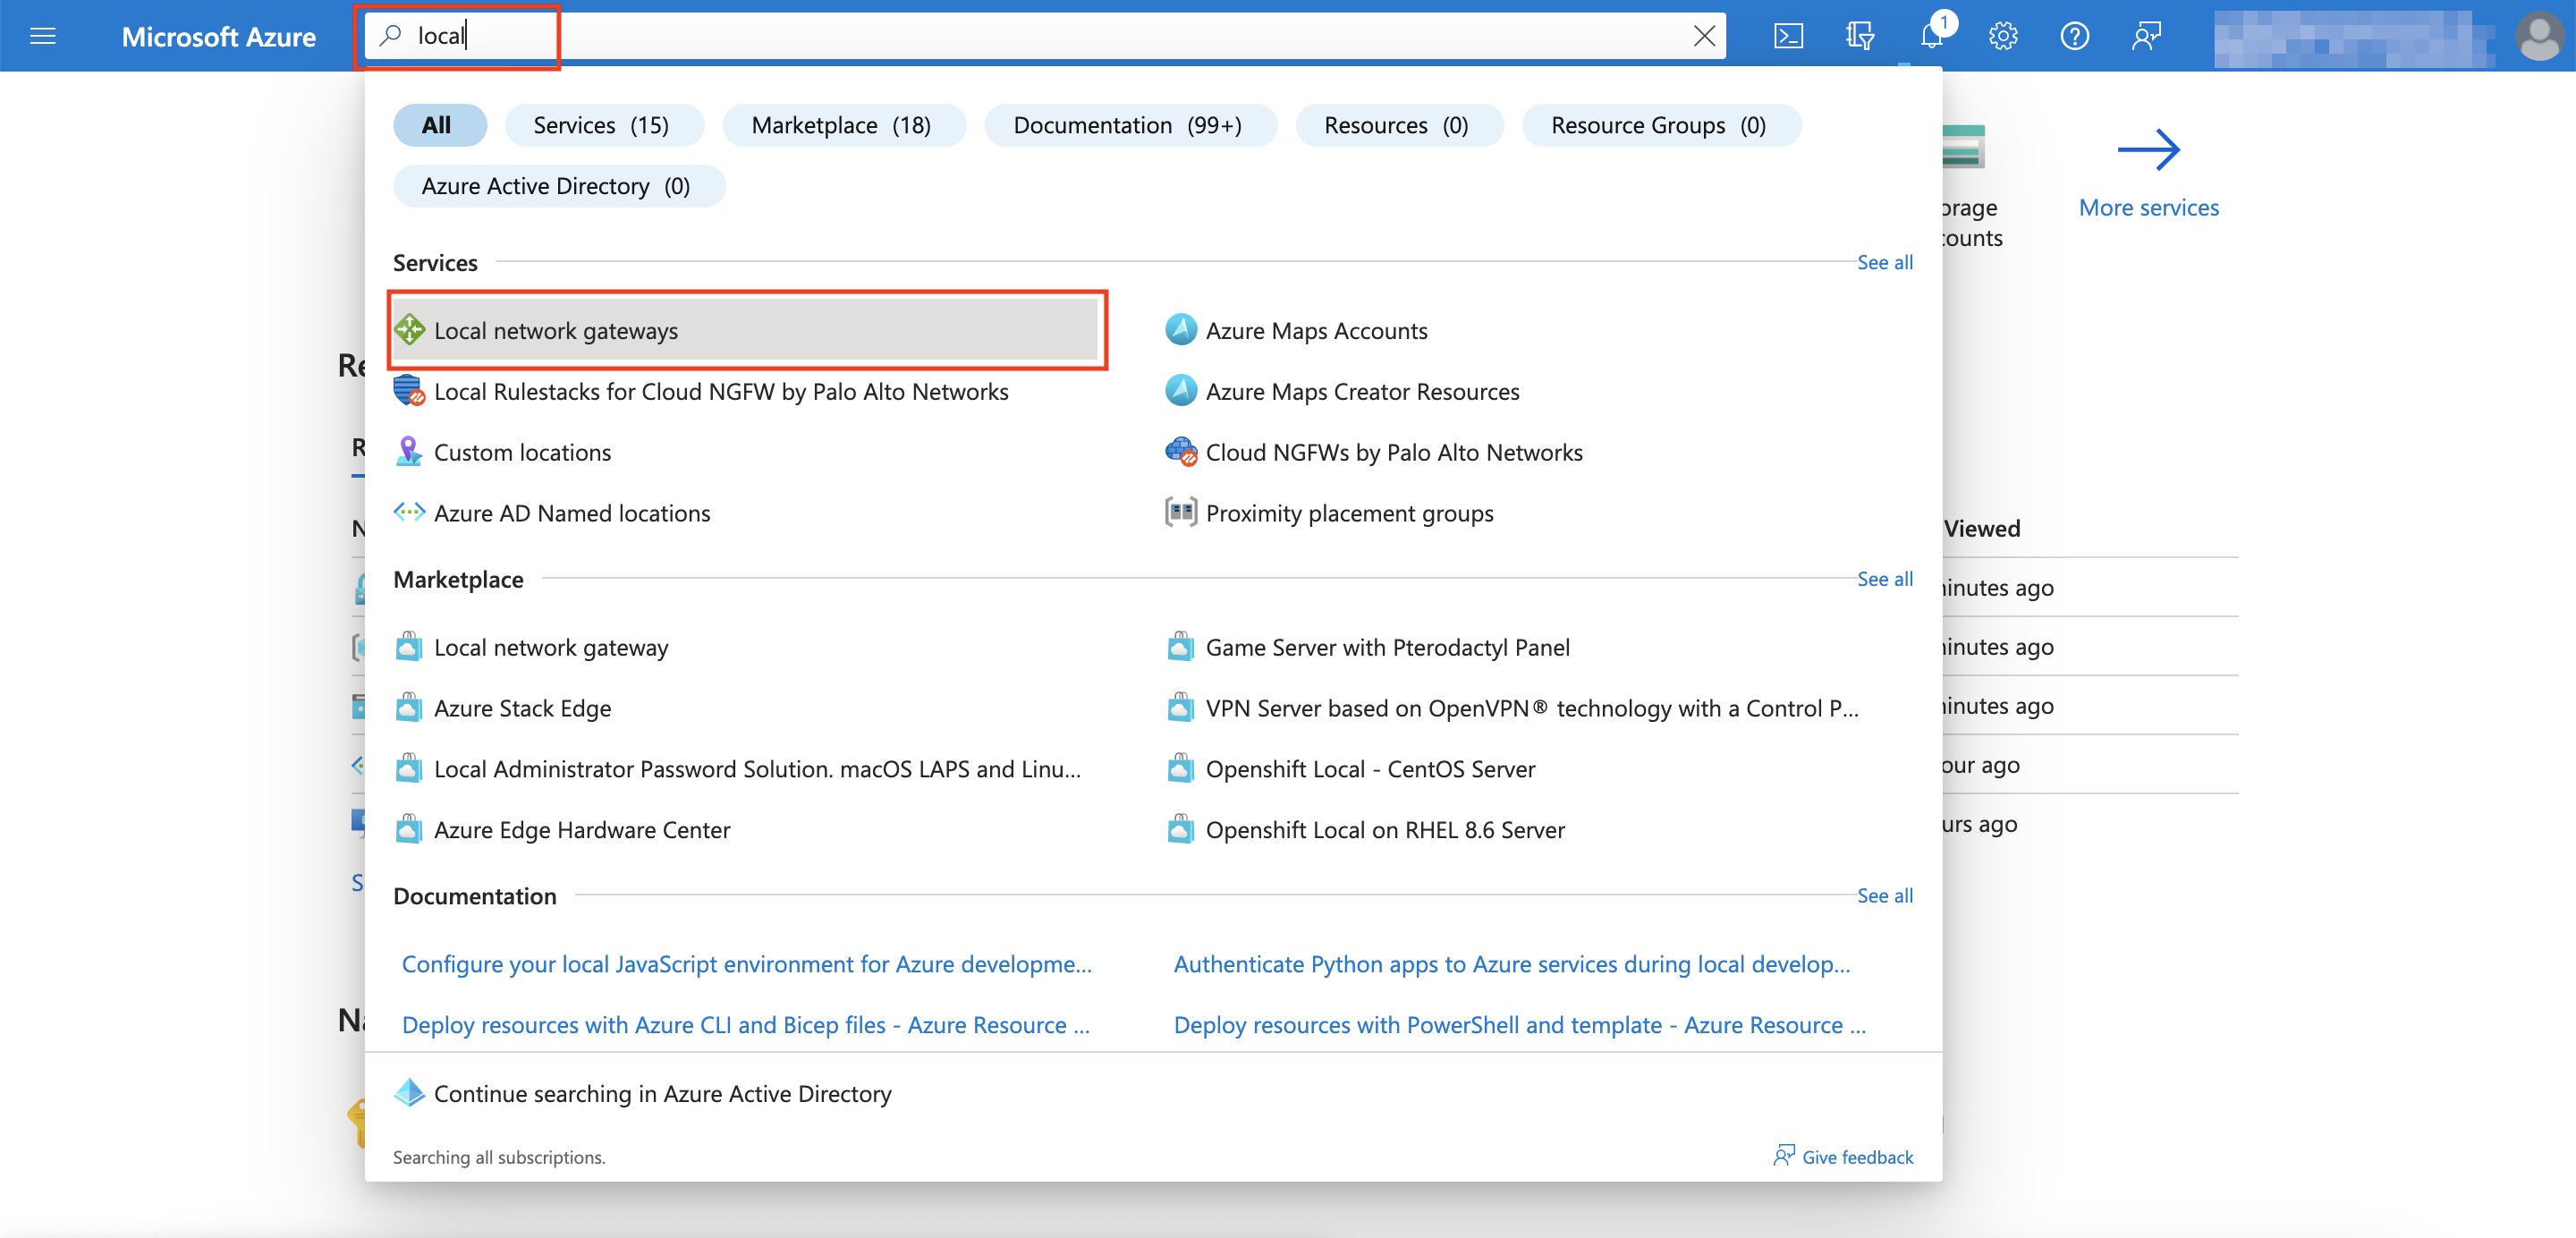
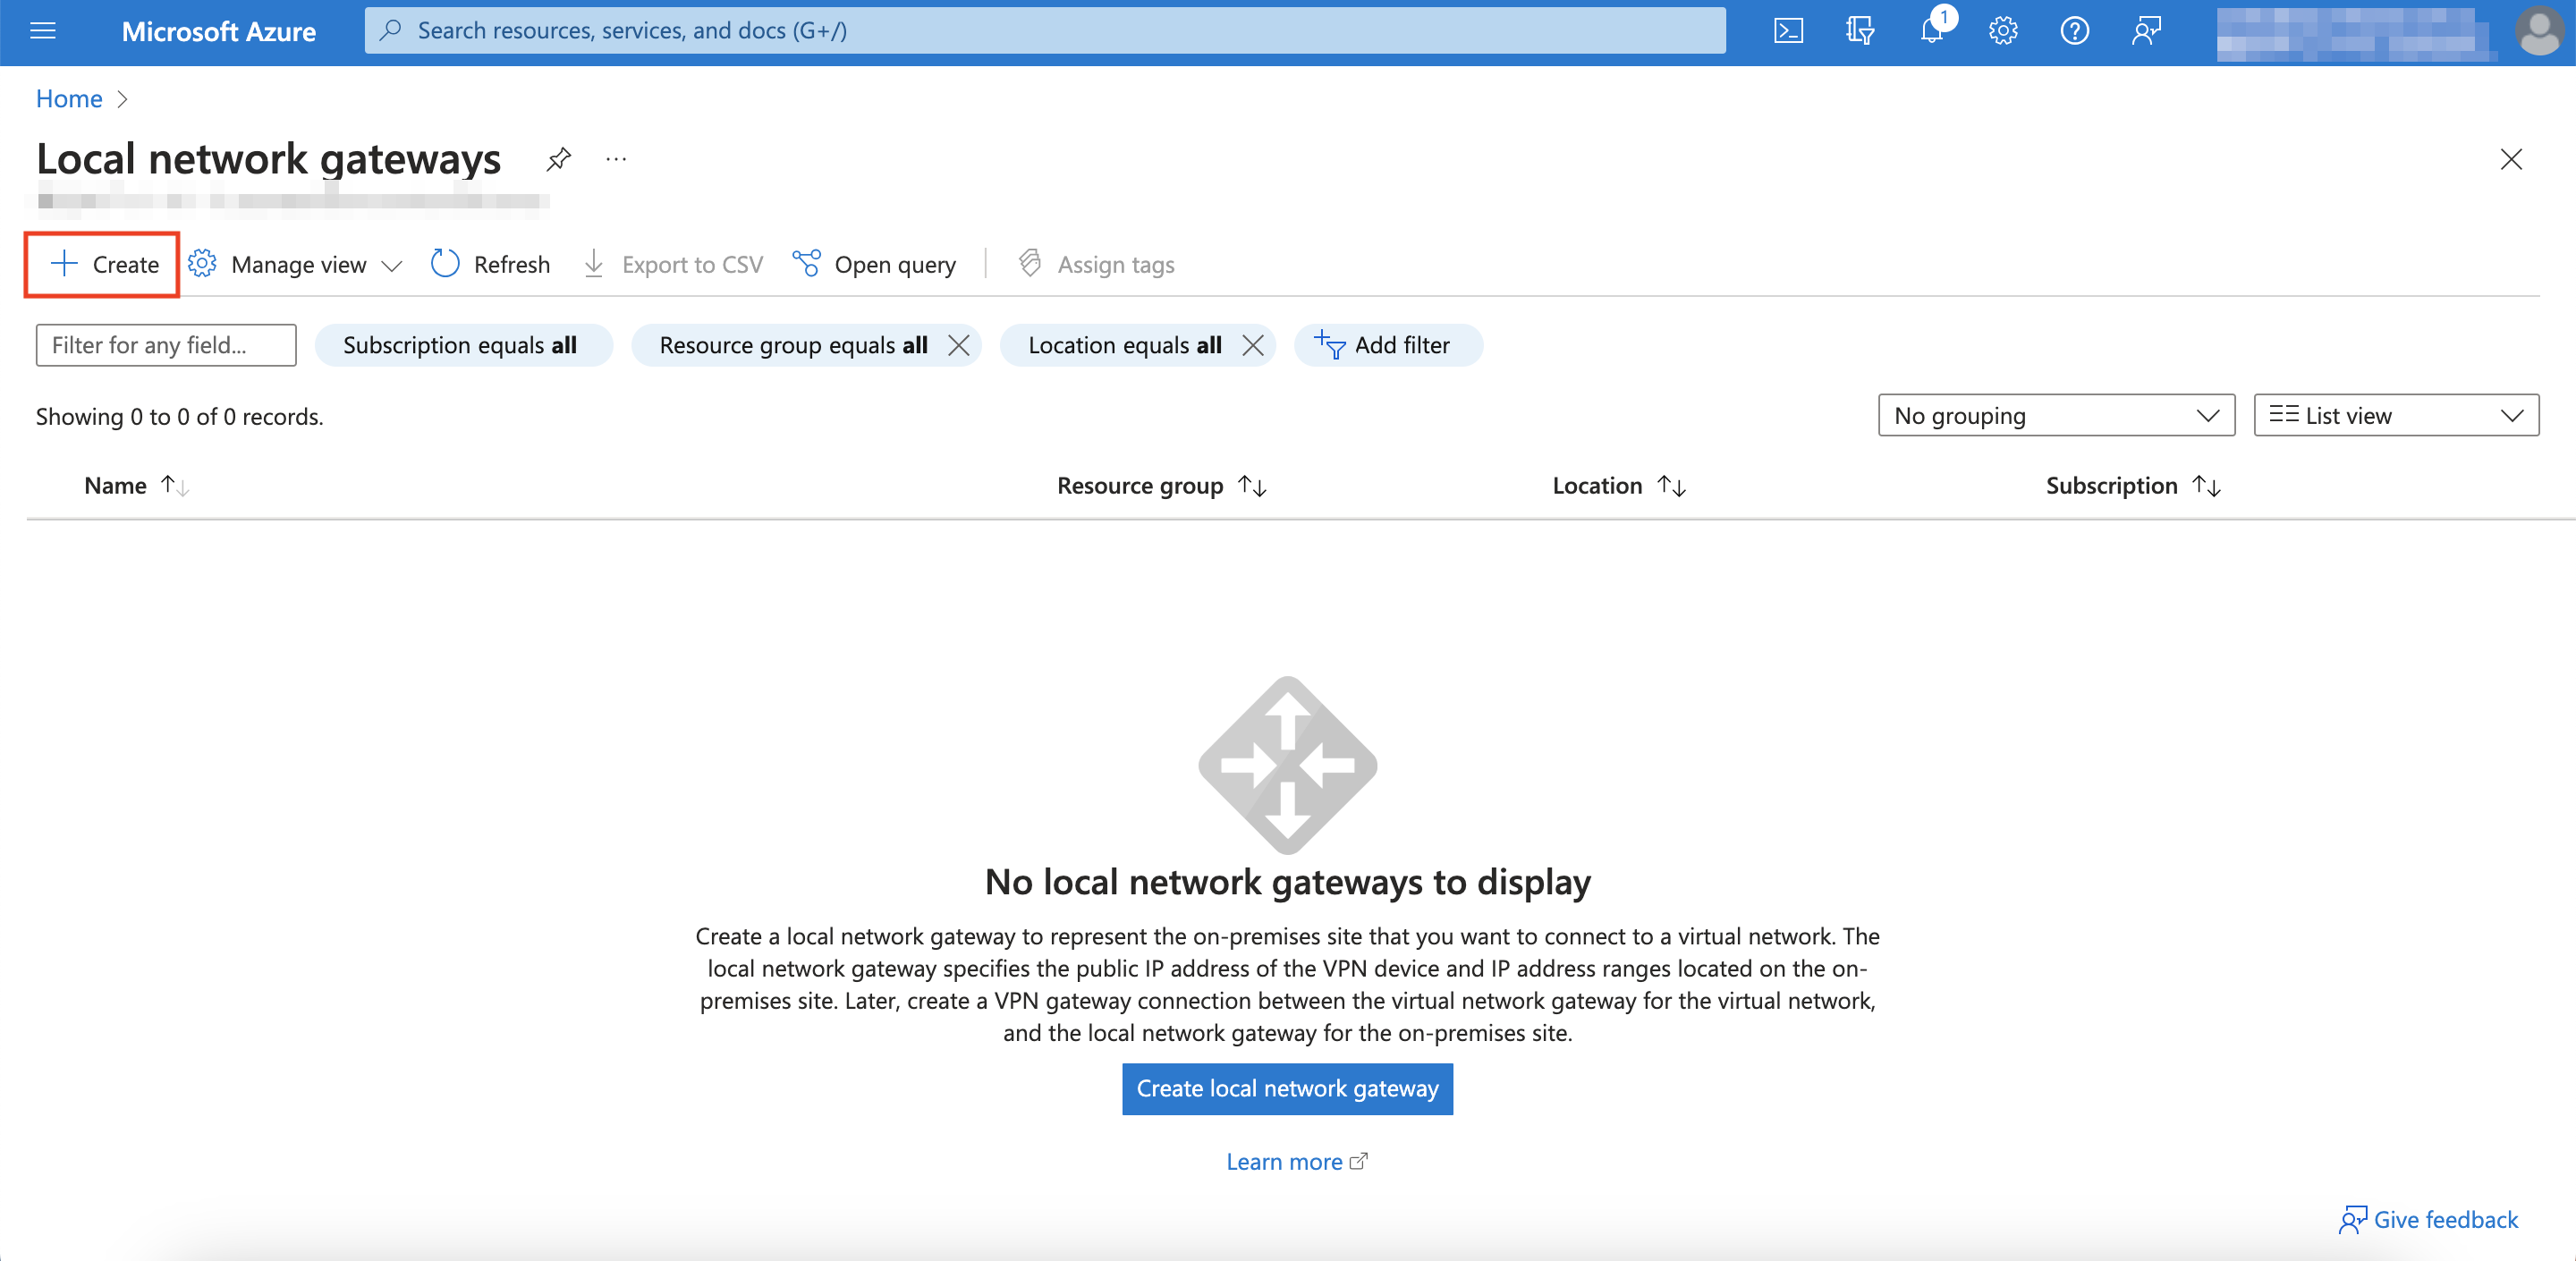
-
Click Create.
-
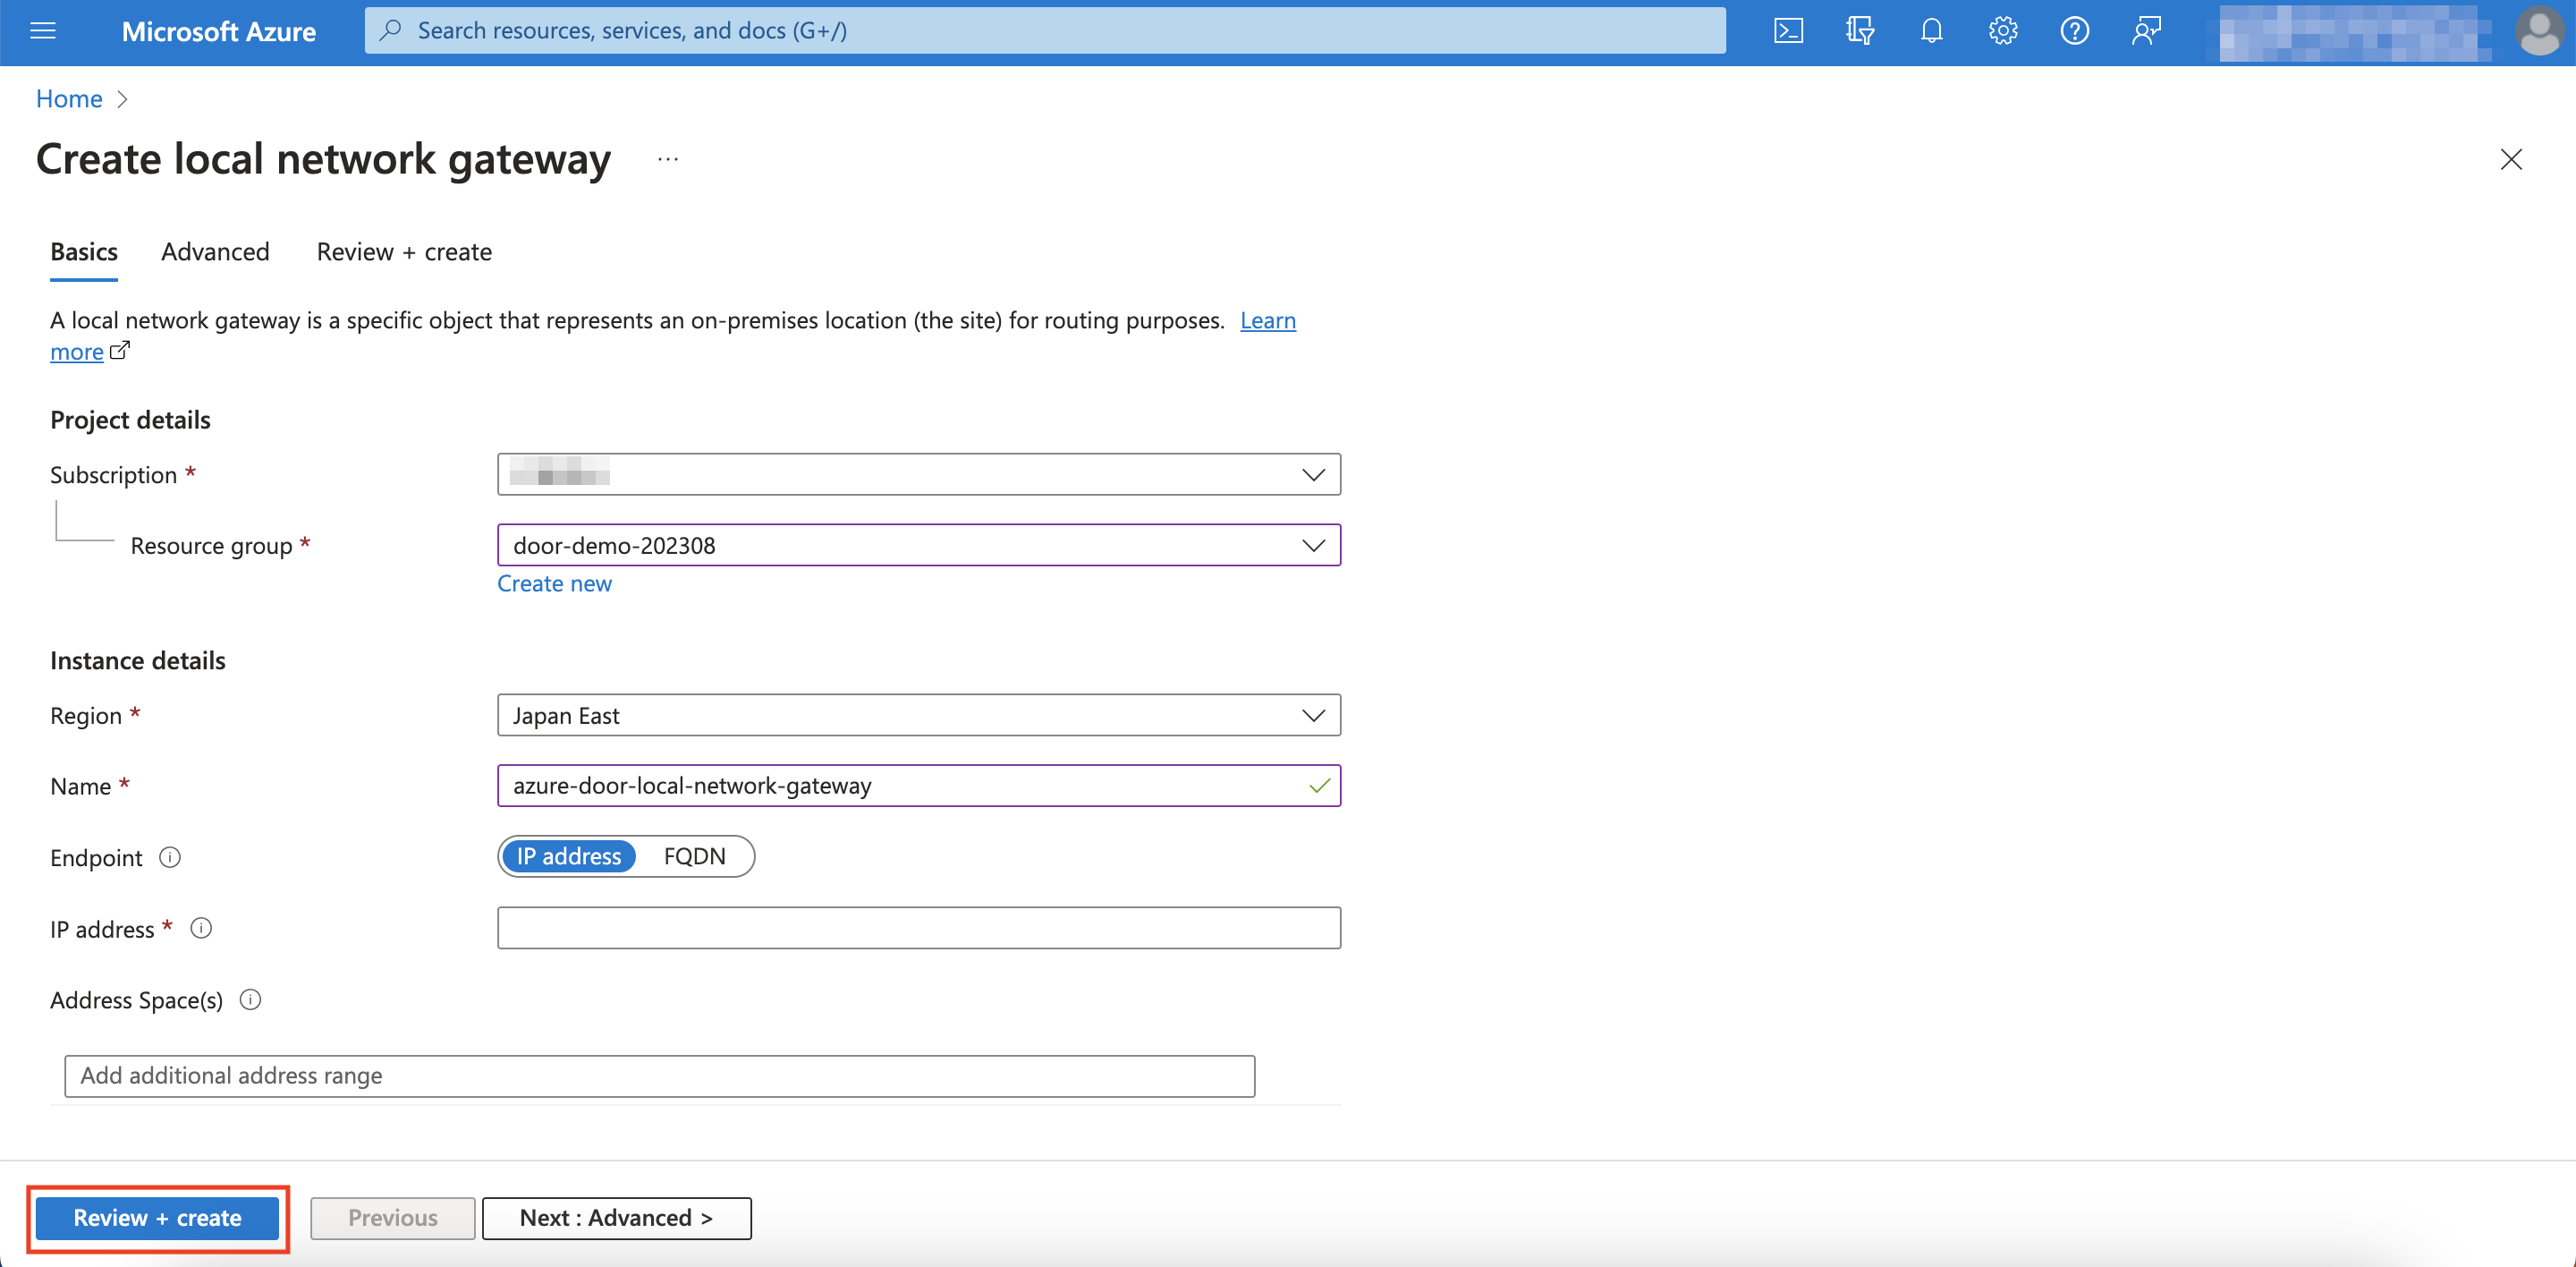
Enter the same resource group as Step 1, select the same region as in Step 1, and name the local gateway however you'd like.

-
IP address: Enter the VPG's Outside IP for the first connection.

-
Address Space(s): Enter the Soracom-side address range that Azure should route through this connection. The value depends on your VPG type, as shown in the following table.
VPG type Value to enter Type-E / Type-F / Type-G VPG IP address range Type-F2 Device subnet IP address range 
The range you specify here must not overlap with your Azure virtual network or subnet.
-
Click Review + create.
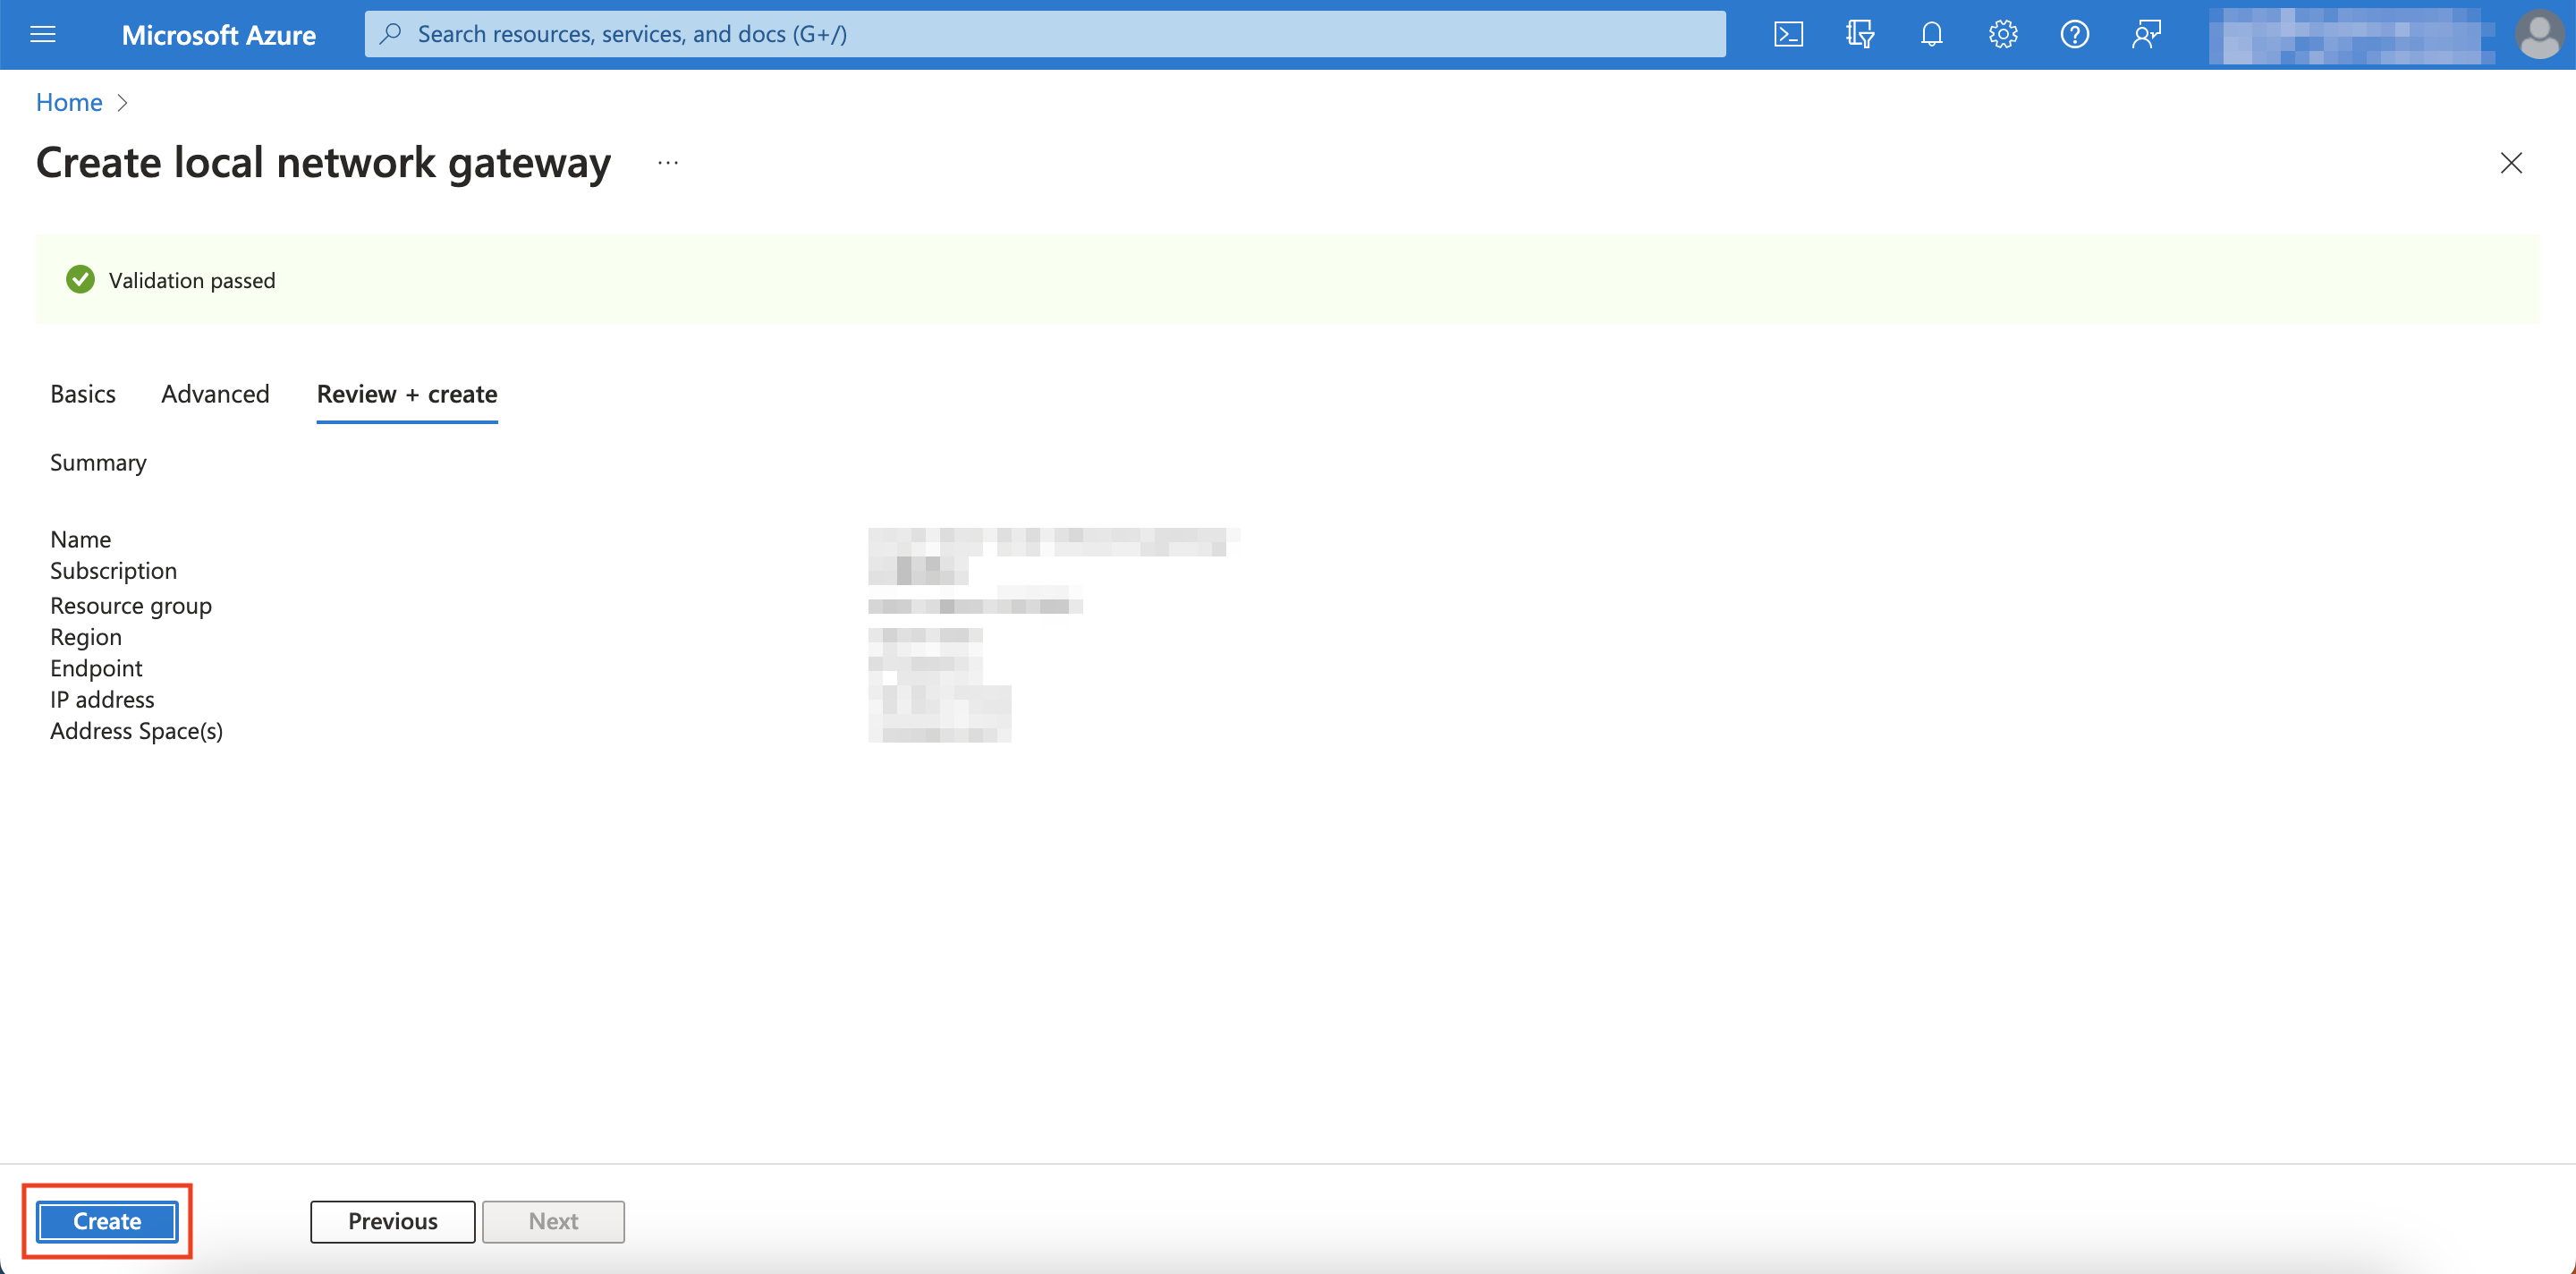
-
Click Create.
-
Repeat steps 3-8 to create one more local network gateway, but now replace the IP address with the second VPG outside IP address.
You've successfully made local network gateways for your connections!
Add Connections
-
Sign in to the Microsoft Azure Portal.
-
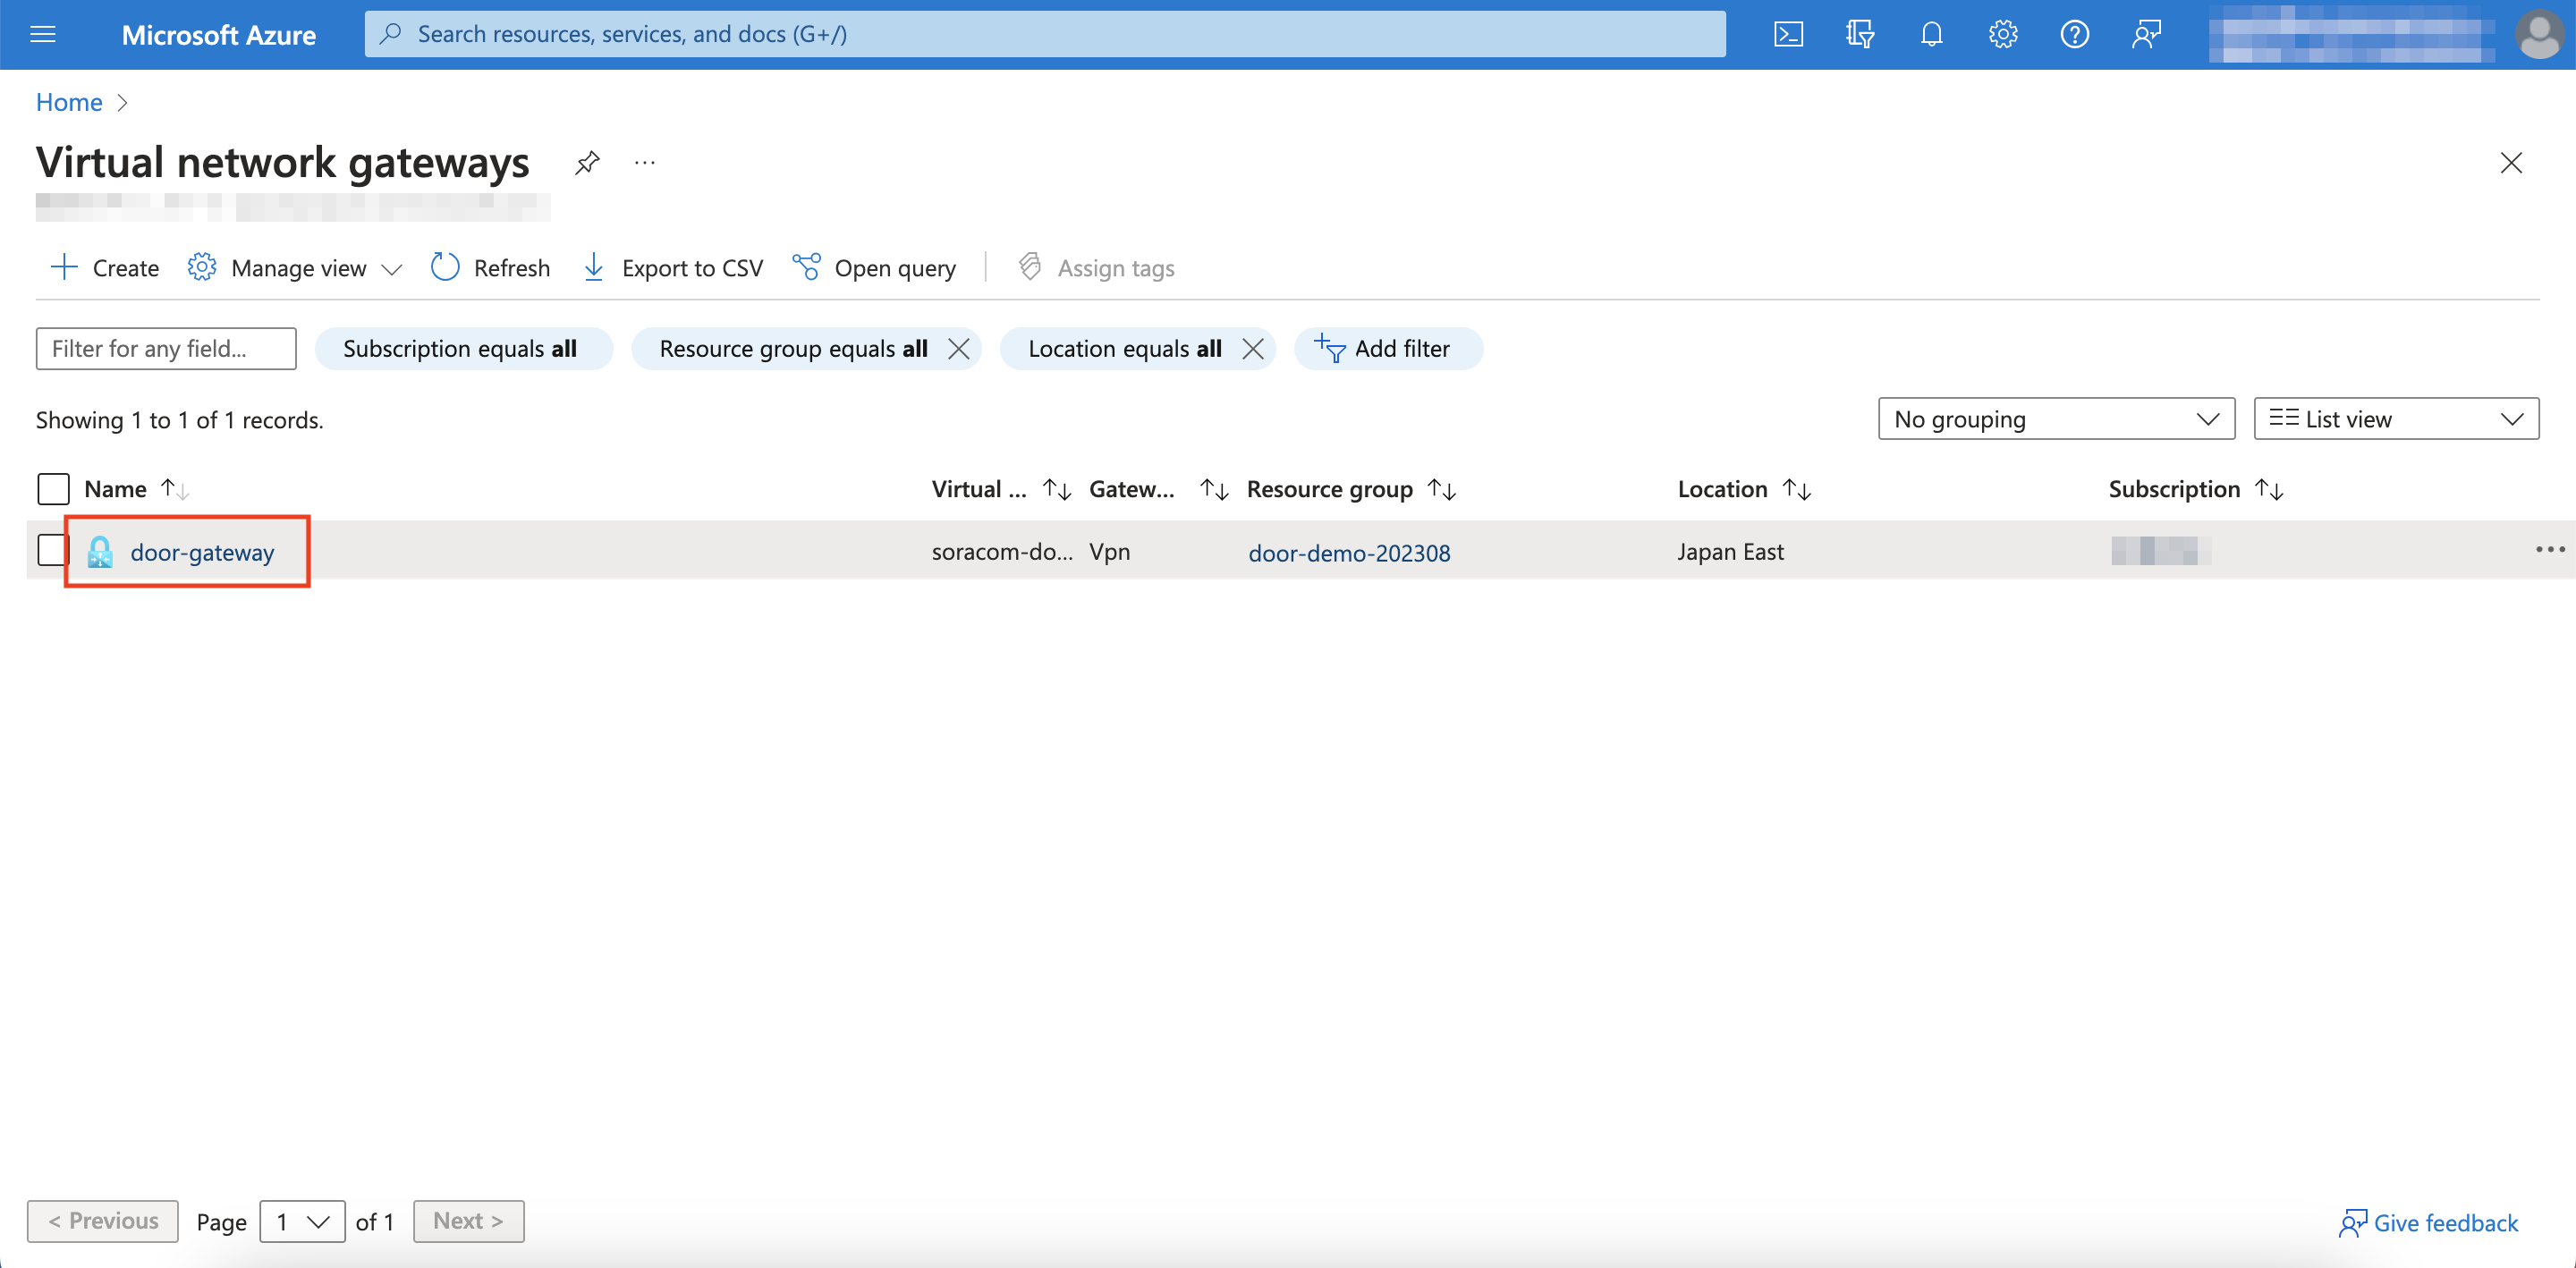
Browse and click Virtual network gateways as you did in Step 1.
-
Click on the Virtual network gateway that you created in Step 1.
-
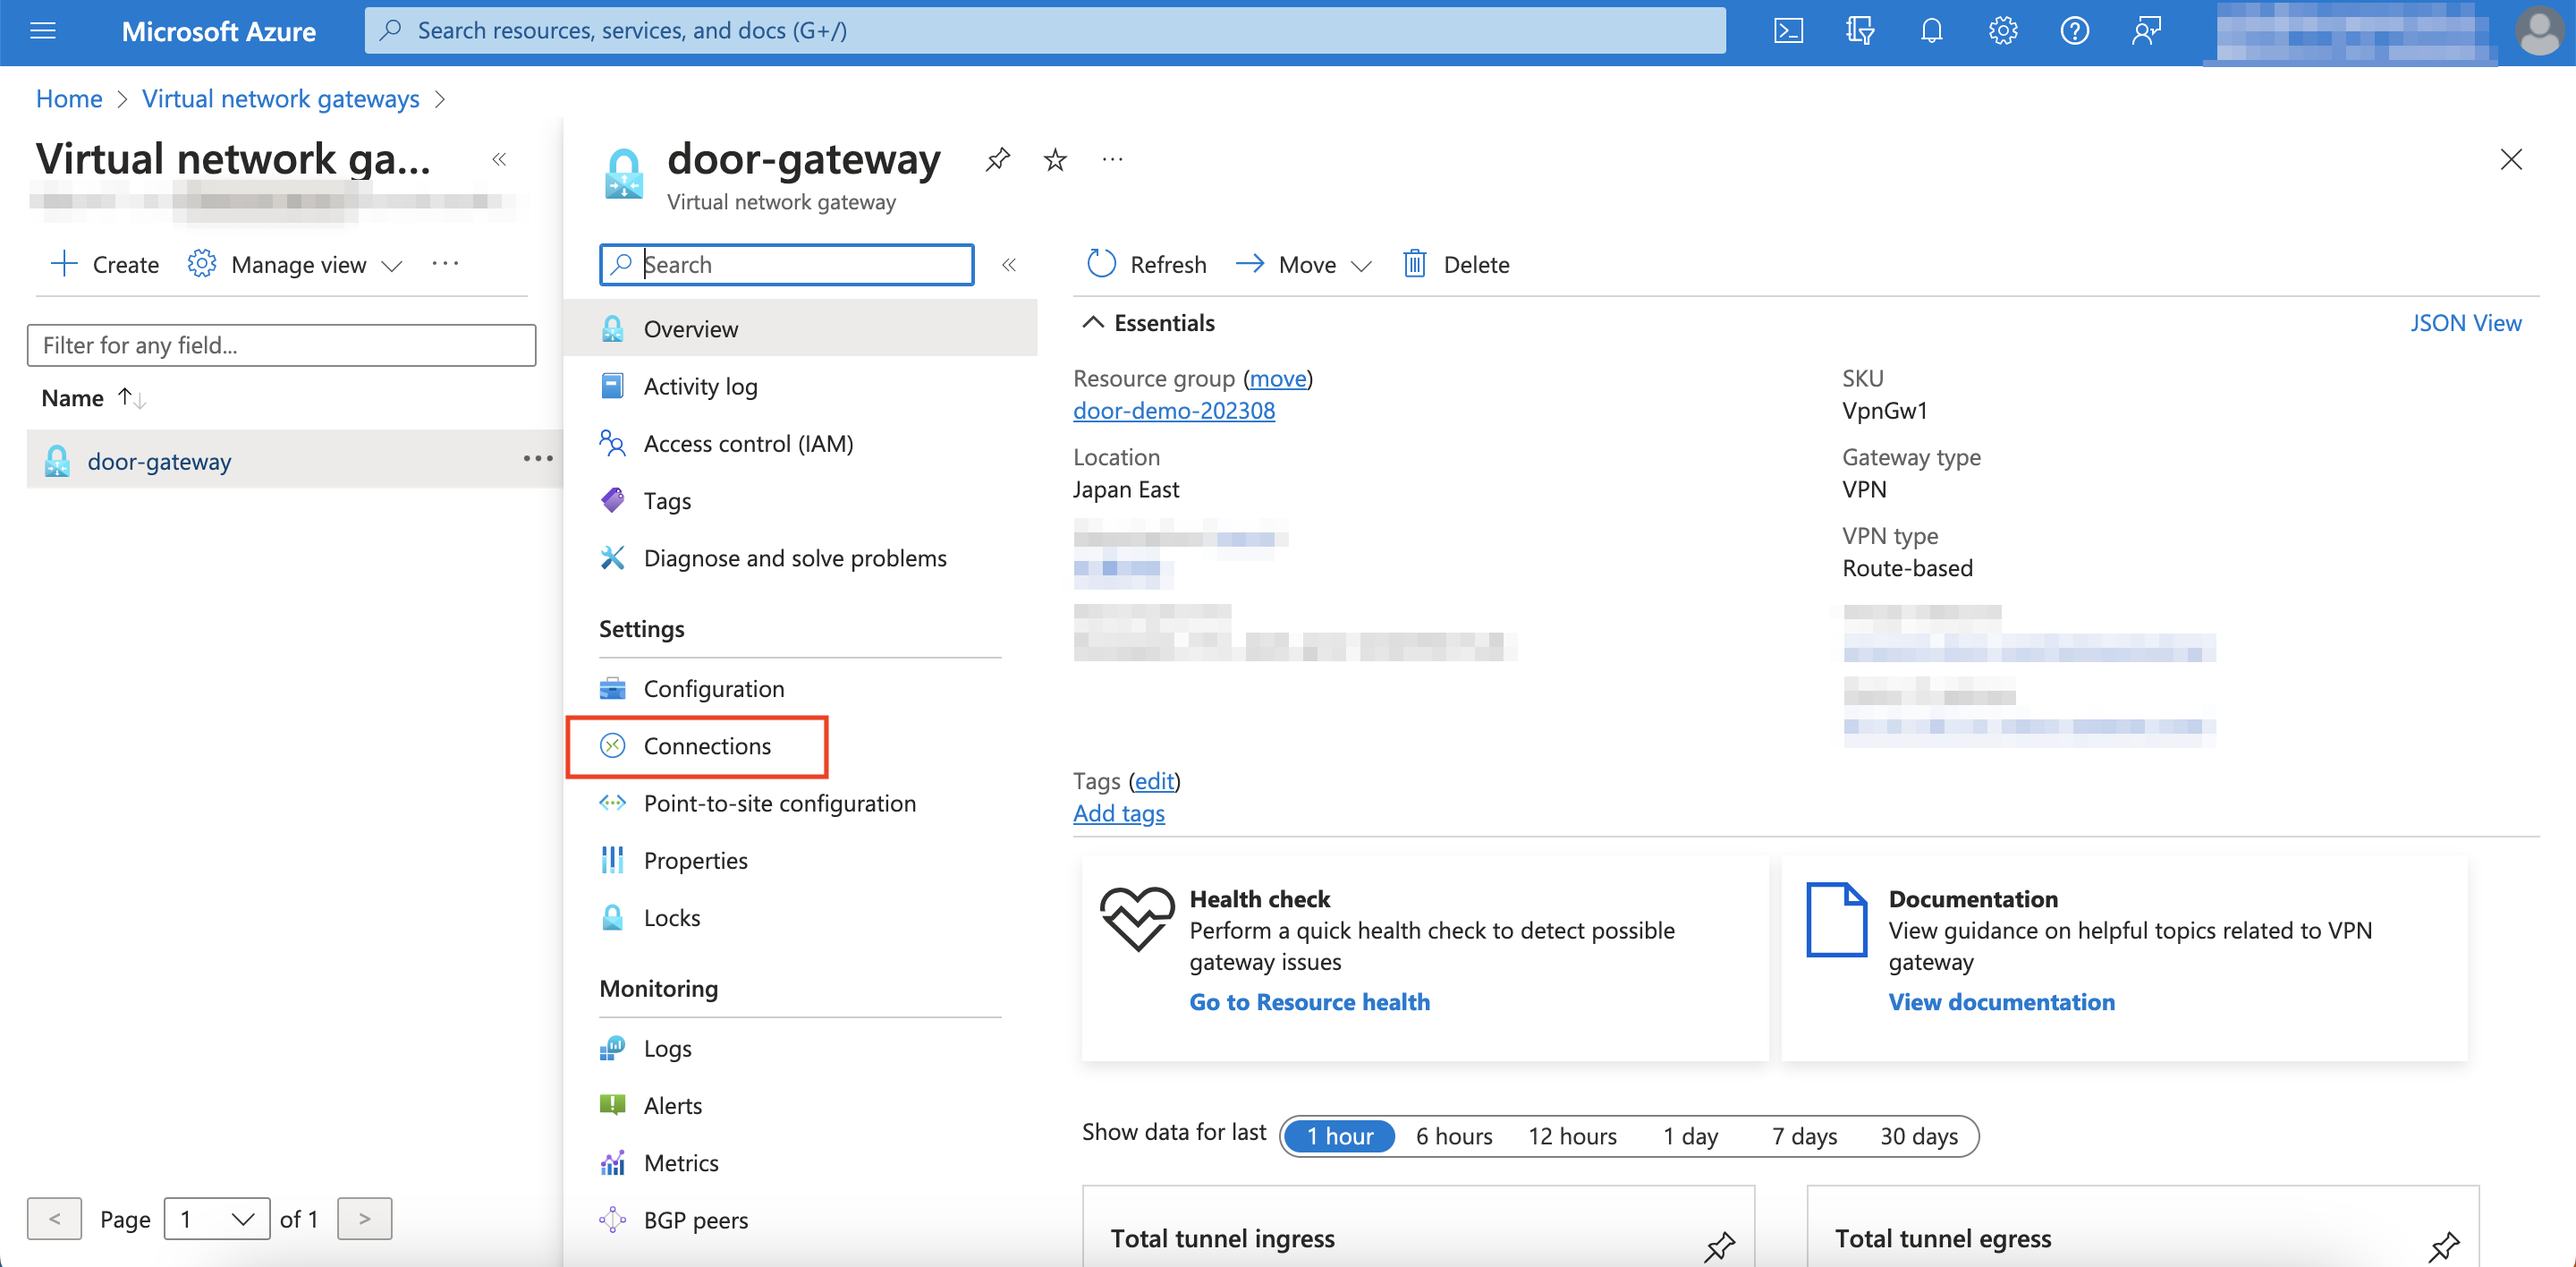
Click Connections.
-
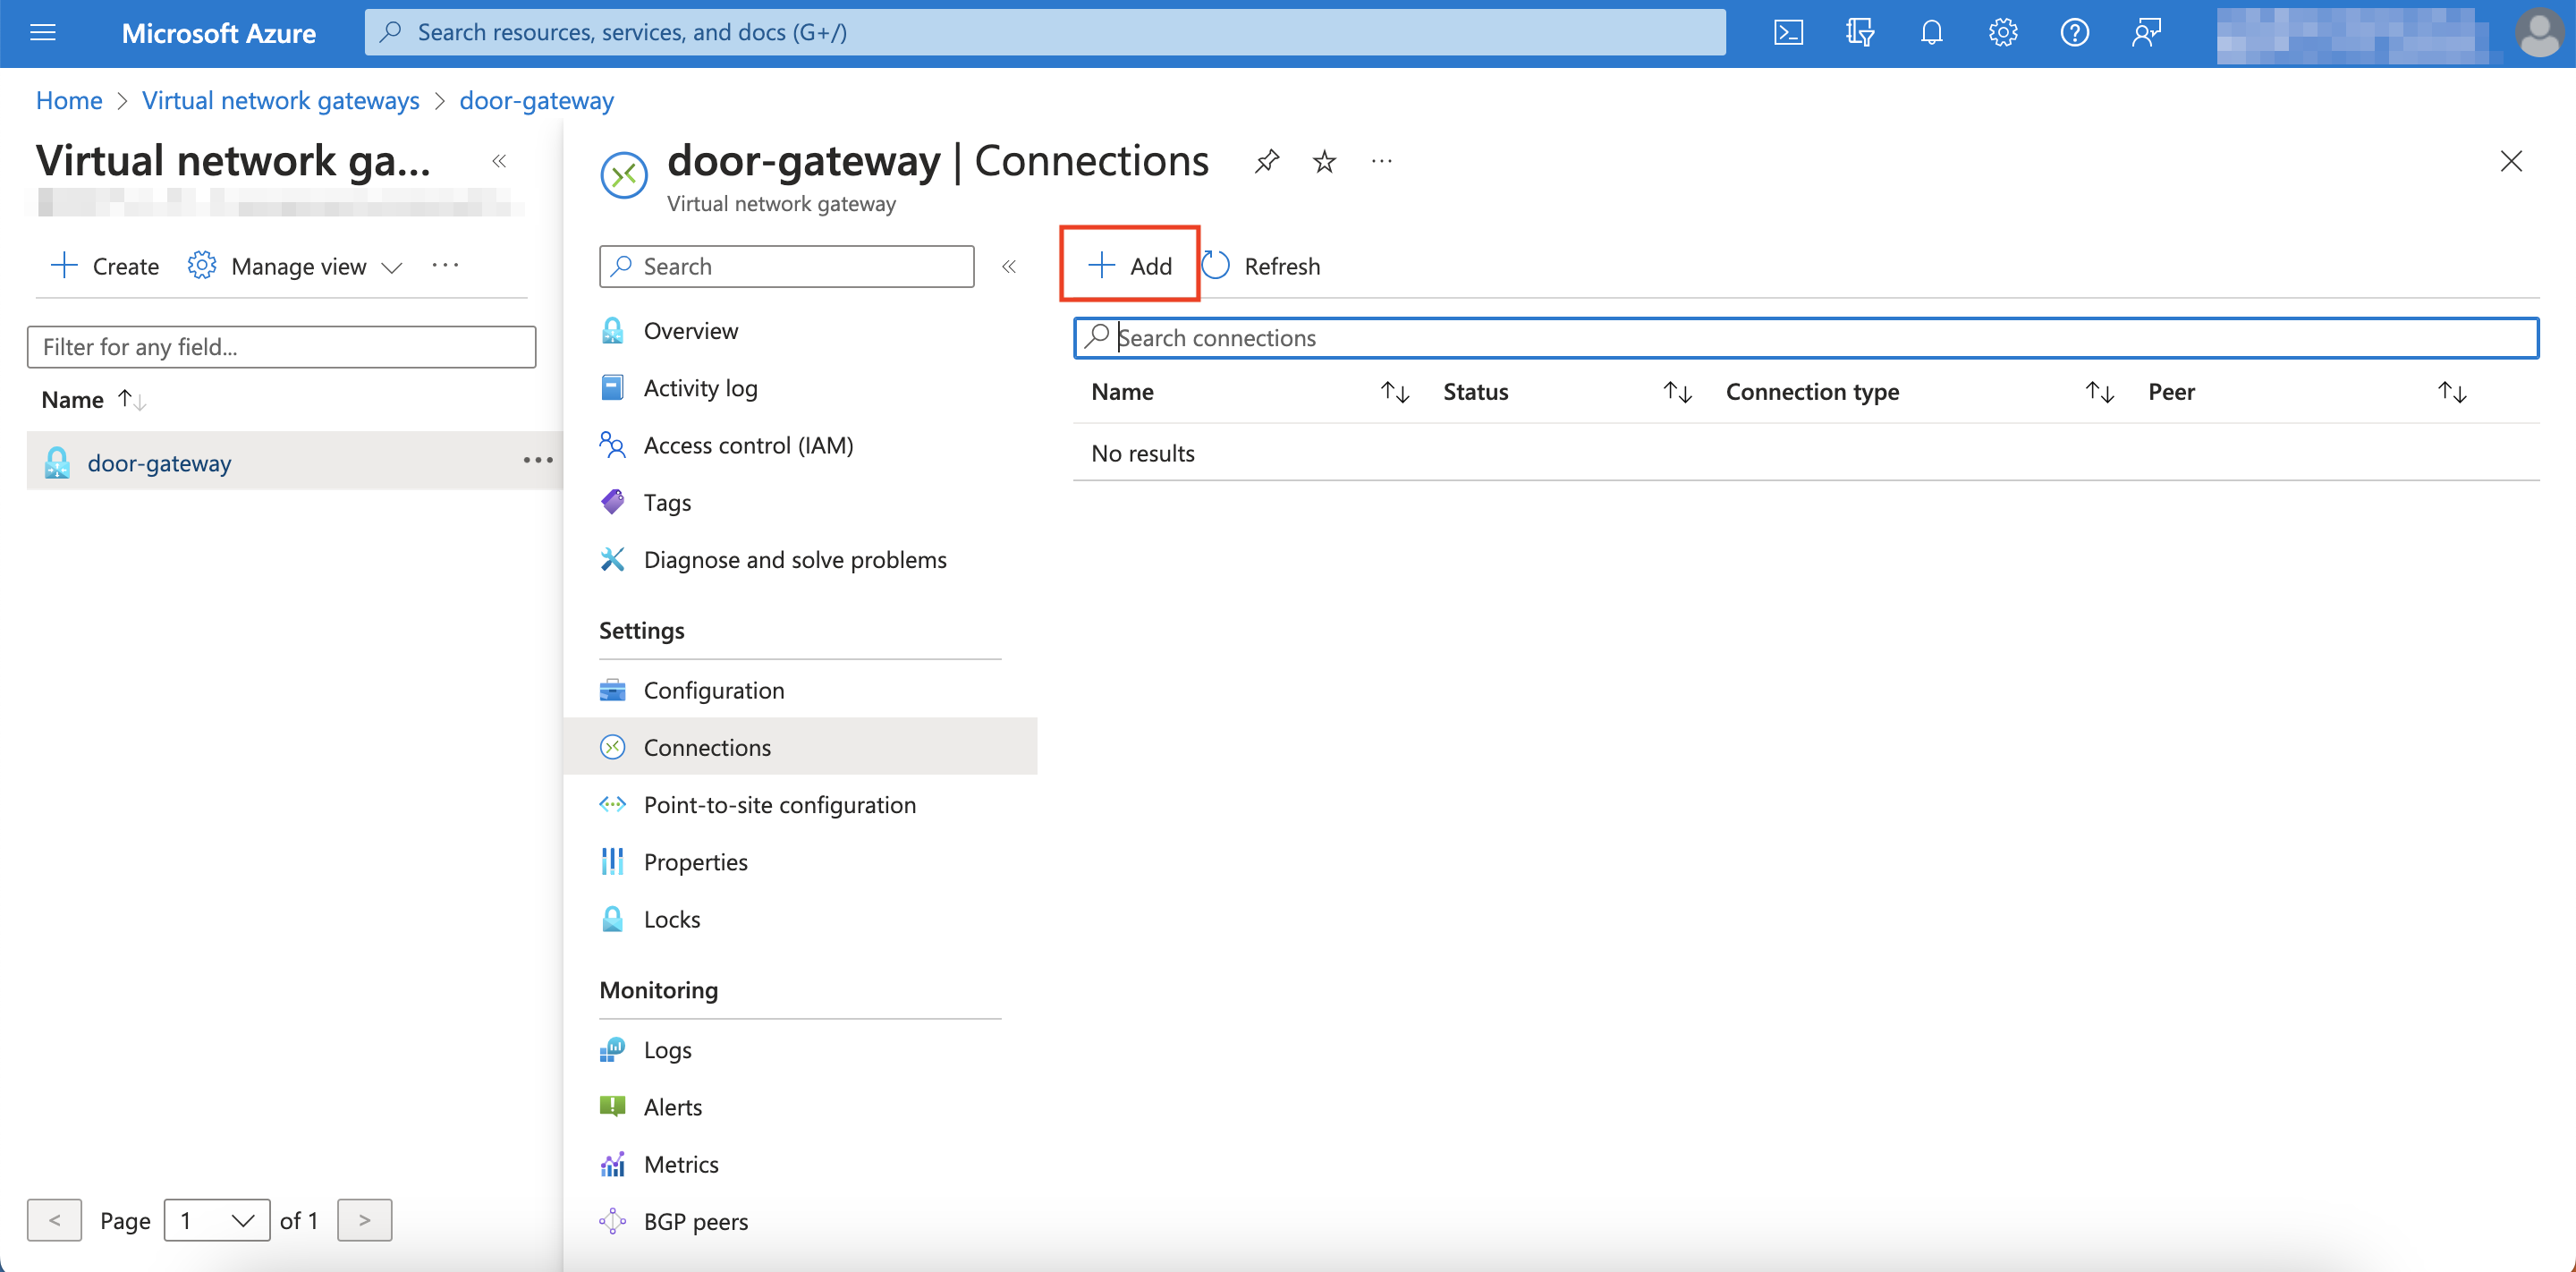
Click Add.
-
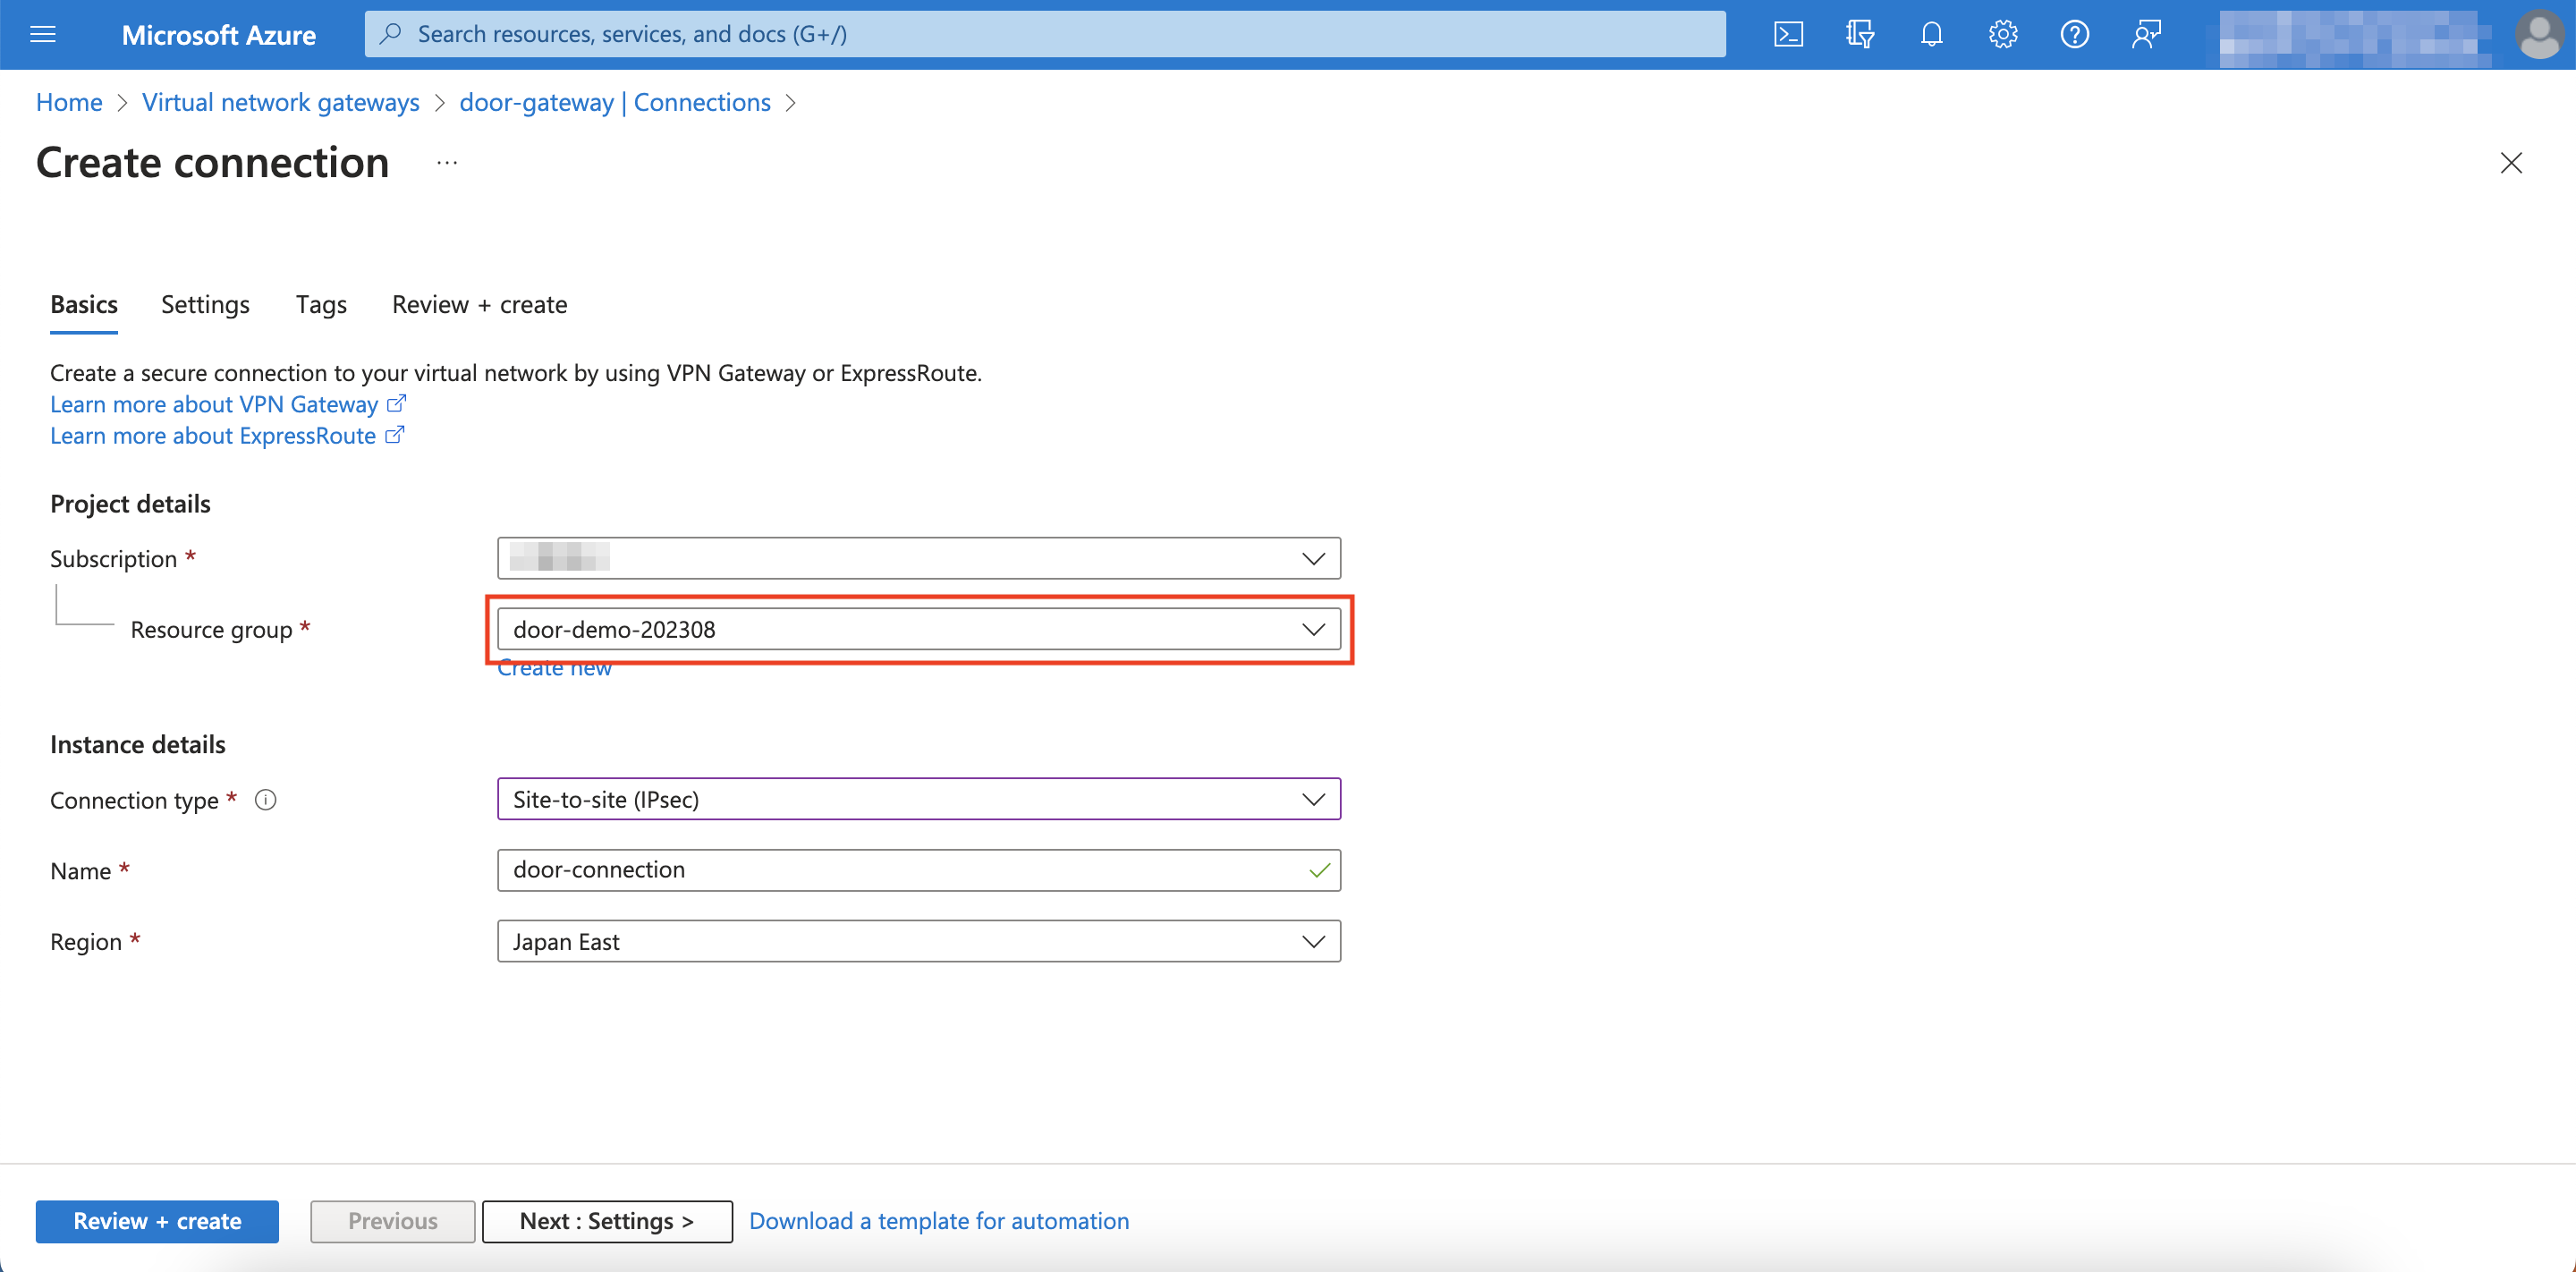
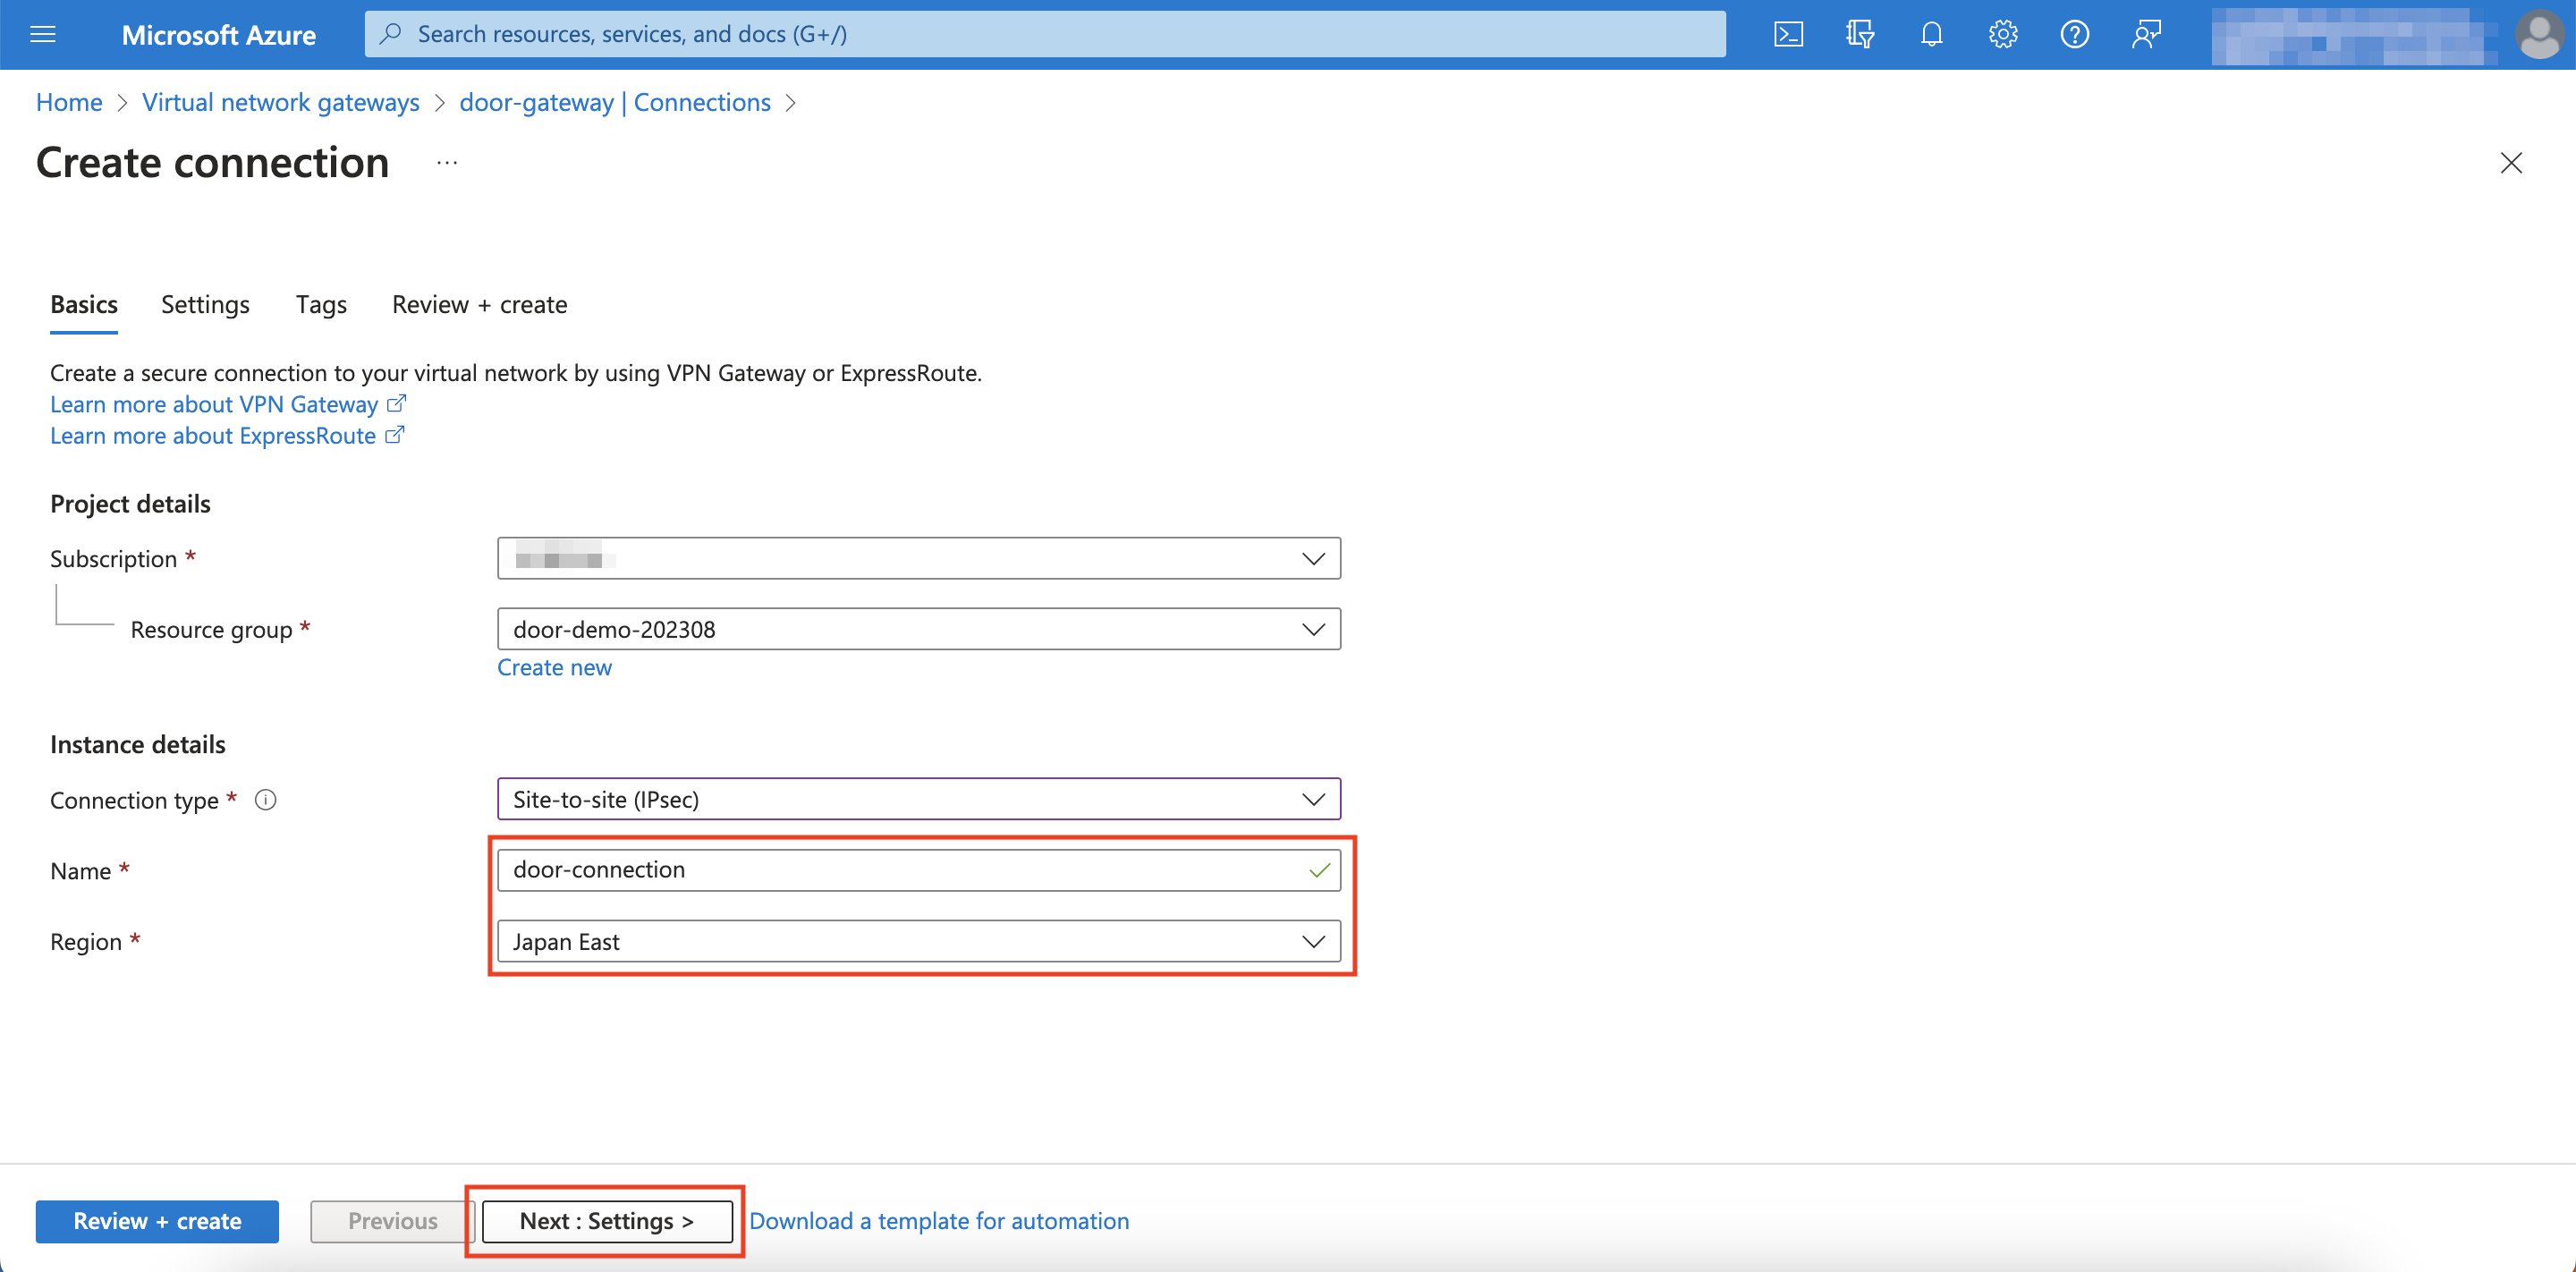
Select the same resource group you have been using from before.
-
Connection type: Select Site-to-site (IPsec).

-
Assign the same region you have been using and give the connection a recognizable name, then click Next: Settings.
-
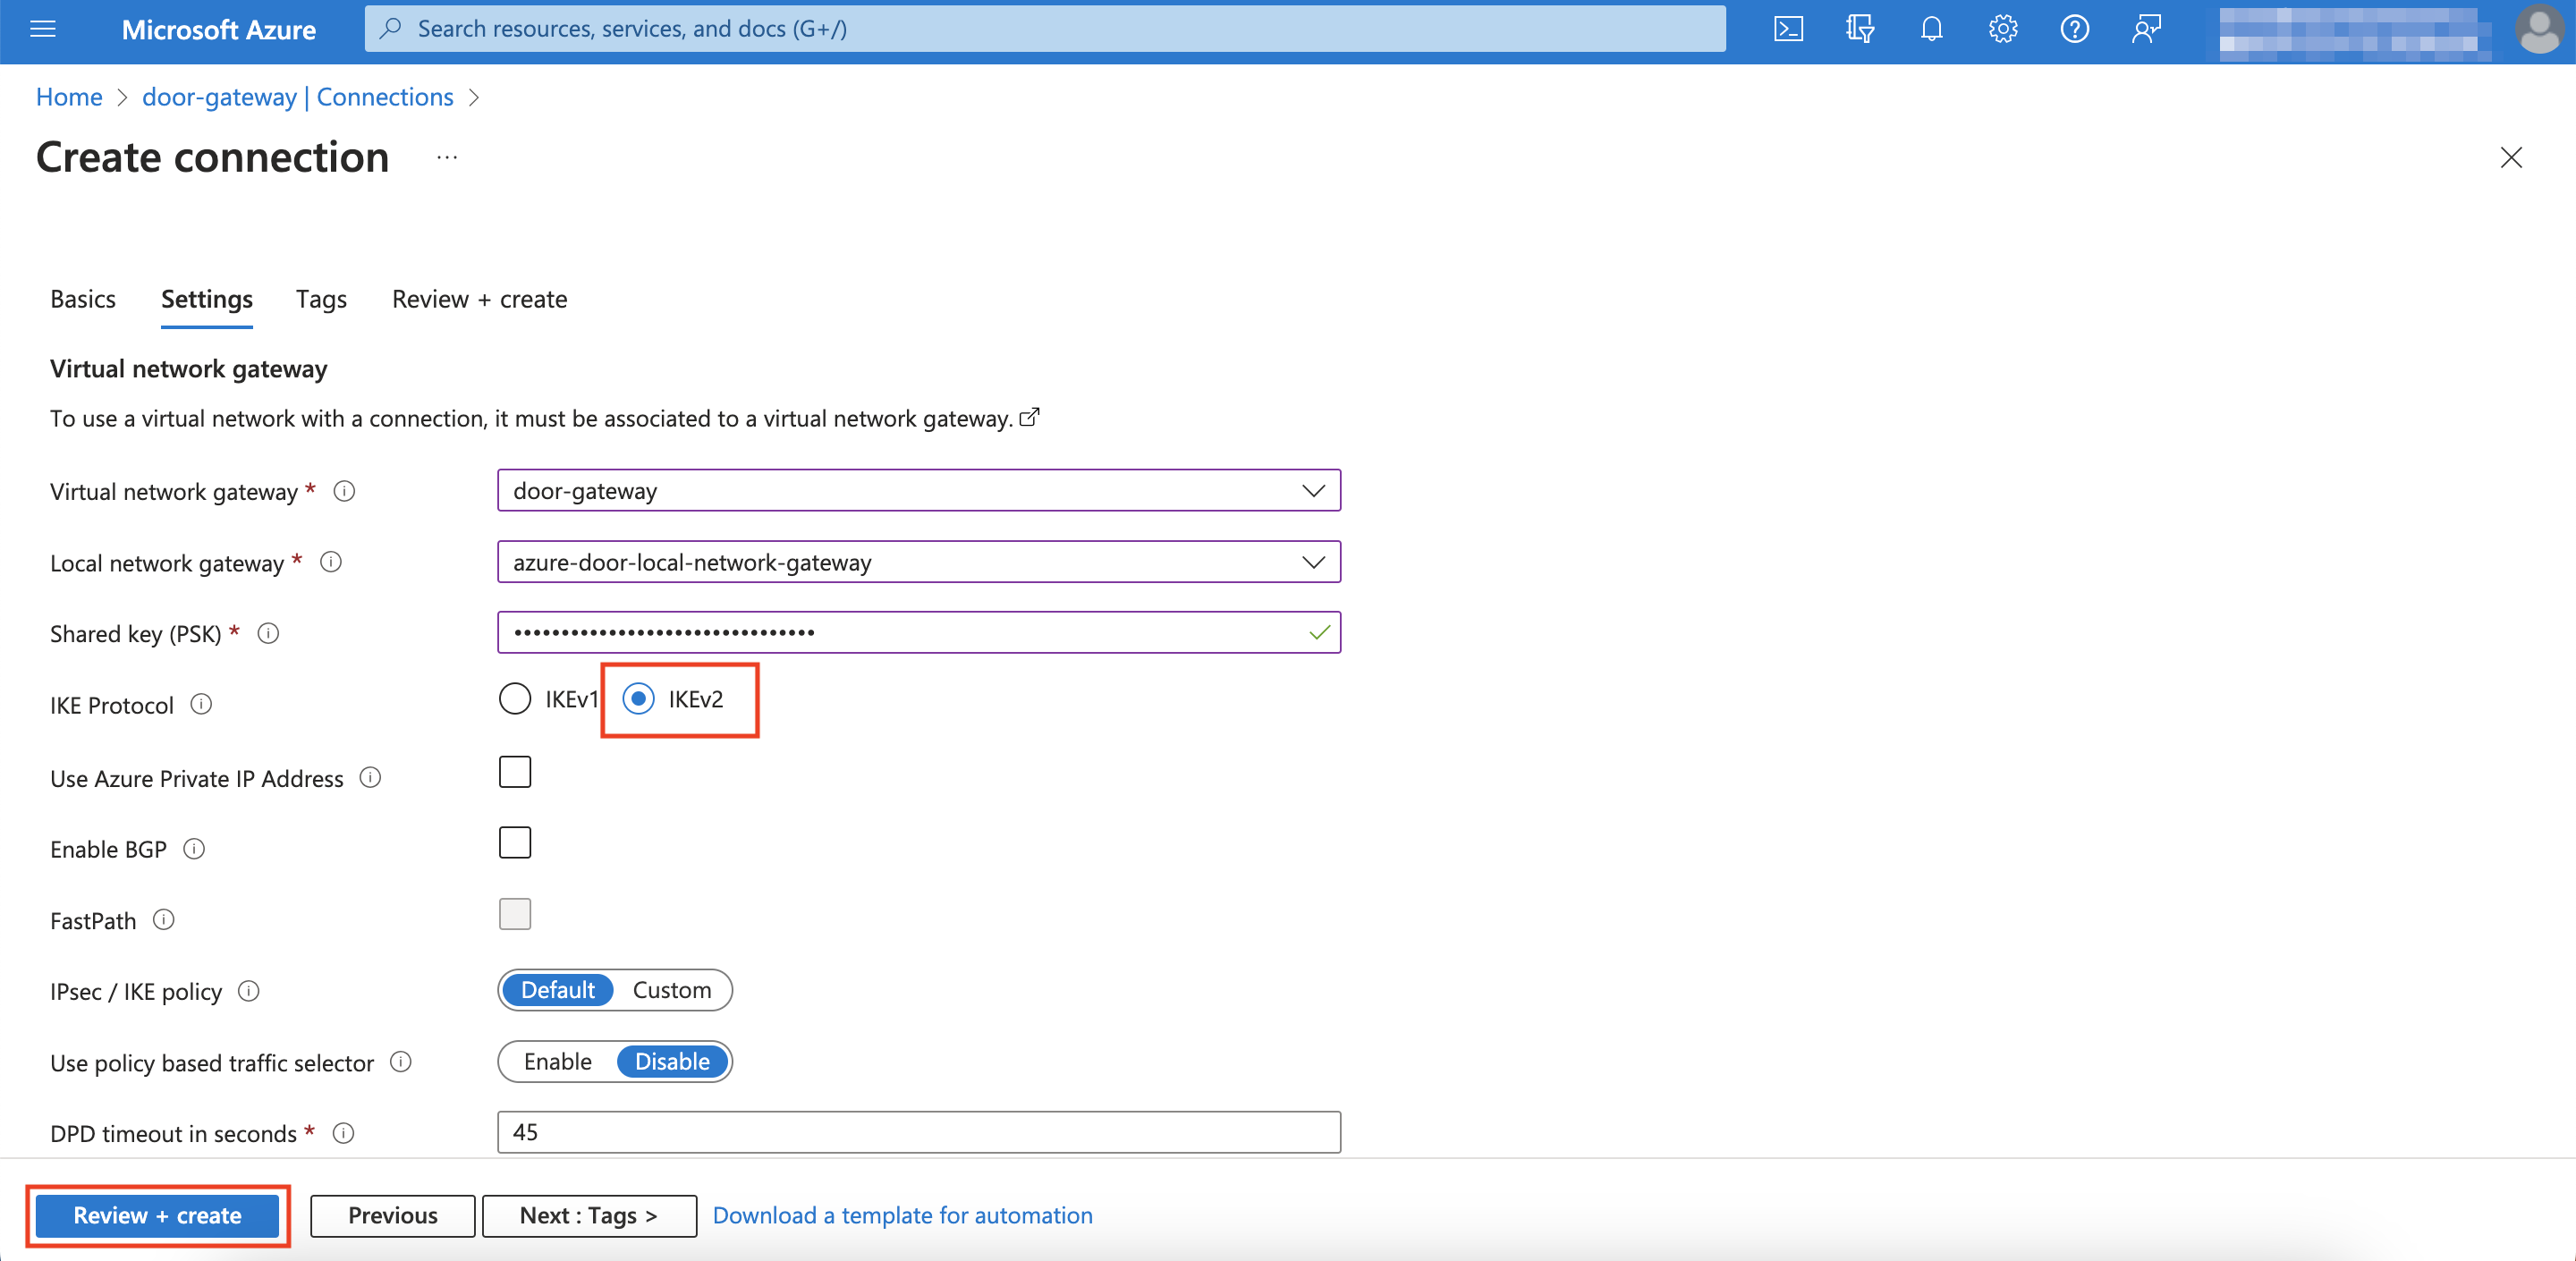
Select the Virtual network gateway from Step 1 and the first Local network gateway that you created just now.

-
Shared key (PSK): Enter the Pre-Shared Key of the first connection.
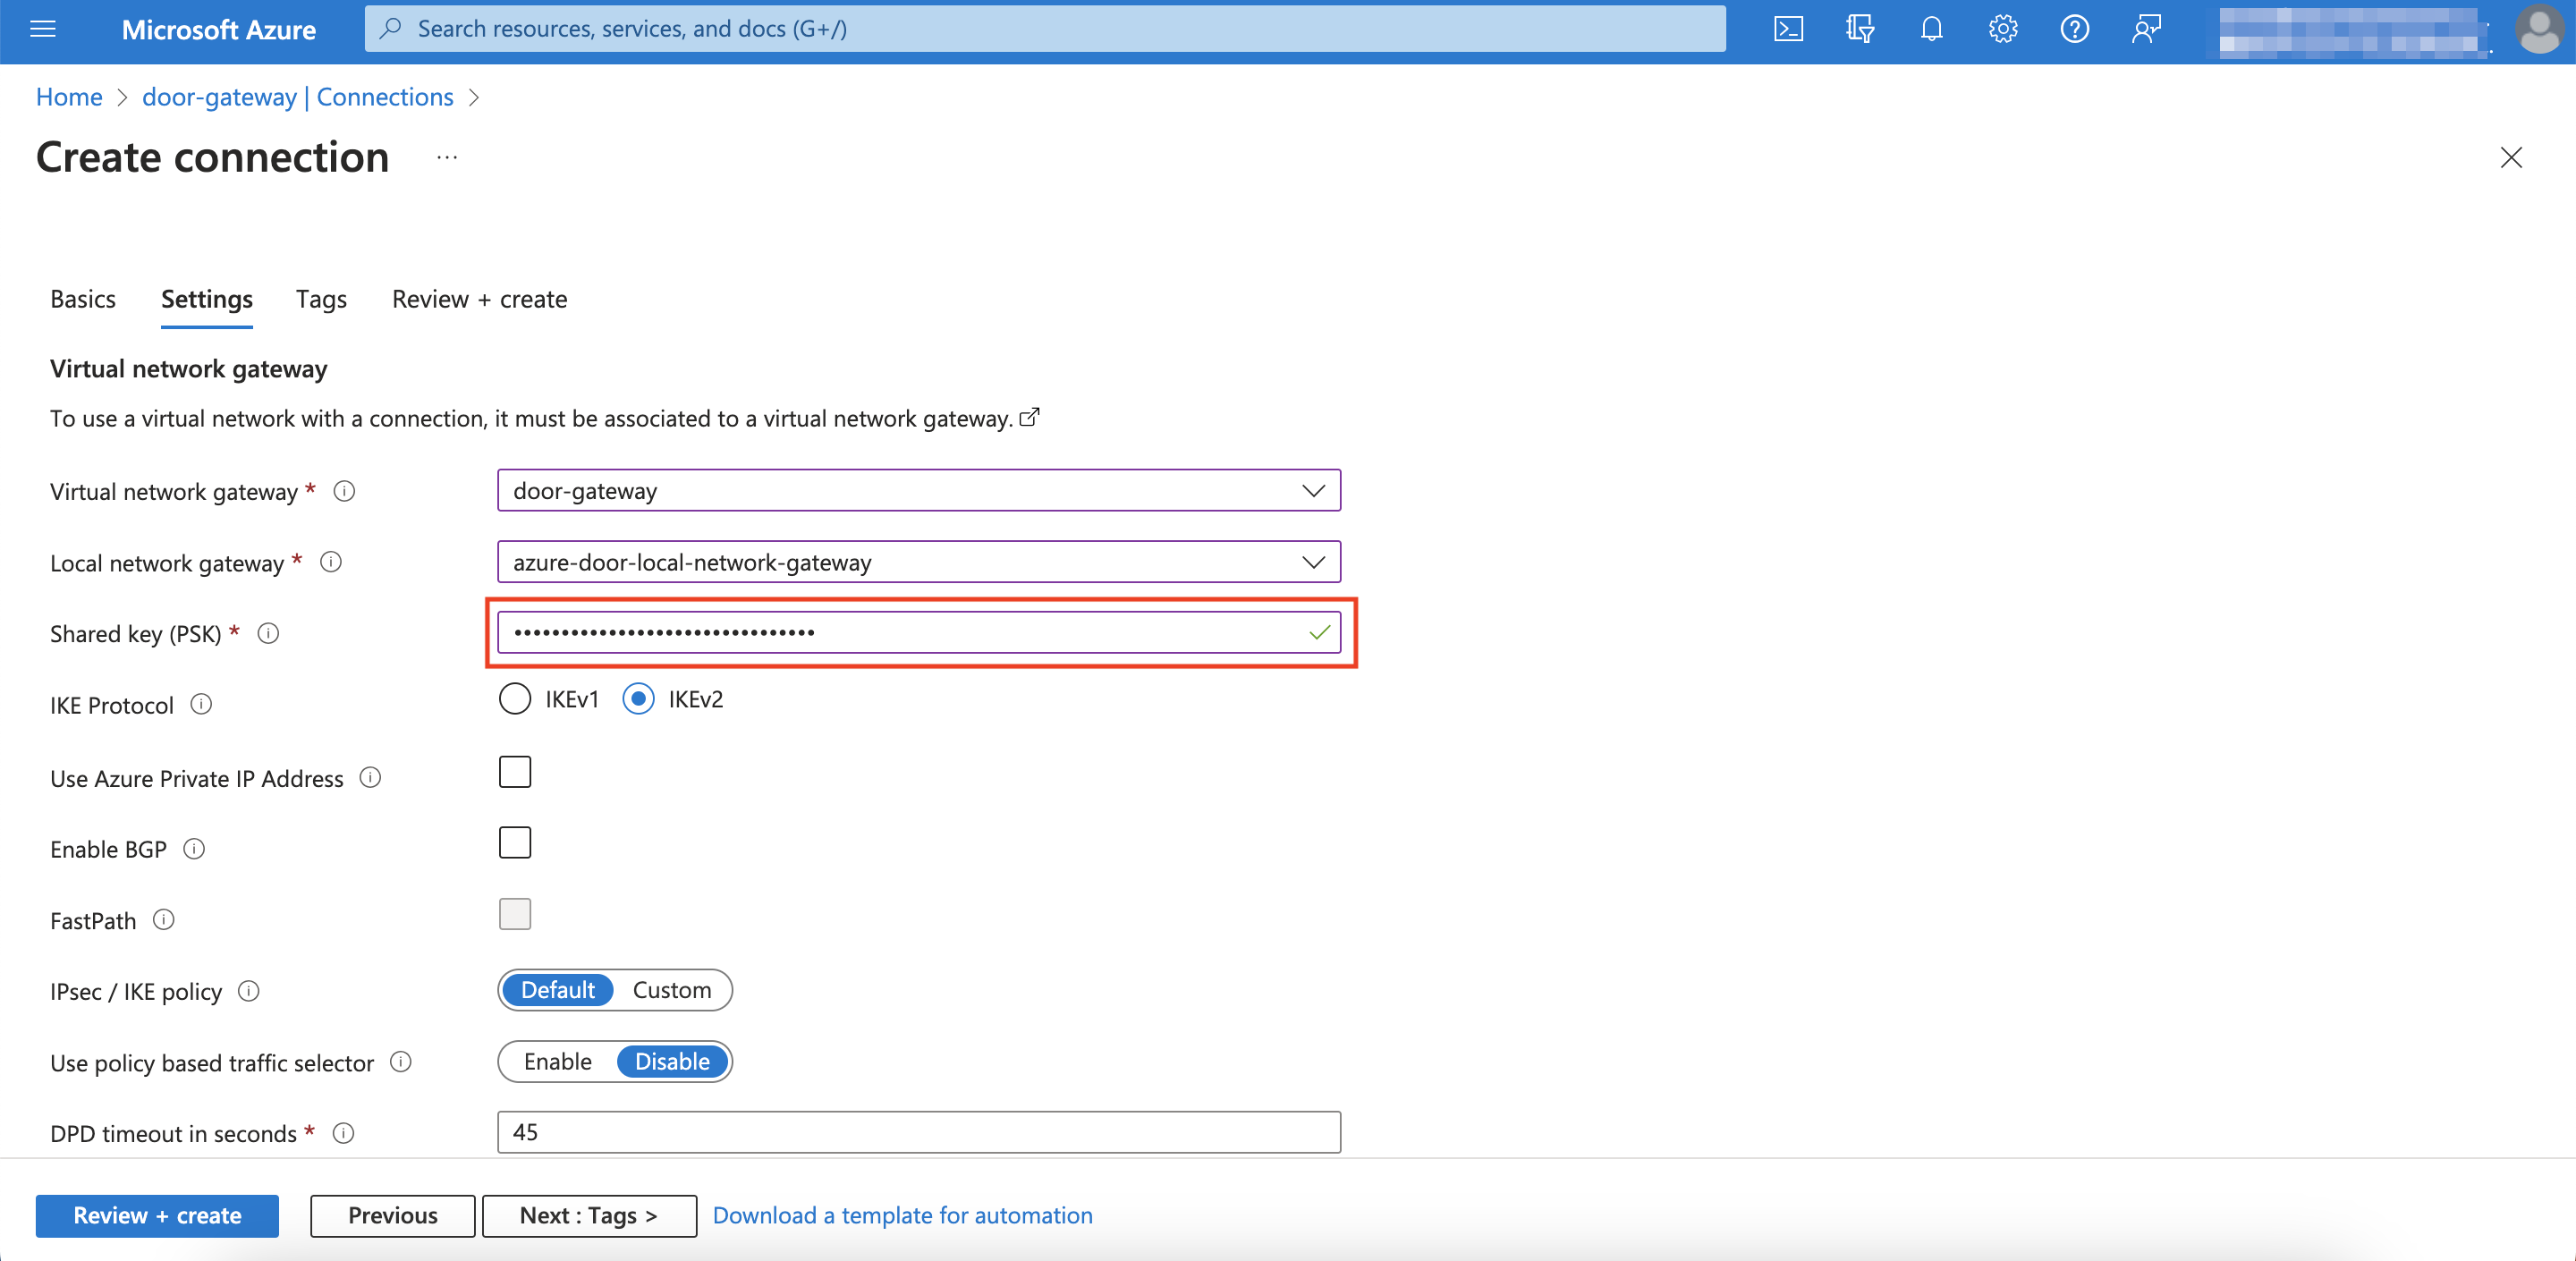
- IKE Protocol: Click IKEv2, then click Review + create.
-
Click Create.

-
Repeat these steps to add another connection, this time for the second local network gateway and the second Pre-Shared Key.
Your two connections should show Connected as you can see below.

Step 5: Attach Your IoT SIM Group to Your VPG
Now that you've finished setting up your network gateways, you must attach your device's IoT SIM to the VPG you created.
-
Sign in to your account on the Soracom Console.
-
Click the top left menu bar and click Groups.

-
Click the SIM group you would like to use.

Attaching your IoT SIM to your VPG is done at the group level. For more information on Groups and how to add your SIM plans to a group, check the Groups section in the User-Console Guide.
-
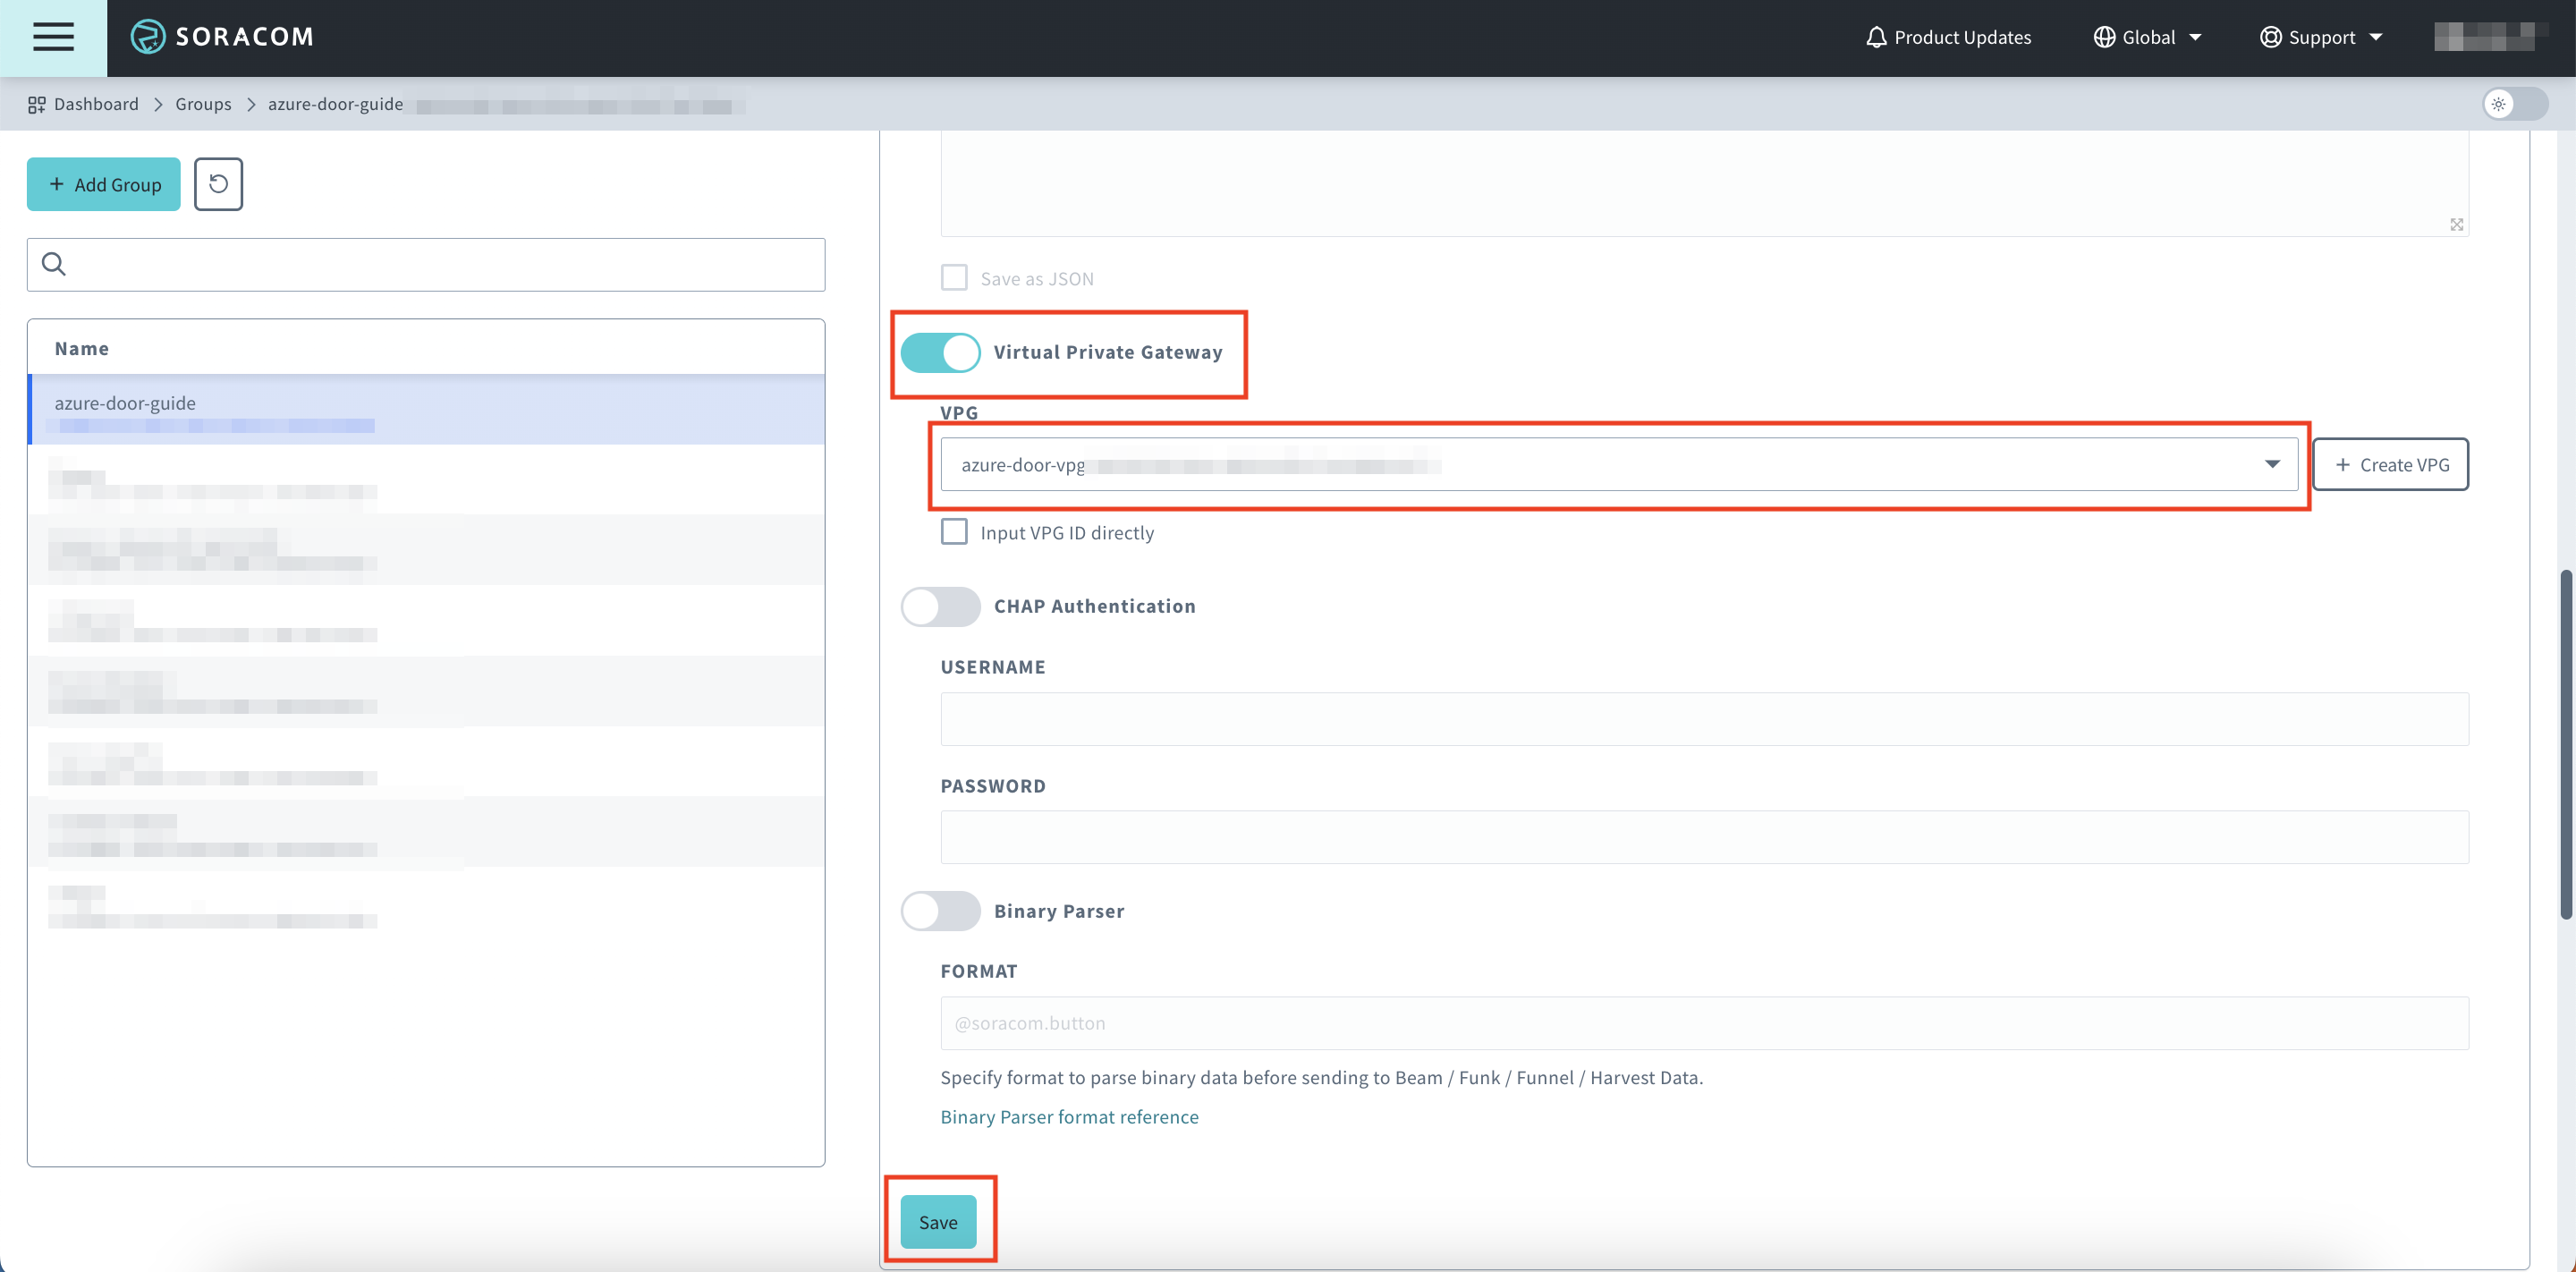
Click SORACOM Air for Cellular.

-
Scroll down and turn on the VPG setting, select the VPG you previously created, then click Save.
-
Restart all IoT SIM sessions belonging to your group, or simply restart your IoT devices.
Even if you have the right VPG attached to your SIM group in the Soracom console, you must restart the session or the device housing your IoT SIM to apply these changes.
Step 6: Connect Your Device with a Private Network
Connect your devices that use the Type-F VPG to the VM that you created in Step 1.
-
Sign in to the Microsoft Azure Portal.
-
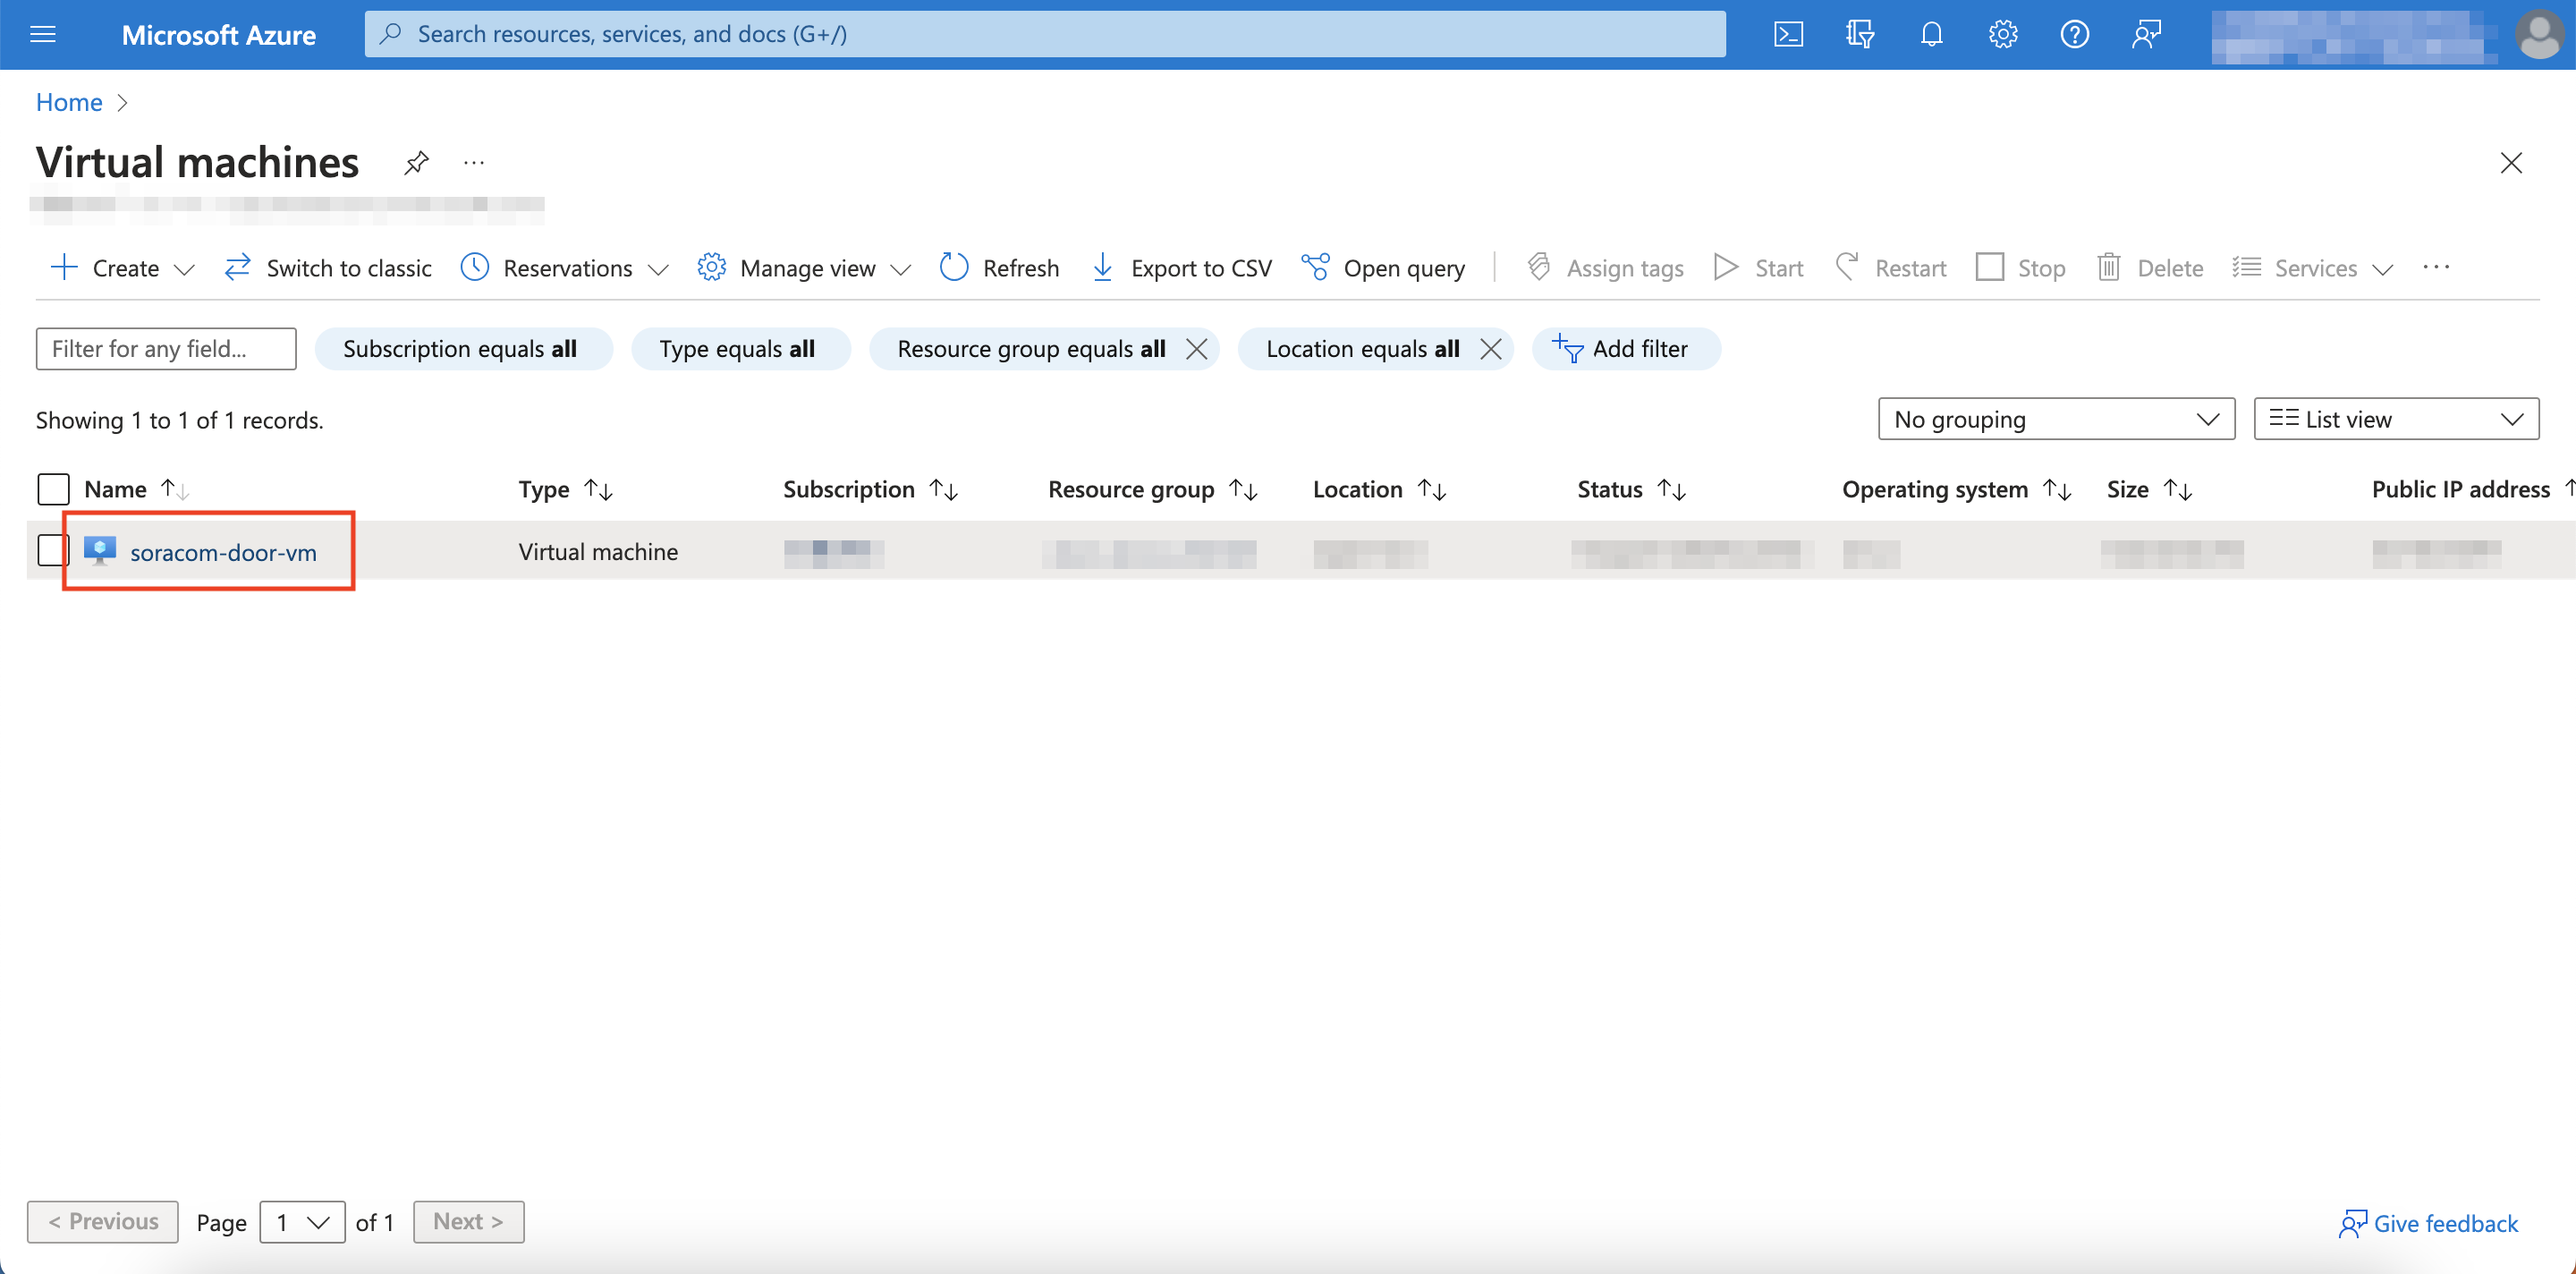
Browse and click Virtual machines as you did in Step 1.
-
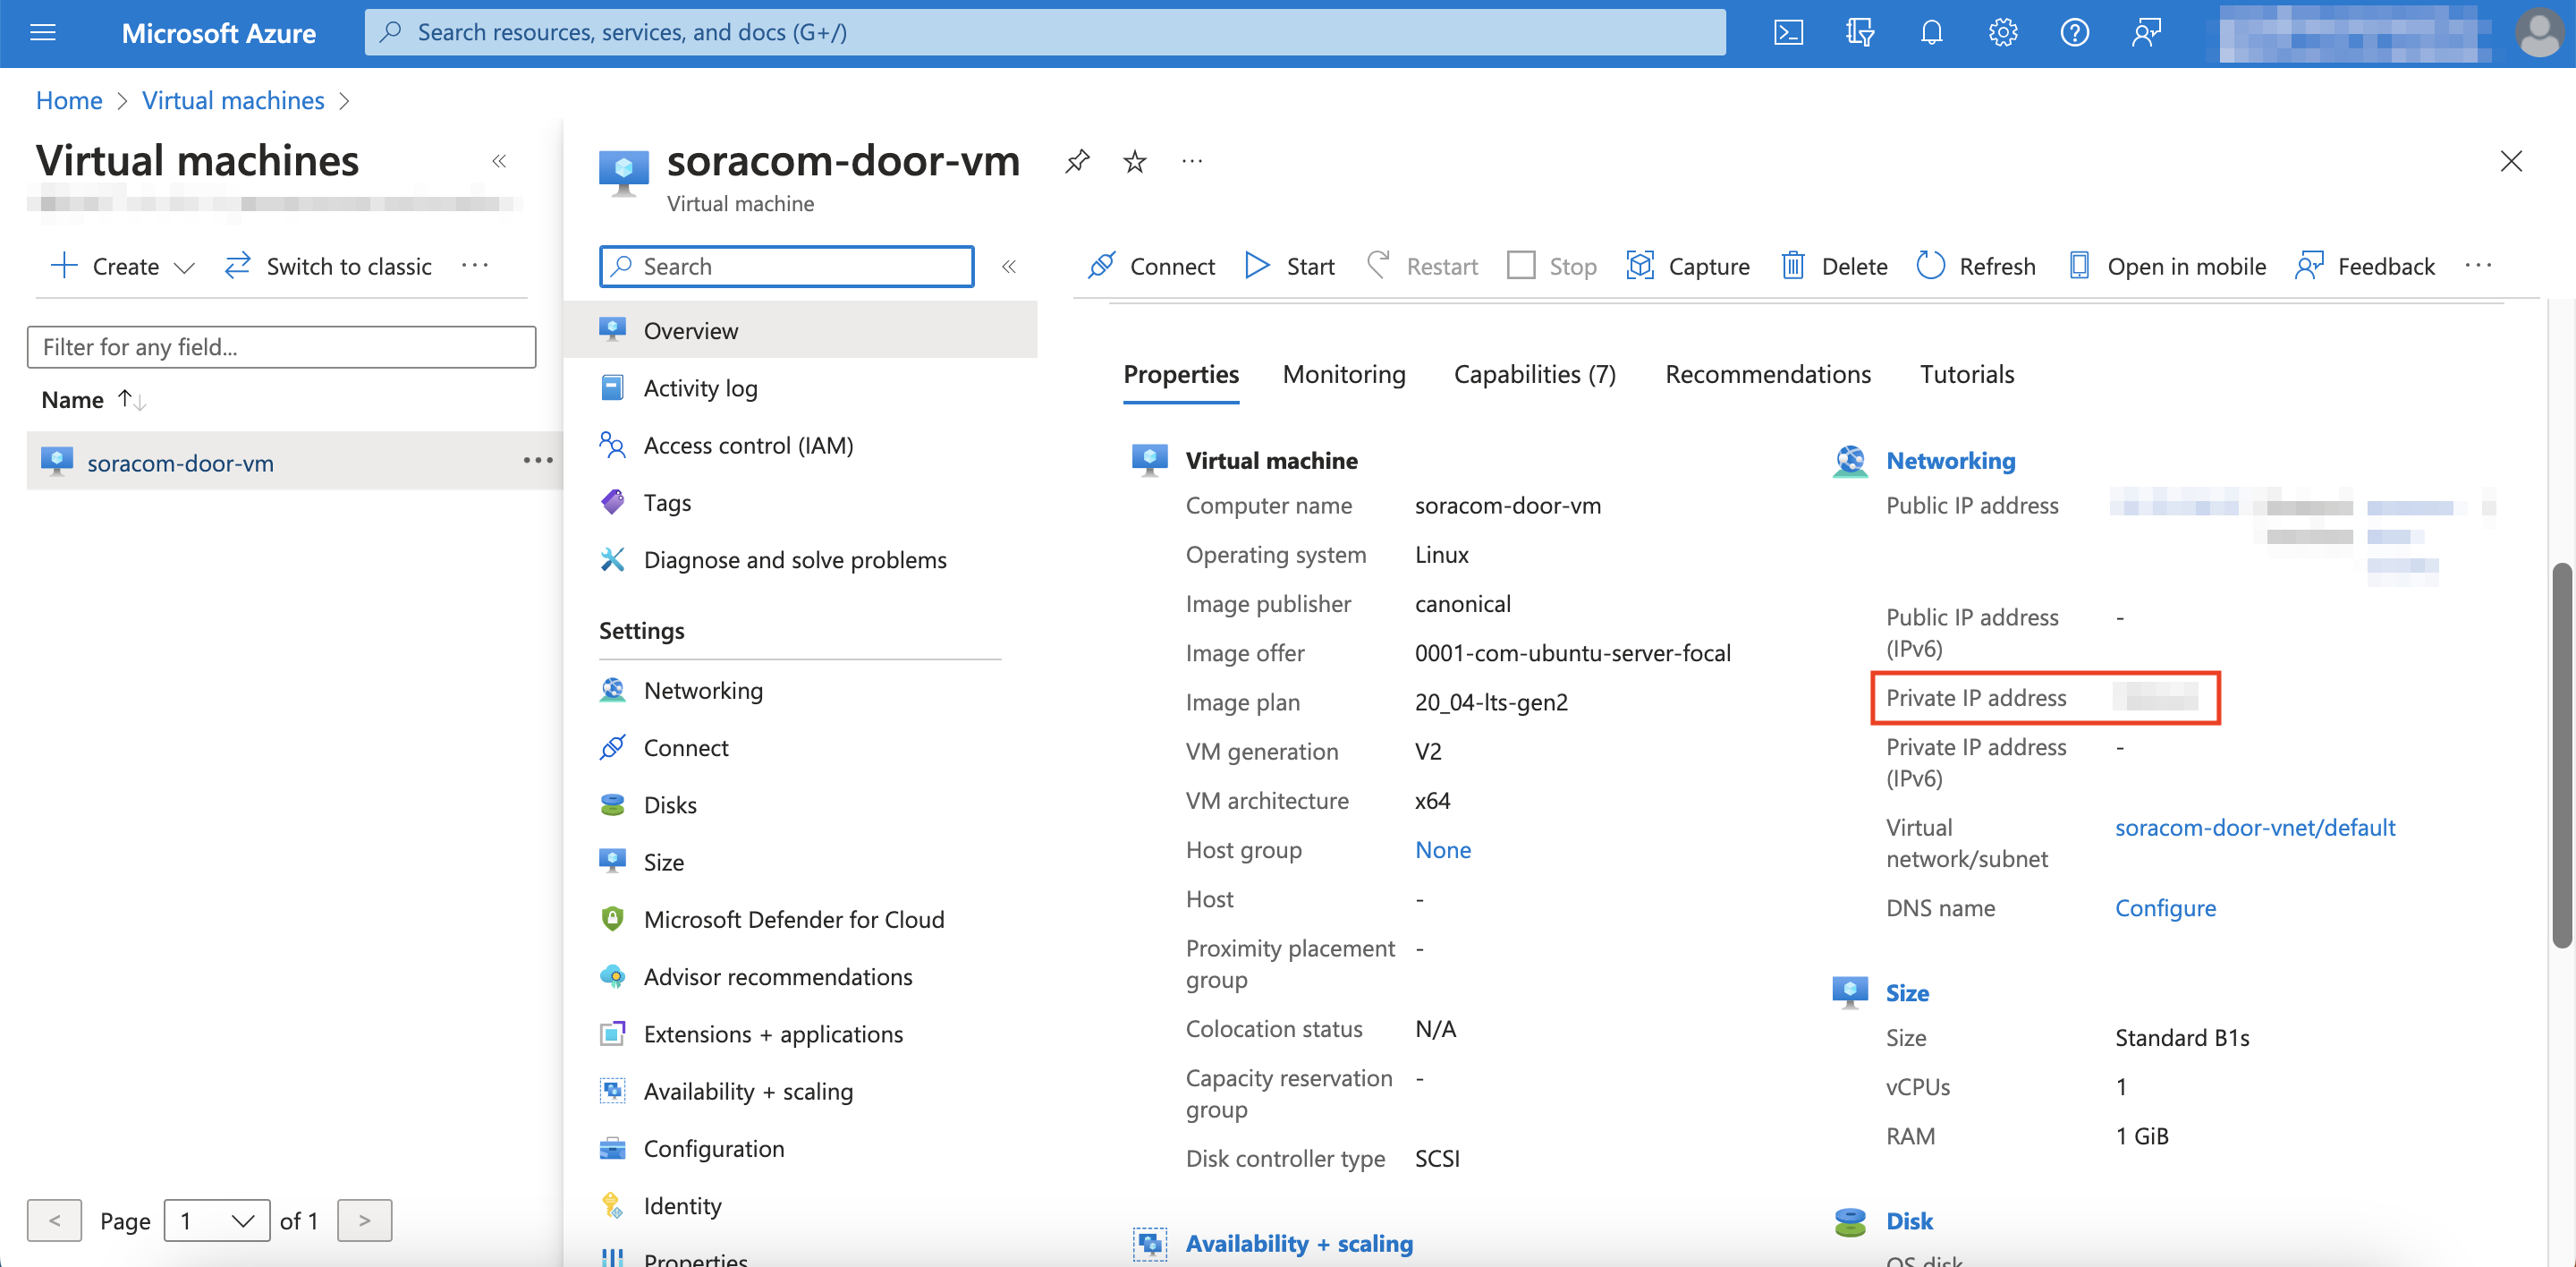
Click on the Virtual machine that you created earlier.
-
Under Properties, copy down the Private IP address.
-
Run the following command from a device that uses the IoT SIM that is registered in the group that you created earlier.
ping 10.0.0.XXX -c 4The output should look like the following
64 bytes from 10.0.0.XXX : icmp_seq=1 ttl=63 time=22.2 ms
64 bytes from 10.0.0.XXX : icmp_seq=2 ttl=63 time=16.9 ms
64 bytes from 10.0.0.XXX : icmp_seq=3 ttl=63 time=18.3 ms
64 bytes from 10.0.0.XXX : icmp_seq=4 ttl=63 time=18.1 ms
A response like this confirms that you are successfully connected to the private network.
Reference: Stop Using Soracom Door and VPN
To stop using Soracom Door and your VPN, you must delete the VPN connection and terminate your VPG.
-
Sign in to your account on the Soracom Console.
-
Click on the top left menu, then click VPG.
-
Click the VPG corresponding to the connection you want to terminate.
-
Copy and save the VPG ID.
-
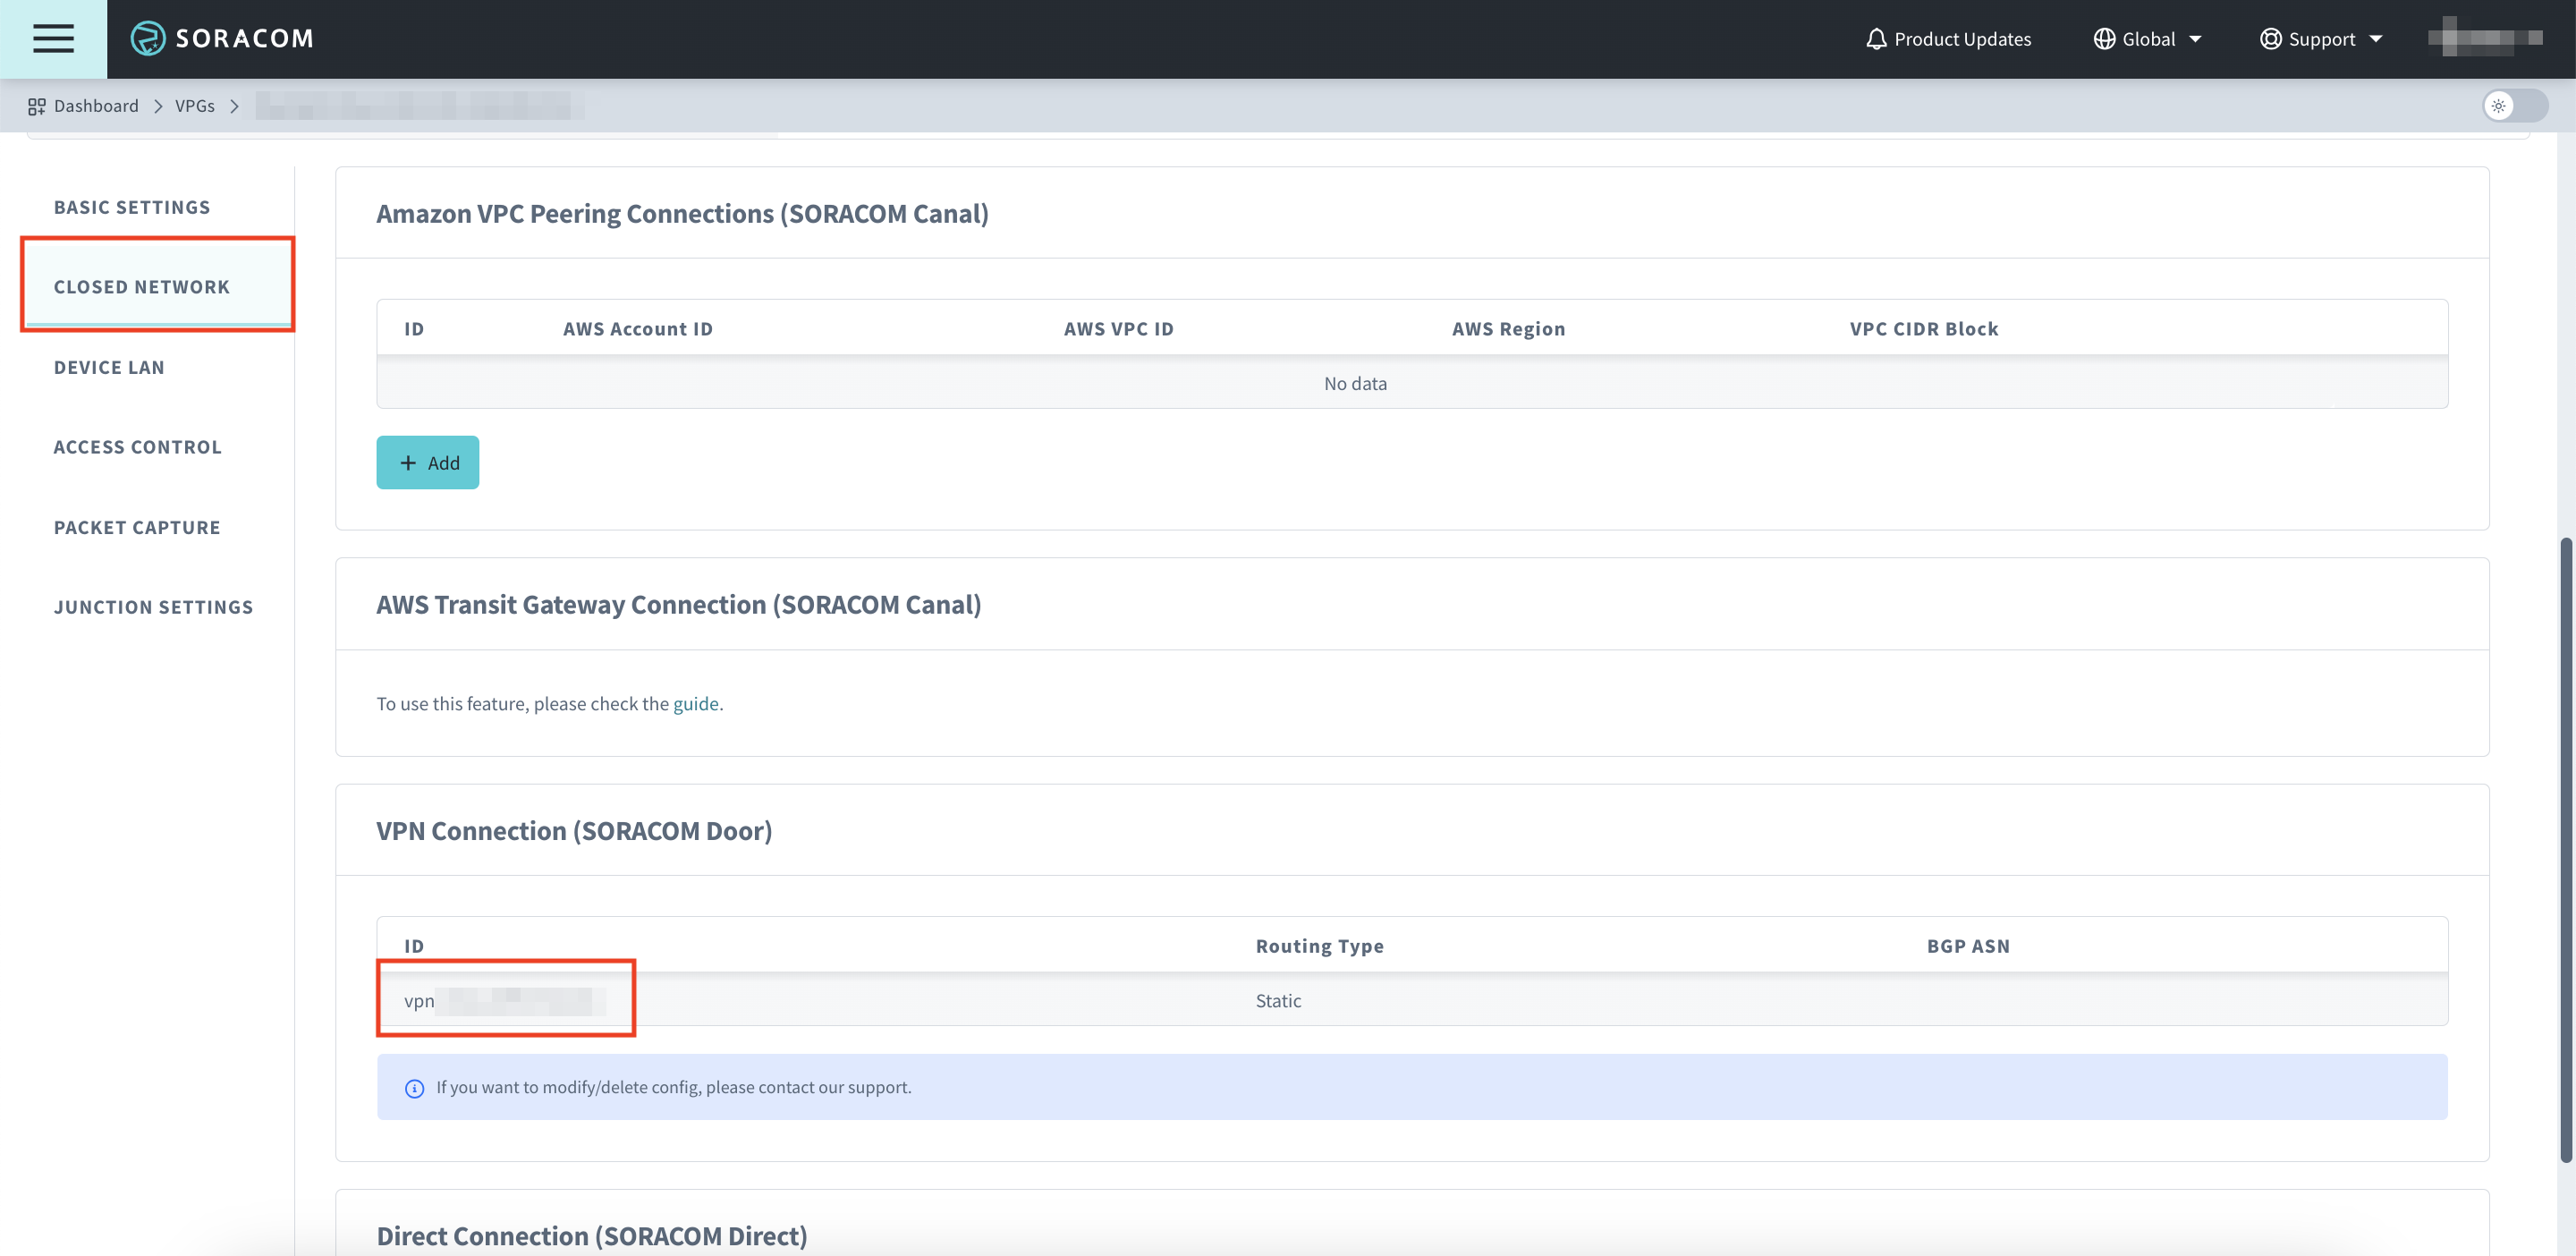
Click CLOSED NETWORK.
-
Scroll down to VPN Connection (SORACOM Door) and save the VPN ID.
-
Contact Soracom Support with the following information:
- Indicate that you are looking to terminate your VPN connection using Door.
- Your VPG ID
- Your VPN ID
The Soracom Support team will reach out to you regarding the termination of your VPN connection.
- Once your VPN connection has been terminated, you can safely remove your IoT SIM group from the VPG and terminate your VPG.