Actions
Actions can be added to channels to conditionally process the event messages received from an event source or other channels. Multiple actions can be added to a channel, and using Action Conditions, each action conditionally executes depending on the input data. In the example below, we can see a Flux App that conditionally triggers three actions when a file is uploaded to Soracom Harvest Files.
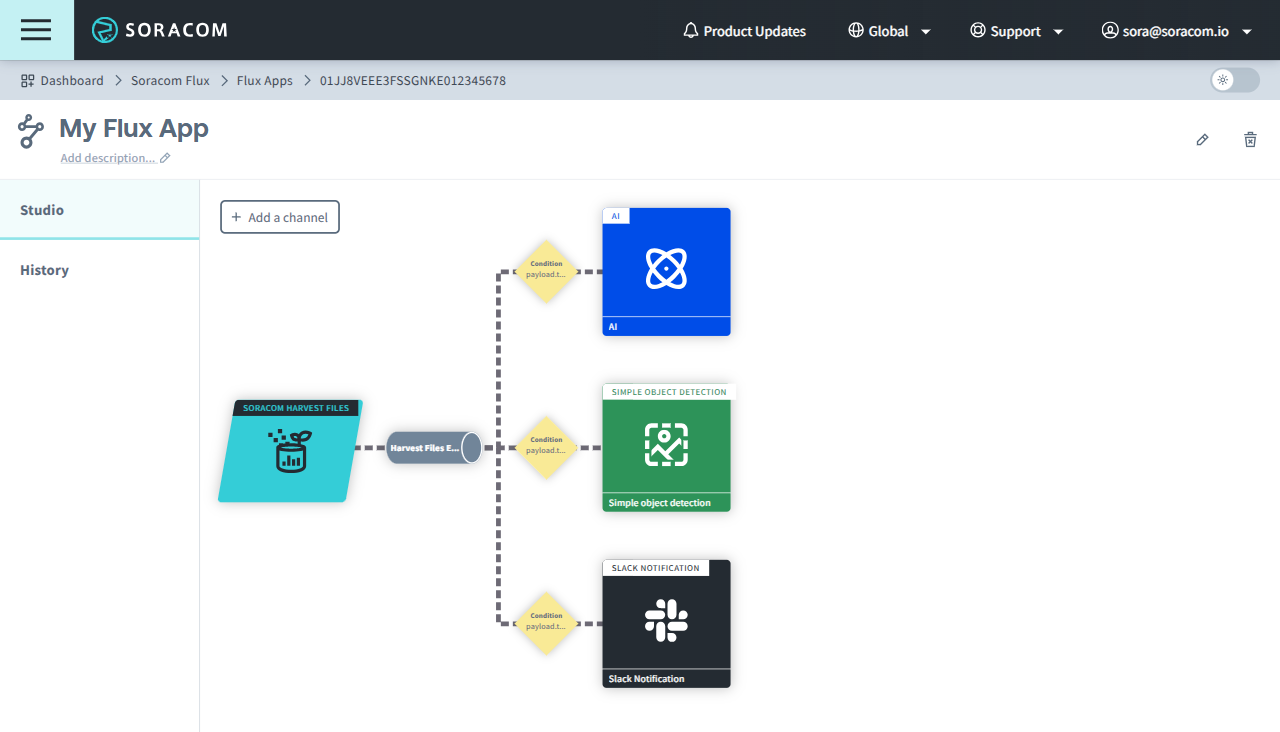
Each Flux App can support up to 10 Actions.
Add an Action
To add an action to a channel:
-
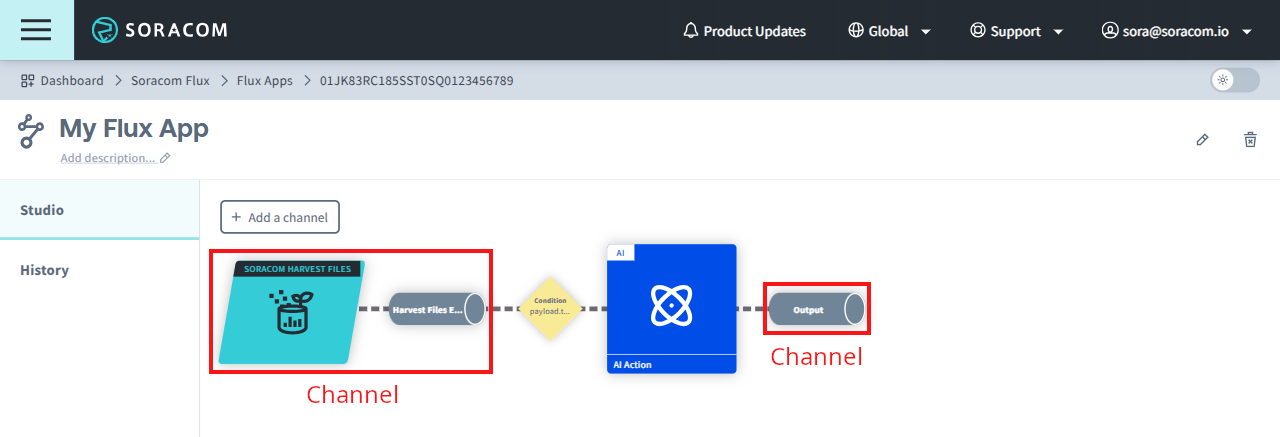
Select the Studio tab of the Flux App in Soracom Flux Studio and click on the channel where you want to add an action.
-
Click on the Actions tab and then Add Action.
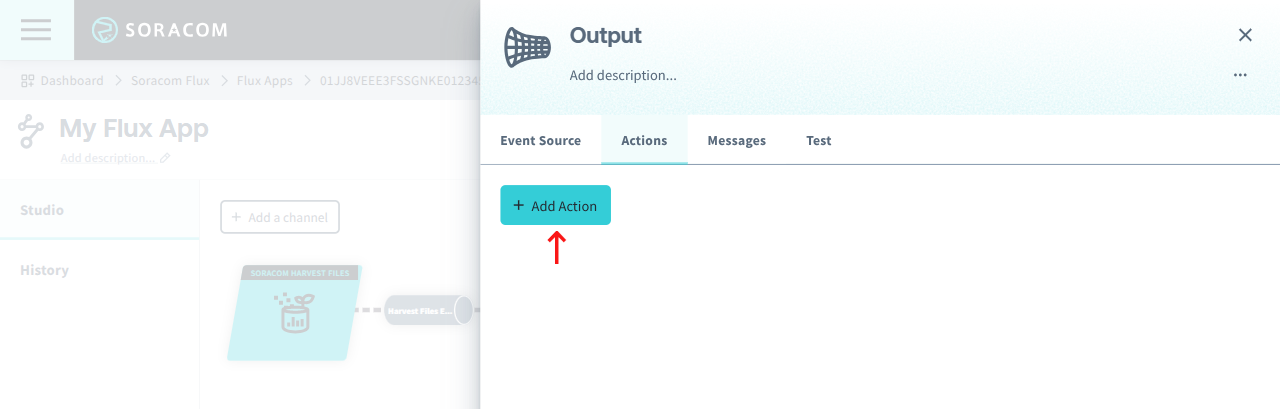
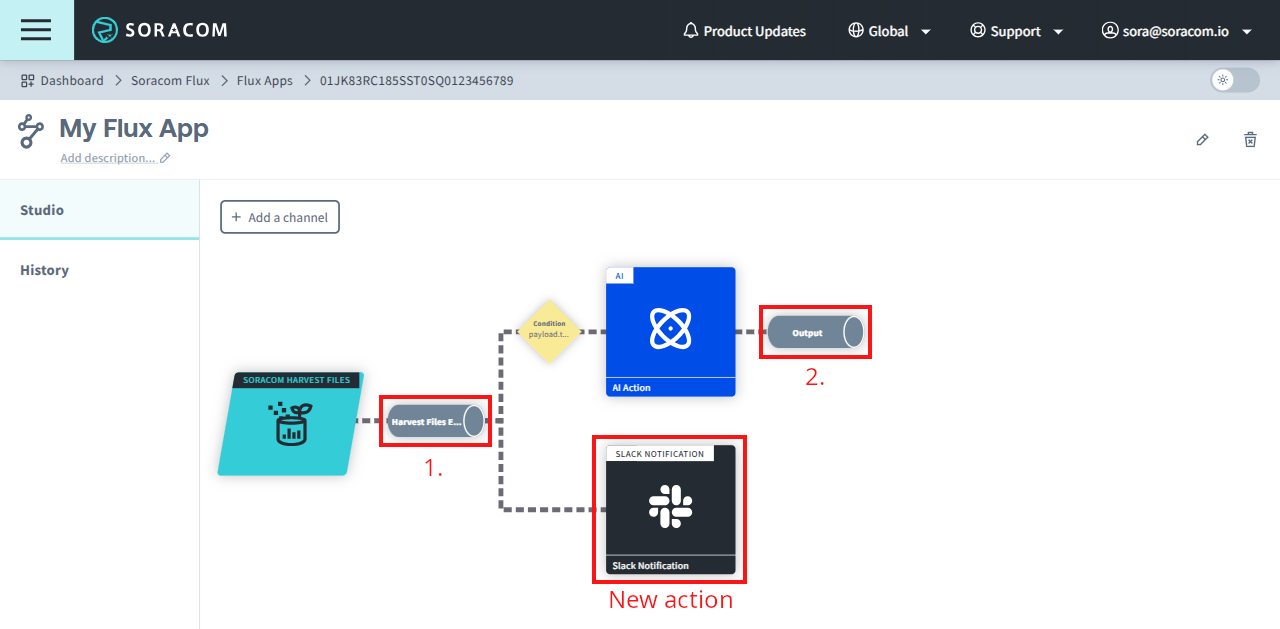
- Adding more than one action to a channel allows you to branch the process.
- You can also add actions to channels that have no actions attached.
-
Select the action and click OK.
- AI: Specify an AI model and prompt to instruct or query the AI model, and send the response to the next channel. For more details, refer to AI Action.
- Soracom API: Invoke the specified Soracom API. For more details, refer to Soracom API Action.
- Republish: Convert the input data and send it to the next channel. For more details, refer to Republish Action.
- Simple Object Detection: Perform simple detection of objects in a still image and send the object-related information to the next channel. For more details, refer to Simple Object Detection Action.
- Webhook: Send an HTTP request to a specified URL. For more details, refer to Webhook Action.
- Slack Notification: Send a message to the specified Slack Incoming Webhook URL. For more details, refer to Slack Notification Action.
- Email Notification: Send an email to the specified email address. For more details, refer to Email Notification Action.
- RTSP Camera Image Action: Acquires a still image from an RTSP (Real-Time Streaming Protocol)-enabled camera. For more details, refer to RTSP Camera Image Action
-
Optionally, define an Action Condition expression to determine whether the action should execute.
Action conditions use event message data as input to evaluate whether your Flux App should execute. For more details, refer to Action Condition Expressions.
-
Configure the action's parameters.
Configuration parameters vary depending on the action. For more details, refer to the individual action pages below:
- AI Action
- Republish Action
- Simple Object Detection Action
- Webhook Action
- Slack Notification Action
- Email Notification Action
- Soracom API Action
- RTSP Camera Image Action
To pass action output data to the next channel, refer to Manage Action Output. To send action error details to another channel when an action fails, refer to Send Action Errors to a Channel.
- Click Create to add the action to the channel.
You will be returned to the Actions tab of the channel, where you can see the newly added action.
Remove an Action from a Channel
For actions that republish their output to other channels, you must first disable republishing to the output channel or delete the output channel directly. For more details, refer to Disable Republishing of Action Output.
To remove an action from a channel:
-
Select the Studio tab of the Flux App in Soracom Flux Studio.
-
Click the action you want to delete.
-
Click (More) and then Delete.

-
Click Delete on the confirmation dialog to delete the action.
When deleting a Soracom API Action, if the SAM user selected in the action is not associated with any other Soracom API Actions, the Delete this SAM user as well option is displayed. If you check Delete this SAM user as well you can delete the SAM User at the same time.
