Gate Peer Configuration
By configuring a Gate Peer within your private network environment, you can establish a connection from your private network back to your Soracom VPG in order to enable remote device access.
Gate Peer configuration involves the following steps:
- Create a server that will act as the Gate Peer.
- Register your server and its networking parameters on your VPG.
- Configure your server to establish a VXLAN connection using your VPG parameters.
Terminology
Gate Peer - A server used to establish a VXLAN connection between your private network and your Soracom VPG. When creating a VPG, two Gate Peers are automatically created inside the VPG (each residing in a different AWS Availability Zone). This document explains the process of setting up a corresponding Gate Peer within your environment. Gate Peers will handle the task of sending traffic between your network environment and the VPG, in order to allow device access.
Outer IP Address - Each Gate Peer will have a physical network interface within its respective network environment. The Outer IP Address refers to the address assigned to this interface. For Gate Peers in the VPG, addresses in the 100.64.0.0/16 range will automatically be assigned. For Gate Peers in your private network, this address should be the IP address within your private network, such as within a 10.0.0.0/8, 172.16.0.0/12, or 192.168.0.0/16 block.
Inner IP Address - Each Gate Peer will also have a VXLAN interface which is used to send network traffic between Gate Peers. The Inner IP Address refers to the address assigned to the VXLAN interface.
Requirements
In order to establish the VXLAN connection, you must have an underlying network connection between your Soracom VPG and your private network. Currently, Gate Peers can be configured for use with one of the following underlying connections:
- Amazon VPC Peering Connection using Soracom Canal
- AWS Direct Connect Virtual Interface using Soracom Direct
- IPSec VPN connection using Soracom Door
- Public Internet connection using VPG Fixed Global IP Address option
When using a Public Internet connection as the underlying network connection, be aware that the VXLAN interface will not encrypt network traffic. Therefore, ensure that all traffic on the established VXLAN interface is encrypted beforehand by using secured protocols, such as SSH and HTTPS.
Before continuing with Gate Peer configuration, ensure that you have completed the following:
- Create a Virtual Private Gateway.
- Configure your VPG to establish a connection to your private network using one of the network connection options above.
- Create a Soracom Air for Cellular Group.
- Configure your group's Virtual Private Gateway option to use your VPG.
- Add Air for Cellular subscribers to the group.
With these requirements completed, continue to configure your Gate Peer.
This document will use an AWS EC2 instance as the Gate Peer and refer to AWS-specific configuration instructions. However, in general the same steps apply when configuring a Gate Peer within a non-AWS environment.
Create a Gate Peer Server
Create a Linux virtual machine instance in your private network, giving it a statically configured IP address within your private network's CIDR block range. You should follow best practices for securing the machine, such as utilizing SSH keys instead of passwords for accessing the machine. Make a note of its static IP address, as it is your Gate Peer's Outer IP Address and is needed later when registering this instance as a Gate Peer.
- For AWS environments, you should launch an Amazon Linux 2023 or similar instance, configuring its network details to use the VPC where Soracom Canal has been configured.
A Linux virtual machine is required in order to establish a VXLAN connection with the Soracom VPG. While VXLAN implementations are available for Windows servers, they are currently unstable and we do not recommend them for production environments.
Then configure the virtual machine's networking configuration to allow connections on the following ports/protocols:
| Protocol | Port | Direction | Source | Description |
|---|---|---|---|---|
| TCP | 22 |
Inbound | 0.0.0.0/0 |
Allow connections over SSH to configure instance. |
| UDP | 4789 |
Inbound | Your VPG IP Address Range | Allow connections from VPG over VXLAN. |
| ICMP | — | Inbound | 0.0.0.0/0 |
Enable responses to ping requests. |
- For AWS environments, you can configure your AMI instance's access policy by creating or updating its Security Group.
Configuring your virtual machine instance to allow inbound TCP traffic on port 22 from 0.0.0.0/0 (any source) is intended only for remotely connecting to the instance in order to configure it. Leaving this configuration as-is will expose your instance to other external access.
Once you have verified that your instance has been configured, you should update this configuration to restrict external access, or remove this configuration altogether. You may also prefer to similarly restrict or remove ICMP traffic.
You can also add any application-specific ports/protocols, such as TCP 80 or 443 in order to allow HTTP access to devices. Where necessary, specify your private network's CIDR block as the Source address in order to confine remote access to requests originating from your private network.
When using an AWS EC2 instance as a Gate Peer, the instance will reject traffic where the destination does not match the EC2 network interface details by default, using a Source/Destination check policy. You must disable this policy so that the instance can receive traffic to send to the VPG. Refer to the VPC NAT Instances: Disabling Source/Destination Checks documentation for instructions.
Register Your Gate Peer
Registering your Gate Peer server tells your Soracom VPG about its existence, in order to establish the VXLAN connection between your private network and the VPG.
Gate Peer registration simply requires your server's static IP address within your private network.
During registration, an Inner IP Address will be automatically assigned to your Gate Peer, which will be used to establish the VXLAN connection between your server and the VPG. You can manually specify the IP address in situations where you may have an existing IP address conflict, however in most cases auto-assignment is recommended.
You can register your Gate Peer from the User Console:
-
Sign in to the User Console. From the Menu, open the VPG screen.
-
From the list of VPGs, click the name of the VPG you want to configure to open its settings page.
-
Click the Device LAN tab.
-
Click the Add Gate Peer button in the Gate Peers in your network section.
-
Enter the Tunnel Endpoint IP address (Outer IP Address) using your server's static IP address within your private network's CIDR block.
If required, you can manually specify the Device Subnet IP address (Inner IP Address). However leaving this blank is recommended for most situations, and a Device Subnet IP Address will be automatically generated.
Then click the Create button.
Once your Gate Peer has been registered, a dialog will appear with commands for downloading a configuration script and for configuring VXLAN settings on your Gate Peer. These commands will simplify the steps for configuring your Gate Peer in the next section. Copy these commands, then proceed to the Scripted VXLAN Configuration section below.
If you need to configure your Gate Peer manually, you can instead close the dialog. Your Gate Peer will appear in the Gate Peers in your network section. Make a note of the Device Subnet IP Address, as it is your Gate Peer's Inner IP Address and is needed next, then proceed to the Manual VXLAN Configuration section below.
Now that the VPG is aware of the Gate Peer in our private network, we can configure our server to create the VXLAN connection in order to complete configuration.
Configure Your Gate Peer
-
This step is written assuming that you will be using Amazon Linux 2023 or Ubuntu as the Gate Peer. Settings may differ for other operating systems. If you are using an operating system other than Amazon Linux 2023 or Ubuntu confirm that the operating system firewall is not blocking ICMP packets
- The interface and routing settings configured here are not permanent and will be lost if the Gate Peer is restarted. After testing remote device access, you will also need to configure your server to perform this configuration automatically on startup in order ensure Gate Peer availability.
Scripted VXLAN Configuration
If you are using the commands provided in the dialog of the previous section, you can enter them here to configure VXLAN settings on your Gate Peer.
-
SSH to your Gate Peer server.
-
Download the
gate_init_vxlan.shscript for configuring VXLAN settings:wget https://soracom-files.s3-ap-northeast-1.amazonaws.com/gate-peer-tools/gate_init_vxlan.sh -
Give the script execute privileges:
chmod +x gate_init_vxlan.sh -
Run the
gate_init_vxlan.shscript as root with the parameters provided in the dialog of the previous section.sudo ./gate_init_vxlan.sh [PHY_IF] [PHY_ADDR] [VXLAN_IF] [VXLAN_ADDR] [VXLAN_NETMASK] [VXLAN_ID] [VPG_OUTER_IP_1] [VPG_OUTER_IP_2]For reference, the parameters should correspond to the following values:
Parameter Value [PHY_IF]The name of your Gate Peer's network interface (example: eth0). Note that you may need to update this depending on your operating system.[PHY_ADDR]The Tunnel Endpoint IP address (Outer IP Address) of your Gate Peer, which corresponds to your Gate Peer's static IP address. This IP address can be found on the VPG settings screen under the Device LAN → Gate Peers in your network section. [VXLAN_IF]The name to assign to the VXLAN network interface (example: vxlan0).[VXLAN_ADDR]The Device Subnet IP address (Inner IP Address) of your Gate Peer, either generated automatically or manually specified. This IP address can be found on the VPG settings screen under the Device LAN → Gate Peers in your network section. [VXLAN_NETMASK]The subnet mask corresponding to the Gate Peer Device Subnet IP addresses (example: 9).[VXLAN_ID]The VXLAN network identifier (example: 10). This ID can be found on the VPG settings screen under the SORACOM Gate → VXLAN Network Identifier section.[VPG_OUTER_IP_1]The Tunnel Endpoint IP address (Outer IP Address) of the first VPG Gate Peer. This IP address can be found on the VPG settings screen under the Device LAN → Gate Peers in VPG section. [VPG_OUTER_IP_2]The Tunnel Endpoint IP address (Outer IP Address) of the second VPG Gate Peer. This IP address can be found on the VPG settings screen under the Device LAN → Gate Peers in VPG section. If you are configuring Gate Peers for multiple VPGs, make sure that the
[VXLAN_IF],[VXLAN_ID], and[VXLAN_NETMASK]values do not overlap for each VPG.
Once the script has finished configuring VXLAN settings, you can proceed to the Packet Forwarding Configuration section below (optional), or test and confirm remote device access.
Manual VXLAN Configuration
To configure VXLAN settings manually, we need to get the information of the Gate Peers that are inside the VPG. We will use these settings to tell our Gate Peer server where it should route traffic.
Make a note of the various IP addresses listed on the VPG settings screen under the Device LAN → Gate Peers in VPG section.
Together with the IP addresses of your Gate Peer, we should have the following IP addresses noted:
These IP addresses are for example purposes only. The IP addresses associated with your VPG will be different.
| Gate Peer | Tunnel Endpoint IP addressouterIpAddress |
Device Subnet IP addressinnerIpAddress |
|---|---|---|
| In your network | 172.16.123.45 |
10.234.56.78 |
| In VPG (1) | 100.67.0.4 |
10.192.0.4 |
| In VPG (2) | 100.67.0.132 |
10.192.0.132 |
Now, let's use these IP addresses to configure our server. The following instructions are written for an AWS EC2 Amazon Linux 2023 instance. If using other virtual machines, you may need to alter the commands according to your Linux environment.
-
SSH to your Gate Peer server.
-
Remove the VXLAN module, then reload it specifying the UDP port
4789to use for the connection:rmmod vxlan modprobe vxlan udp_port=4789 -
Create a
vxlan0network interface that is linked to the EC2 instance's physical network interface:ip link add vxlan0 type vxlan local 172.16.123.45 id 10 dstport 4789 srcport 4789 4789 dev eth0This command uses the following options:
add vxlan0 type vxlan- Create a new VXLAN interface namedvxlan0local 172.16.123.45- Set the source IP address in outgoing packets as your Gate Peer's Outer IP Address.id 10 dstport 4789 srcport 4789 4789- Set the VXLAN Network Identifier to10and specify the VXLAN tunnel endpoint ports.dev eth0- Specifies the physical network interface to use for the VXLAN connection.
-
Enable the new
vxlan0interface, assigning its IP address to your Gate Peer's Inner IP Address:ifconfig vxlan0 10.0.123.45/9 up -
Establish the VXLAN connection between your Gate Peer and each of the two Gate Peers in the VPG:
bridge fdb append 00:00:00:00:00:00 dev vxlan0 dst 100.64.0.4
bridge fdb append 00:00:00:00:00:00 dev vxlan0 dst 100.64.0.132
Once you have finished configuring VXLAN settings, you can proceed to the Packet Forwarding Configuration section below (optional), or test and confirm remote device access.
Packet Forwarding Configuration
In order for EC2 instances other than your Gate Peer to be able to connect to your devices, you must also configure the Gate Peer to act as a NAT instance by enabling iptables packet forwarding. However, this setting is not necessary if you intend on using the Gate Peer as a so-called "jump host" or "stepping-stone server" where you first connect directly to the Gate Peer (such as via SSH) and then connect from within the Gate Peer to your devices.
To configure your Gate Peer as a NAT instance, run the following commands on the Gate Peer:
-
Install iptables:
sudo dnf install iptables -
Configure iptables to first accept all traffic in order to avoid SSH lockdown due to firewall rules:
sudo iptables -P INPUT ACCEPT sudo iptables -P FORWARD ACCEPT sudo iptables -P OUTPUT ACCEPT -
Flush all iptables chains and firewall rules, delete all iptables chains, and flush all iptables counters:
sudo iptables -F sudo iptables -X sudo iptables -Z -
Flush and delete all NAT and mangle settings:
sudo iptables -t nat -F sudo iptables -t nat -X sudo iptables -t mangle -F sudo iptables -t mangle -X sudo iptables -t raw -F sudo iptables -t raw -X -
Configure the EC2 instance as a NAT instance:
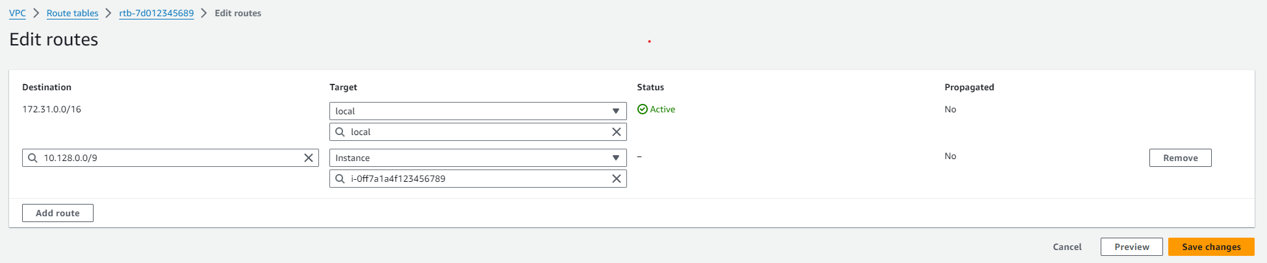
sudo sh -c "echo 1 > /proc/sys/net/ipv4/ip_forward" sudo iptables -t nat -A POSTROUTING -o vxlan0 -j MASQUERADE - Finally, in your AWS VPC add a route for packet forwarding through your Gate Peer, using your instance as the target and your VPG's device subnet as the destination.
Ensure that the VPC route table is correctly associated with the subnet containing your EC2 instances. For VPCs with multiple subnets, verify that the desired subnet is explicitly mapped to the appropriate route table to avoid connectivity issues.
The iptables settings configured by the commands above will reset when you restart the operating system. If necessary, save the iptables settings to make them persistent.
Amazon Linux 2023 example:
sudo /etc/init.d/iptables saveSettings may differ for other operating systems.
Now our Gate Peer has been properly configured to accept packets that need to be sent to the VPG, and forward them to the corresponding Gate Peers using the VXLAN connection, which in turn will route them to the device for us. Each packet will also contain our Gate Peer's IP address as the packet source, ensuring any responses will be routed back to us correctly.
Confirm Remote Device Access
Now that the Gate Peer has been configured, you should be able to remotely access a cellular device attached to your Soracom VPG.
To test, first SSH to your Gate Peer server.
Then from within the SSH session, you can test a ping command, curl an HTTP resource on the device, or even open up another ssh session.
ping 10.219.96.63
>PING 10.219.96.63 (10.219.96.63) 56(84) bytes of data.
>64 bytes from 10.219.96.63: icmp_seq=1 ttl=64 time=816 ms
>64 bytes from 10.219.96.63: icmp_seq=2 ttl=64 time=403 ms
>64 bytes from 10.219.96.63: icmp_seq=3 ttl=64 time=423 ms
>64 bytes from 10.219.96.63: icmp_seq=4 ttl=64 time=422 ms
>
curl http://10.219.96.63
>Hello World!
Although routing between network environments via the VXLAN connection is set up between your Gate Peer and the Soracom VPG, you will need to perform additional network configuration within your private network in order to route local traffic to your Gate Peer. As this process varies for each network environment, test your routing configuration in order to confirm that only traffic intended for Soracom Air devices is routed accordingly.
Programmatic Usage
When configuring a Gate Peer, we can also use the Soracom API and Soracom CLI for registering our server as a Gate Peer, and listing the Gate Peers in our VPG:
Soracom API
Register a Gate Peer using the registerGatePeer API method:
curl -X POST \
|  -b '{
|        "outerIpAddress": "172.16.123.45"
|      }' \
| https://g.api.soracom.io/v1/virtual_private_gateways/<VPG-ID>/gate/peersOnce registered, the API will return the following data about the Gate Peer:
{
  "outerIpAddress": "172.16.123.45",
  "ownedByCustomer": true,
  "innerIpAddress": "10.0.123.45"
}
Then get a list of all Gate Peers by using the listGatePeers API method:
curl -X GET \
| https://g.api.soracom.io/v1/virtual_private_gateways/<VPG-ID>/gate/peersThe API will return something like this:
[
  {
    "outerIpAddress": "100.64.0.4",
    "ownedByCustomer": false,
    "innerIpAddress": "10.192.0.4"
  },
  {
    "outerIpAddress": "100.64.0.132",
    "ownedByCustomer": false,
    "innerIpAddress": "10.192.0.132"
  },
  {
    "outerIpAddress": "172.16.123.45",
    "ownedByCustomer": true,
    "innerIpAddress": "10.0.123.45"
  }
]
For each Gate Peer, the ownedByCustomer key corresponds to whether the Gate Peer is located in your private network or in the VPG.
Soracom CLI
You can also register a Gate Peer using the register-gate-peer command:
soracom vpg register-gate-peer --vpg-id "<VPG-ID>" --outer-ip-address "172.16.123.45" --coverage-type gThe CLI will return information about the registered Gate Peer as above.
Then list Gate Peers using the list-gate-peers command:
The CLI will return information about the Gate Peers in the VPG as above.