Register Inventory Devices
When using Soracom Inventory to manage devices, the Inventory agent must perform the initial key exchange during device registration using a Soracom Air cellular conenction in order to authenticate the device.
As Krypton provides a method for performing device authentication without using the Air cellular connection, you can combine this method with Inventory in order to perform Inventory registration without using a cellular connection.
Requirements
In order to perform device authentication, a Krypton Client must be installed on the device and is used to access authentication information embedded in a Soracom IoT SIM card. Much like the Soracom Endorse authentication method, this feature is therefore only available for devices that use plan01s and plan01s - LDV SIMs.
The Soracom IoT SIM card used for device authentication must have an Active SIM status. SIM cards that are not Active will result in an error when trying to access the Krypton Provisioning APIs.
These additional requirements also apply:
- The Krypton Client for Go requires Golang.
- On Linux, the Krypton Client for Go also requires
pcscd,libpcsclite1, andlibpcsclite-dev.
- On Linux, the Krypton Client for Go also requires
- The Krypton Client for Java requires Java runtime 8 or later.
- You must install an LwM2M agent. Refer to the Inventory Configuration documentation for more information.
- You must use a plan01s, plan01s - LDV, plan-US, planX3, or planX3-EU IoT SIM.
-
The SIM must be inserted into a compatible modem or SIM card reader. As reference, Soracom has tested the following devices:
- Huawei MS2131i-8 3G USB modem
- Gemalto USB-TR HWP119316 card reader
When using other modems, ensure that the modem supports the
AT+CSIMcommand.
Prerequisites
To enable Krypton provisioning when registering Inventory devices, you must create a Soracom Air for Cellular group with the following settings enabled:
- SORACOM Air for Cellular: Metadata Service
- SORACOM Krypton
-
Login to the User Console. From the Menu, open the Groups screen.
-
From the list of groups, click the Name of the group you want to configure to open its settings page.
-
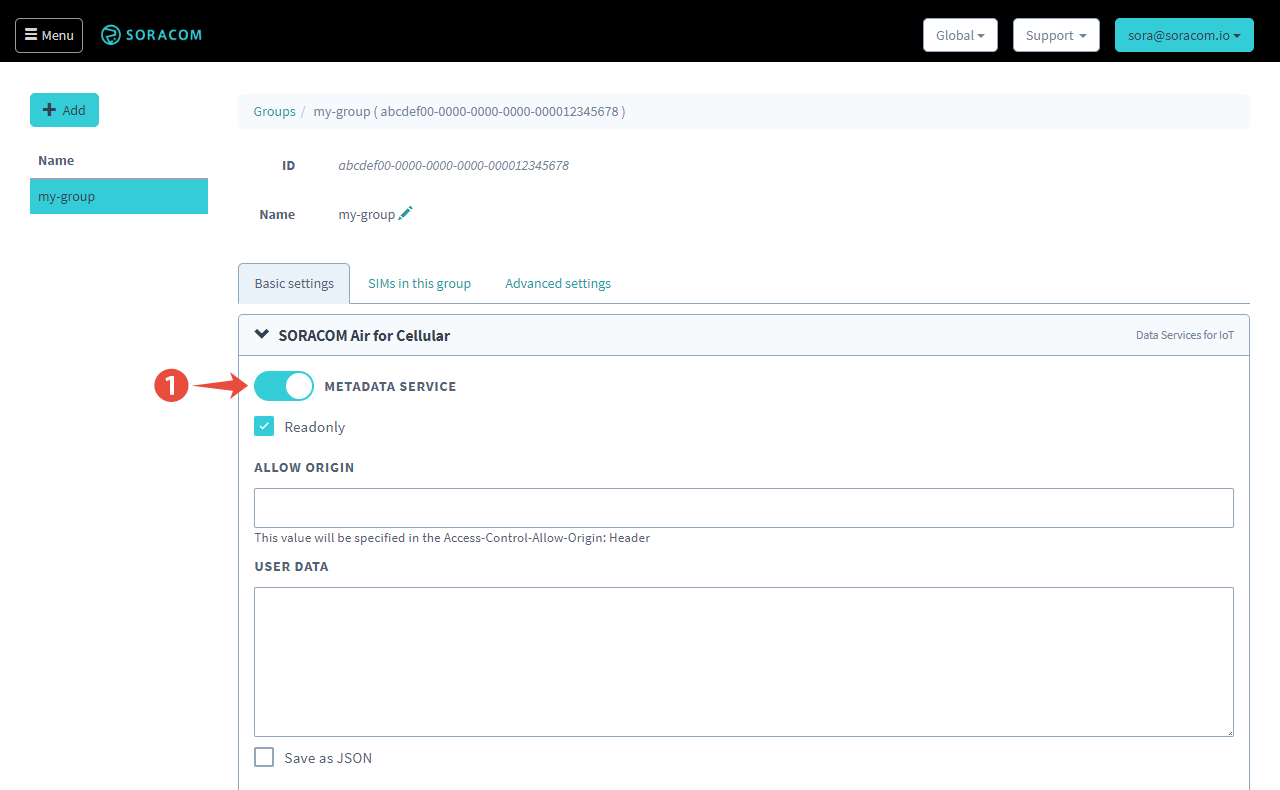
From the Basic Settings tab, click the SORACOM Air for Cellular panel to expand its settings.
-
Enable the Metadata Service option by switching the option to ON.

-
Click the Save button at the bottom of the panel.
-
Next, click the SORACOM Krypton panel to expand its settings.
-
Enable Krypton by switching the option to ON.

- Click the Save button at the bottom of the panel.
Ensure that the Air subscriber of the device you want to register to Inventory has been added to this group.
Krypton Client Installation
Install either the Soracom Krypton Client for Go or Soracom Krypton Client for Java client to your device. Refer to each repository for installation instructions.
We can first check that the client is successfully installed by using the -h flag to display client commands:
krypton-cli -hNext, with the Soracom IoT SIM inserted in a compatible modem (with the cellular connection disabled) or SIM card reader, let's check that we can access the Soracom Air Metadata Service:
krypton-cli -operation getSubscriberMetadataNormally, in order to access the Metadata Service, the request must be sent using the Soracom Air cellular connection. However, the Krypton Client will access the authentication information embedded in the SIM card in order to provide authentication over a non-cellular connection.
If successful, we should see the Metadata Service return information about our Air subscriber:
>{"imsi":"295000012345678","msisdn":"423012345678","ipAddress":"10.0.123.45","operatorId":"OP0012345678","apn":"soracom.io","type":"s1.fast","groupId":"abcdef00-0000-0000-0000-000012345678","createdAt":1530863331946,"lastModifiedAt":1534490141382,"expiredAt":null,"registeredTime":1533105977108,"expiryAction":null,"terminationEnabled":false,"status":"active","tags":{"name":"my-sim"},"sessionStatus":{"lastUpdatedAt":1534238915002,"imei":null,"location":null,"ueIpAddress":null,"dnsServers":null,"online":false},"imeiLock":null,"speedClass":"s1.fast","moduleType":"trio","plan":1,"iccid":"8900000000012345678","serialNumber":"8900000000012345678","subscription":"plan01s","createdTime":1530863331946,"expiryTime":null,"lastModifiedTime":1534490141382}This confirms that Krypton is working properly.
Bootstrapping and Registration
We can now use the Krypton Client to perform Inventory bootstrapping. We will need to specify an endpoint parameter which defines the endpoint name of this device. Refer to the Inventory Configuration documentation for more information on recommended endpoint names.
We can pass this parameter into the Krypton Client using the form -params '{"endpoint": "my-inventory-device"}'.
We can then start the bootstrap process with the following command:
krypton-cli -operation bootstrapInventoryDevice -params '{"endpoint": "my-inventory-device"}When bootstrapping and device registration is complete, the Krypton API will return the following information:
{
  "applicationKey":"XXXXXXXXXXXXXXXXXXXXXXXXXXXXXXXXXXXXXXXX=",
  "pskId":"YYYYYYYYYYYYYYYYYYYYY",
  "serverUri":"coaps://g.inventory.soracom.io:5684"
}- pskId - An ID that acts as the Inventory device ID.
- applicationKey - A key that acts as the Inventory device secret key.
- serverUri - The Inventory Device Management server where the device's LwM2M client should connect.
We can also confirm that registration was successful by opening the Device Management screen from the User Console, and checking that our device with the corresponding endpoint name is listed.
Connecting to Inventory
Now that the bootstrap and registration process is complete, we can connect to the Inventory Device Management server, using the same process as in the standard Inventory connection process.
However, rather than using a device ID and secret key generated by Inventory during the bootstrap process, we will use the pskId and applicationKey values, respectively.
For the Eclips Wakaama client, we need to first convert the applicationKey to a hexadecimal value, as this is the format that lwm2mclient requires.
echo "q83vAAAAAAAAABI0VniZyg==" | base64 --decode | xxd -p
>abcdef000000000000001234567899ca
Then, our connection command will look like this:
lwm2mclient -h g.inventory.soracom.io -p 5684 -4 -n {CLIENT-ENDPOINT-NAME} -i {PSK-ID} -s {APPLICATION-KEY}If using the Soracom Inventory Agent for Java, our command will look like this:
./soracom-inventory-agent-example-start -u g.inventory.soracom.io -i {PSK-ID} -p {APPLICATION-KEY}In both cases, we should then be able to see the command output as the LwM2M client communicates with the Inventory Device Management server.