Multi-Factor Authentication
Soracom provides an additional layer of security for Root user access as well as SAM user access with Multi-Factor Authentication (MFA), also known as Two-Factor Authentication (2FA). When enabled, a secure key will be generated which can then be registered to a device that you physically control, such as a smartphone with a compatible MFA application. Once the secure key is registered, the MFA application will generate a temporary 6-digit code, which will be required in addition to your Root user password or SAM user password in order to access the Soracom User Console, or to generate API keys and tokens.
Soracom's Multi-Factor Authentication uses the RFC 6238 specification.
Enabling MFA
Root User
-
Sign in to the User Console.
-
Click your account menu, then select Security.
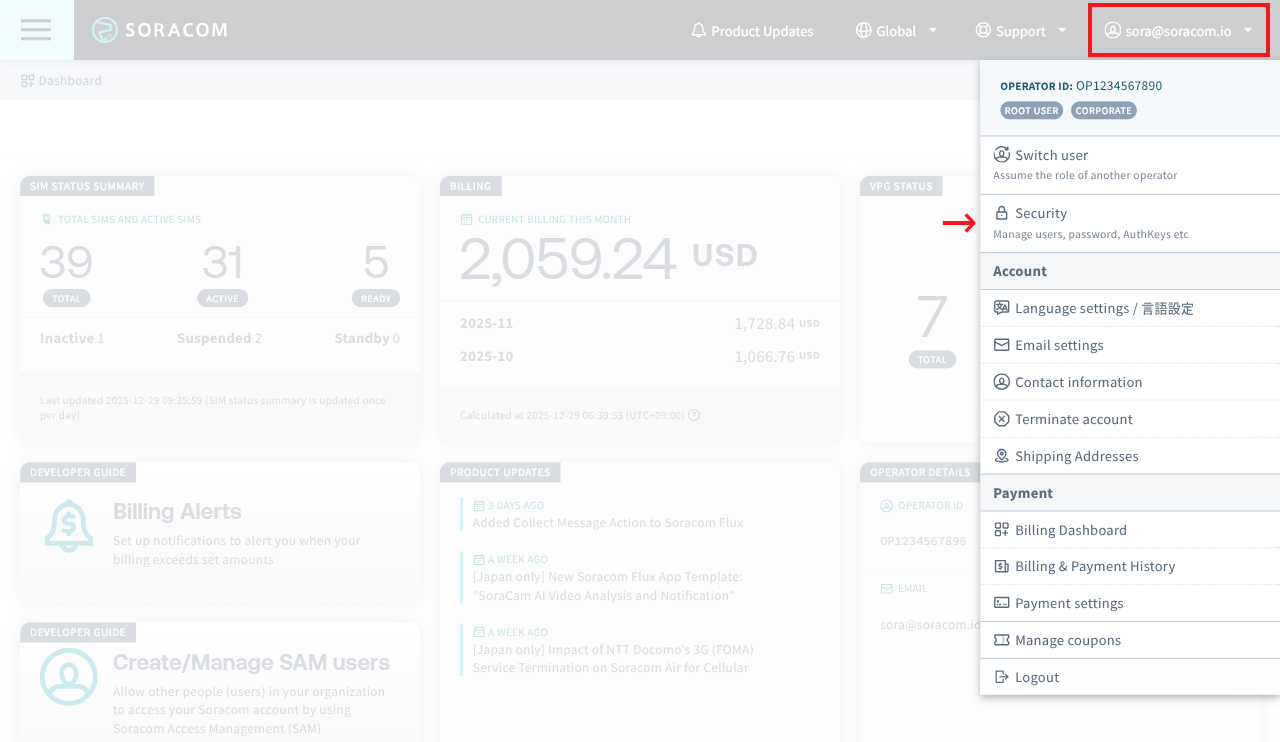
-
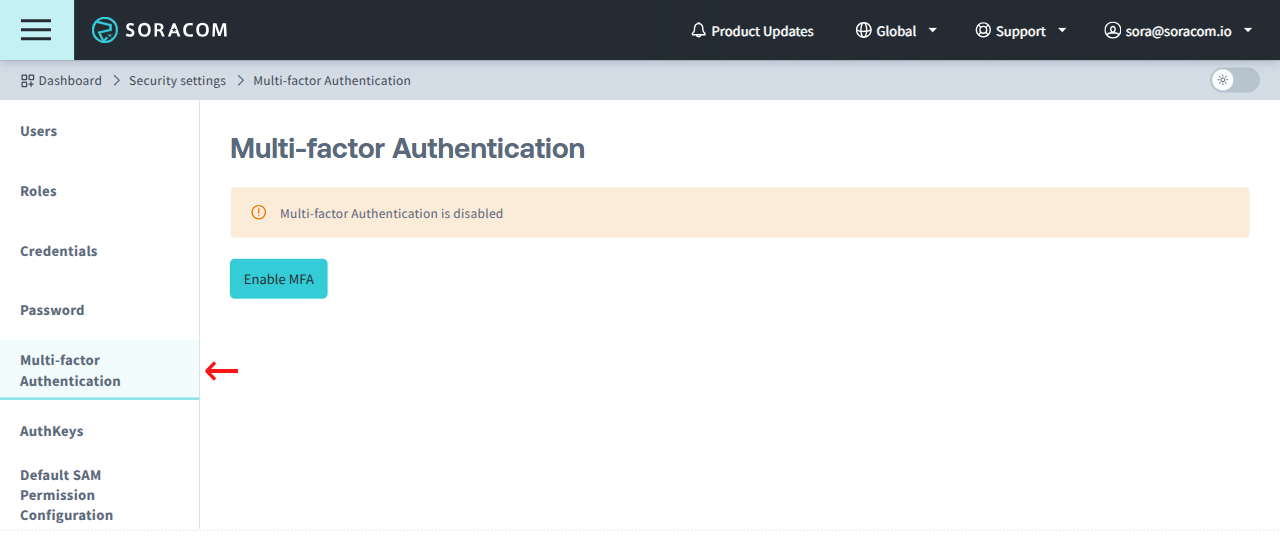
Click the Multi-factor Authentication tab.
-
Click the Enable MFA button.
-
A QR code containing a secure key will appear. Scan the QR code using an MFA application such as Google Authenticator (available on Apple App Store or Google Play Store).
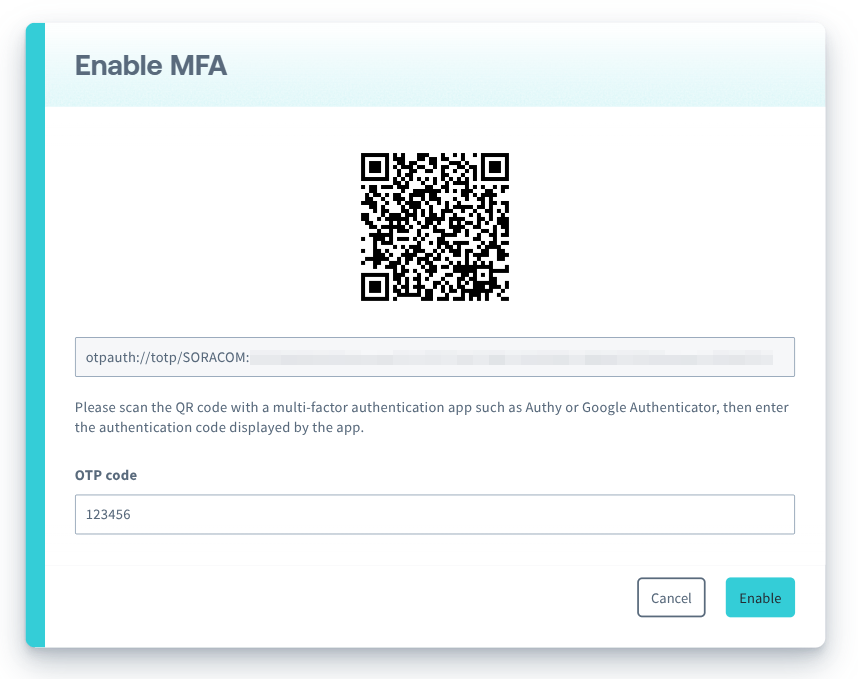
The MFA application will automatically register the secret key to your device. Once registered, you should see that the MFA application is generating temporary 6-digit verification codes.
- Enter the 6-digit verification code that appears in the MFA application in order to confirm that the secret key has been correctly registered.
For your security, MFA will not be enabled if an incorrect code is applied.
If you are enabling Multi-Factor Authentication for your Root user, several backup codes will be displayed. These codes are used to revoke the Multi-Factor Authentication setting in case you lose access to your MFA device. When revoking MFA, you will be asked to enter one of these codes.
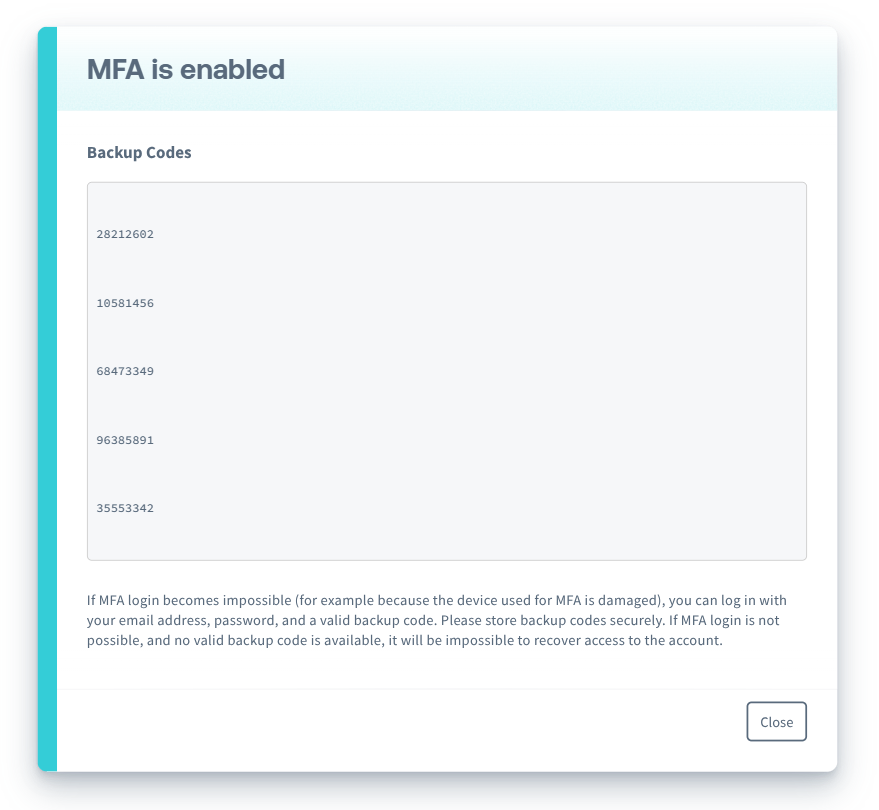
It is imperative that you keep a copy of your backup codes in a secure location. If your MFA device is lost or damaged and you do not have any of your backup codes, you will no longer be able to sign in to your Soracom account.
Current SAM User
If you are signed in as a SAM user, you can enable MFA for your SAM user account.
-
Click your account menu, then select Security.
-
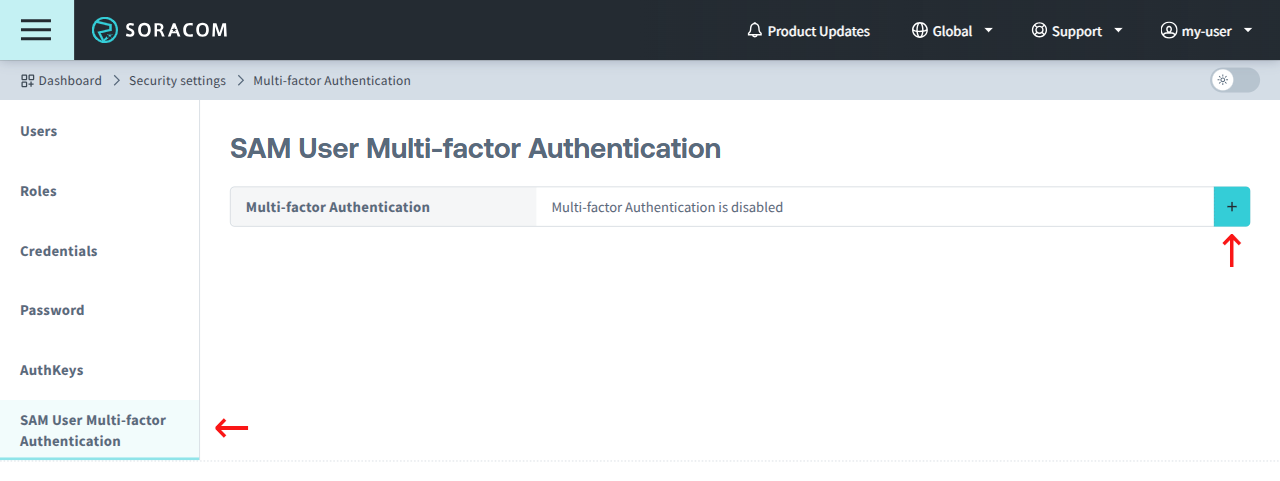
Click the SAM User Multi-factor Authentication tab.
-
Click the button.
- Follow the instructions above for registering the secret key to your MFA device and confirming that the secret key has been correctly registered.
No backup codes will be displayed when enabling MFA for a SAM user.
Other SAM Users
You can also enable MFA for other SAM users in your account. This can be done either when signed in using your Root user, or when signed in as another SAM user with sufficient privileges.
-
Click your account menu, then select Security.
-
Click the Users tab.
-
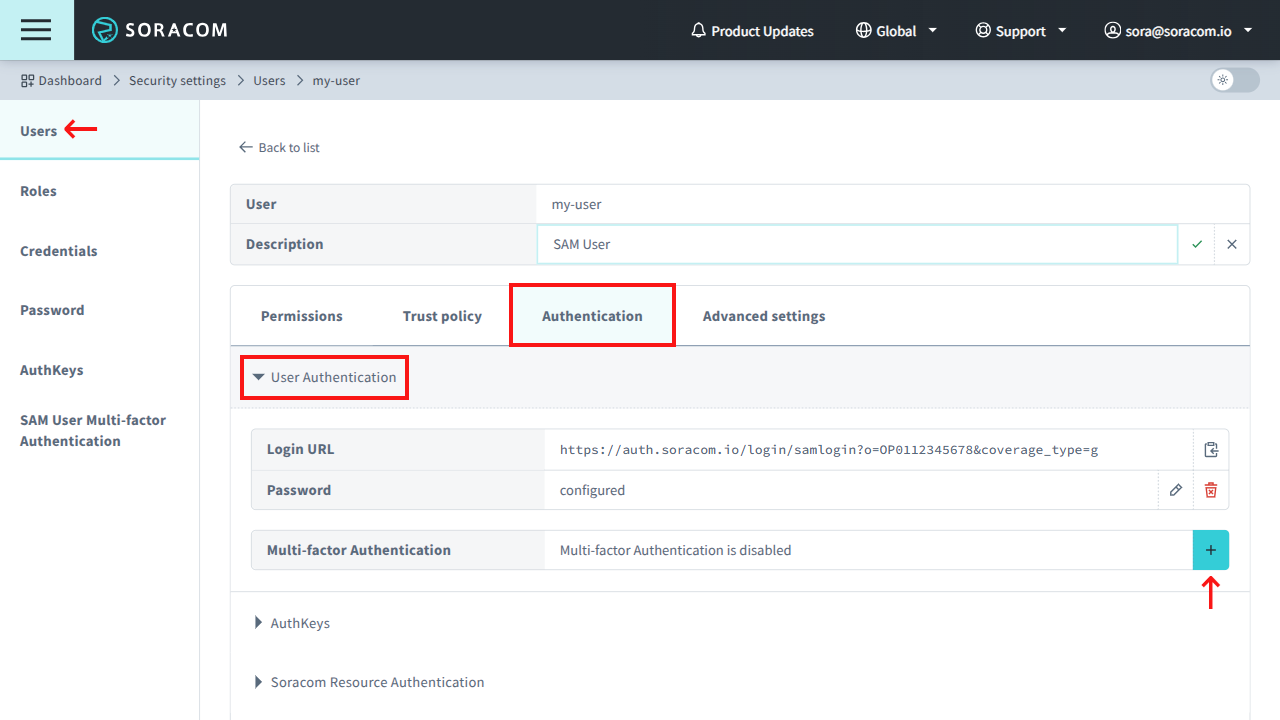
Click the Name of the SAM user you want to manage.
-
Click the Authentication tab.
-
Expand the User Authentication section, then click the button.
- Follow the instructions above for registering the secret key to your MFA device and confirming that the secret key has been correctly registered.
No backup codes will be displayed when enabling MFA for a SAM user.
Signing in with MFA Enabled
User Console
-
Open the User Console.
-
Sign in as normal using your Root user Email address and Password, or Operator ID, SAM Username, and Password.
-
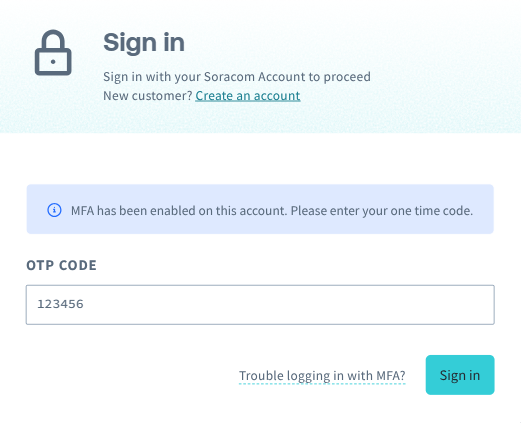
You will be prompted to enter your OTP Code. Open your MFA application and enter the 6-digit verification code.
If the date and time of the device with your MFA application deviates significantly from the actual current date and time, the MFA verification codes will be out of sync. Ensure that your device date and time is updated appropriately.
Soracom API
When using the Soracom API, you must perform authorization using the auth API endpoint and pass a mfaOTPCode parameter as part of the authentication request payload.
To authenticate using your Root user, make an HTTP POST request to the /auth endpoint with the following body:
{
  "email": "sora@soracom.io",
  "password": "myP@assw0rd",
  "mfaOTPCode": "123456"
}
To authenticate as a SAM user, make an HTTP POST request to the /auth endpoint with the following body:
{
  "operatorId": "OP0012345678",
  "userName": "myuser",
  "password": "myP@ssw0rd",
  "mfaOTPCode": "123456"
}
If authentication is successful, you will receive a 200 HTTP response with JSON response that contains apiKey and token parameters. You can then use these API key and token values to call other API endpoints.
Soracom CLI
When using the Soracom CLI, you must perform authentication using the soracom auth command and passing in the MFA verification code using the --mfa-otpcode option.
To authenticate using your Root user:
soracom auth --email sora@soracom.io --password myP@ssw0rd --mfa-otpcode 123456To authenticate as a SAM user:
soracom auth --operator-id OP0012345678 --user-name myuser --password myP@ssw0rd --mfa-otpcode 123456If authentication is successful, the command will return a response that contains apiKey and token parameters. You can then use these API key and token with other Soracom CLI commands by specifying the --api-key and --api-token flags, respectively.
When setting up Soracom CLI for the first time, you can use the soracom configure command to save authentication credentials (Root user, SAM user, or AuthKeys) so that they are used with each command. However, the credentials stored using this configuration command cannot be used together with MFA. As a result, you must run the soracom auth command above in order to generate an API key and token, and then perform subsequent commands using the --api-key and --api-token flags.
Disabling MFA
If you no longer wish to use Multi-Factor Authentication, you can disable it from the User Console by simply reversing the steps above.
You must have access to your MFA application and verification codes. If you have lost your MFA device and cannot view your MFA verification codes:
- For root accounts: Use the Revoking MFA instructions below instead.
- For SAM Users: delete the SAM User and re-create it.
Root User
-
Sign in to the User Console.
-
Click your account menu, then select Security.
-
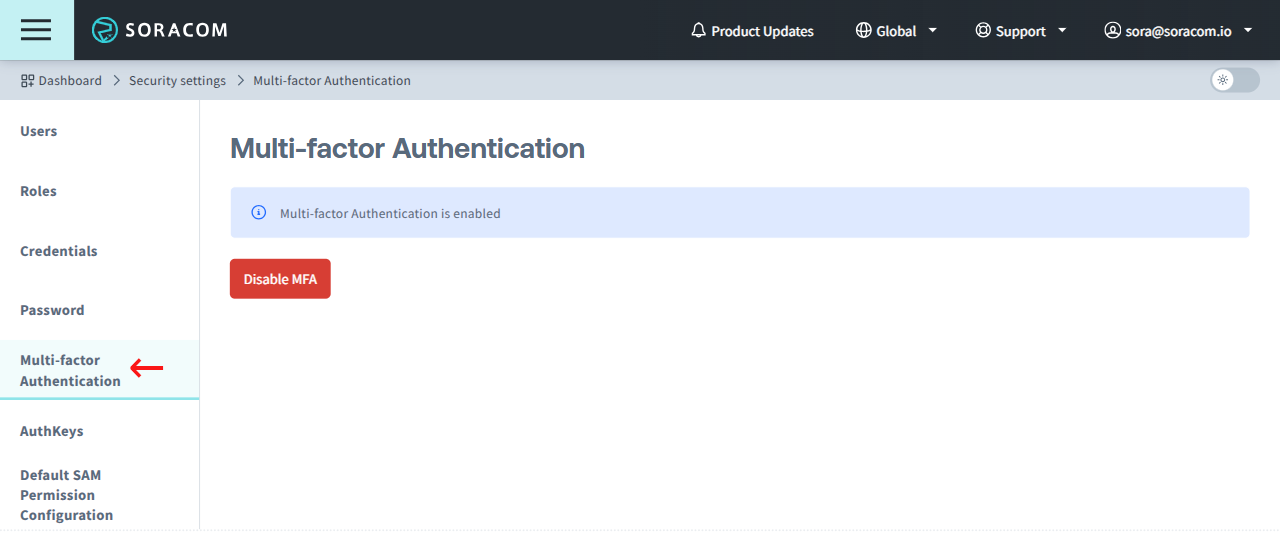
Click the Multi-factor Authentication tab.
-
Click the Disable MFA button.
Current SAM User
When signed in as a SAM user, follow the instructions above, and click on the SAM User Multi-factor Authentication tab instead.
Other SAM Users
When signed in using your Root user or as another SAM user with sufficient privileges:
-
Click your account menu, then select Security.
-
Click the Users tab.
-
Click the name of the SAM User you want to manage.
-
Click the Authentication tab.
- Click the Multi-factor Authentication panel, then click the Disable button.
Revoking MFA
If you have lost your MFA device and are unable to view your MFA verification codes, you can revoke the Multi-Factor Authentication setting. This process requires one of the backup codes that were generated when MFA was originally enabled.
The revocation process applies to the root account only. If you need to revoke the MFA setting for a SAM User, ask your root account administrator to delete and re-create your SAM User.
The backup code is mandatory in order to prevent unauthorized users from revoking your MFA setting without your permission. If you are unable to access your MFA verification codes and you have lost your backup code, contact Soracom for assistance.
-
Open the User Console.
-
Sign in as normal using your Root user email address and password.
-
When prompted to enter your MFA verification code, click the Trouble logging in with MFA? link.

-
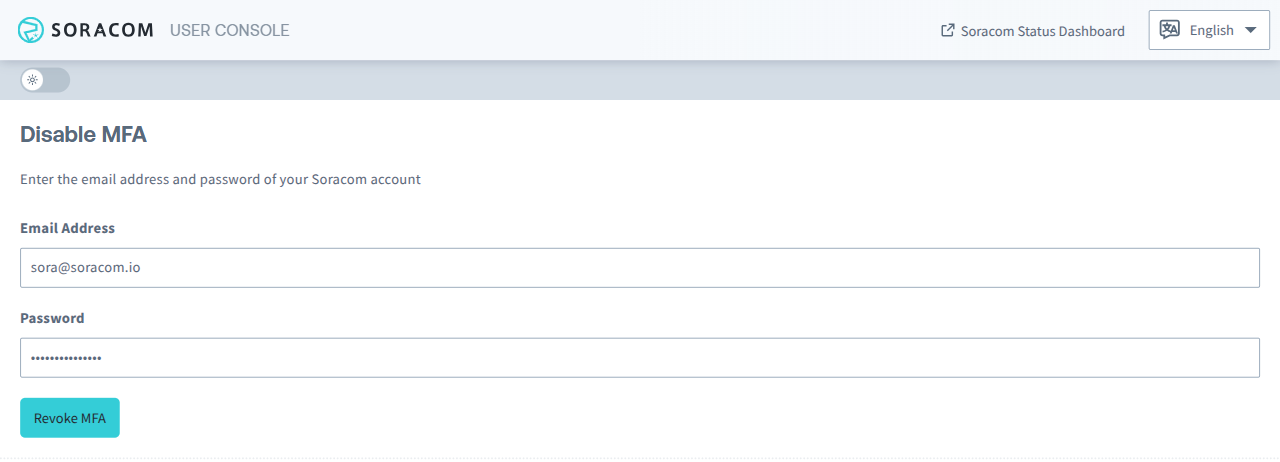
Enter your Root user email address and password again to confirm that you want to begin the MFA revocation process.
-
An email containing a URL will be sent to you. Click the link in the email to continue the revocation process.

-
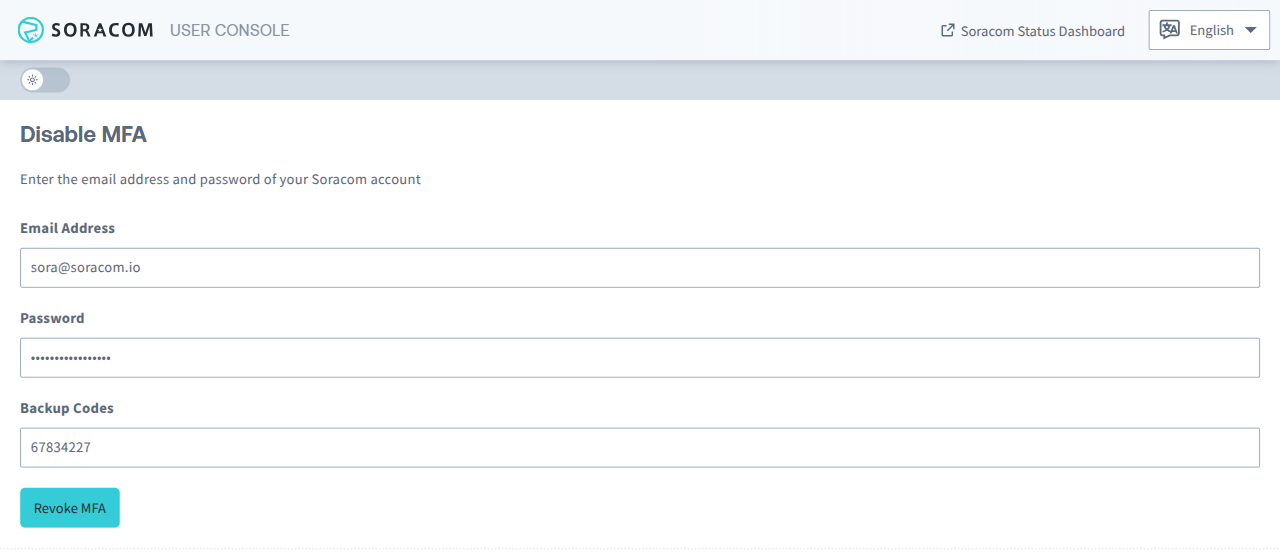
Finally, enter your Root user Email Address, Password, and your MFA Backup Codes, then click Revoke MFA to confirm revocation.
Once the MFA setting has been revoked, you will be able to sign in to your Root user without using an MFA verification code.