Publishing Data to AWS IoT Using Webhook Actions and AWS Signature V4 Authentication
This guide explains how to use the AWS Signature Version 4 authentication to publish data to AWS IoT from Soracom Flux Webhook Actions. By leveraging Signature V4 authentication, you can interact with AWS services without embedding credentials or Signature V4 generation logic on your devices.
Step 1: Create an AWS IAM Policy and IAM Role
To allow the Soracom Flux Webhook Action to publish data to AWS IoT in your AWS account, set up the following IAM policy and role in your AWS account. You can perform your IAM setup using the AWS IAM Console.
-
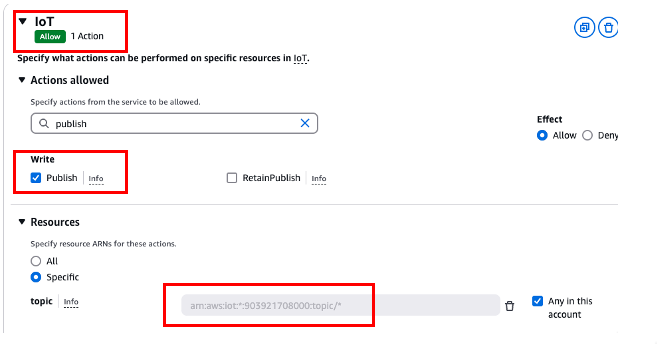
IAM Policy: Grant permissions to publish data to AWS IoT.
- Service: IoT
- Actions: Publish
- Resource: Specify any region and topic.
-
IAM Role:
- Trust Entity: Specify Soracom's AWS account as a trusted entity.
- Enter one of the following in the
Account IDfield according to the Soracom coverage type.- Global Coverage:
950858143650 - Japan Coverage:
762707677580
- Global Coverage:
- Enter one of the following in the
- External ID: Strengthen security by requiring an external ID.
- Attach the IAM policy created above.

The External ID and IAM role ARN will be used in Step 3.
- Trust Entity: Specify Soracom's AWS account as a trusted entity.
Step 2: Confirm Device Data Endpoint for AWS IoT
- Open the AWS IoT Console.
- Select the AWS Region you intend to use in the console.
-
Navigate to Domain configurations and copy the domain name labeled
iot:Data-ATSto your clipboard.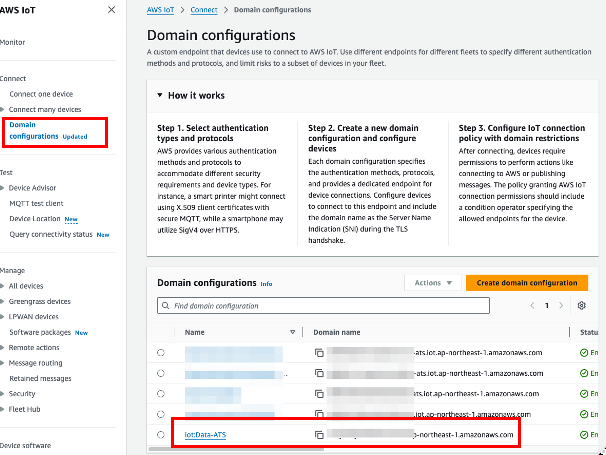
This domain name will be used in Step 4.
Step 3: Register AWS IAM Role Credentials in the Soracom User Console
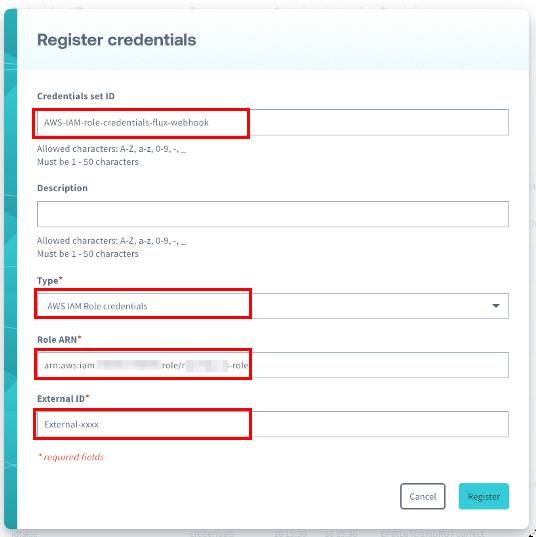
Register the IAM role credentials in the credential set menu in the Soracom User Console.
| Field | Value |
|---|---|
| Credential set ID | Any descriptive name, e.g., AWS-IAM-role-credentials-flux-webhook |
| Type | AWS IAM Role credentials |
| Role ARN | The ARN of your IAM role you created in Step 1. |
| External ID | The external ID you entered in Step 1. |
Step 4: Configure a Flux Application
Set up a Flux application to execute webhook actions. For this guide you use API/Manual Execution Event Source to manually send data.
-
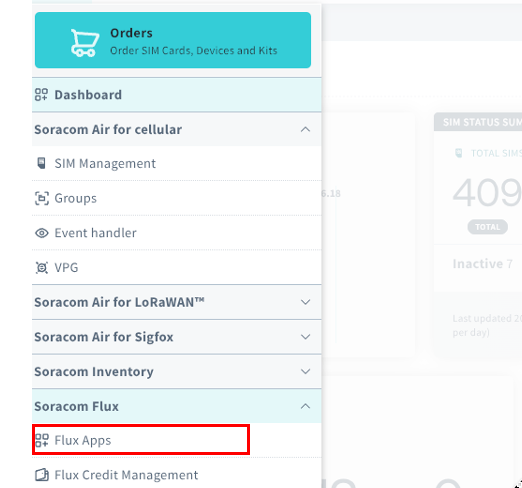
Login to the User Console. From the Menu, expand Soracom Flux and select Flux Apps.
-
Click Create a new Flux app.
-
Enter the app Name and Description, then click Create.
The Flux application will be created, and the Studio tab in Soracom Flux Studio will be displayed.
Step 5: Add Event Source and Webhook Action to Flux App
- Open the Studio tab in Soracom Flux Studio.
- Click Create a channel and select event source of type API/Manual Execution, then click Next.
-
Enter the Name of the channel and optionally add a Description, then click Create a new channel.
A channel connected to the event source will be created and a screen displaying the channel details will appear.
-
Click Actions > Add Action.
The Create a new action dialog will appear.
-
Select Webhook and click OK.
The Create a new action: Webhook dialog will appear.
-
Configure the following fields:
Field Description Name Enter a name for the Webhook action. Description Provide a brief summary of the Webhook action. Enabled Set this option to Enabled to activate the action. Action Condition Leave this blank to execute the action for all conditions. 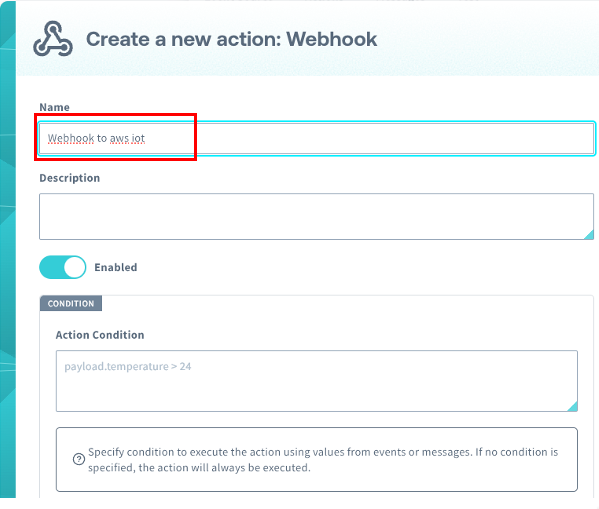
-
Continue with the following settings:
Field Description HTTP Method Select the HTTP method for the Webhook. Choose POST here. URL Enter the Webhook HTTP URL. Use the AWS IoT endpoint obtained in Step 2. Example: https://<random-string>-ats.iot.ap-northeast-1.amazonaws.com/topics/<TopicName>/. For this guide, usetest-topicfor the topic name.Auth Type Select AWS Signature V4. Service Enter the AWS IoT ServiceCode: iotdata.Region Select the AWS IoT region used in Step 2. Credentials Select the credentials registered in Step 3. 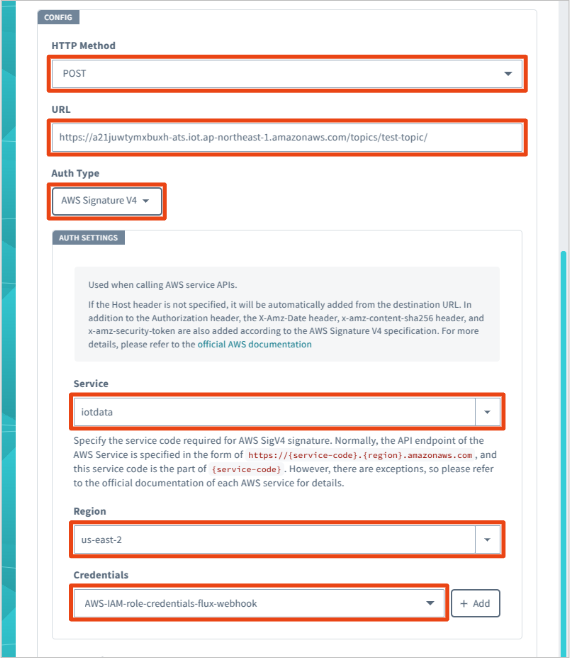
-
Configure additional fields:
Field Description HTTP Header Set the HTTP headers for the Webhook request. Selecting application/jsonfor the HTTP body will auto-fill this.HTTP Body Set the HTTP body for the Webhook request. Use ${payload}to send the input data from the event source directly.Output Configure whether the Webhook action's response should be sent to another channel. Set this to Disabled. 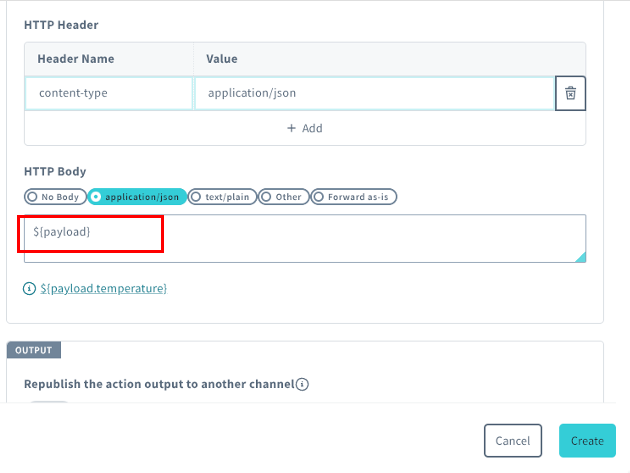
-
Click Create.
The Webhook action will be created and displayed under the Actions tab of the channel's details screen.
Testing the Configuration
Prepare the AWS IoT MQTT Test Client
-
Access the AWS IoT Console.
-
From the left pane, click MQTT test client.
-
Click the Subscribe to a topic tab and enter the topic name you set in Step 5, e.g.,
test-topic/#.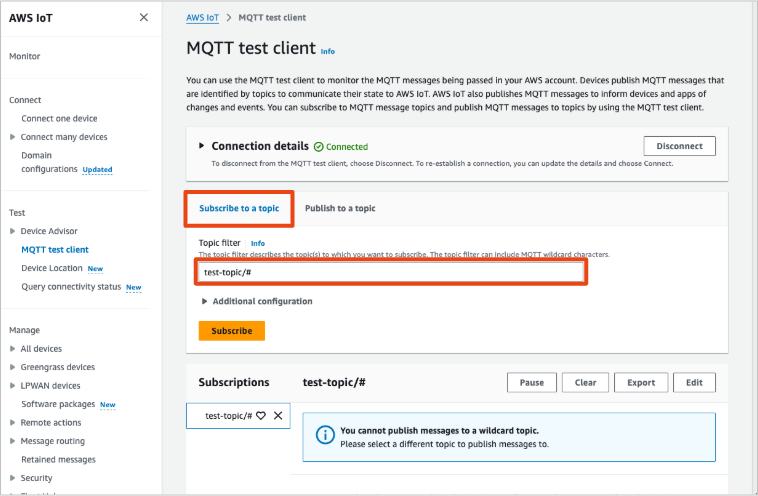
- Click Subscribe.
Send a Message Using API/Manual Execution
- Log in to the User Console and navigate to the Flux Apps screen as shown in Step 4.
- Click the Flux Application you created in Step 4.
-
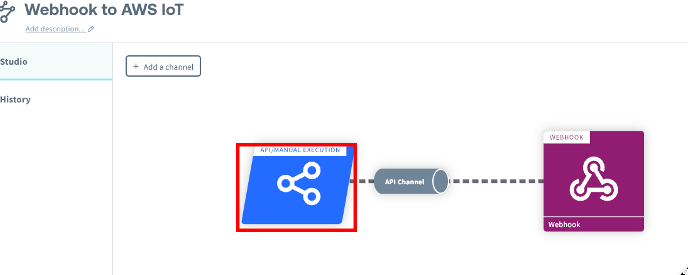
Select theAPI/Manual Execution event source created in Step 5.
-
Click Test tab, then enter a message in the Body field to send to the channel. For example:
{"message":"Hello from Flux!"}.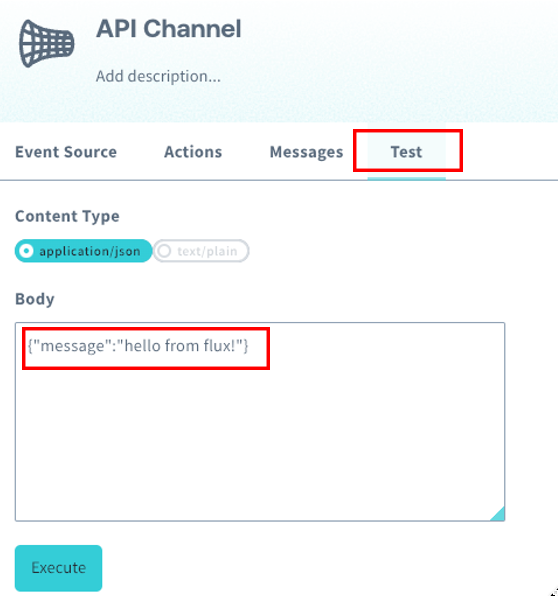
-
Click Execute.
-
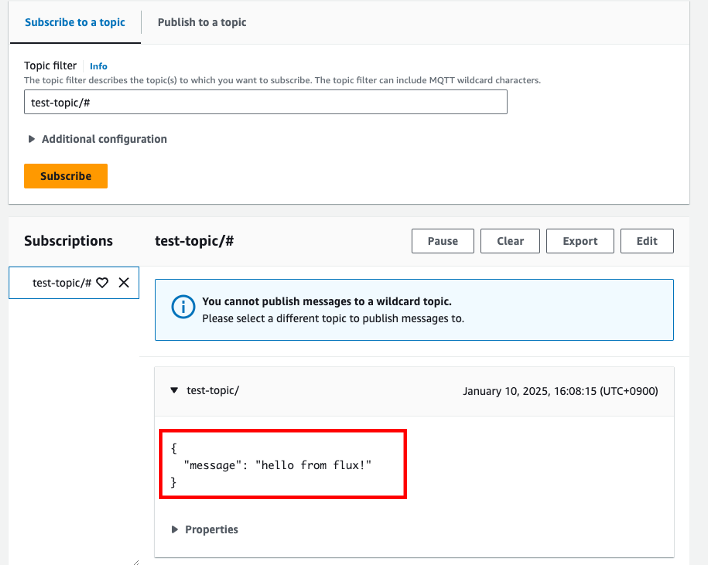
Verify the message appears in the AWS IoT MQTT Test Client.
View Flux App Execution History
You can also check execution history in the History tab of Soracom Flux Studio.
-
Login to the User Console. From the Menu, expand Soracom Flux and select Flux Apps.
-
Select the Flux app you created.
-
Click the History tab.
You will see logs for each channel, including Message, Context, and the Input and Output of actions executed from that channel. For more details, see View Logs.