Outbound Filter
The VPG Outbound Filter lets you control which IP address ranges your devices can send traffic to. By defining allow or deny rules for specific CIDR blocks, you can restrict devices to trusted destinations or block access to specific networks.
Outbound Filter is supported on VPGs using Canal, Door, and Direct connection types (including VPC peering, VPN, and virtual interface connections), as well as VPGs with an internet gateway enabled.
For Type-F, Type-G, and Type-F2 VPGs, Traffic Filtering provides finer-grained control, including protocol- and port-aware rules and matching by destination FQDN.
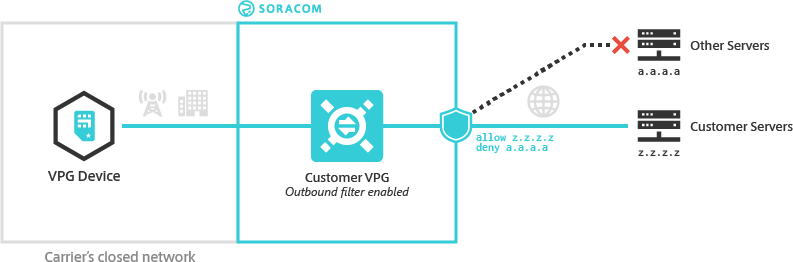
Use Outbound Filter to prevent devices from communicating with untrusted servers or to ensure that data is not sent to unintended destinations.
Filter Rules
An Outbound Filter consists of one or more rules. Each rule includes:
- Action - Either
allowordeny - IP Address Range - A CIDR block defining the destination IP range
If multiple rules contain overlapping CIDR blocks, the more specific rule takes precedence.
For example:
allow 192.0.2.128/25deny 192.0.2.128/28
Traffic destined for 192.0.2.130 matches both ranges, but /28 is more specific than /25, so the deny rule applies.
Rule Precedence
When multiple rules match a destination, the rule with the most specific CIDR block (largest prefix length) takes precedence. For example, if you configure deny 0.0.0.0/0 and allow 203.0.113.50/32, traffic to 203.0.113.50 is allowed because /32 is more specific than /0.
Outbound Filter rules apply regardless of whether an internet gateway is enabled. However, if your VPG does not have an internet gateway enabled, adding an allow 0.0.0.0/0 rule does not enable internet connectivity.
Configuration
You can configure outbound filter rules from the User Console.
- Sign in to the User Console. From the Menu, open the VPG screen.
- From the list of VPGs, click the name of the VPG you want to configure to open its settings page.
-
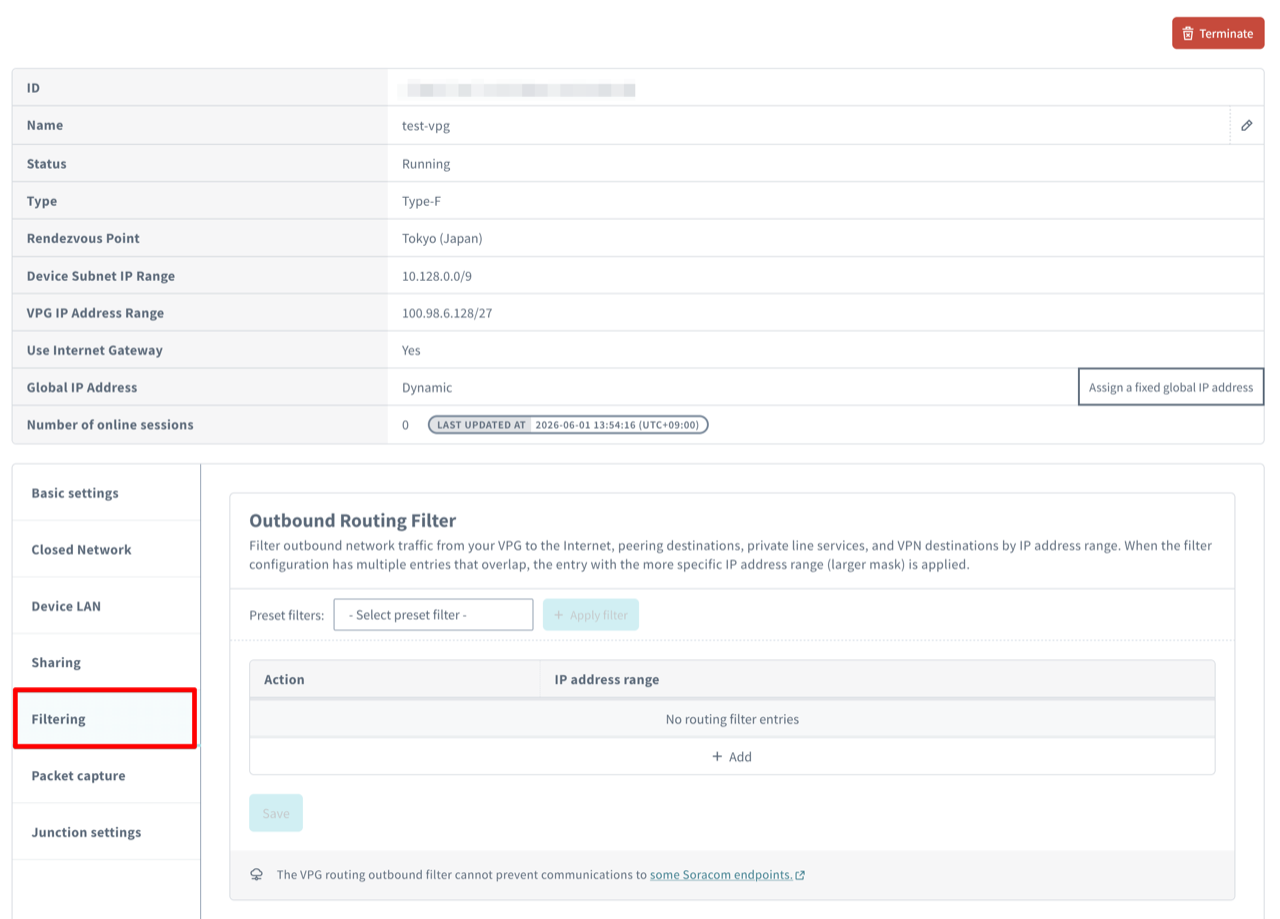
Click the Filtering tab, then locate the Outbound Routing Filter section.
On Type-F, Type-G, and Type-F2 VPGs, the Filtering tab also contains a Traffic Filtering section for the Traffic Filtering option. Outbound Filter is the Outbound Routing Filter section.
Outbound Filter rules can be defined using preset filters, manual rules, or a combination of both.
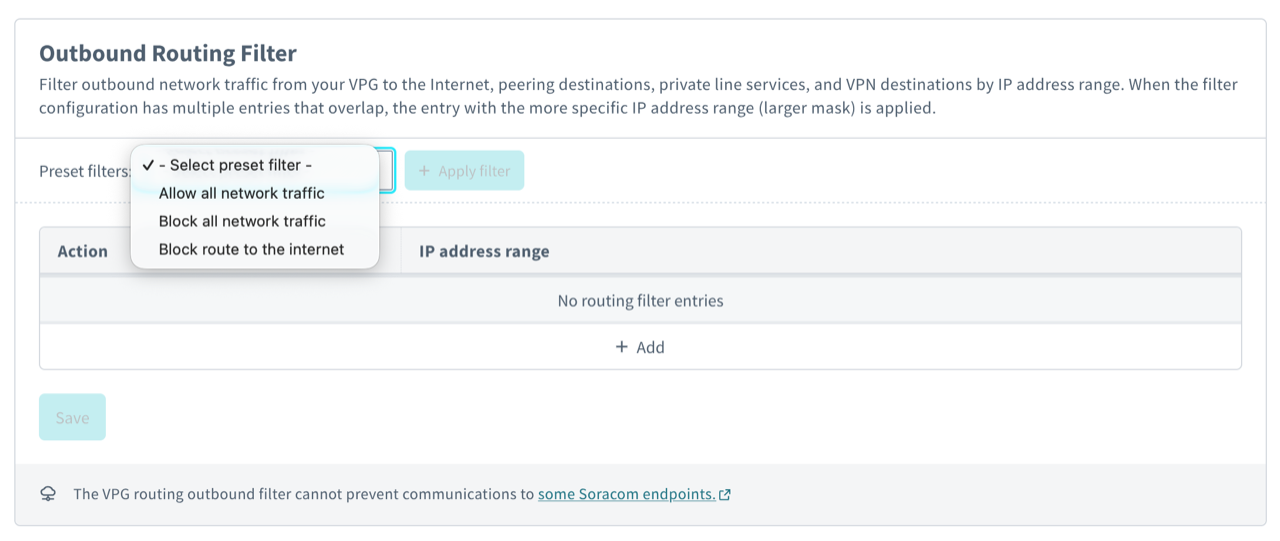
Using Preset Filters
Preset filters provide predefined rule sets for common configurations. Only one preset can be active at a time.
-
From the Preset filters dropdown, select a preset.
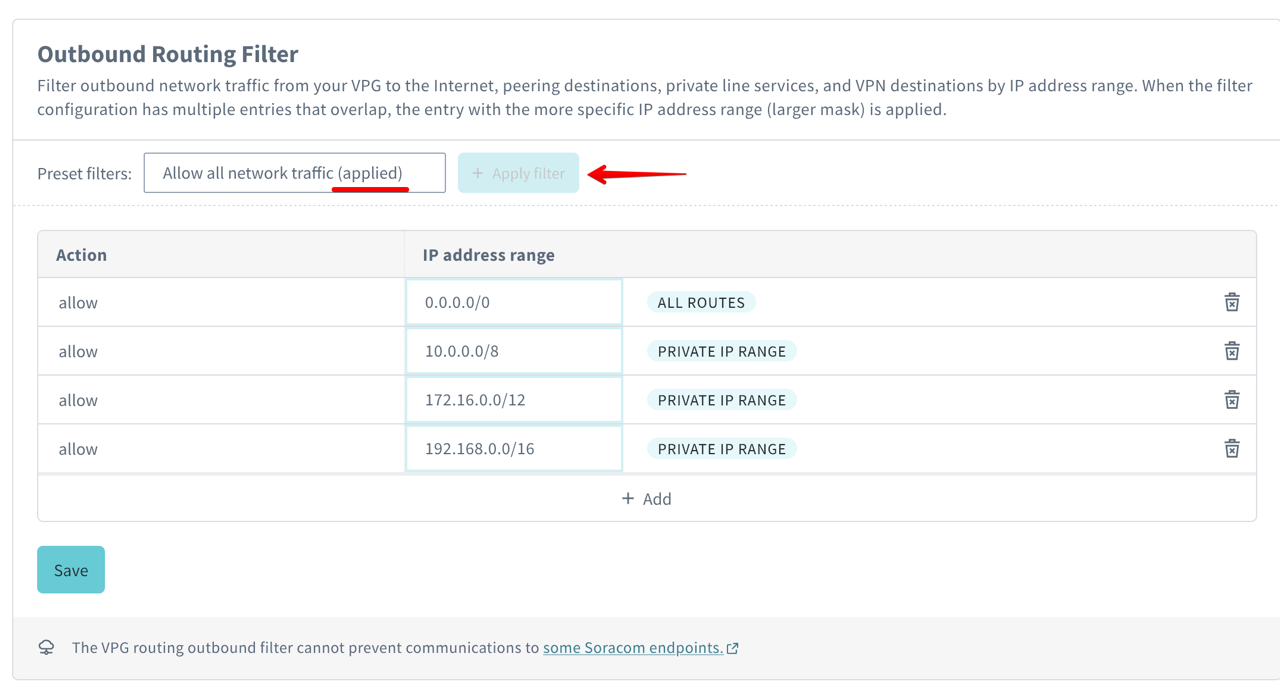
-
Click Apply filter.
The preset’s rules are added to the rule list. If you apply a different preset, the previous preset’s rules are replaced. Any manually added rules are preserved.
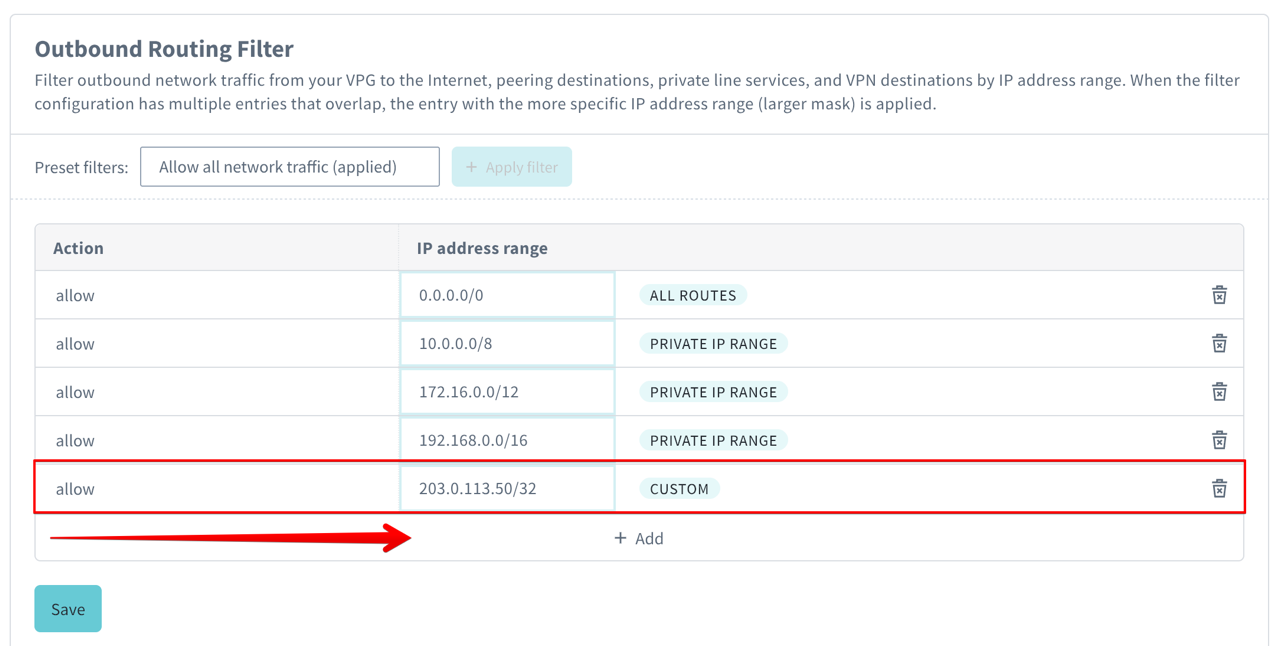
Adding Rules Manually
You can add rules manually whether or not a preset is applied.
For example, if you apply a preset that blocks internet access but need to allow traffic to a specific external server (203.0.113.50), you can add a rule for that destination.
- Click Add in the rule table.
- Set Action to
allowordeny. -
Enter the IP address range as a CIDR block.
Example:
Action IP Address Range Description allow203.0.113.50/32Allow traffic to a specific external server Repeat as needed for additional rules.
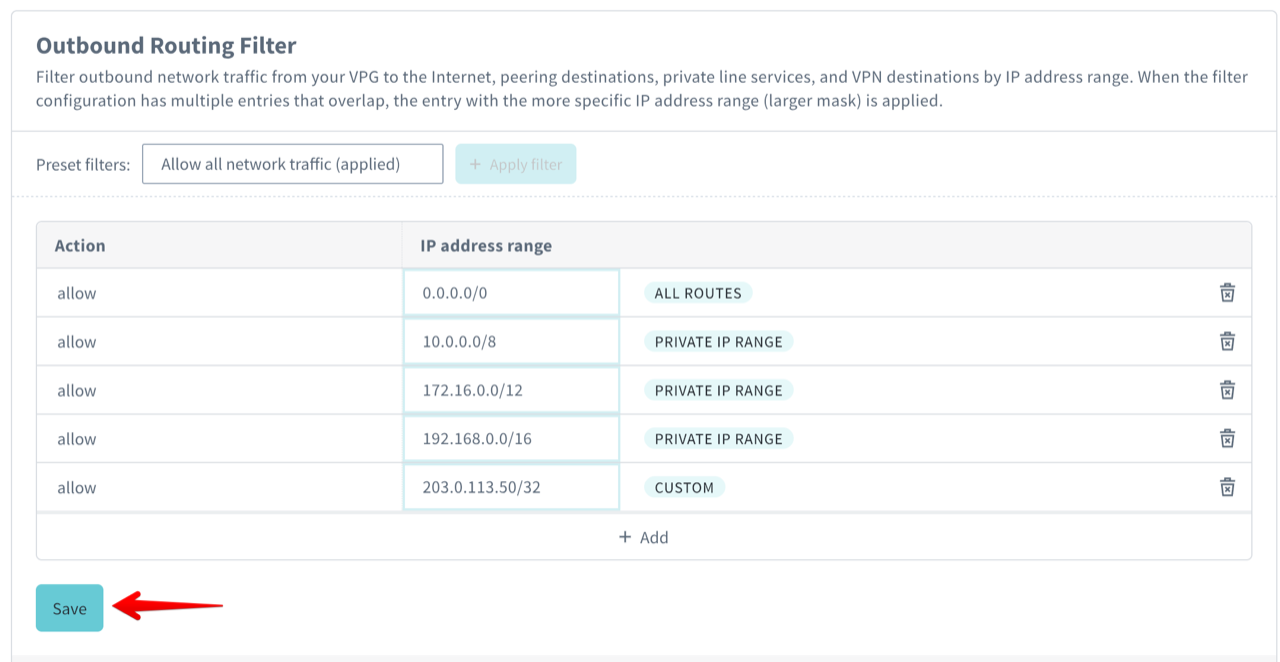
-
After configuring your rules, click Save.
Limitations
Outbound Filter cannot prevent communication to the following Soracom endpoints:
- Soracom Beam -
beam.soracom.io - Soracom Funnel -
funnel.soracom.io - Soracom Funk -
funk.soracom.io - Soracom Harvest Data -
harvest.soracom.io - Soracom Harvest Files -
harvest-files.soracom.io - Unified Endpoint -
uni.soracom.ioorunified.soracom.io - Ping Response Service -
pong.soracom.io - Soracom Air Metadata Service -
metadata.soracom.io - Soracom DNS servers -
100.127.0.53,100.127.1.53 - Soracom NTP server -
ntp.soracom.io
When using Soracom Gate, traffic from the Gate peer server to SIMs in the VPG cannot be filtered.
Programmatic Usage
You can configure Outbound Filter rules using the Soracom API or Soracom CLI.
Each rule requires:
action(string, required) -allowordenyipRange(string, required) - CIDR block
The following example prevents all outbound traffic except traffic destined for 192.0.2.128/25:
[
  {
    "action": "deny",
    "ipRange": "0.0.0.0/0"
  },
  {
    "action": "allow",
    "ipRange": "192.0.2.128/25"
  }
]
Then, simply pass in the filter configuration to the Soracom API or Soracom CLI. For either method, you will need the VPG ID.
Soracom API
To access the Soracom API, first use the auth API to obtain an API Key and Token. Refer to the API Usage Guide for instructions on how to use the API Key and Token in API requests.
Then, use the setRoutingFilter API to set the Outbound Filter rules:
curl -X POST \
|  -H 'X-Soracom-API-Key: <MY-API-KEY>' \
|  -H 'X-Soracom-Token: <MY-TOKEN>' \
|  -H 'Content-Type: application/json' \
|  -d '[
|        {
|          "action": "deny",
|          "ipRange": "0.0.0.0/0"
|        },
|        {
|          "action": "allow",
|          "ipRange": "10.0.0.123/32"
|        }
|      ]' \
| https://g.api.soracom.io/v1/virtual_private_gateways/<VPG-ID>/set_routing_filterSoracom CLI
To use the Soracom CLI, you must first configure it to authenticate with your account information, authorization key, or SAM user credentials.
Then, run the following command to set the Outbound Filter rules:
soracom vpg set-routing-filter --vpg-id '<VPG-ID>' --body '@path/to/filter.json' --coverage-type gIn this sample, we're using the @filename method for passing in the filter definition which is stored in a separate file, but you can of course pass the raw data into the --body parameter directly.