Configuration
All of the settings needed to manage Soracom LTE-M Buttons are stored in Soracom LTE-M Button groups. These settings include both the settings for controlling the button's behavior as well as for where to send messages sent by a button. Configuring these settings within a group allows you to manage the settings for multiple Soracom LTE-M Buttons together, without having to configure each button individually.
Managing Buttons
From the Menu, expand Gadgets and select Soracom LTE-M Button.
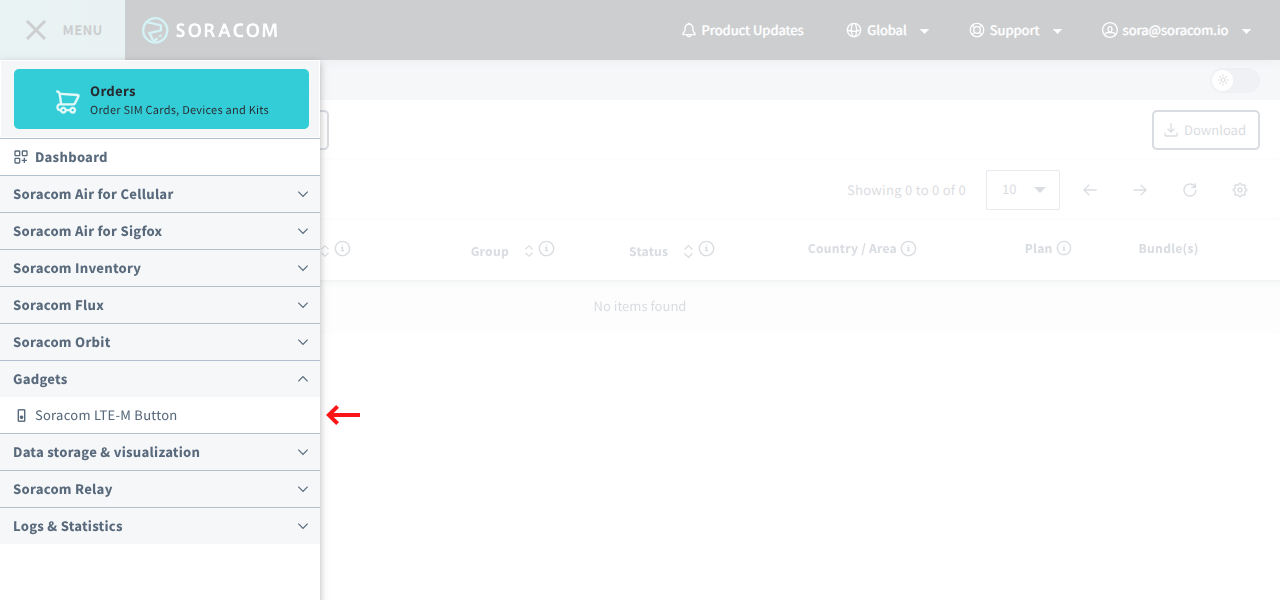
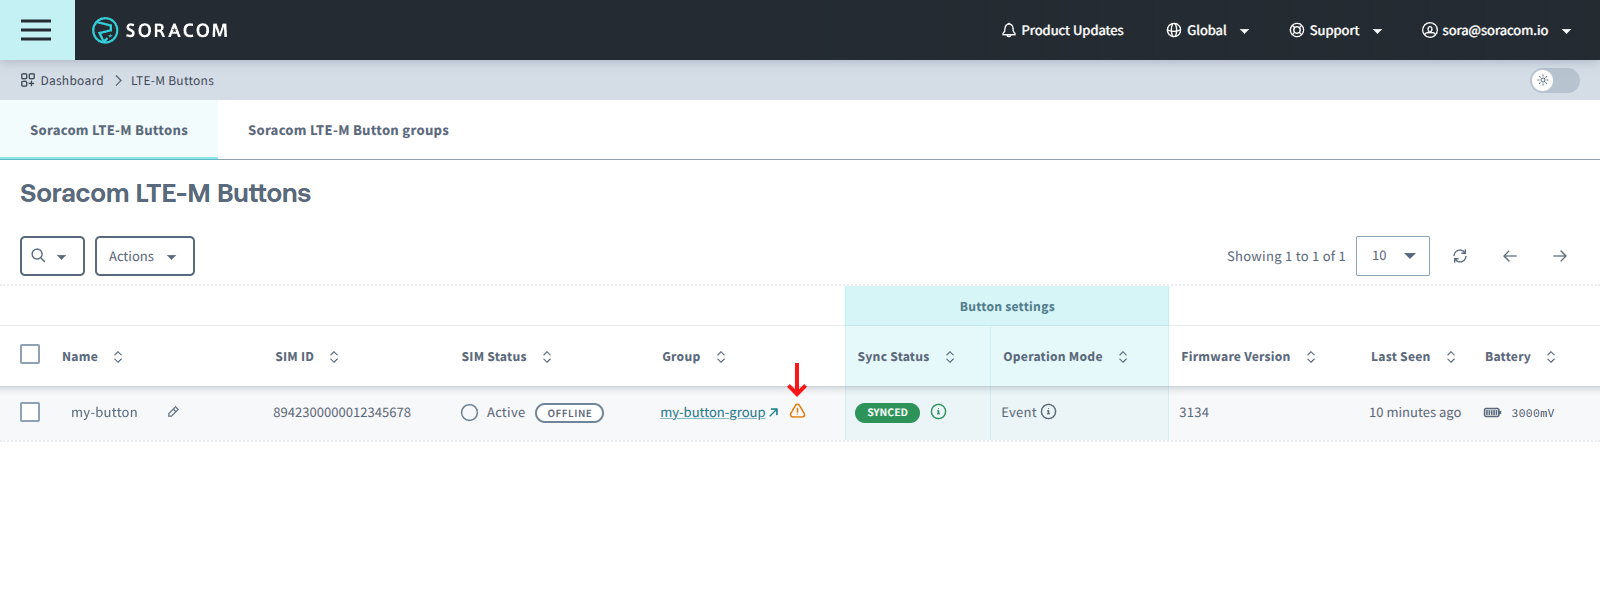
The Soracom LTE-M Buttons screen will appear, listing the Soracom LTE-M Buttons in your account as well as their current settings and latest status.
- Name - The name of the button, if provided.
- SIM ID - The ICCID of the button's built-in eSIM.
- SIM Status - The status of the button's built-in eSIM.
- Group - The group the button belongs to.
- Sync Status - Indicates if the button's current settings have been synchronized with the group configuration.
- Operation Mode - The current operation mode of the button. Hover over the icon to see additional details.
- Firmware Version - The firmware version of the button. See Firmware Updates for more information.
- Last Seen - Indicates how long ago the button last connected.
- Battery - Indicates the last reported battery voltage level.
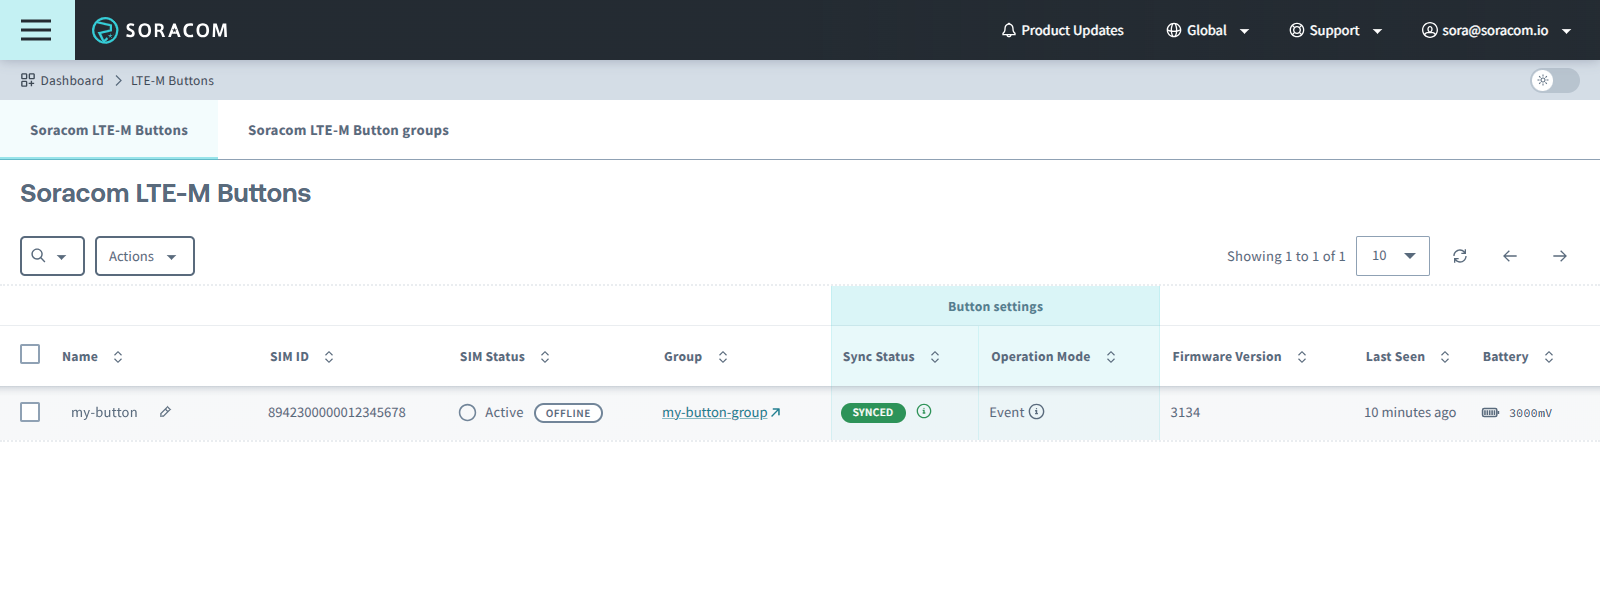
Renaming a Button
To rename a button, simply click the icon in the Name column.
Creating a Group
To create a new Soracom LTE-M Button group for a particular button:
-
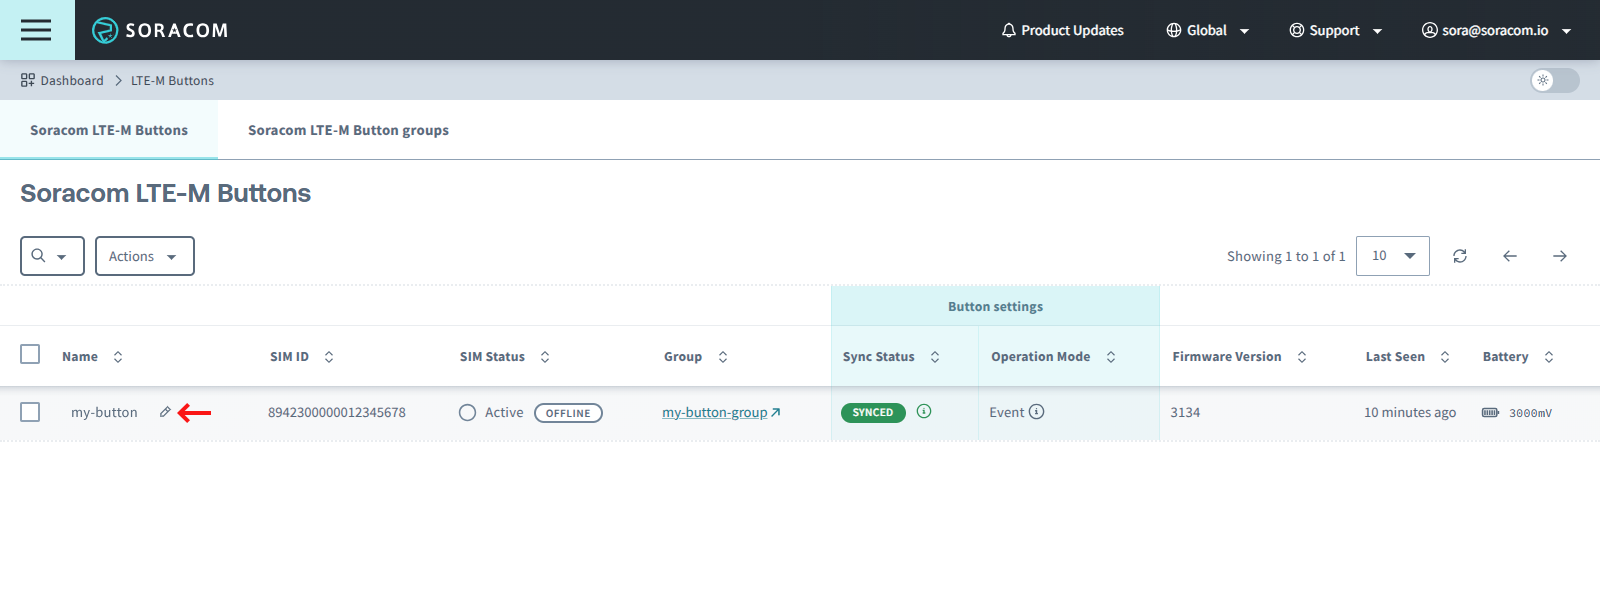
Click the for the button, then click the Actions menu and select Change group:
-
From the Change Soracom LTE-M Button group popup, click the button:

-
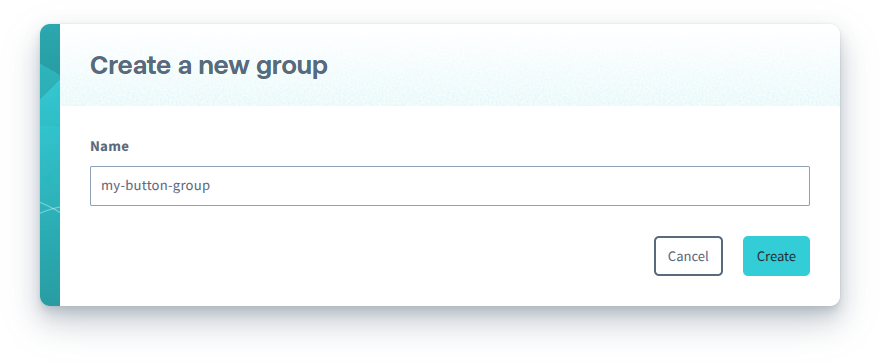
Enter a name for the new group, and click Create:
-
Finally, select the group you created and click Change group:

Alternatively, you can also create a new Soracom LTE-M Button group by itself:
-
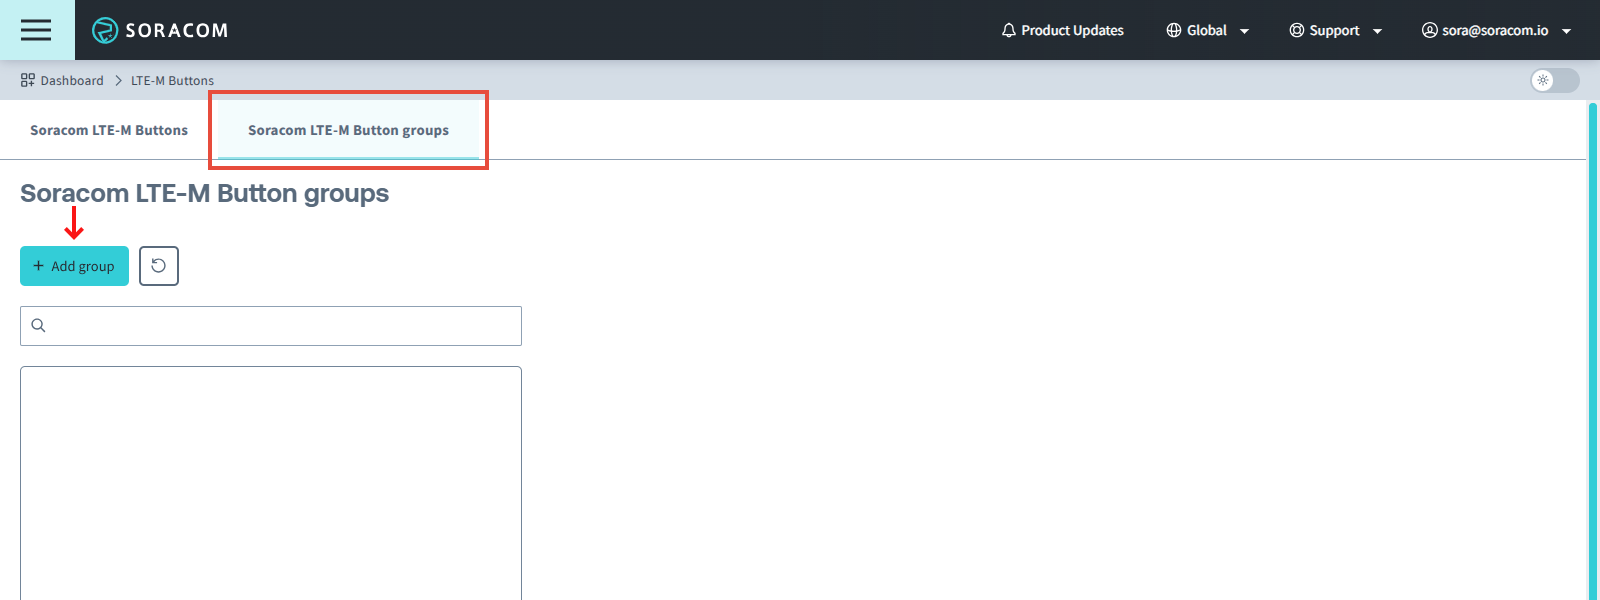
Click the Soracom LTE-M Button groups tab, then click Add group:
- Enter a name for the new group and click Create.
Adding a Button to a Group
To add a button to an existing group:
-
Click the for the button, then click the Actions menu and select Change group:
-
From the Change Soracom LTE-M Button group popup, select a group and click Change group:
Configuring a Group
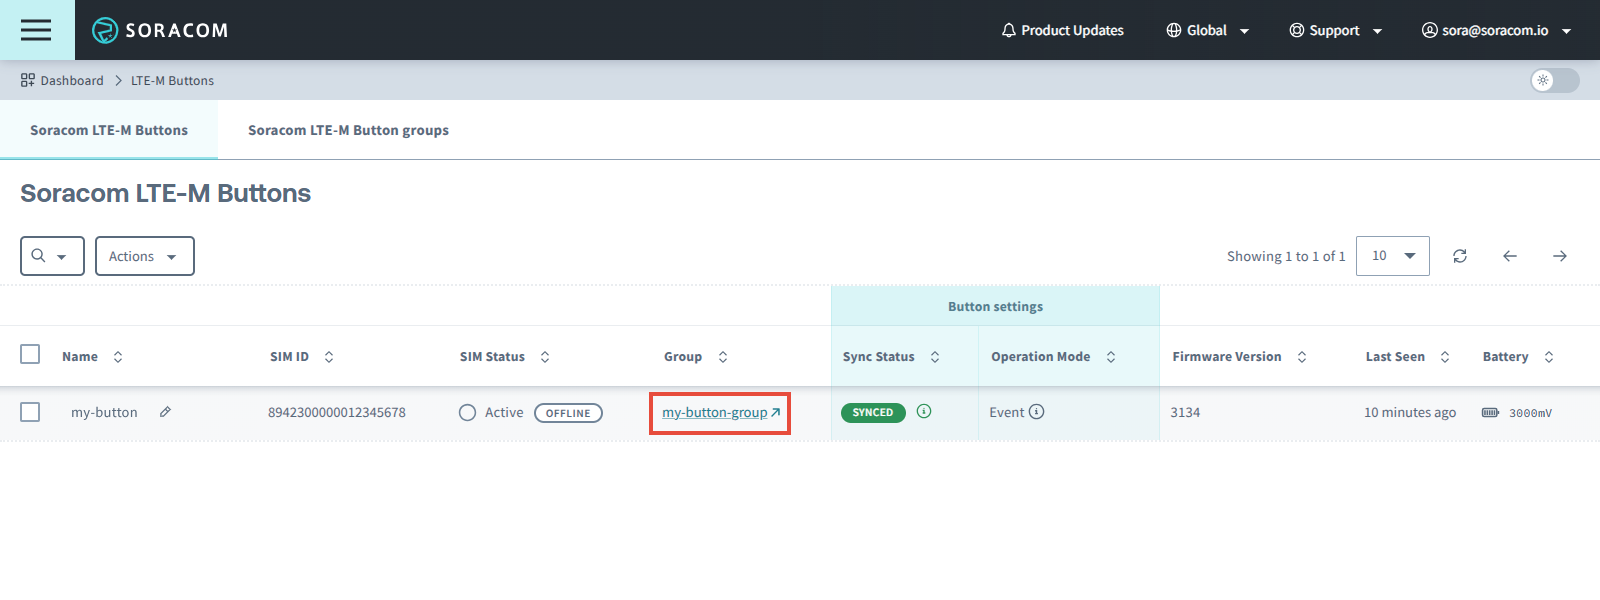
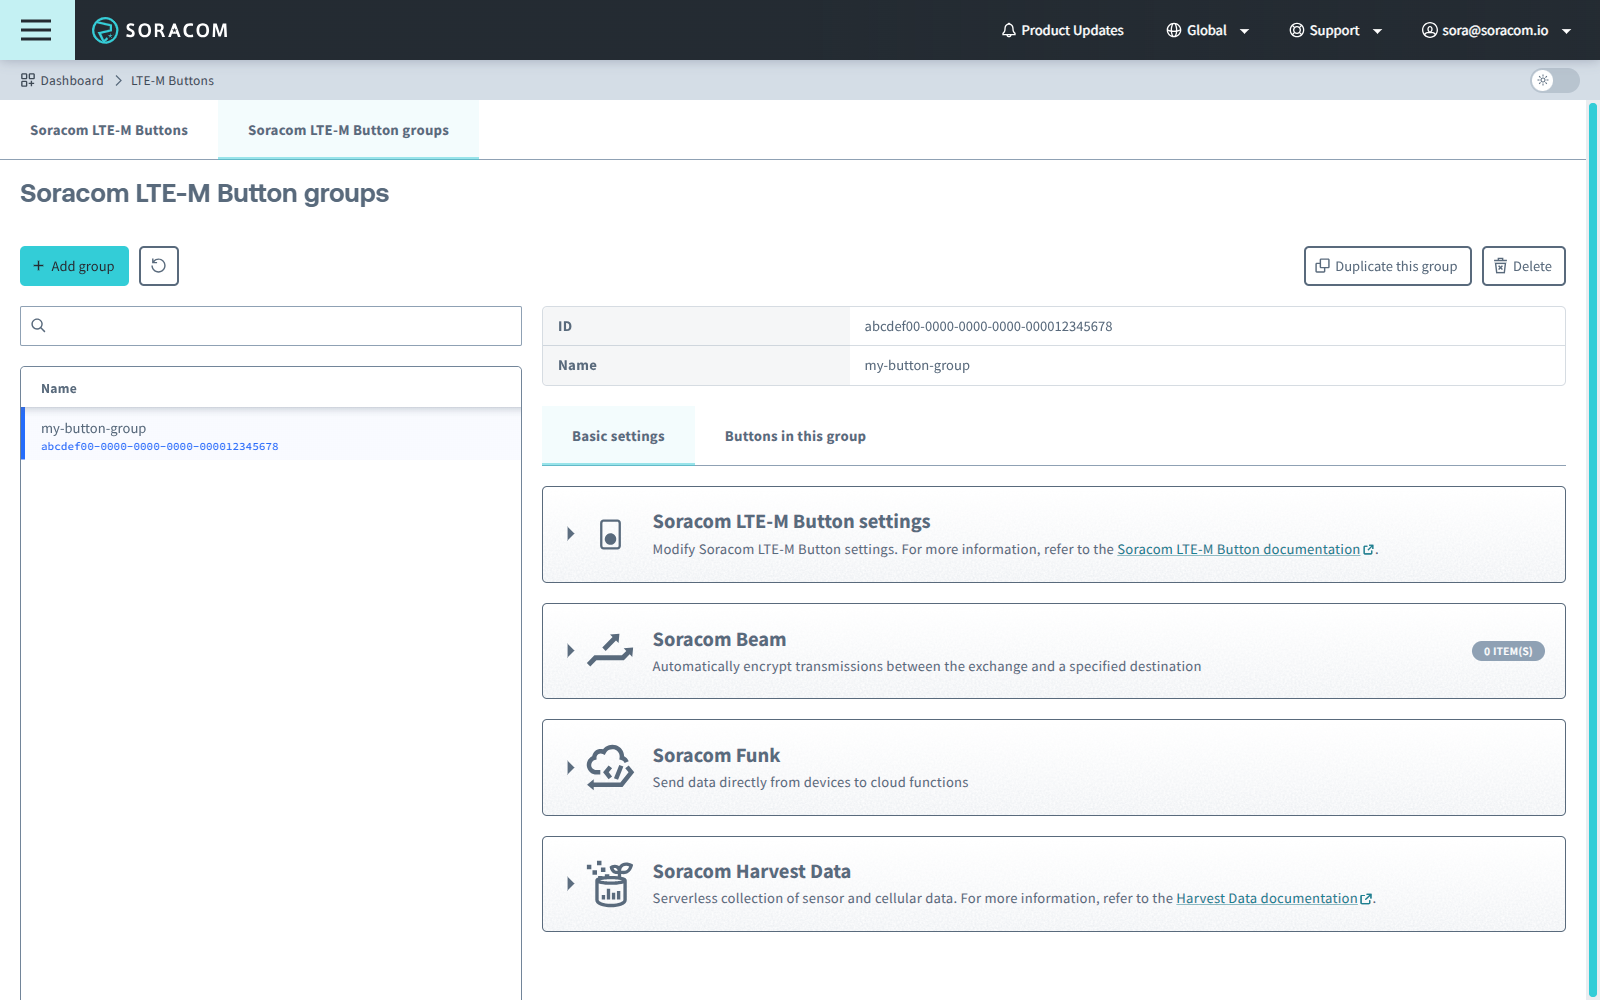
To configure a Soracom LTE-M Button group's settings, find it in the Soracom LTE-M Buttons list and click the link for the group:
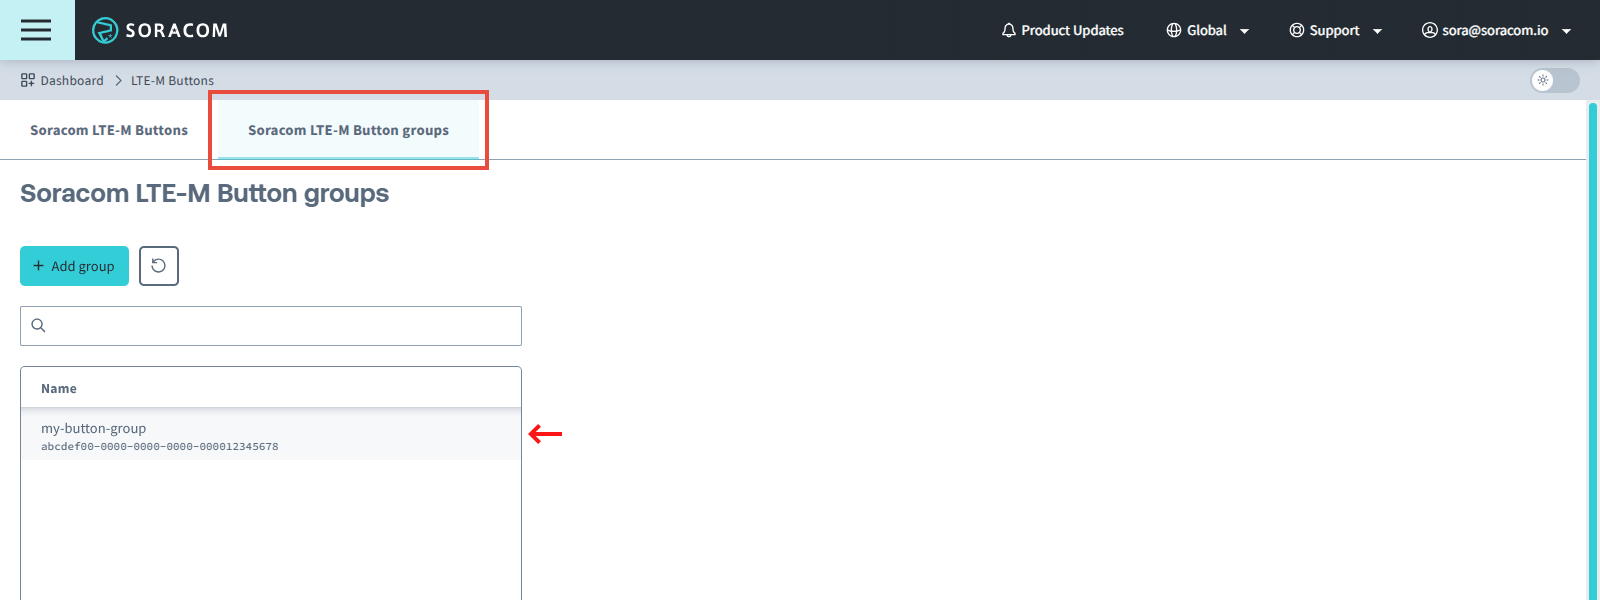
Alternatively, you can click the Soracom LTE-M Button groups tab and find it in the list of groups.
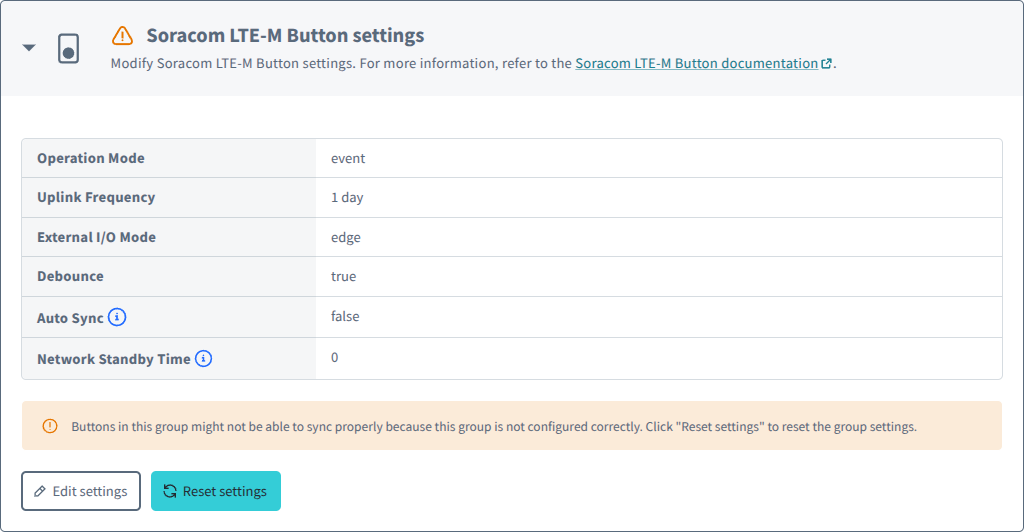
Here you will see the group settings:
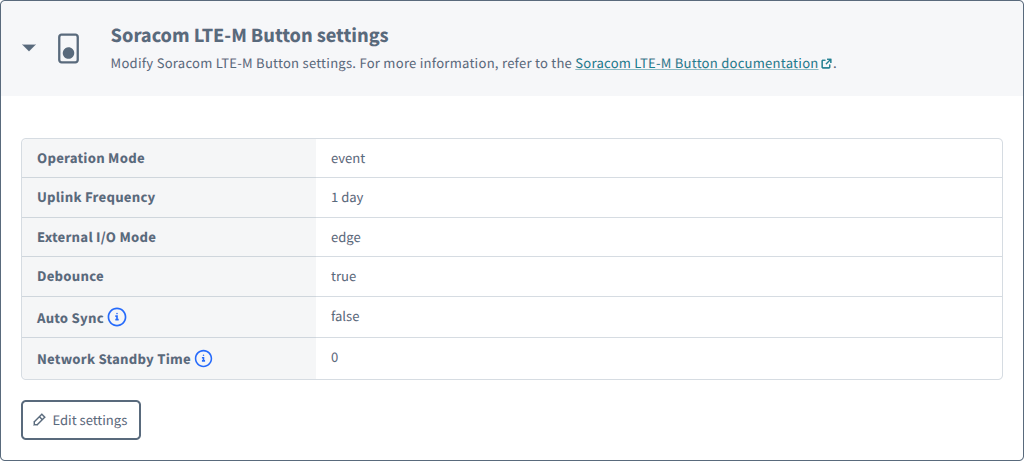
Soracom LTE-M Button Settings
These settings control the behavior of the Soracom LTE-M Buttons themselves, such as changing the operation mode or external I/O mode.
-
Expand the Soracom LTE-M Button settings panel, then click Edit settings.
-
Follow the prompts to select the button settings to apply to the buttons in the group.
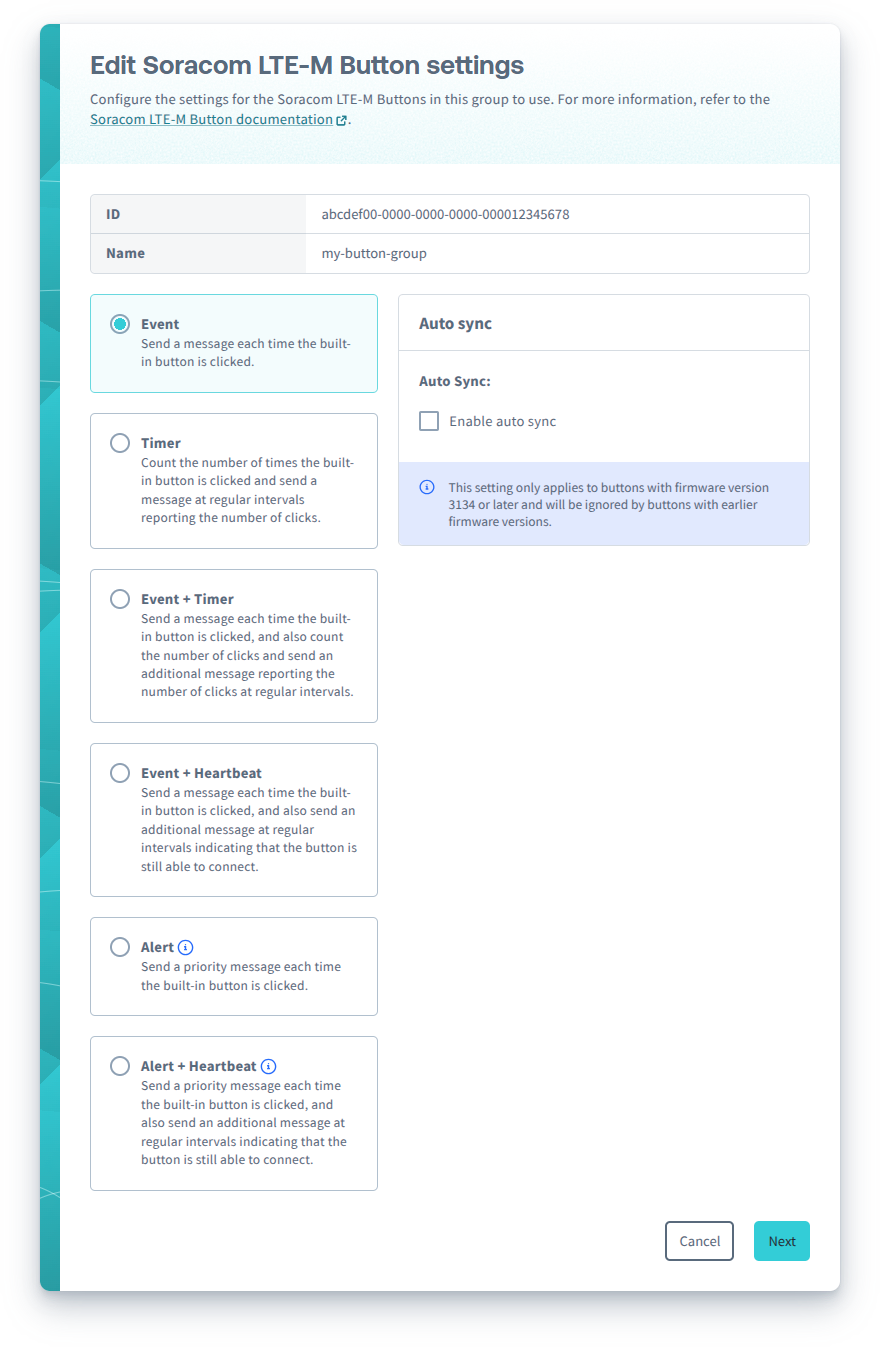
The available settings and options depend on the operation mode you select. For more information on each operation mode's settings, refer to the following:
Once you have saved the Soracom LTE-M Button settings, you may need to sync each button in order to update its settings. Refer to the Syncing button settings section below.
Soracom LTE-M Button groups are designed so that you can configure the Soracom LTE-M Button settings once and sync multiple buttons to those settings, without having to configure settings for each button one by one.
After configuring Soracom LTE-M Button settings, follow the steps in the Syncing button settings section to sync your buttons.
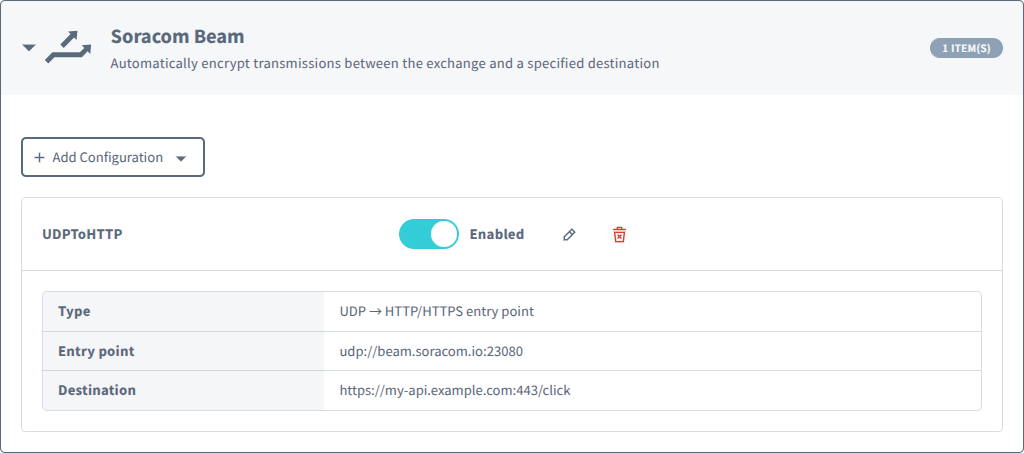
Soracom Beam Settings
These settings allow you to forward button messages to your web server or to a web application with a custom webhook, such as IFTTT, Zapier, Make, or Automate.io.
-
Expand the Soracom Beam panel, then click Add Configuration and select UDP → HTTP/HTTPS entry point.
-
Configure the settings for your server or webhook.
For more information, refer to the Soracom Beam: Configuration and Soracom Beam: UDP → HTTP/HTTPS documentation. You can also refer to the Soracom LTE-M Button Webhook Tutorial for a step-by-step guide.
Soracom Funk Settings
These settings allow you to forward button messages to cloud function providers, such as AWS Lambda, Google Cloud Functions, or Microsoft Azure Functions.
-
Expand the Soracom Funk panel, then click the toggle to enable Soracom Funk.
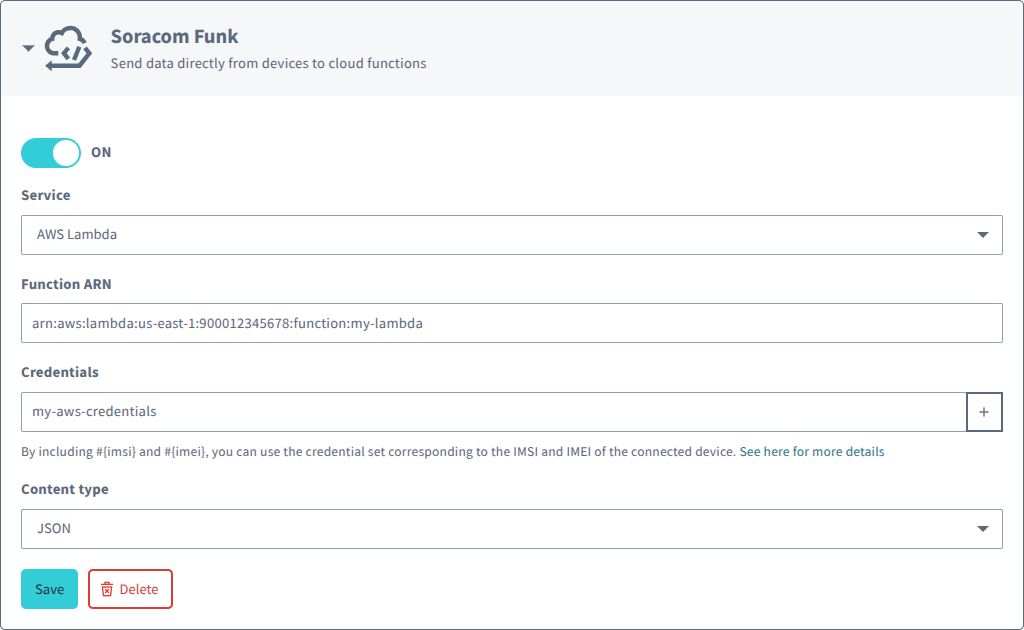
-
Configure the settings for your cloud function.
For more information, refer to the Soracom Funk: Configuration documentation. You can also refer to the Soracom LTE-M Button Slack Notification Tutorial for a step-by-step guide.
Soracom Harvest Data Settings
These settings allow you to store and view button messages directly in Soracom.
-
Expand the Soracom Harvest Data panel, then click toggle to enable Soracom Harvest Data and click Save.
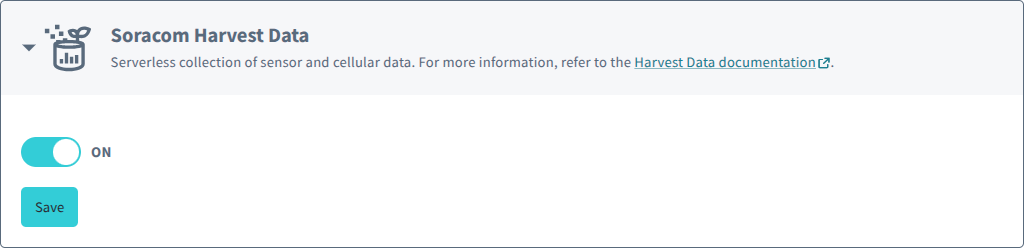
For more information, refer to the Harvest Configuration and Viewing Data documentation. You can also refer to the Soracom LTE-M Button Harvest Data Tutorial for a step-by-step guide.
Syncing Button Settings
Since the Soracom LTE-M Button will normally be powered off and disconnected from the network in order to minimize battery usage, button settings cannot be pushed directly to the button. Instead, the button will need to power on and connect to the network in order to receive updated settings.
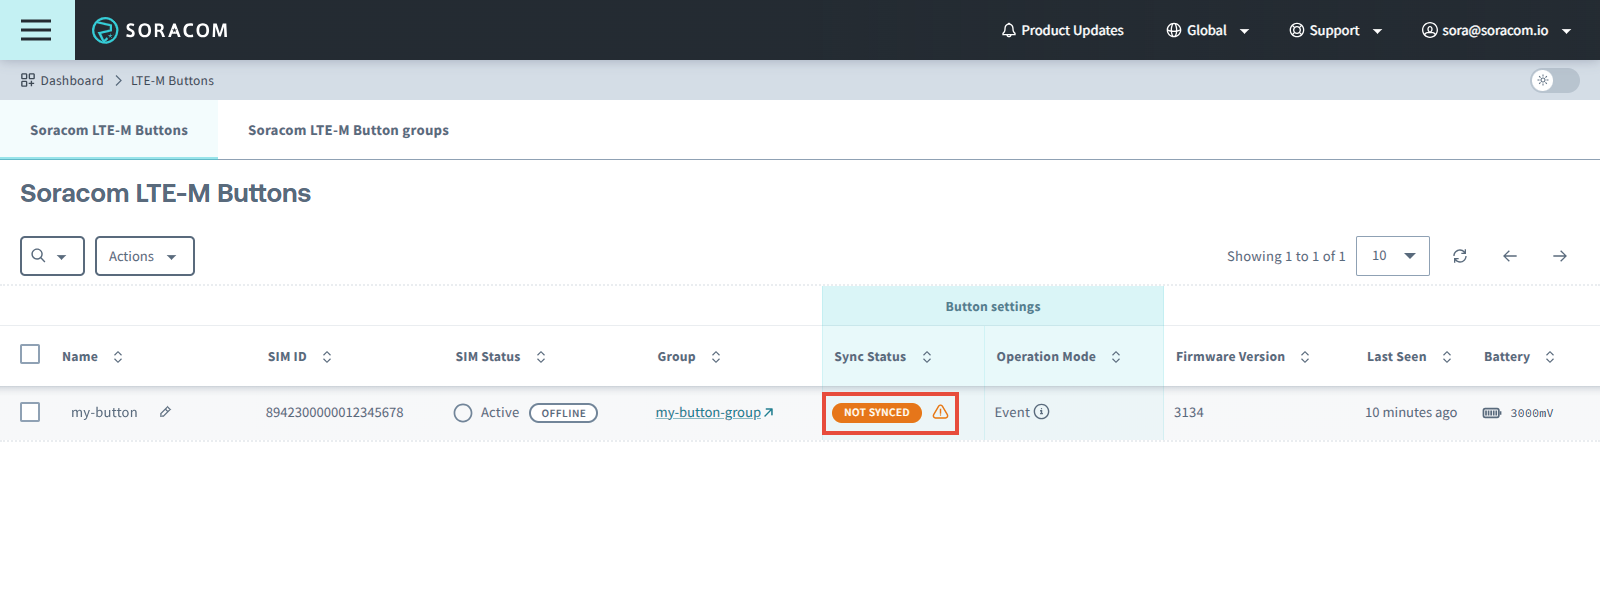
Buttons only need to be synced when changing Soracom LTE-M Button settings.
If a button's settings are different than its group's Soracom LTE-M Button settings, the Sync Status column will display a Not Synced warning indicating that the button needs to be synced:
Auto Sync
For buttons with firmware version 3134 or later, an Auto sync option is available. When enabled, the button automatically wakes up once every 24 hours and sends a Status message to report its current state and support configuration synchronization. This allows you to remotely change a button's settings without having to manually trigger a sync.
Note that if a button's Auto sync option is not already enabled, you must enable it in its group's Soracom LTE-M Button settings and manually trigger a sync in order to update the button's settings. Afterwards, the button will begin automatically syncing.
Even if Auto sync is enabled, you can still manually trigger a sync using the steps below in order to update the button settings immediately.
Manual Sync
To manually trigger a sync:
-
Press and hold the built-in button for 10 seconds.
-
Once you see the LED blink green three times ☀☀☀, release the button.*1
*1 - For buttons with firmware version 2220, the LED will blink green only one time.
During a sync, the button will connect to a network and update its settings to match its group's Soracom LTE-M Button settings if required.
- If the sync was successful and the button's settings were updated, the LED will show two extra long green blinks: ☀────────☀────────
- If the sync was successful and the button's settings are already up-to-date, the LED will show one extra long green blink: ☀────────
- If the sync was unsuccessful, the LED will show one extra long red blink: ☀────────
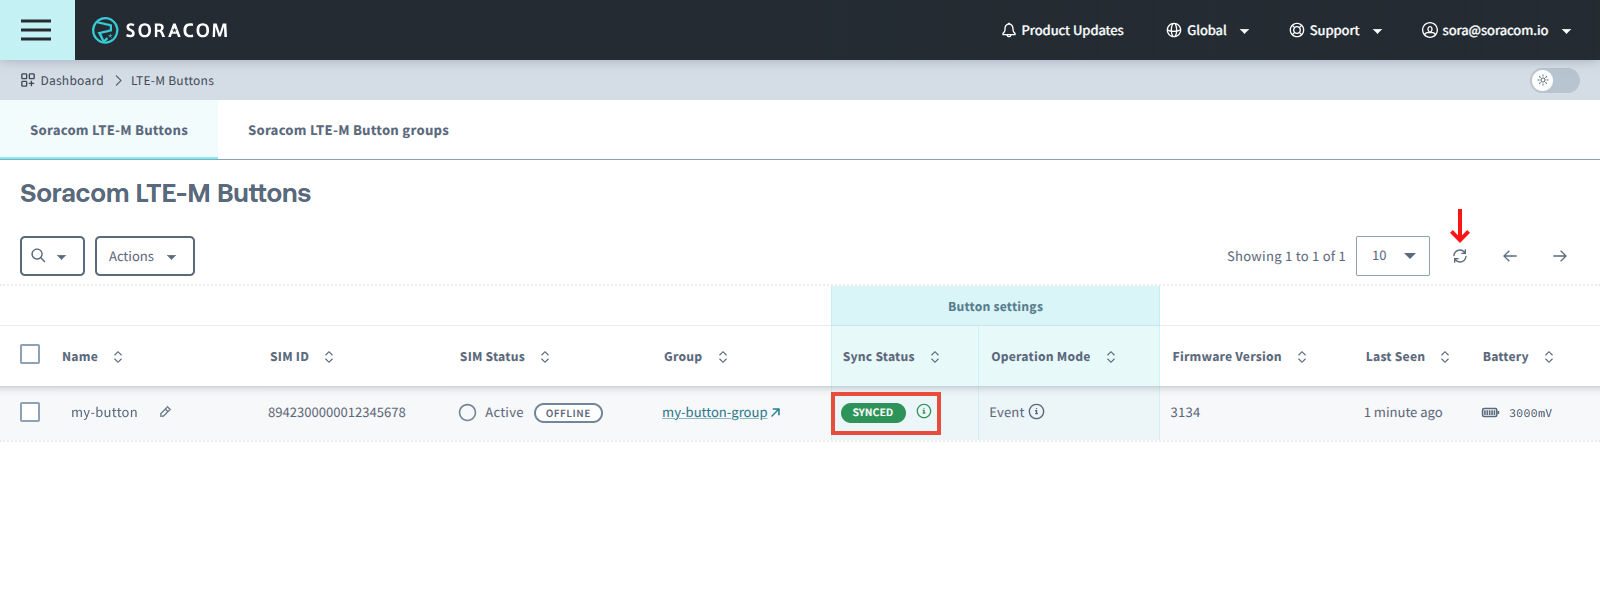
After the button has synced its settings, you can click the button to confirm that the button updated its settings:
Resetting a Group
Soracom LTE-M Button functionality is implemented using a combination of Binary Parser, Soracom Orbit, and Unified Endpoint. When creating a Soracom LTE-M Button group, settings for these services are automatically configured.
If you change these settings elsewhere, buttons in the group might not be able to sync properly. In most cases, buttons should still be able to send messages, however information such as battery voltage level may stop updating, and you might not be able to change button settings.
Soracom will automatically check if the settings for these services are configured correctly. If any issues are detected, a warning will be displayed in both the list of Soracom LTE-M Buttons as well as in the group settings for the affected Soracom LTE-M Button group:
To reset these settings:
-
Find the group in the Soracom LTE-M Buttons list and click the link for the group.
- Expand the Soracom LTE-M Button settings panel and click the Reset settings button to reset the Soracom LTE-M Button settings to their original state:
Resetting the Soracom LTE-M Button settings will not affect any Soracom Beam, Soracom Funk, or Soracom Harvest Data settings you have configured.