Using Beam to Upload Files to Amazon S3
Soracom Beam can be used to enable your IoT devices to work with files in an Amazon S3 bucket without the need to install credentials on the device. You can use Beam for Amazon S3 access via the AWS SDK or CLI on your device, or you can send files to your Amazon S3 bucket direcly by sending them securely to Beam and having Beam forward them without the overhead of AWS installations on your device.
The steps detailed below will walk you through the process of enabling your devices to upload and download files to an Amazon S3 bucket simply by accessing the Beam Website entry point.
Note that the Website entry point must be used, the HTTP entry point is not available for uploading or downloading files to Amazon S3.
There are 4 steps in this process:
- Create an Amazon S3 bucket
- Create an IAM role and assign it to Soracom's AWS account
- Set up Soracom Beam
- Upload files to Amazon S3 using the website entry point
Step 1: Create an Amazon S3 Bucket
Create an Amazon S3 bucket to upload/download from Beam.
-
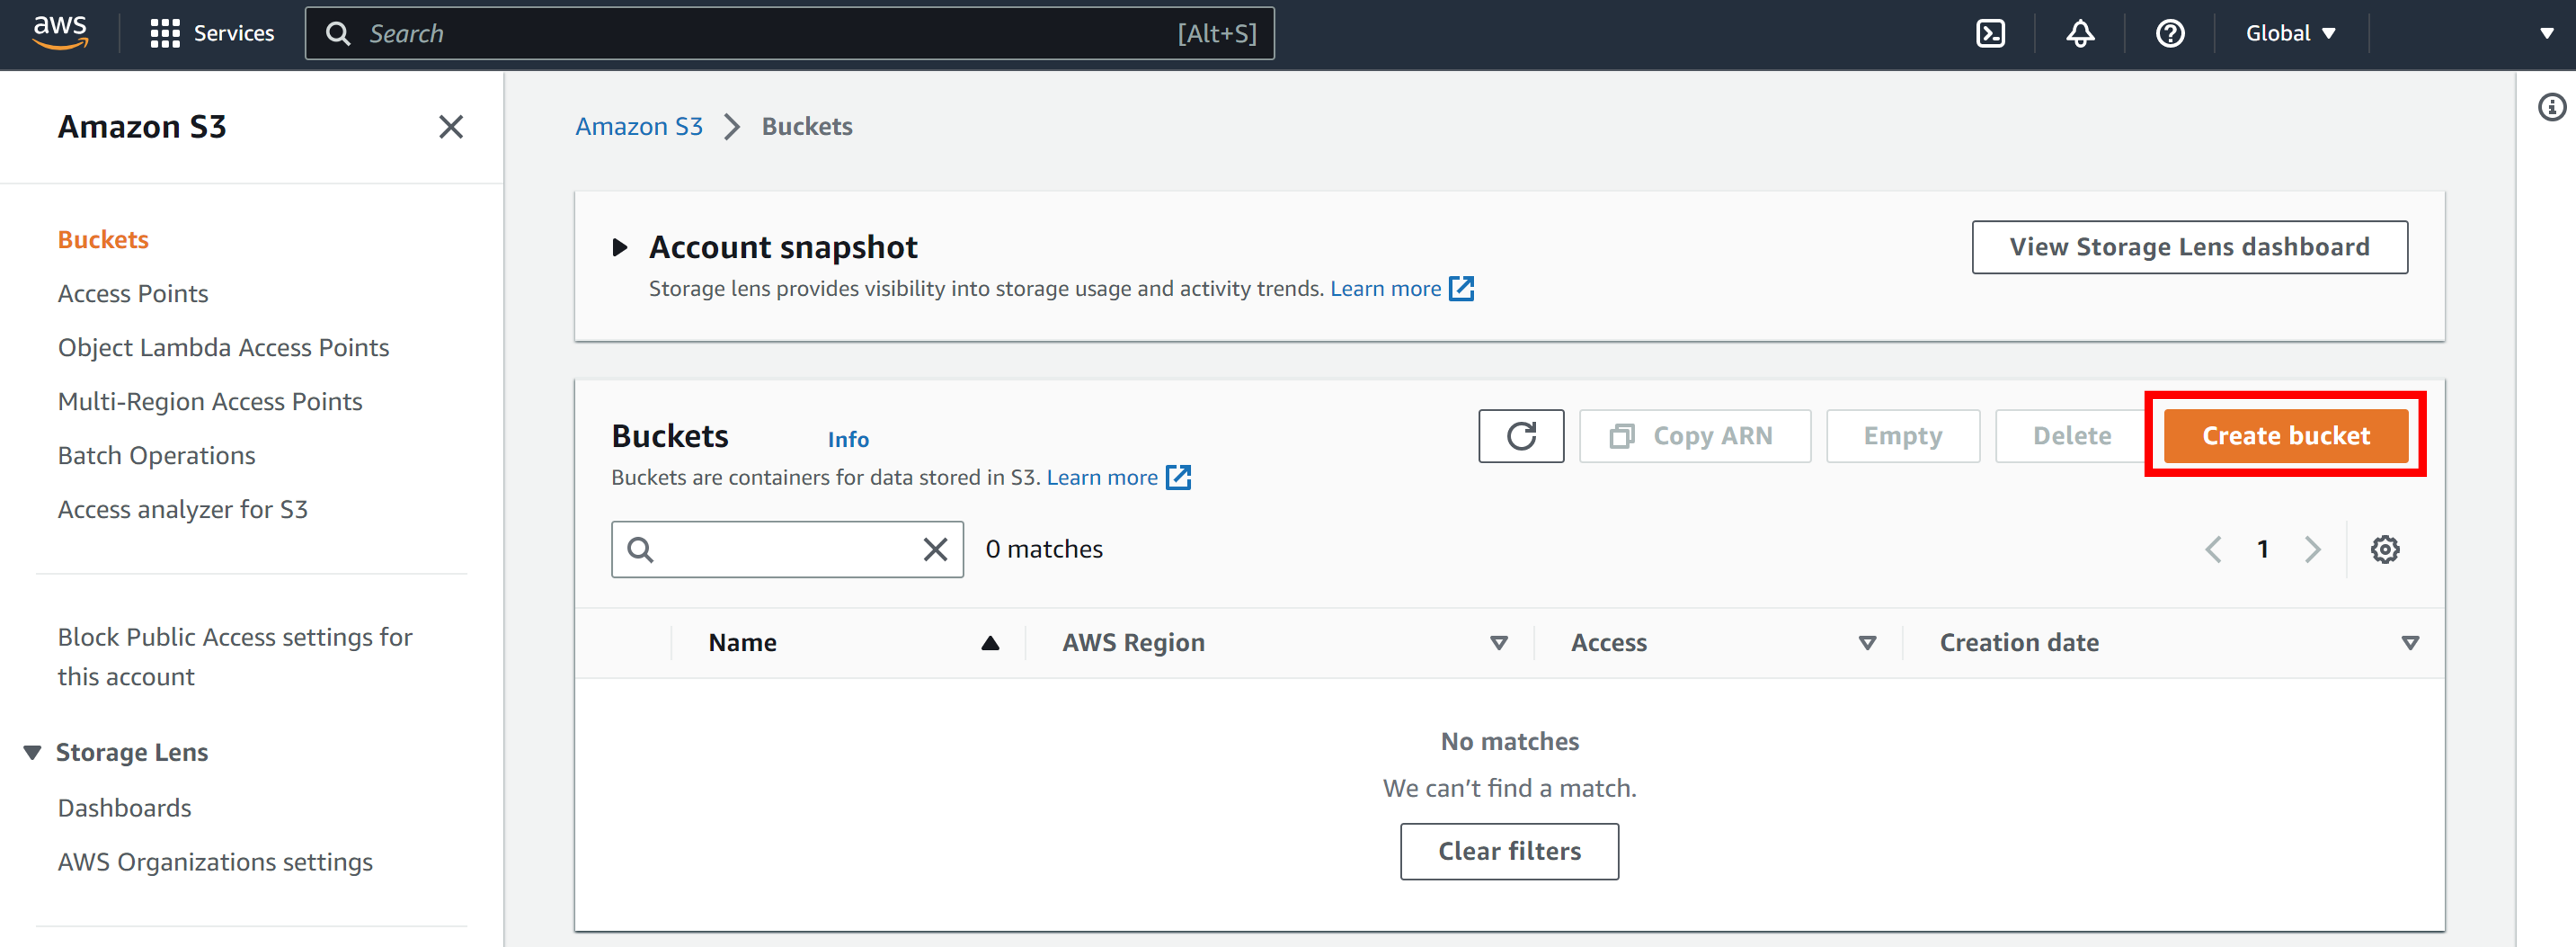
Go to the Amazon S3 Management Console and click Create bucket.
-
Enter a bucket name in Bucket name and click Create bucket.
The bucket name will henceforth be denoted ${amazon_s3_bucket}. Example:
beam-amazon-s3-bucket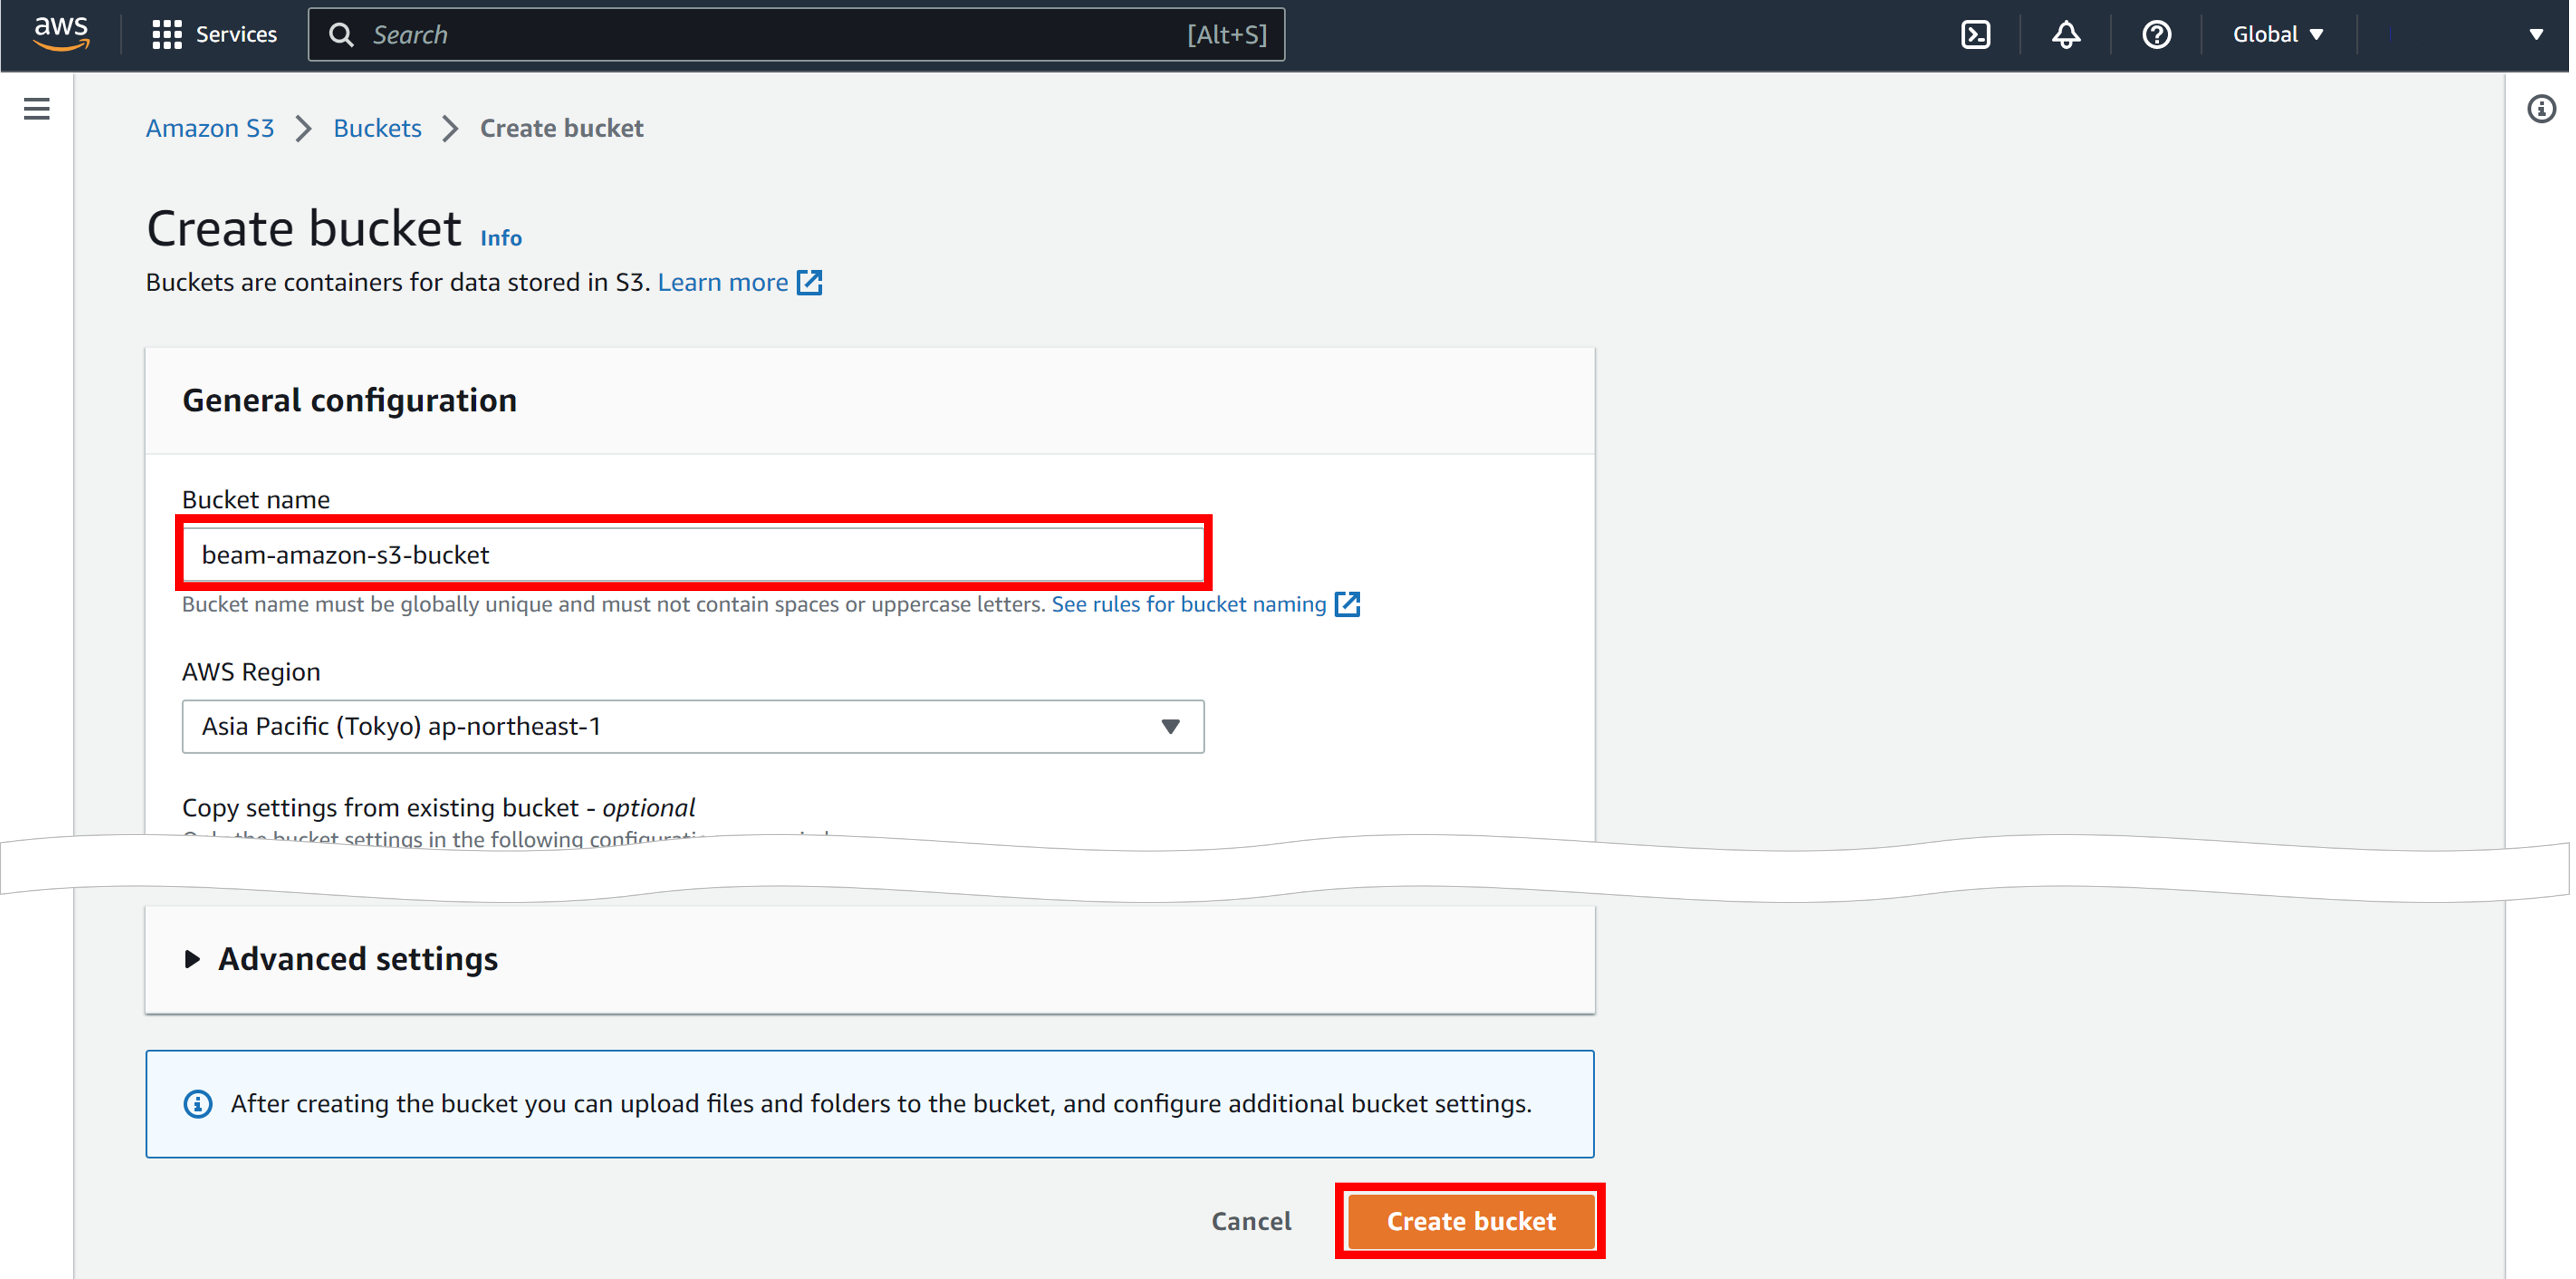
An Amazon S3 bucket is created.
-
Click on the Amazon S3 bucket you created, click Properties, and copy the Amazon Resource Name (ARN) value.
The Amazon Resource Name (ARN) value will henceforth be denoted ${amazon_s3_bucket_arn}. Example:
arn:aws:s3:::beam-amazon-s3-bucket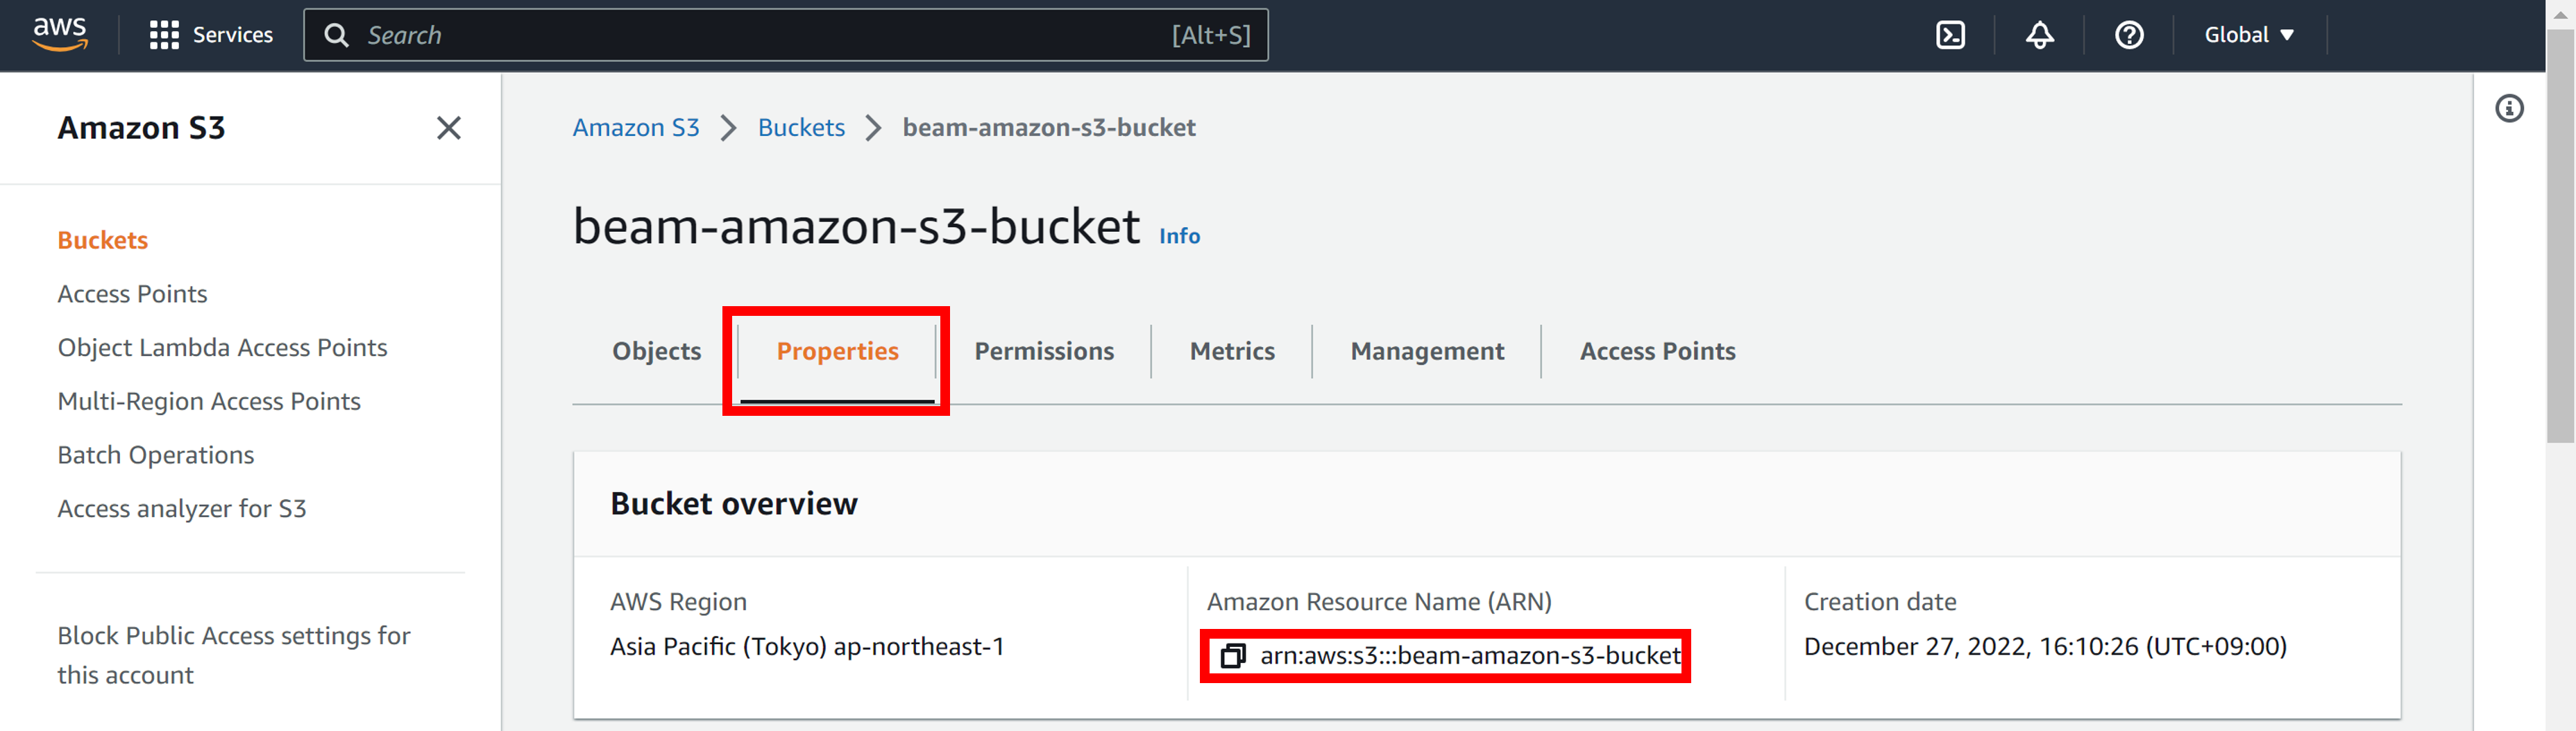
Step 2: Create an IAM Role and Assign It to Soracom's AWS Account
Allow our Soracom AWS account that runs Beam to upload to and download from the Amazon S3 bucket created in Step 1. Specifically, create an AWS IAM role to allow uploads and downloads, and assign it to Soracom's AWS account.
-
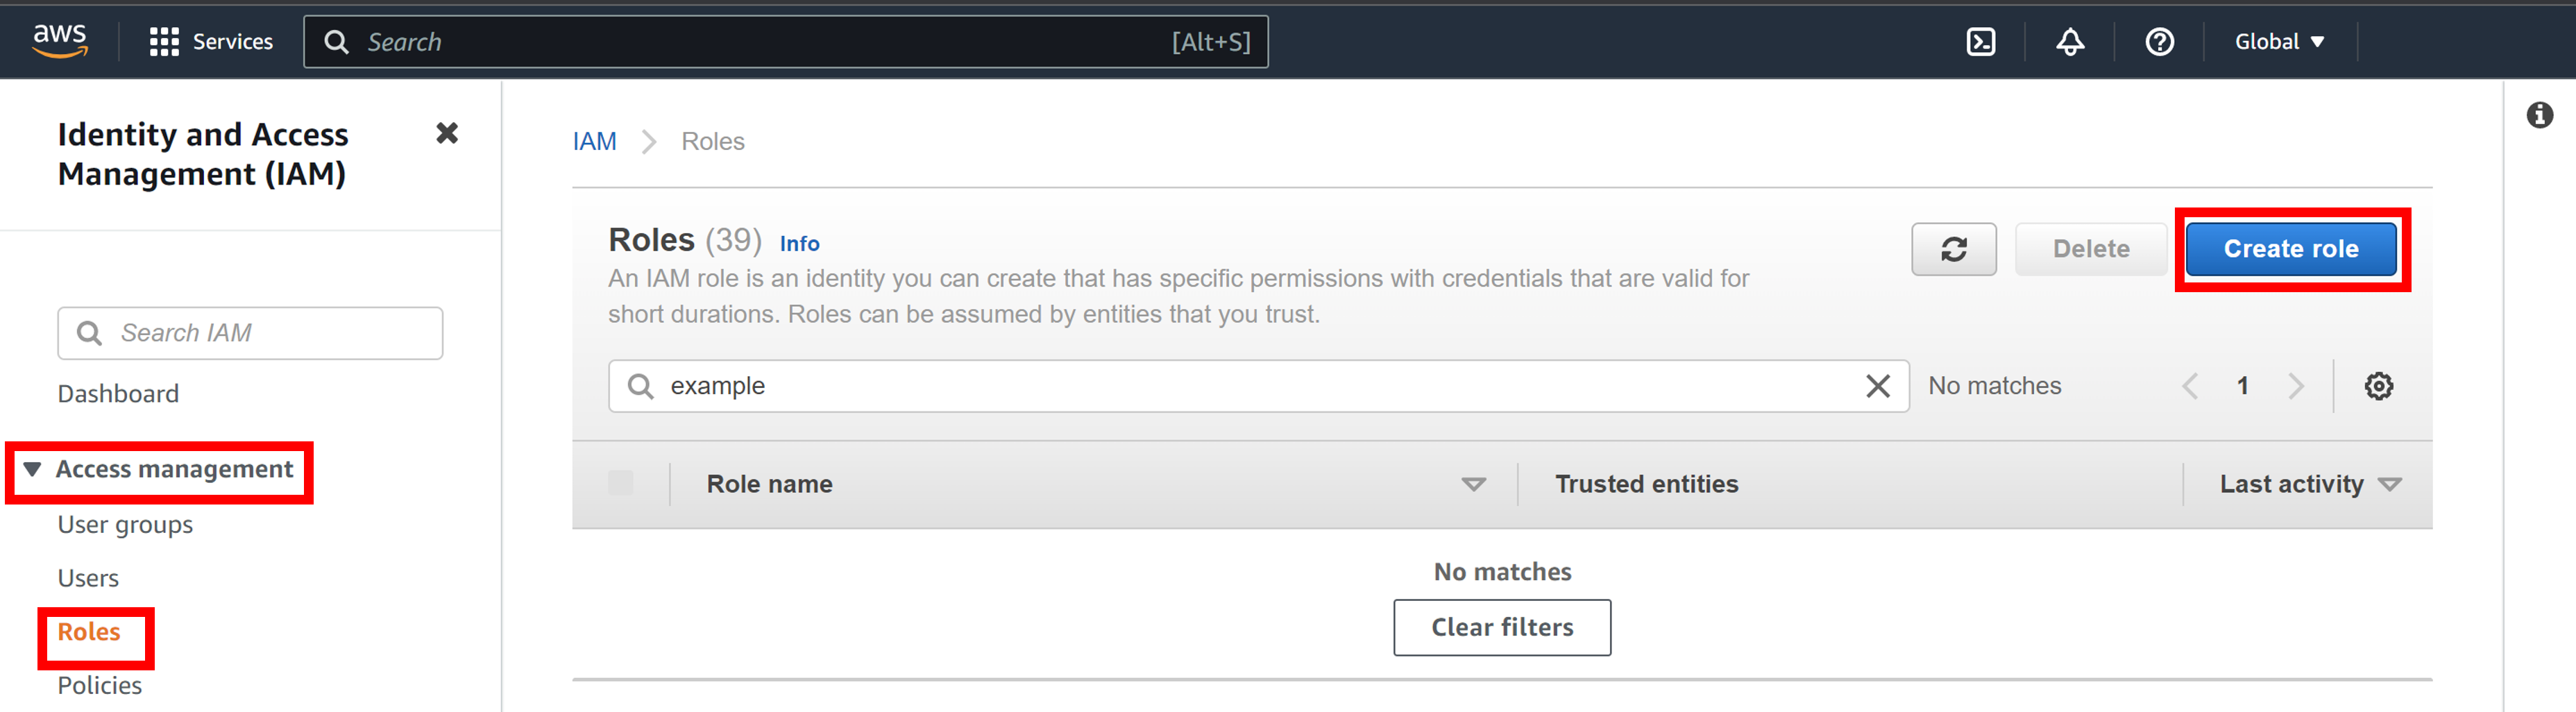
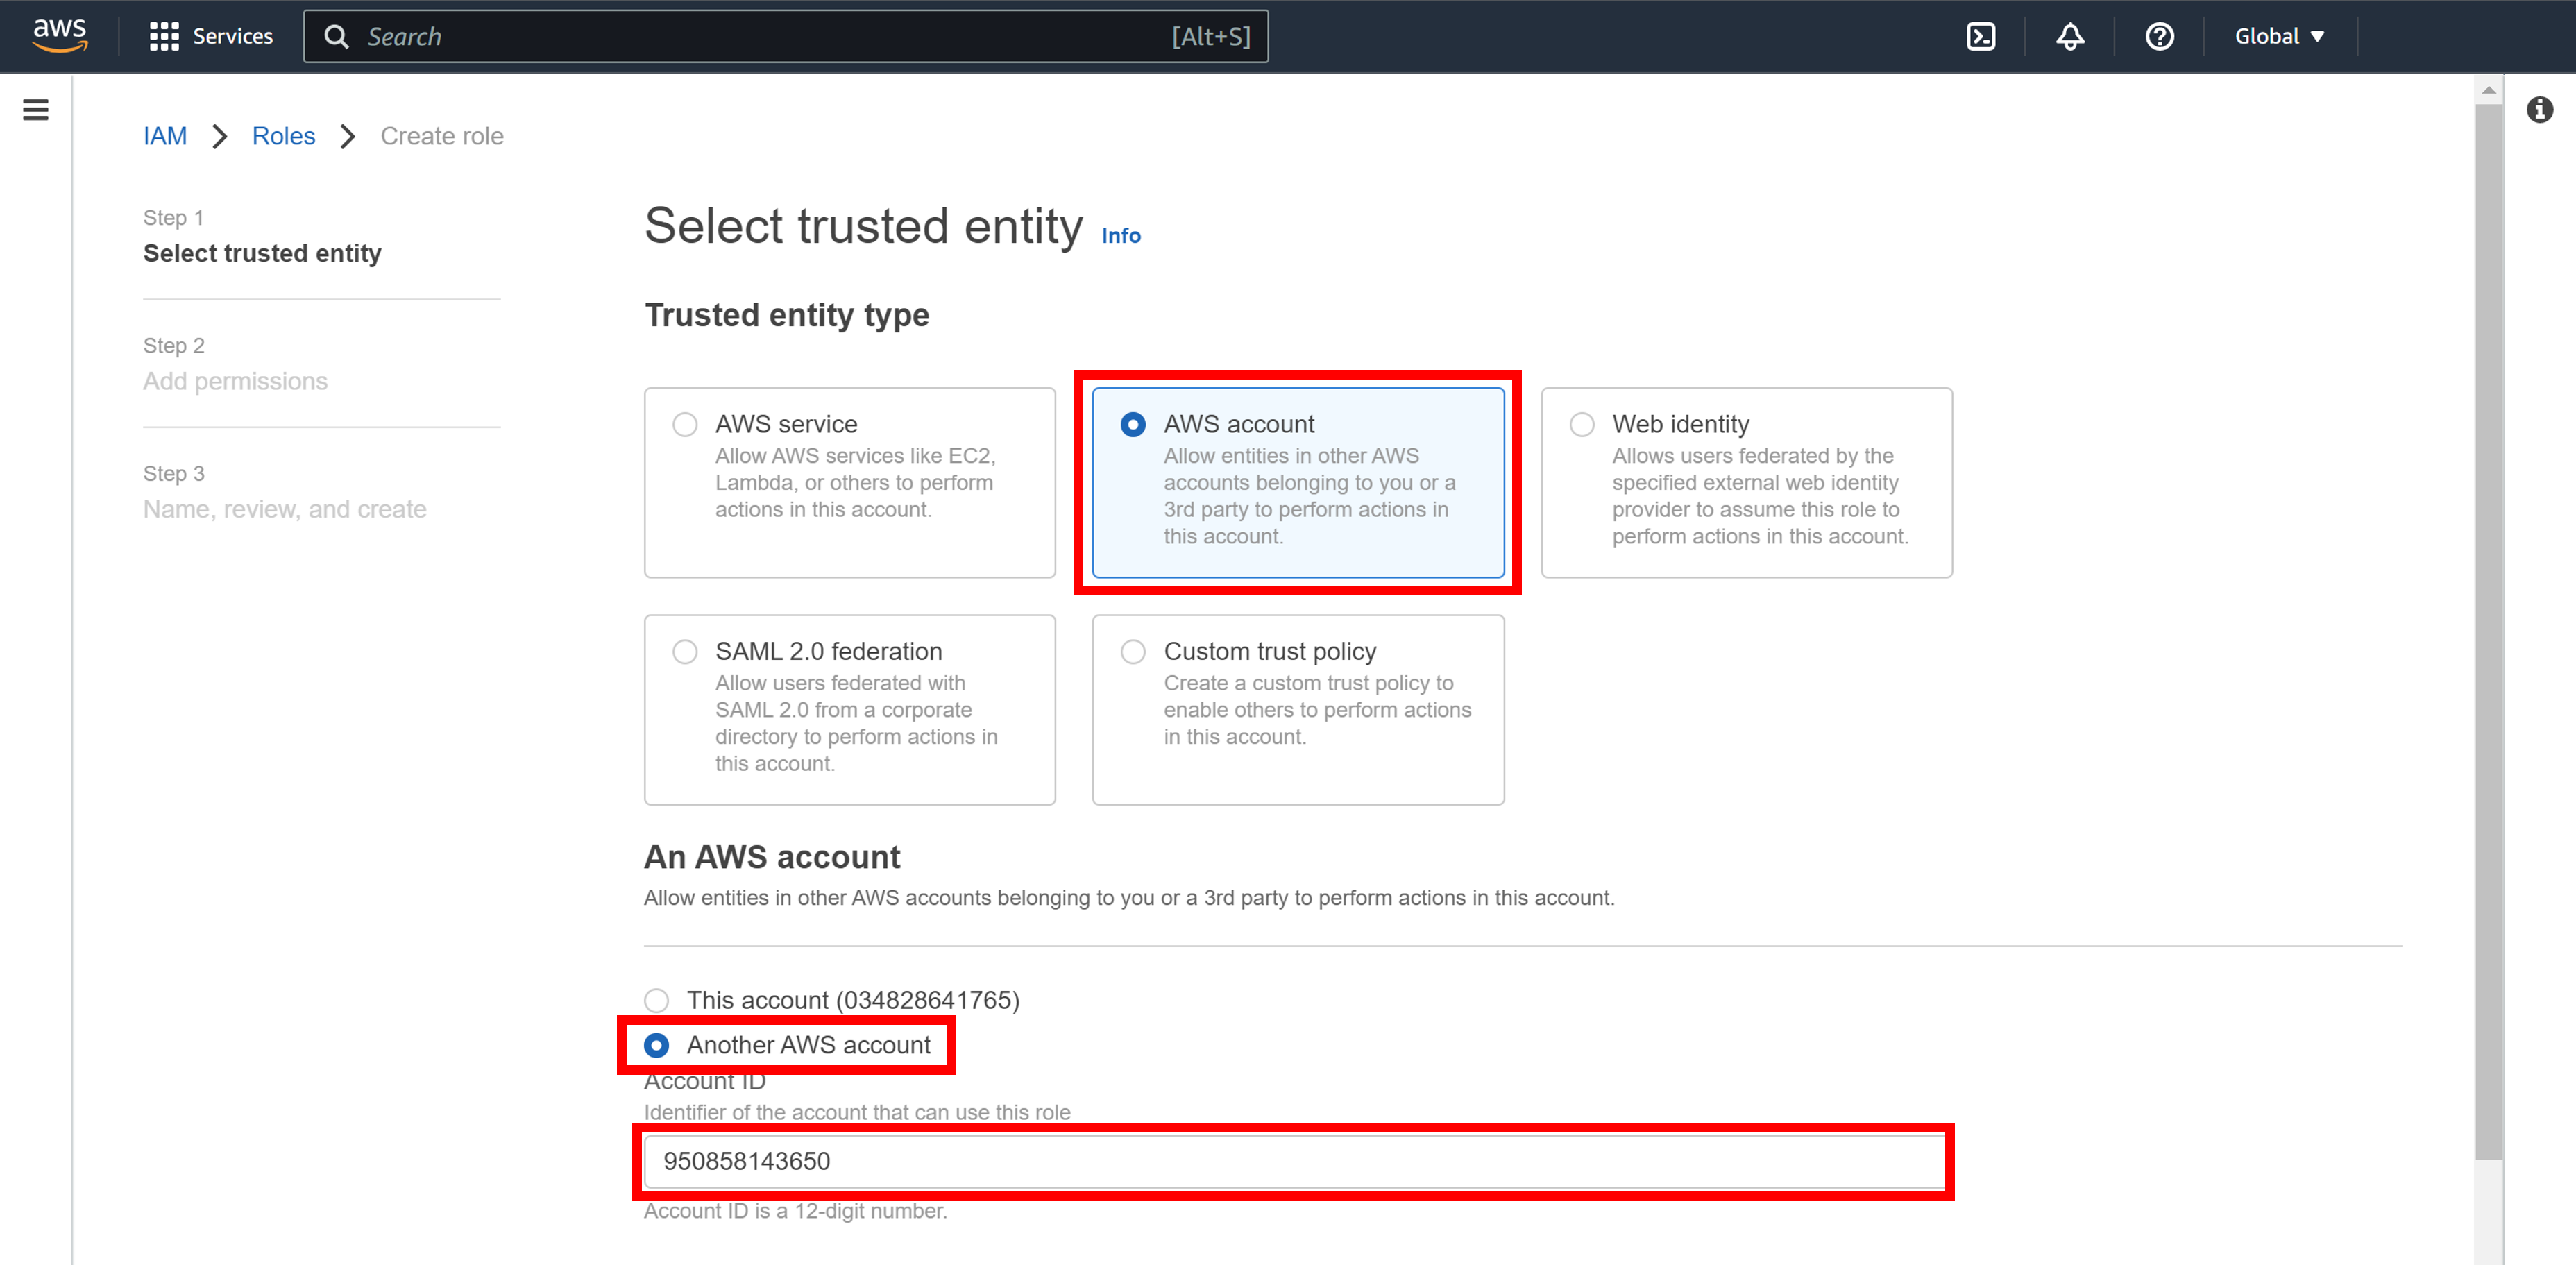
Go to the IAM Management console, click on Access management > Roles > Create role.
-
Click AWS account > Another AWS account, and enter Soracom's AWS account ID in Account ID field.
If you're working in Japan these use our Japanese Soracom AWS account ID, otherwise use our global account ID.
- Global Coverage:
950858143650 - Japan Coverage:
762707677580
- Global Coverage:
-
Check the Require external ID checkbox and enter any string for the external ID field.
The string entered for the external ID will henceforth be denoted ${external_id}. Example:
External-ID-Rs6E3TFfh5QsyFWp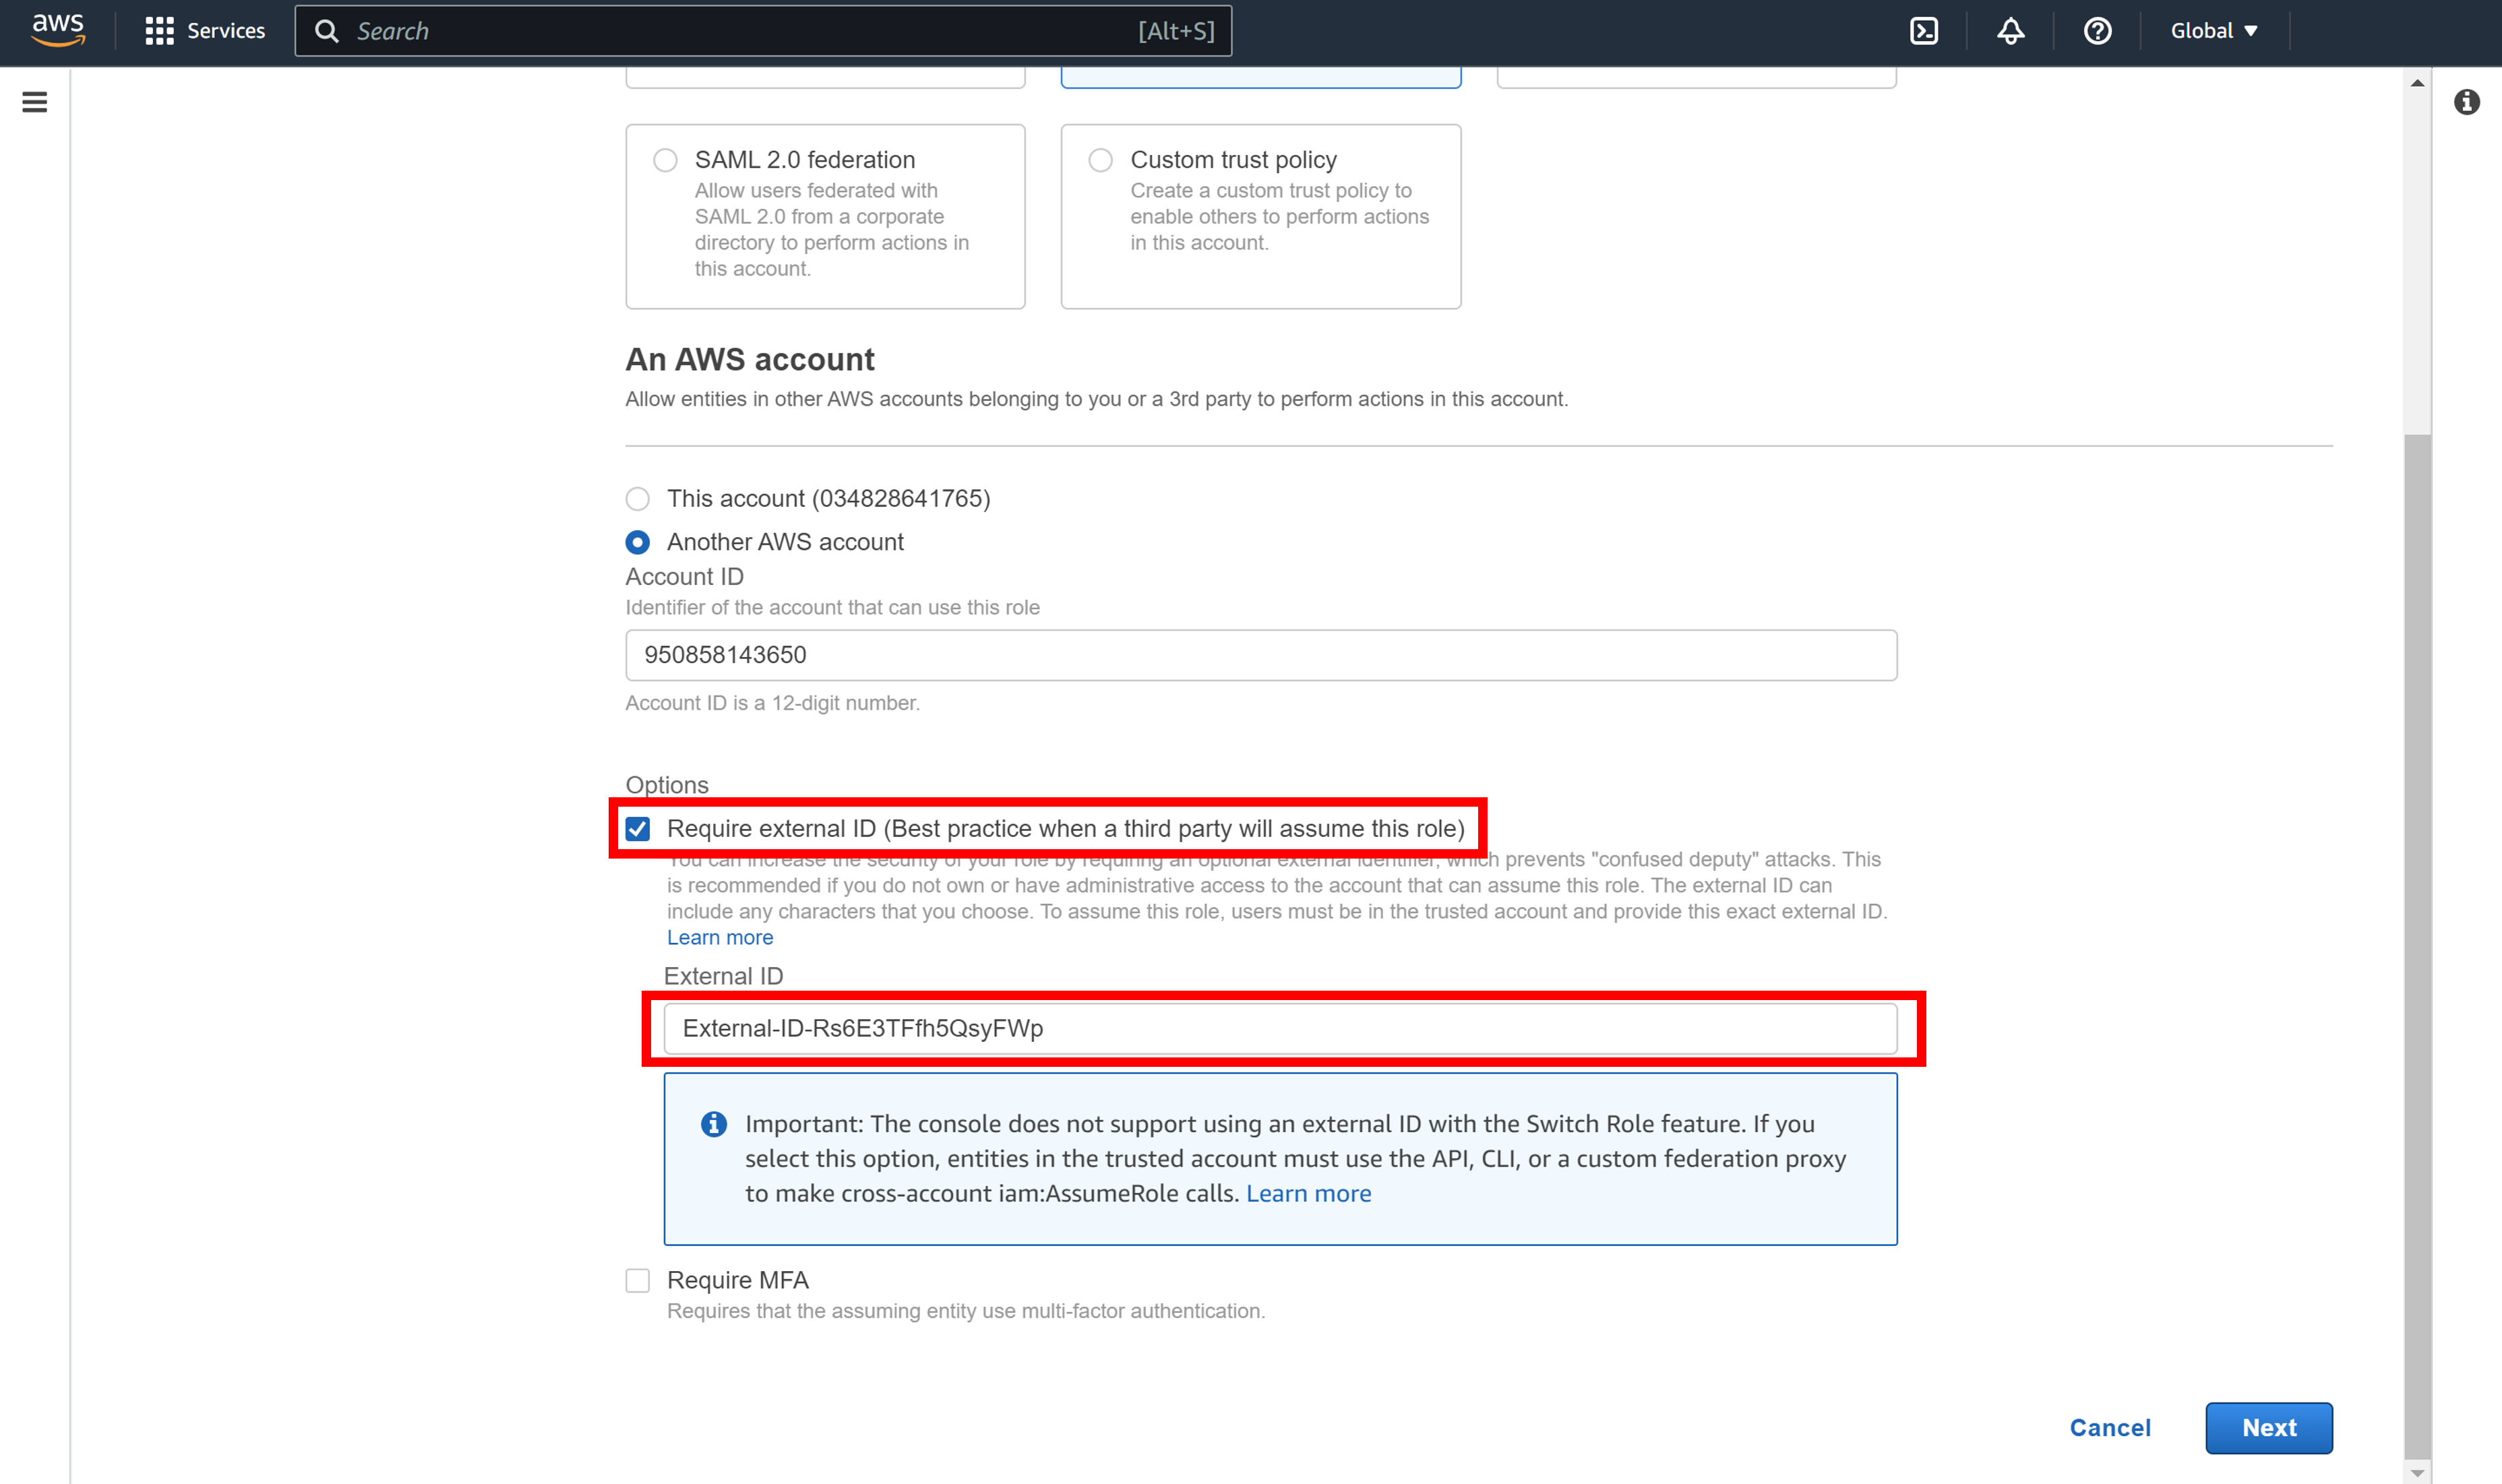
For more information on external ID, see the AWS document: How to use an external ID when granting access to your AWS resources to a third party.
-
Click Register.
You will see the "Add permissions" navigation pane.
-
Click Create policy.
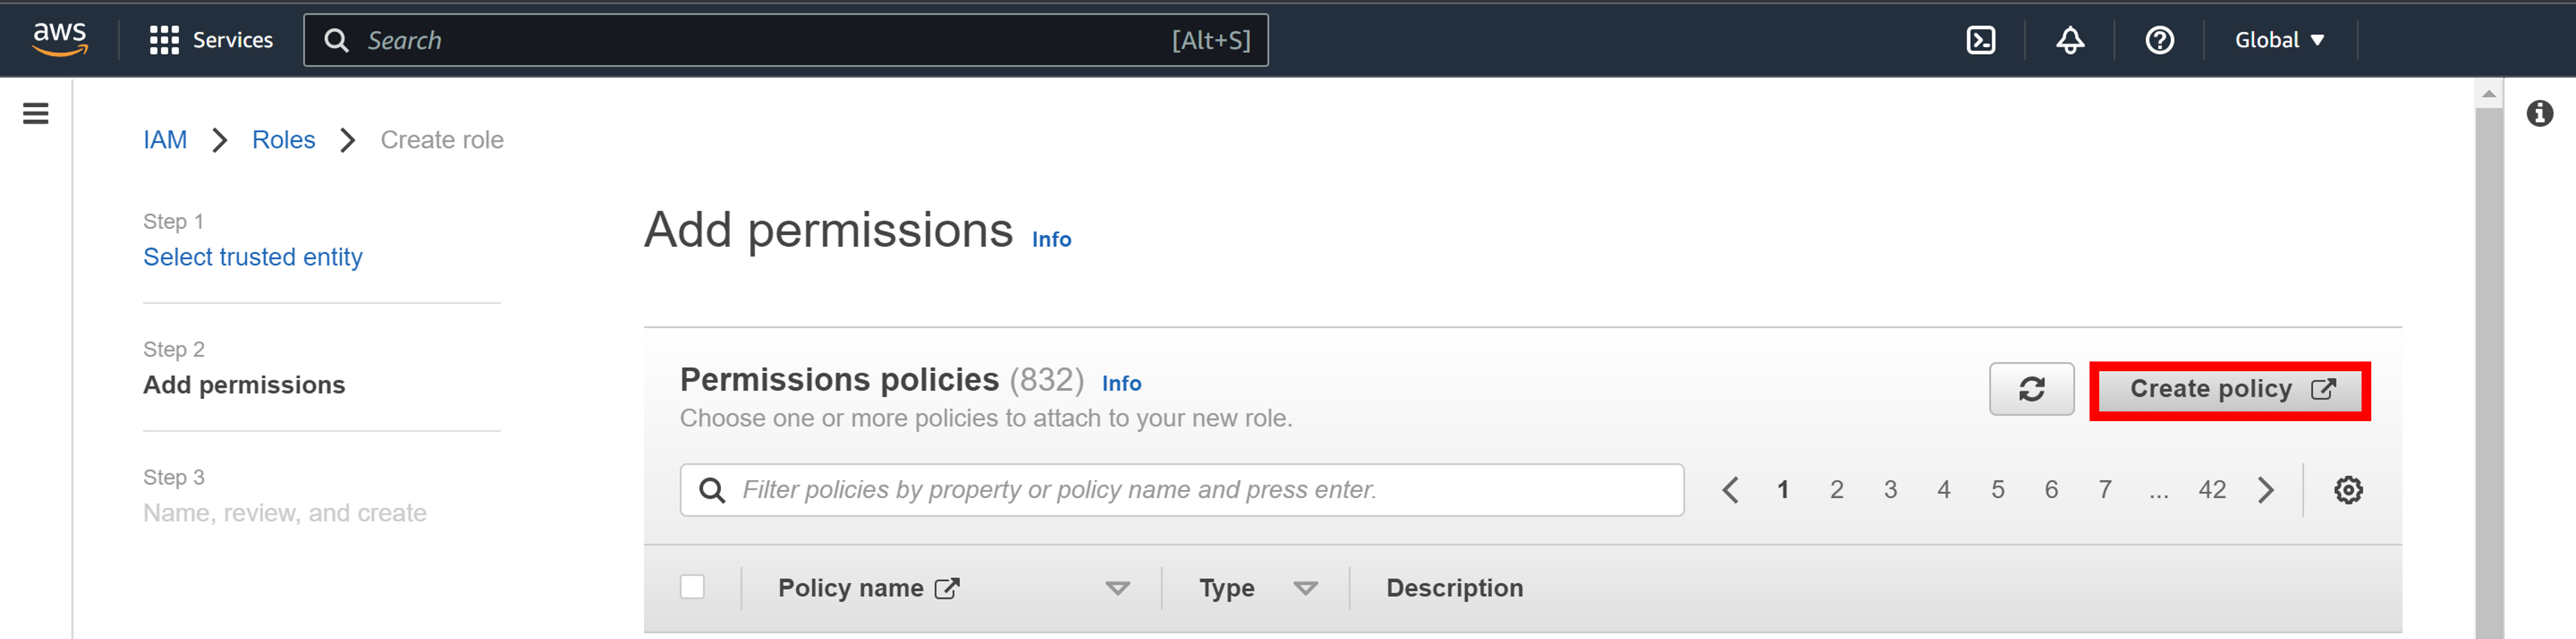
In a new window or tab, you will see the "Create policy" navigation pane.
Create a policy on the "Create Policy" navigation pane. When you completed the "Create Policy" navigation pane, come back to the "Add permissions" navigation pane where you see Create policy and continue with the creation of IAM roles. Do not close the original navigation pane.
-
Configure the following settings
Item Description Service Click on Choose a service, then click on S3. Actions Find "GetObject" and "PutObject" in filter and check them. 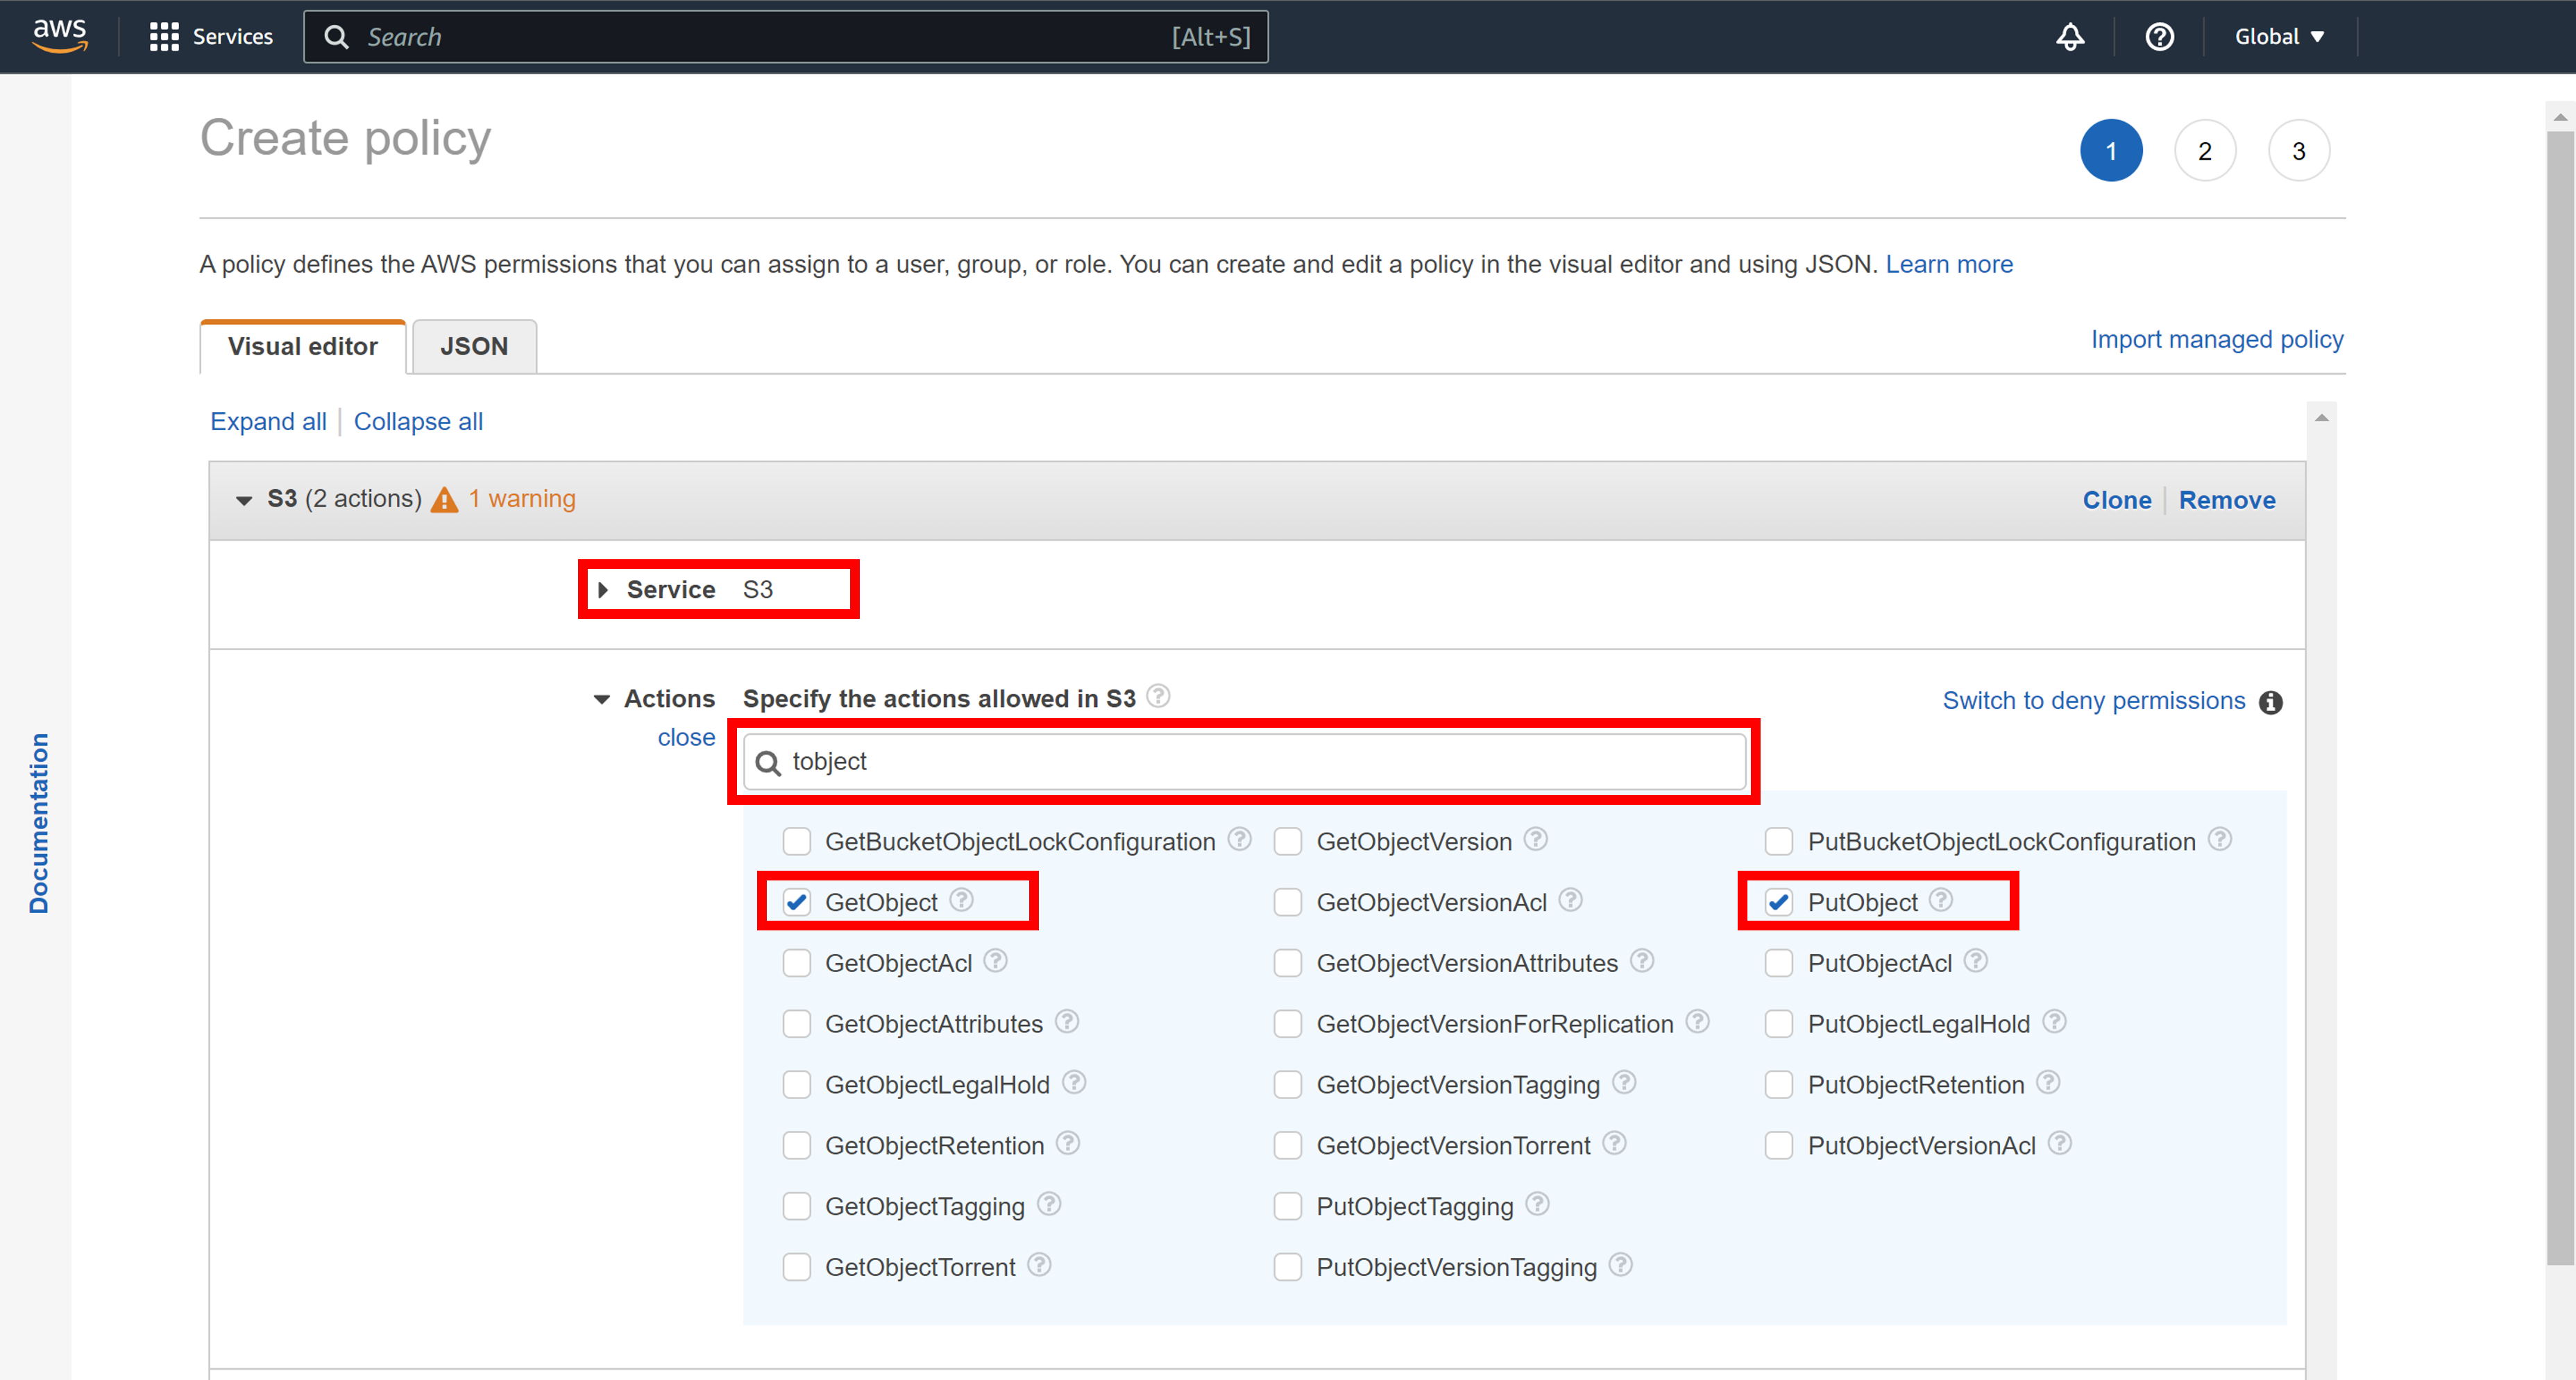
-
Click Resources > Specific > Add ARN.
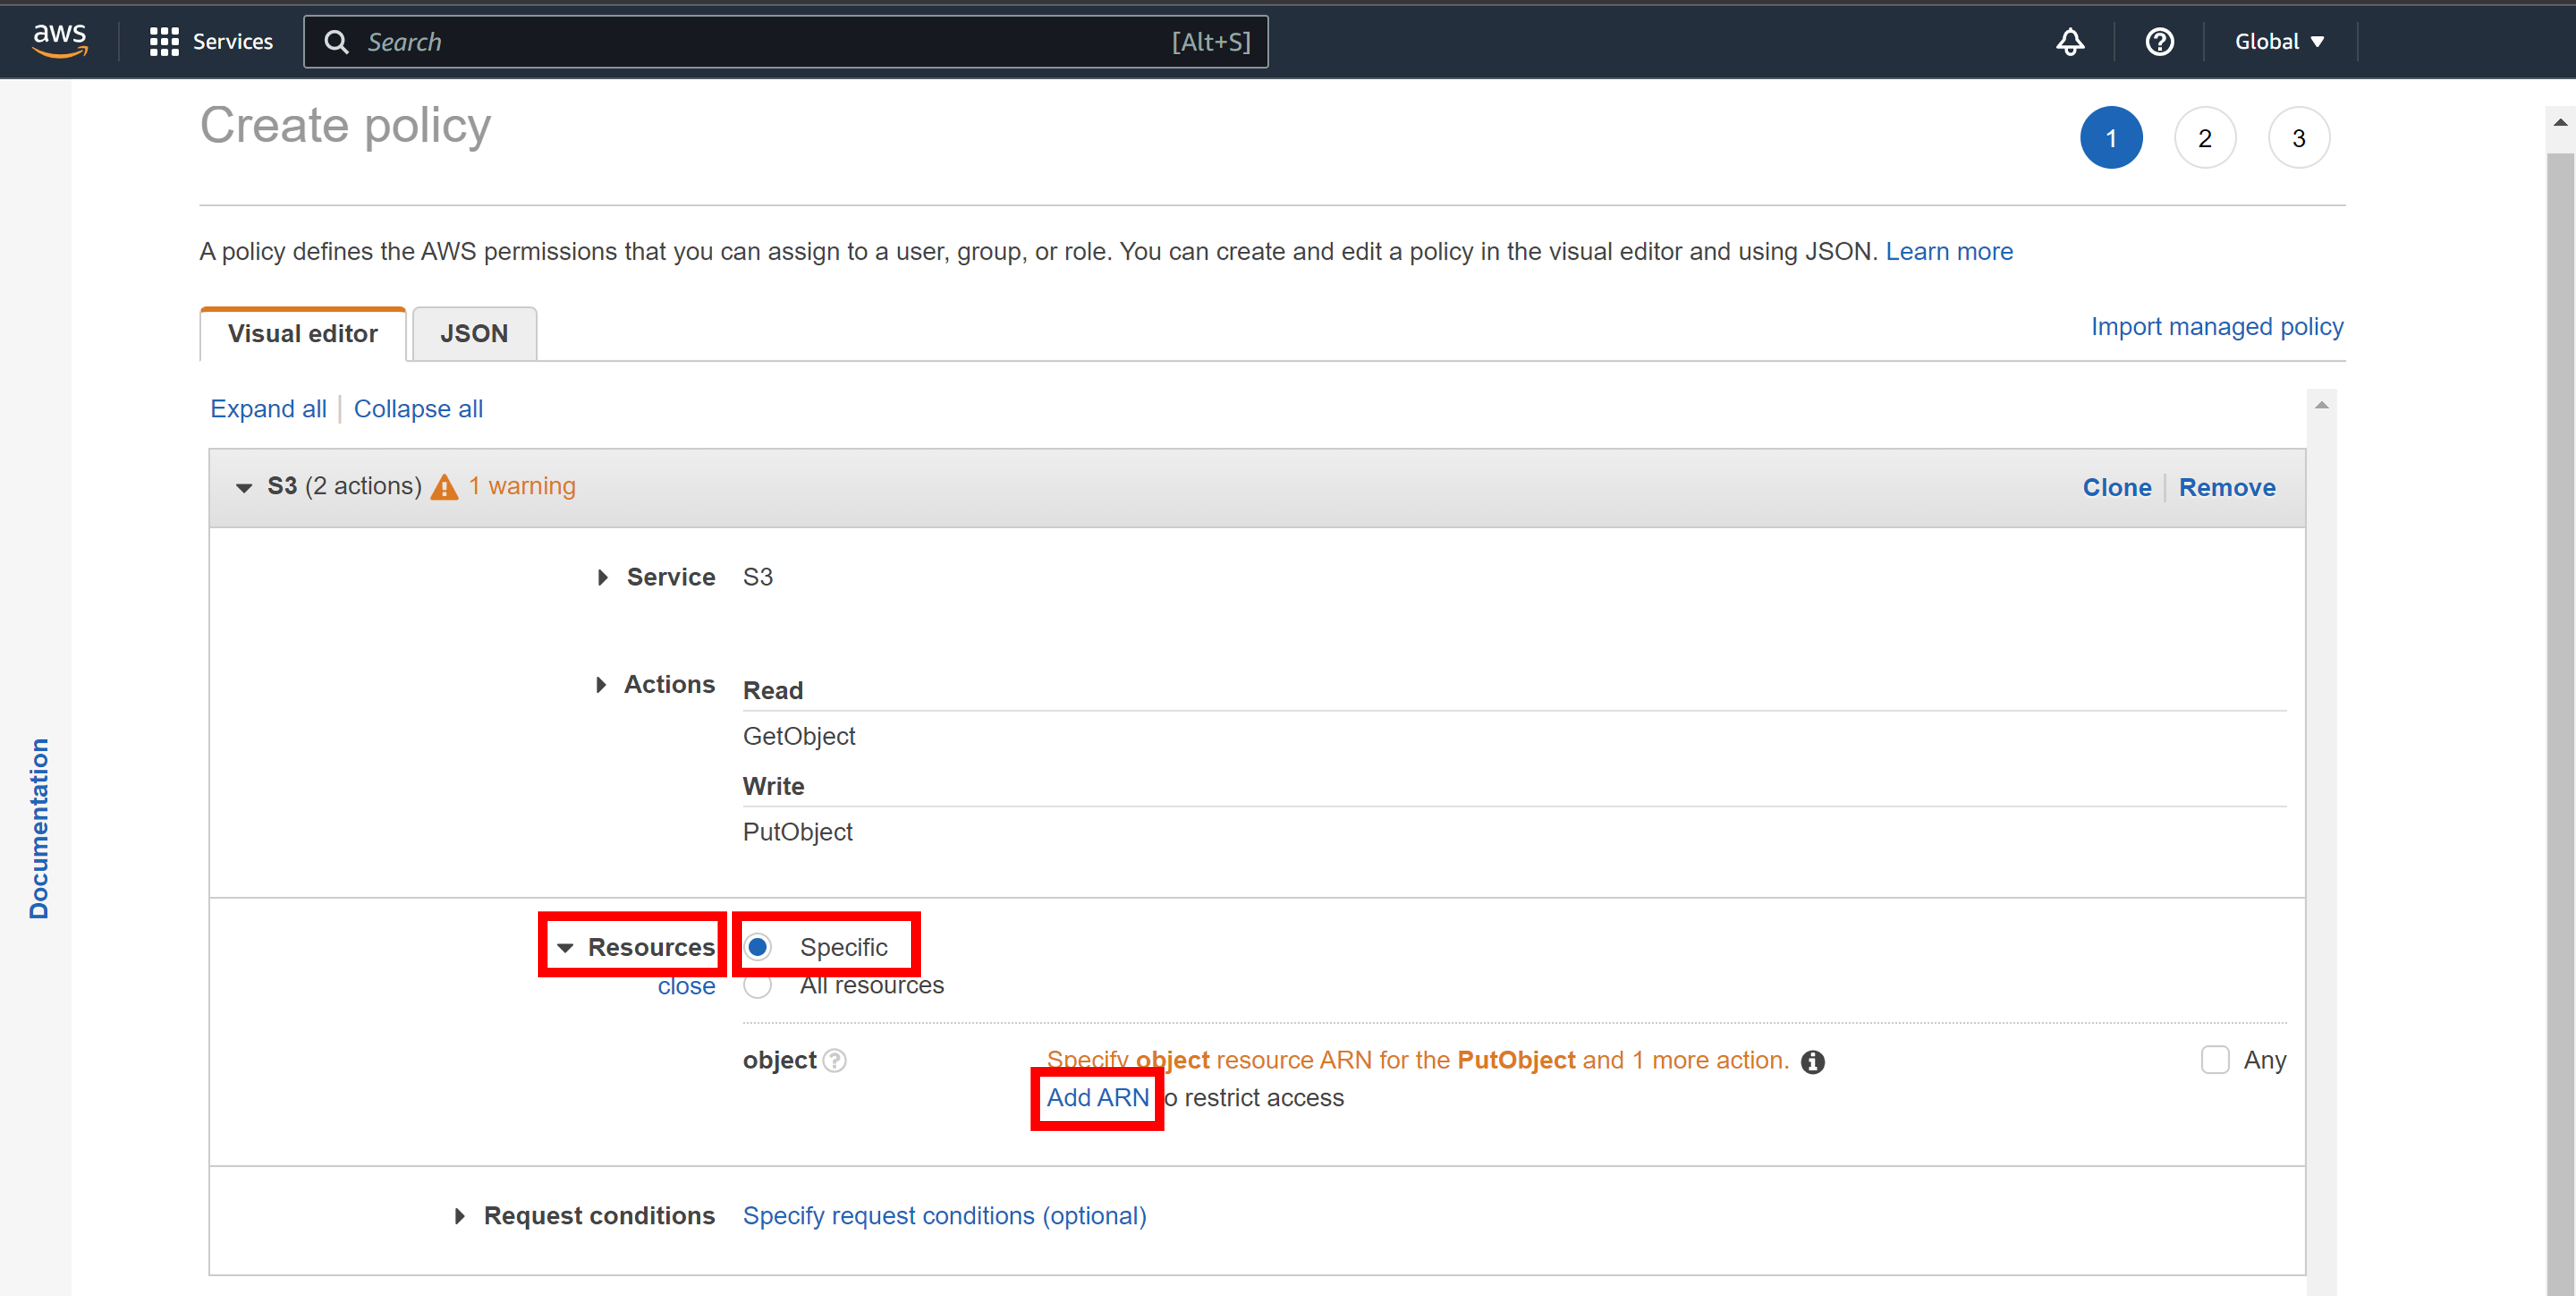
You will see the "Add ARN" navigation pane.
-
Enter ${amazon_s3_bucket_arn}, check Any on the right of Object name, and click Add.

You will return to the "Create policy" navigation pane.
-
Click on Next: Tags > Next: Review.
-
Enter a name for the AWS IAM policy in Name field and click Create policy.
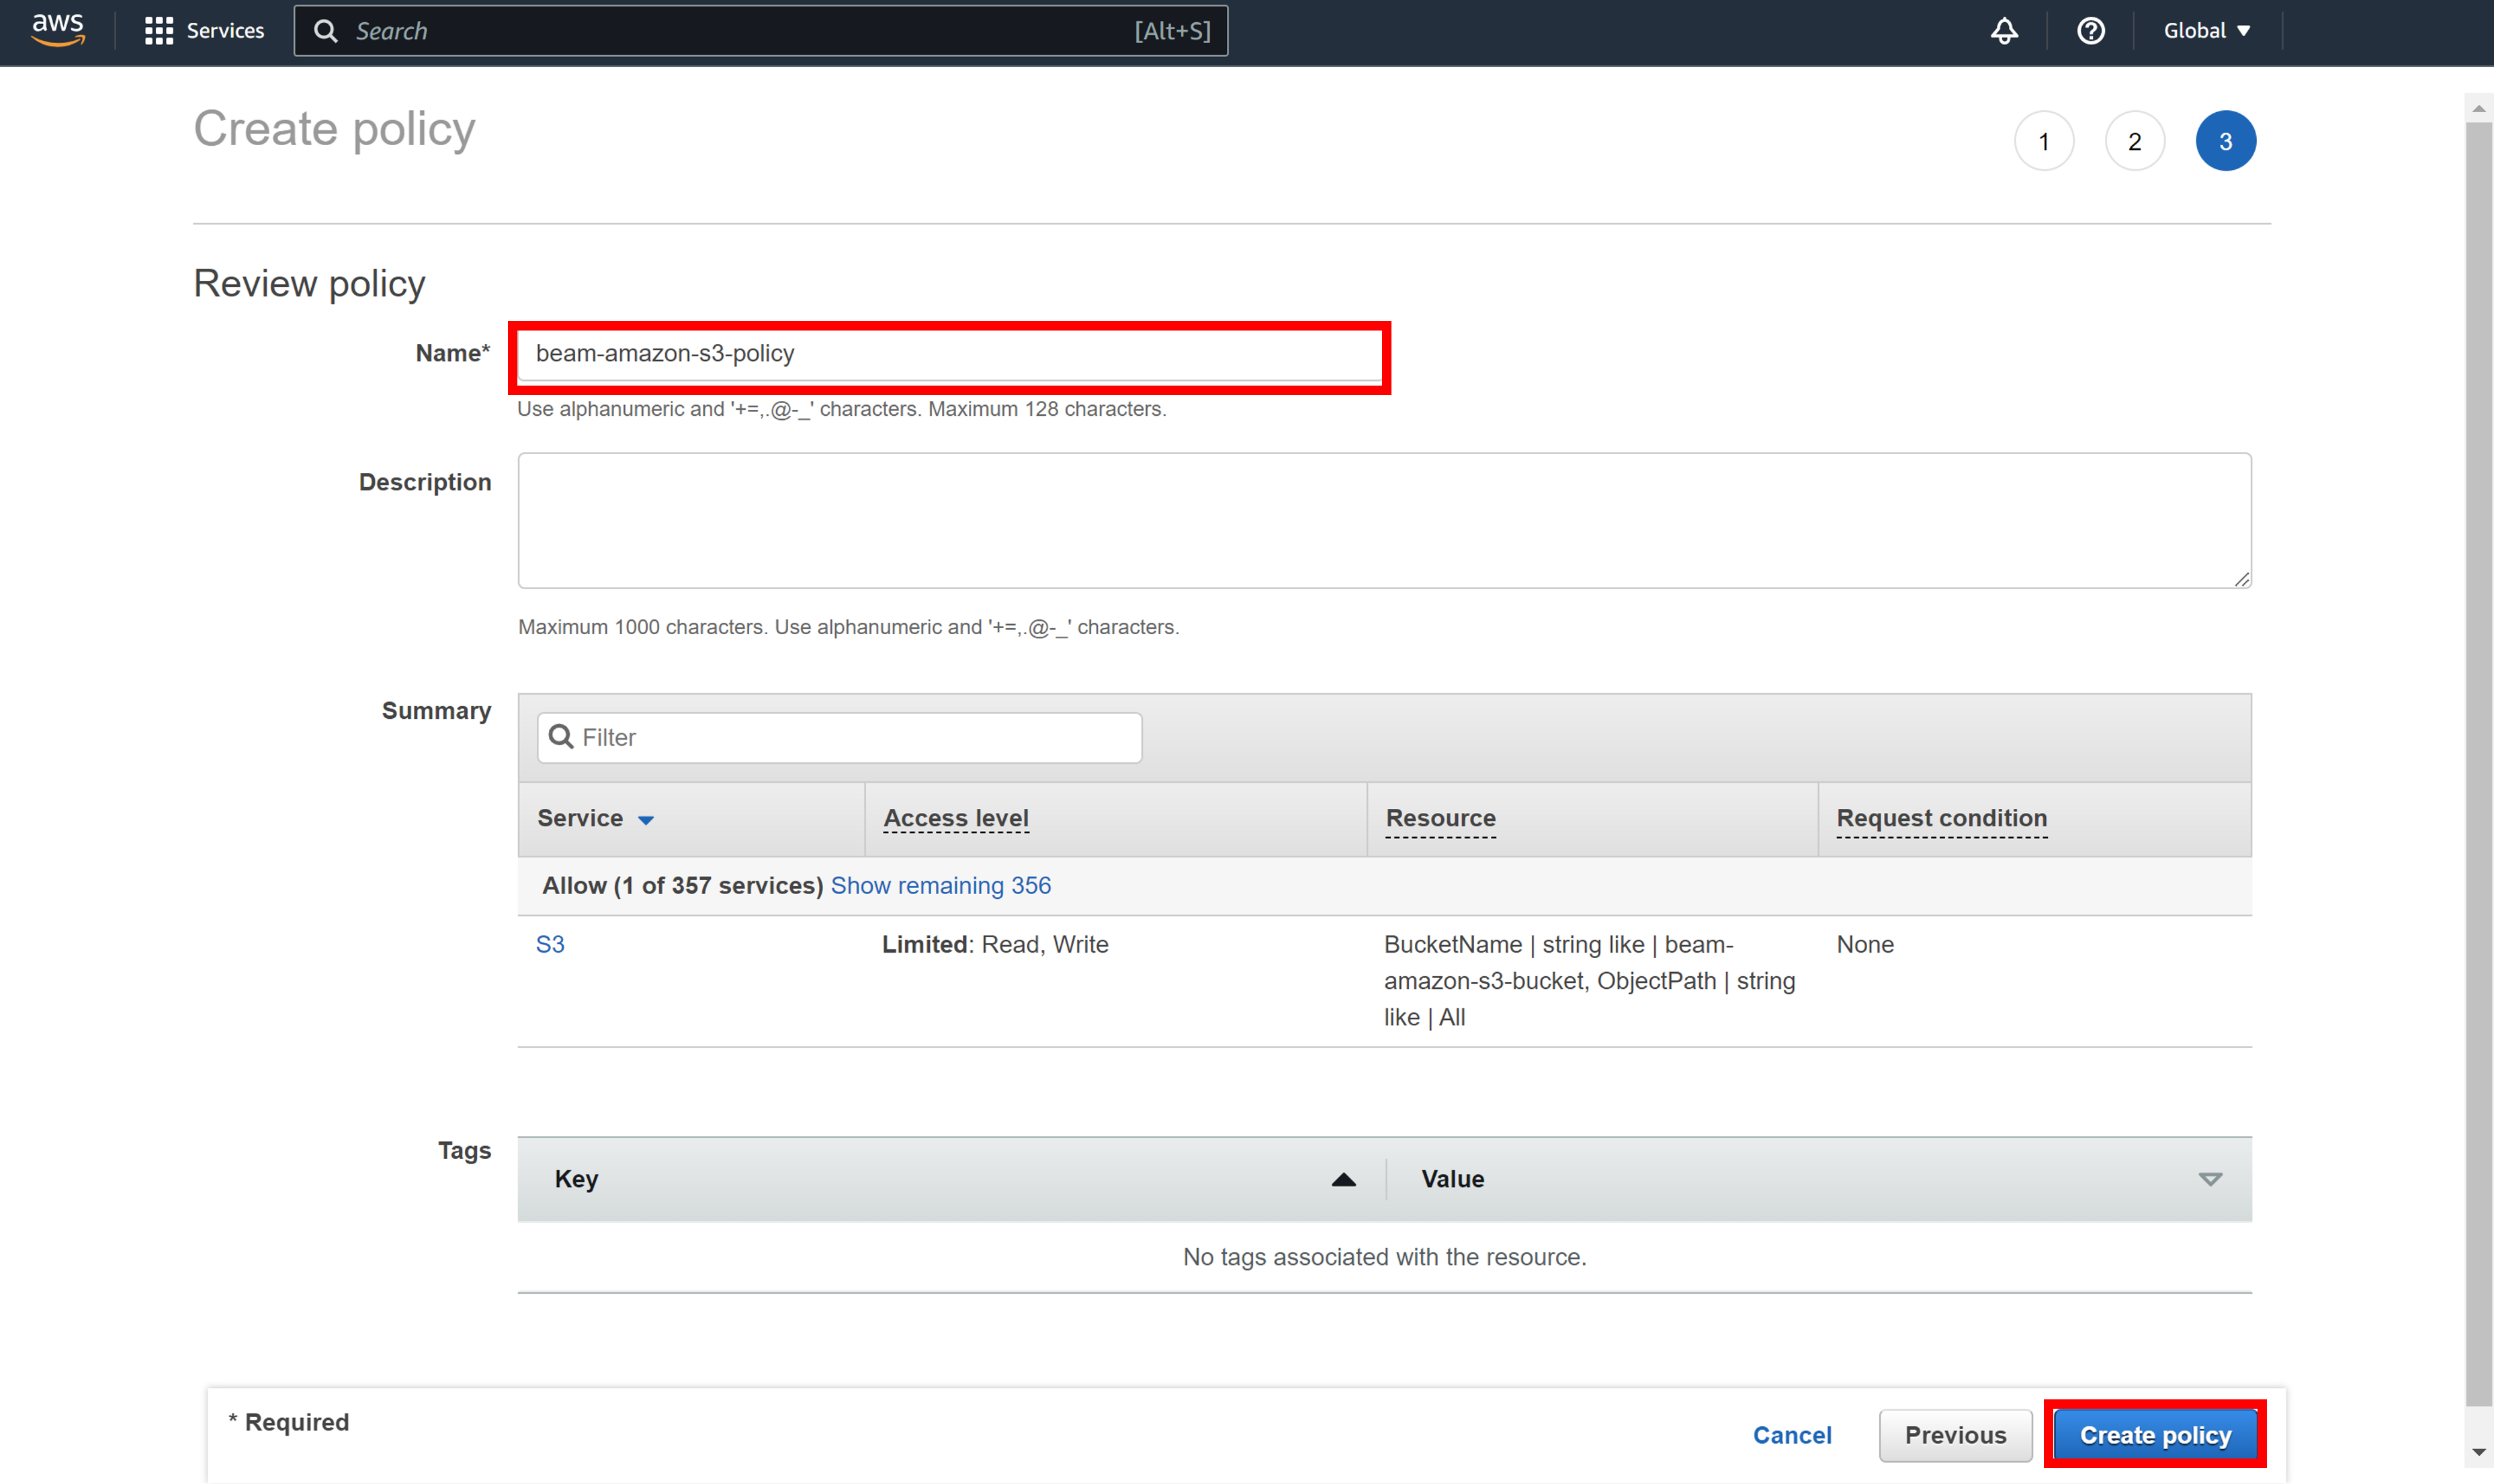
An AWS IAM policy will be created and you will see the policy detail page.
-
Close the window or tab where the policy detail page is displayed to return to the "Add permissions" navigation pane.
-
Click the reload icon then find the AWS IAM policy created in [10].
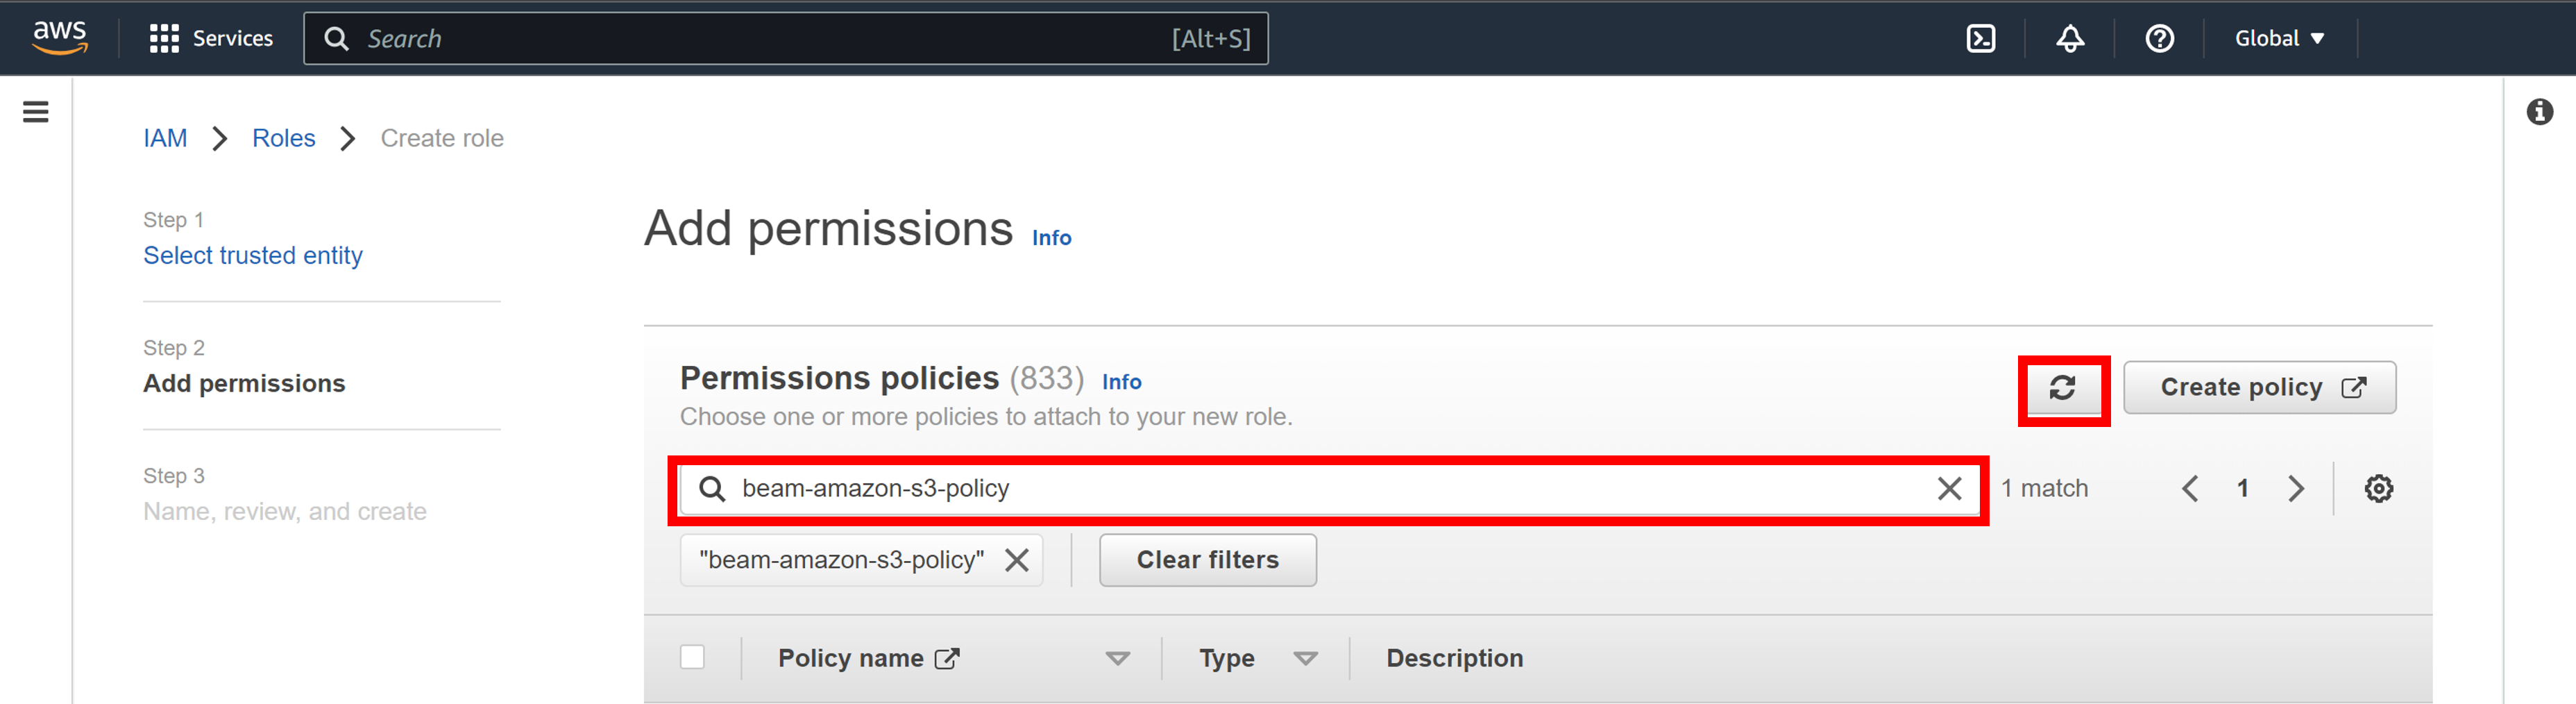
You will see the AWS IAM policy that you just created.
-
Select the AWS IAM policy you created and click Next.
-
Enter the IAM role name in the Role name field and click Create role.

You will return to the role detail.
-
Click on the name of the IAM role you created to note the ARN.
This ARN will henceforth be denoted ${iam_role_arn}. Example:
arn:aws:iam::XXXXXXXXXXXXXX:role/beam-amazon-s3-bucket-role
Step 3: Set up Soracom Beam
Sign in to your Soracom Console account to set up the Beam website entry point. When configured as described here, the following functions can be achieved
- Upload files sent from device that are using IoT SIM from Beam to Amazon S3 bucket.
- Download files stored in Amazon S3 buckets on devices using the IoT SIM.
Register AWS IAM Role Credentials in the Credential Set
In order to upload or download files from Amazon S3 using Beam, credentials related to the IAM role should be registered in the credential set in the User Console. For details on how to register the credential sets, see Credential Sets.
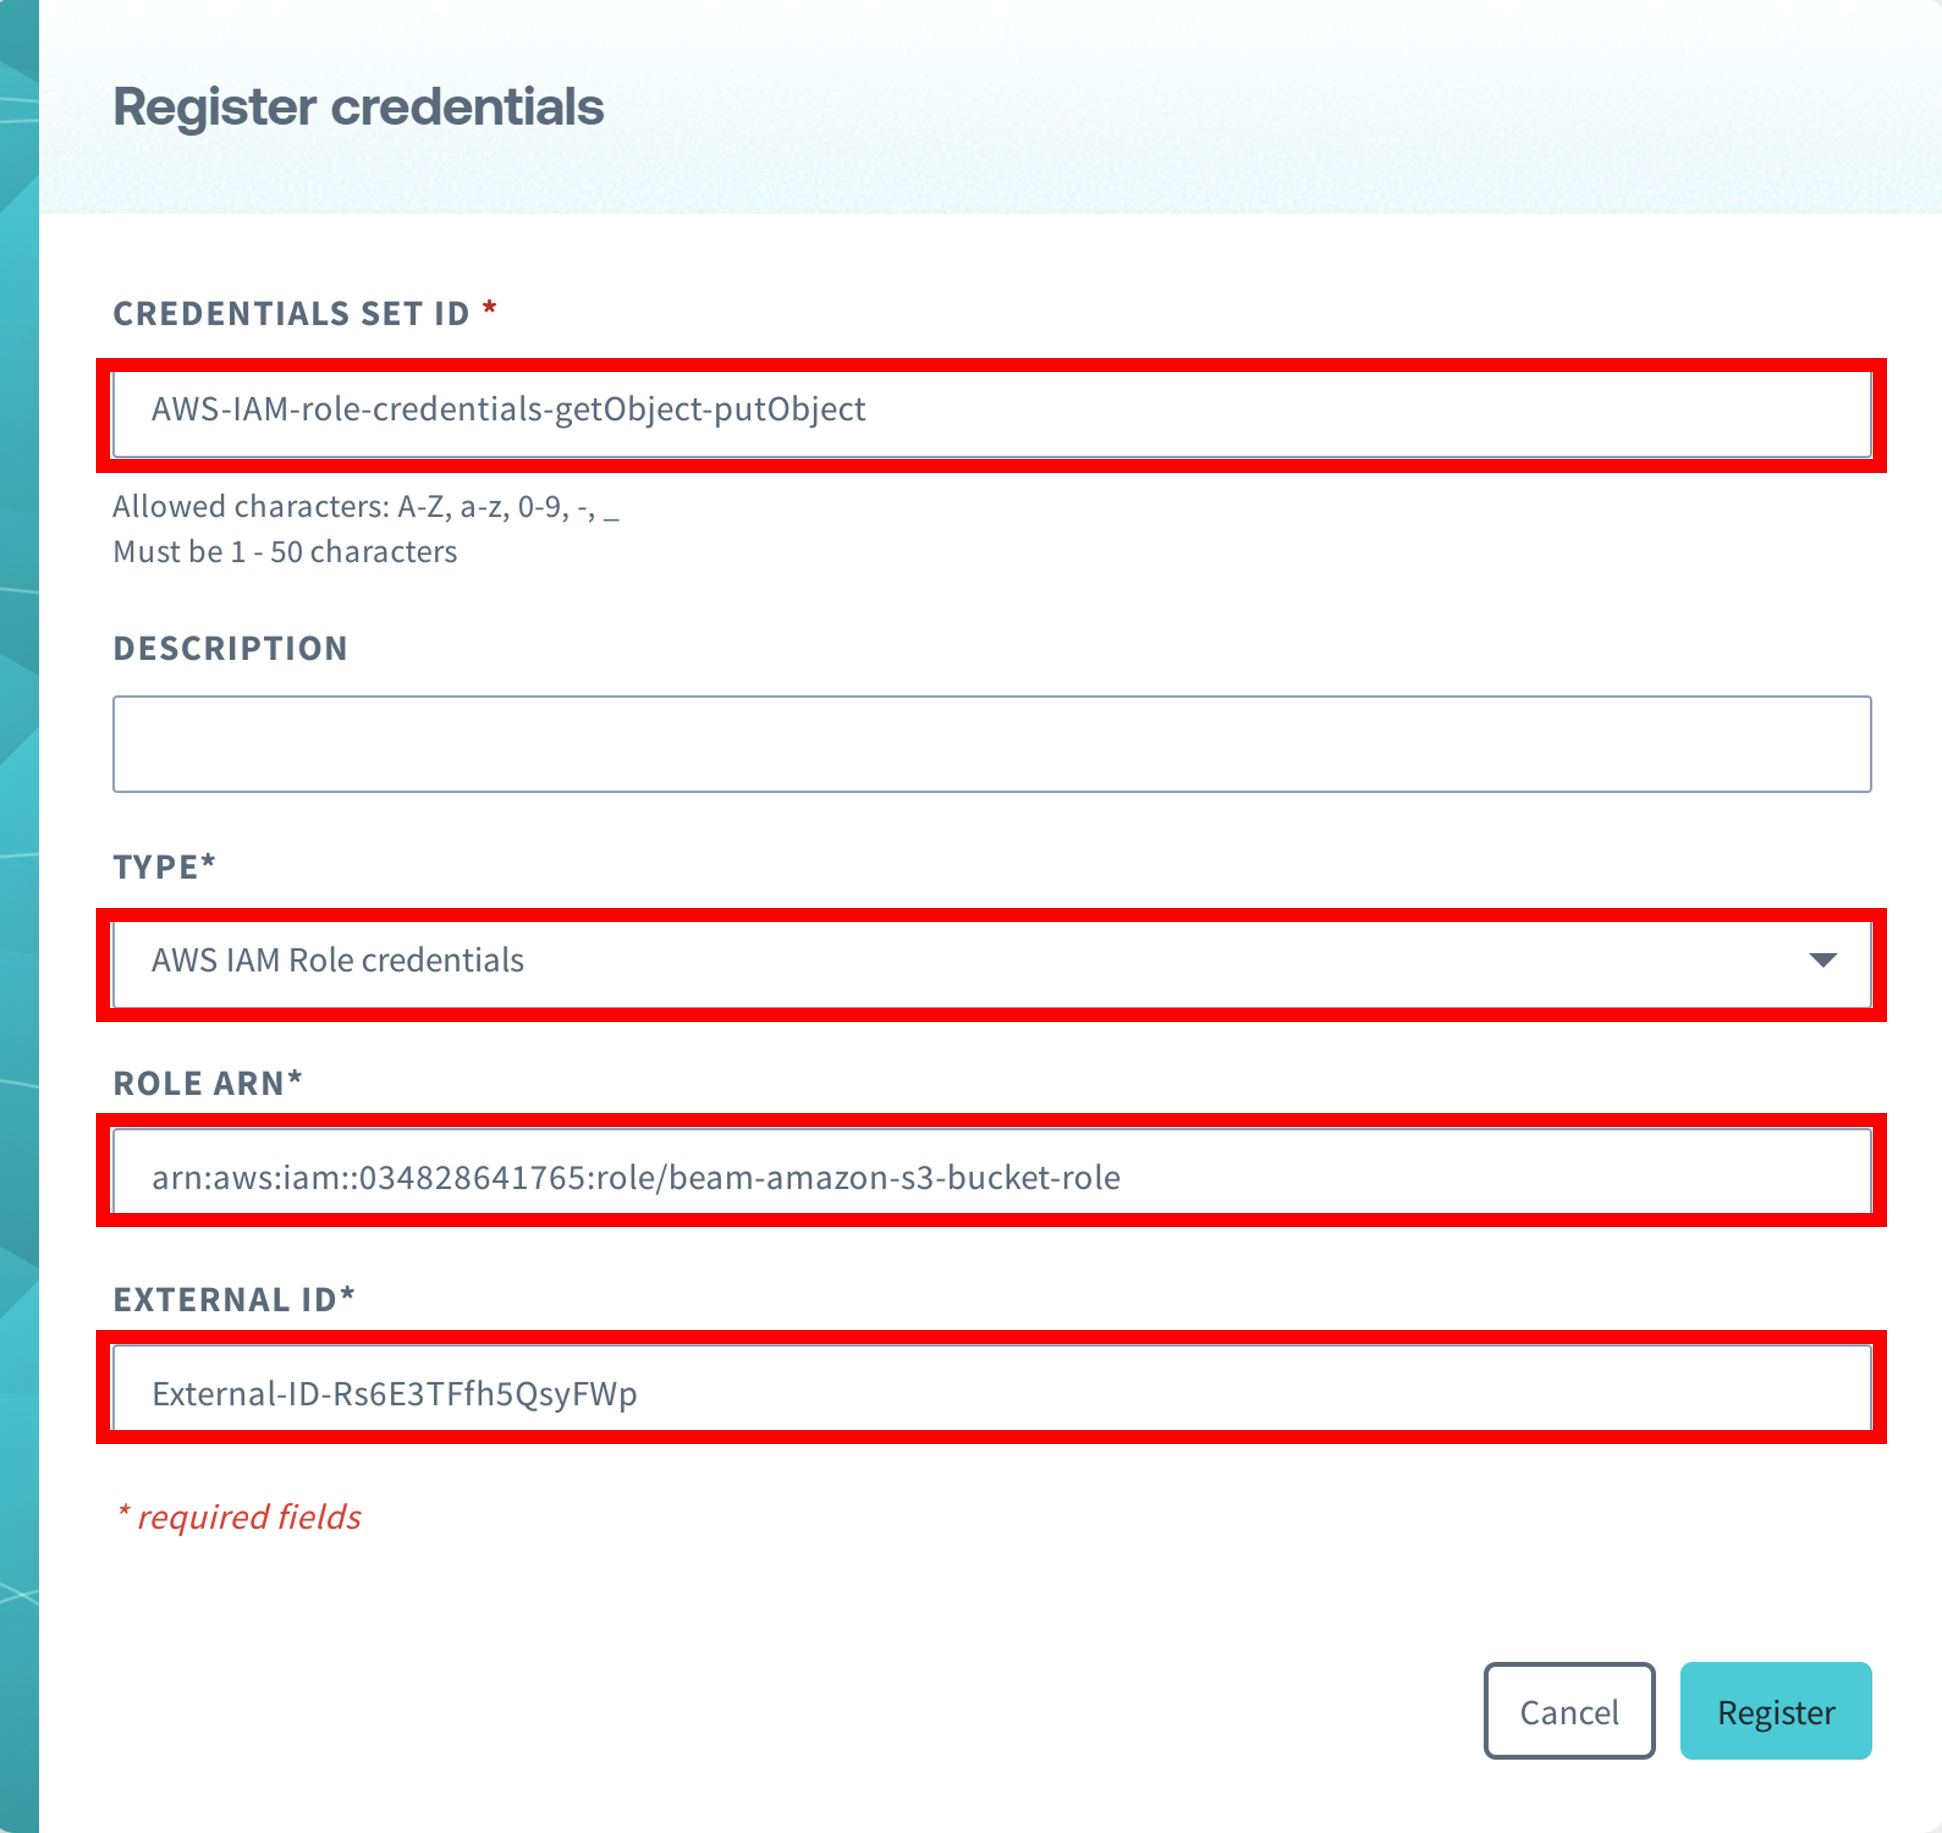
The credential set is registered as follows
| Item | Description |
|---|---|
| CREDENTIAL SET ID | Enter any name to identify the credential set. Example: AWS-IAM-role-credentials-getObject-putObject |
| TYPE | Select "AWS IAM Role credentials". |
| ROLE ARN | Enter ${iam_role_arn}. Example: arn:aws:iam::XXXXXXXXXXXXXX:role/beam-amazon-s3-bucket-role |
| EXTERNAL ID | Enter ${external_id}. Example: External-ID-Rs6E3TFfh5QsyFWp |
Configuring Beam's Website Entry Point
Beam is a configuration of a Soracom IoT SIM group. This section describes only operations to change group settings. For more information on how groups work and how to create a group, see Group Management Overview and Basic Usage.
-
On the SIM Group page, open SORACOM Beam.
See Group Settings for more information on configuring the SIM group.
-
Click on + Add Configuration > Website entry point.
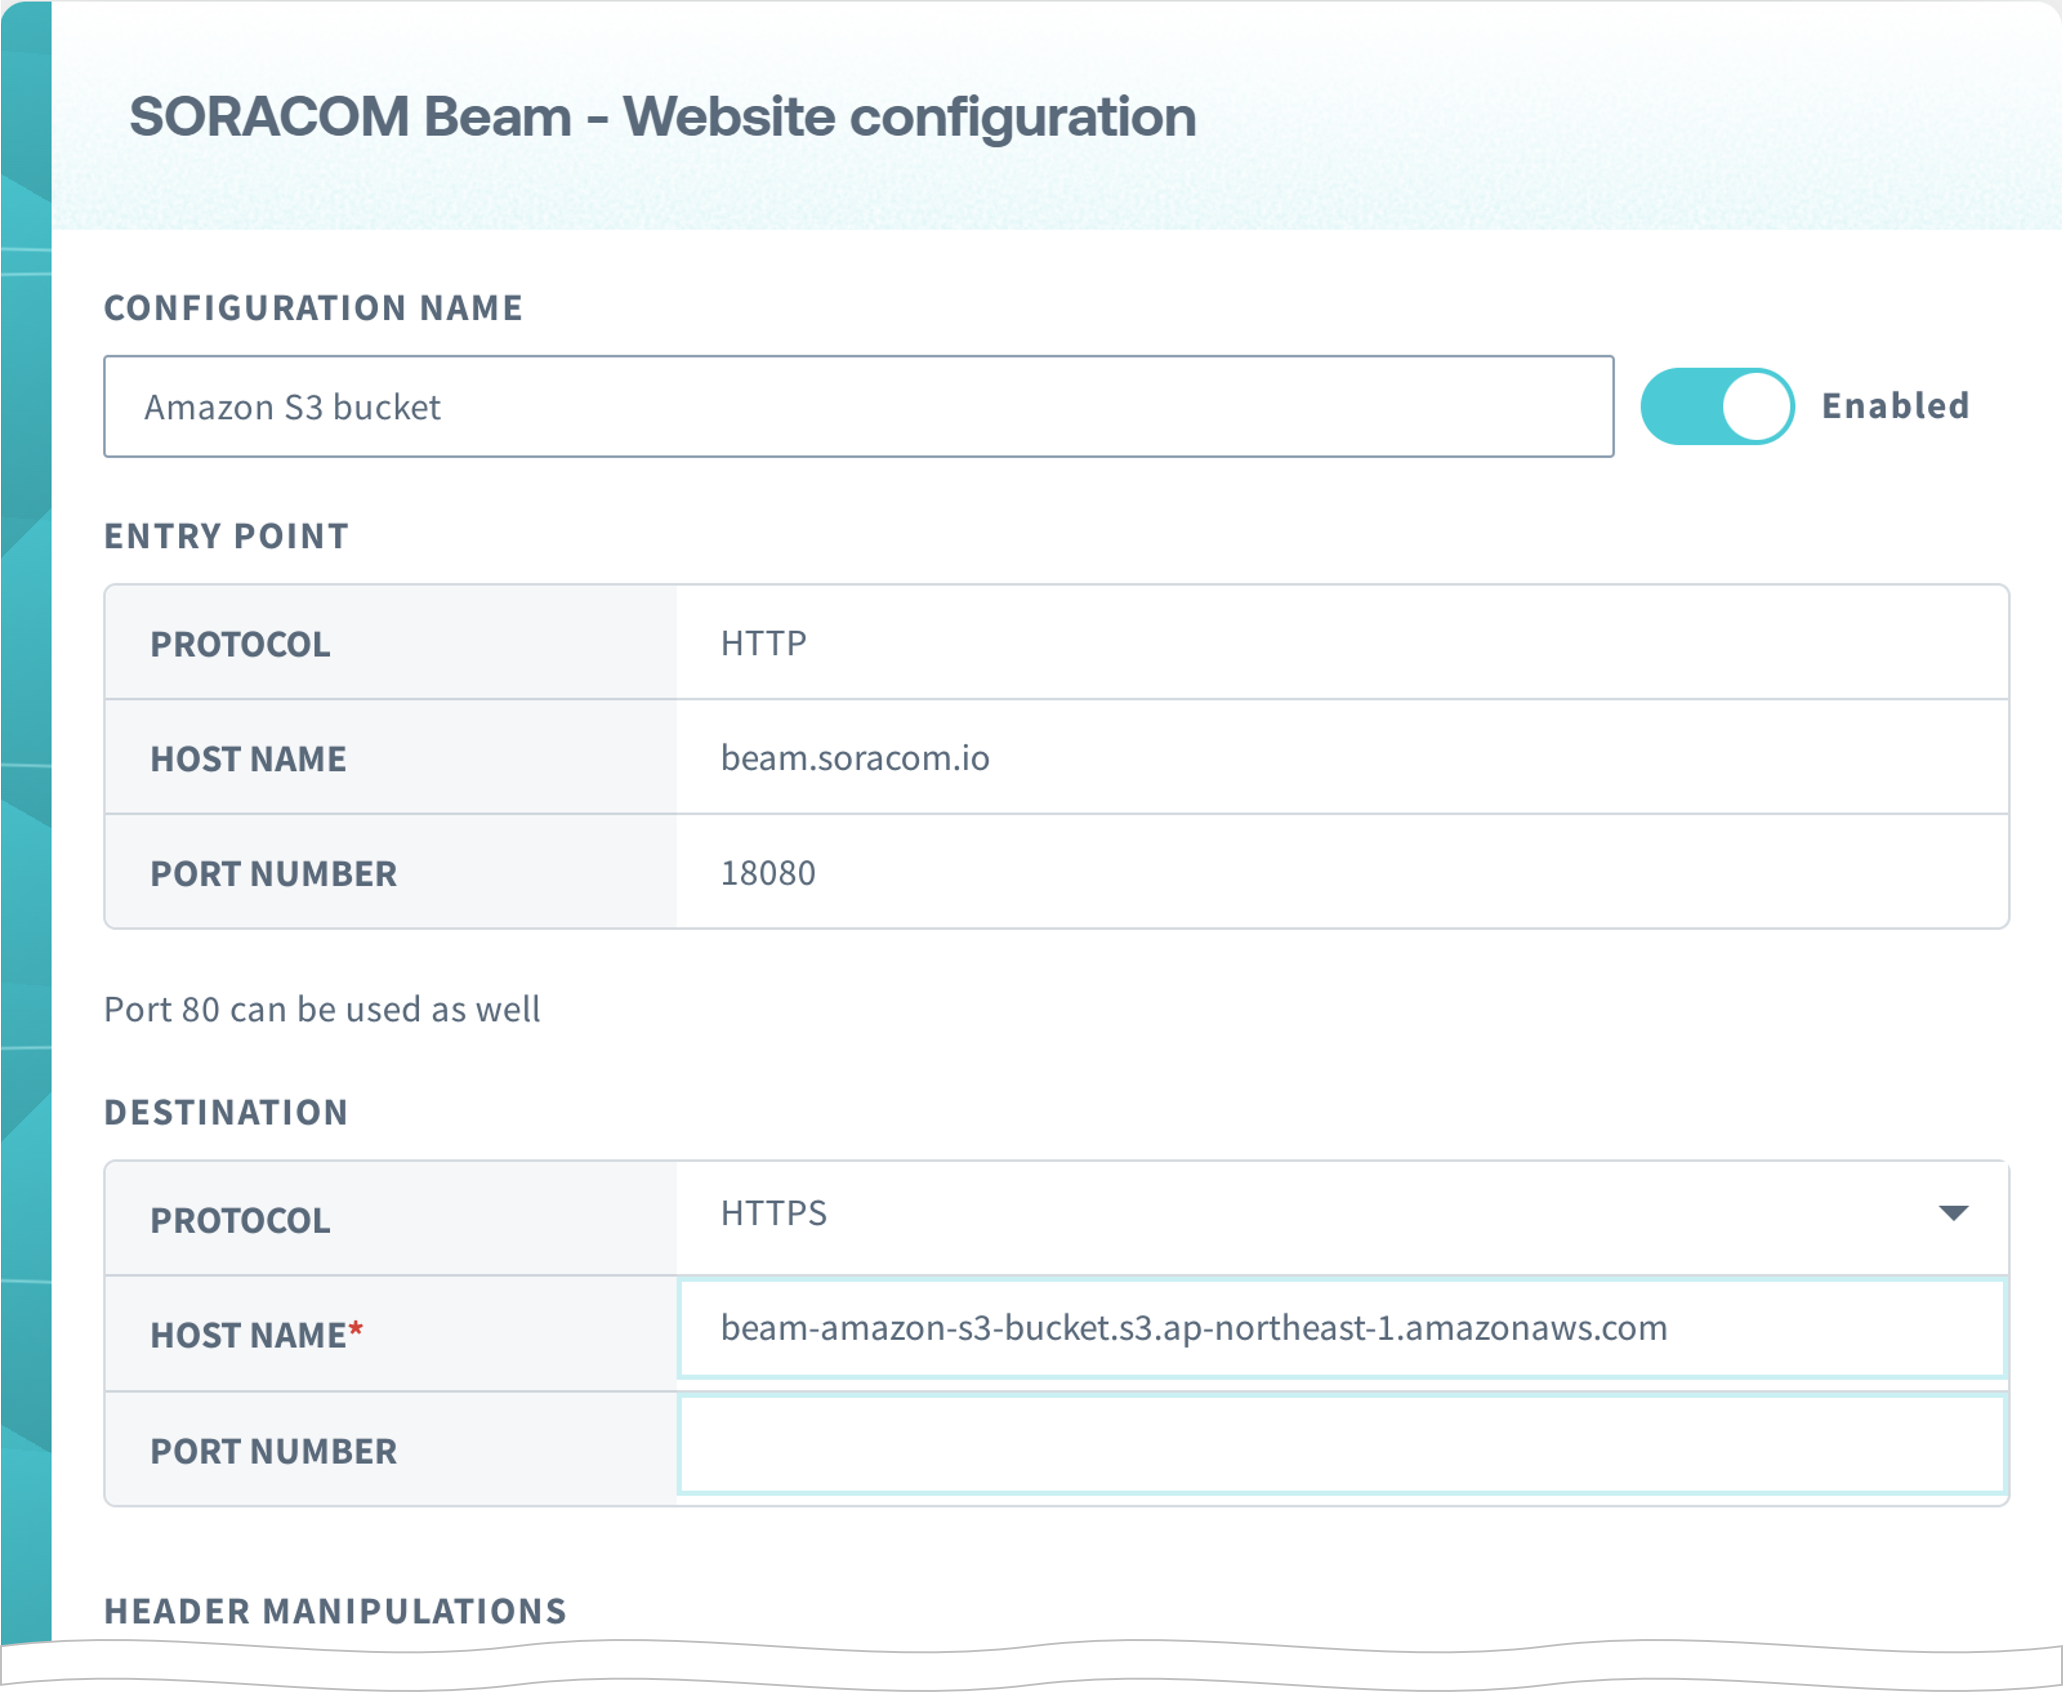
The "SORACOM Beam - Website configuration" pop-up will appear.
-
Set up as follows
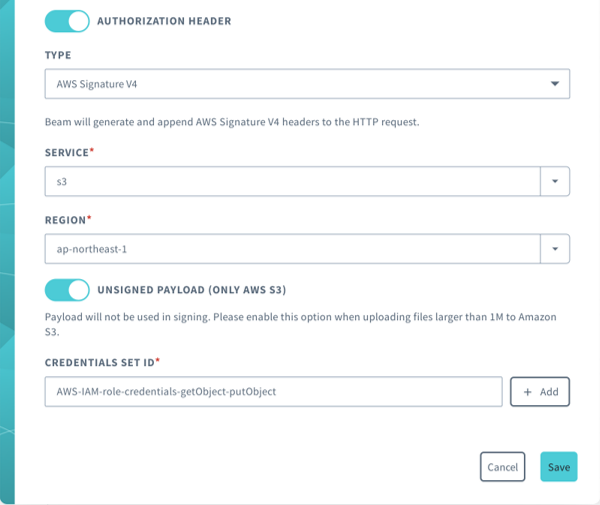
Item Description CONFIGURATION NAME Enter any configuration name (e.g. Amazon S3 bucket).DESTINATION > PROTOCOL. Select "HTTPS" DESTINATION > HOST NAME. Enter `${amazon_s3_bucket}.s3.{region}.amazonaws.com` (e.g. beam-amazon-s3-bucket.s3.ap-northeast-1.amazonaws.com).DESTINATION > PORT NUMBER. Leave it blank. HEADER MANIPULATIONS > AUTHORIZATION HEADER. Turn on and set as follows
- TYPE: select "AWS Signature V4".
- SERVICE: Select "AWS S3".
- REGION: Select the region for the Amazon S3 bucket.
- UNSIGNED PAYLOAD (ONLY AWS S3): Turn on if there is a possibility of uploading files with a file size greater than 1 MiB to Amazon S3.
- CREDENTIALS SET ID: Select the AWS IAM role credentials registered in Register AWS IAM role credentials in the credential set.
For more information on the Website entry point settings, see Website Entry Point.
-
Click Register.
-
Add the IoT SIM to the group you created. If you need help, see Basic Usage - Adding a Device to a Group.
Beam configuration for your IoT SIM is completed.
Step 4: Upload and Download Files to Amazon S3 Using the Website Entry Point
This step shows you the 3 possible methods to work with Amazon S3 buckets using Soracom Beam.
Your device must be connected to the Soracom platform to use Beam.
Upload Small-Size Files Using Curl
For uploading files of 100 MiB or less, the following command can be executed on a device that is using an IoT SIM.
curl -X PUT http://beam.soracom.io:18080/test.jpg \
|  -H "Content-Type: image/jpg" \
|  -T test.jpg
If Content-Type: multipart/form-data, boundary=xxxxxxxxxxxxxx is specified, the boundary (xxxxxxxxxxxx), etc. inserted in the request body will also be uploaded as part of the file.
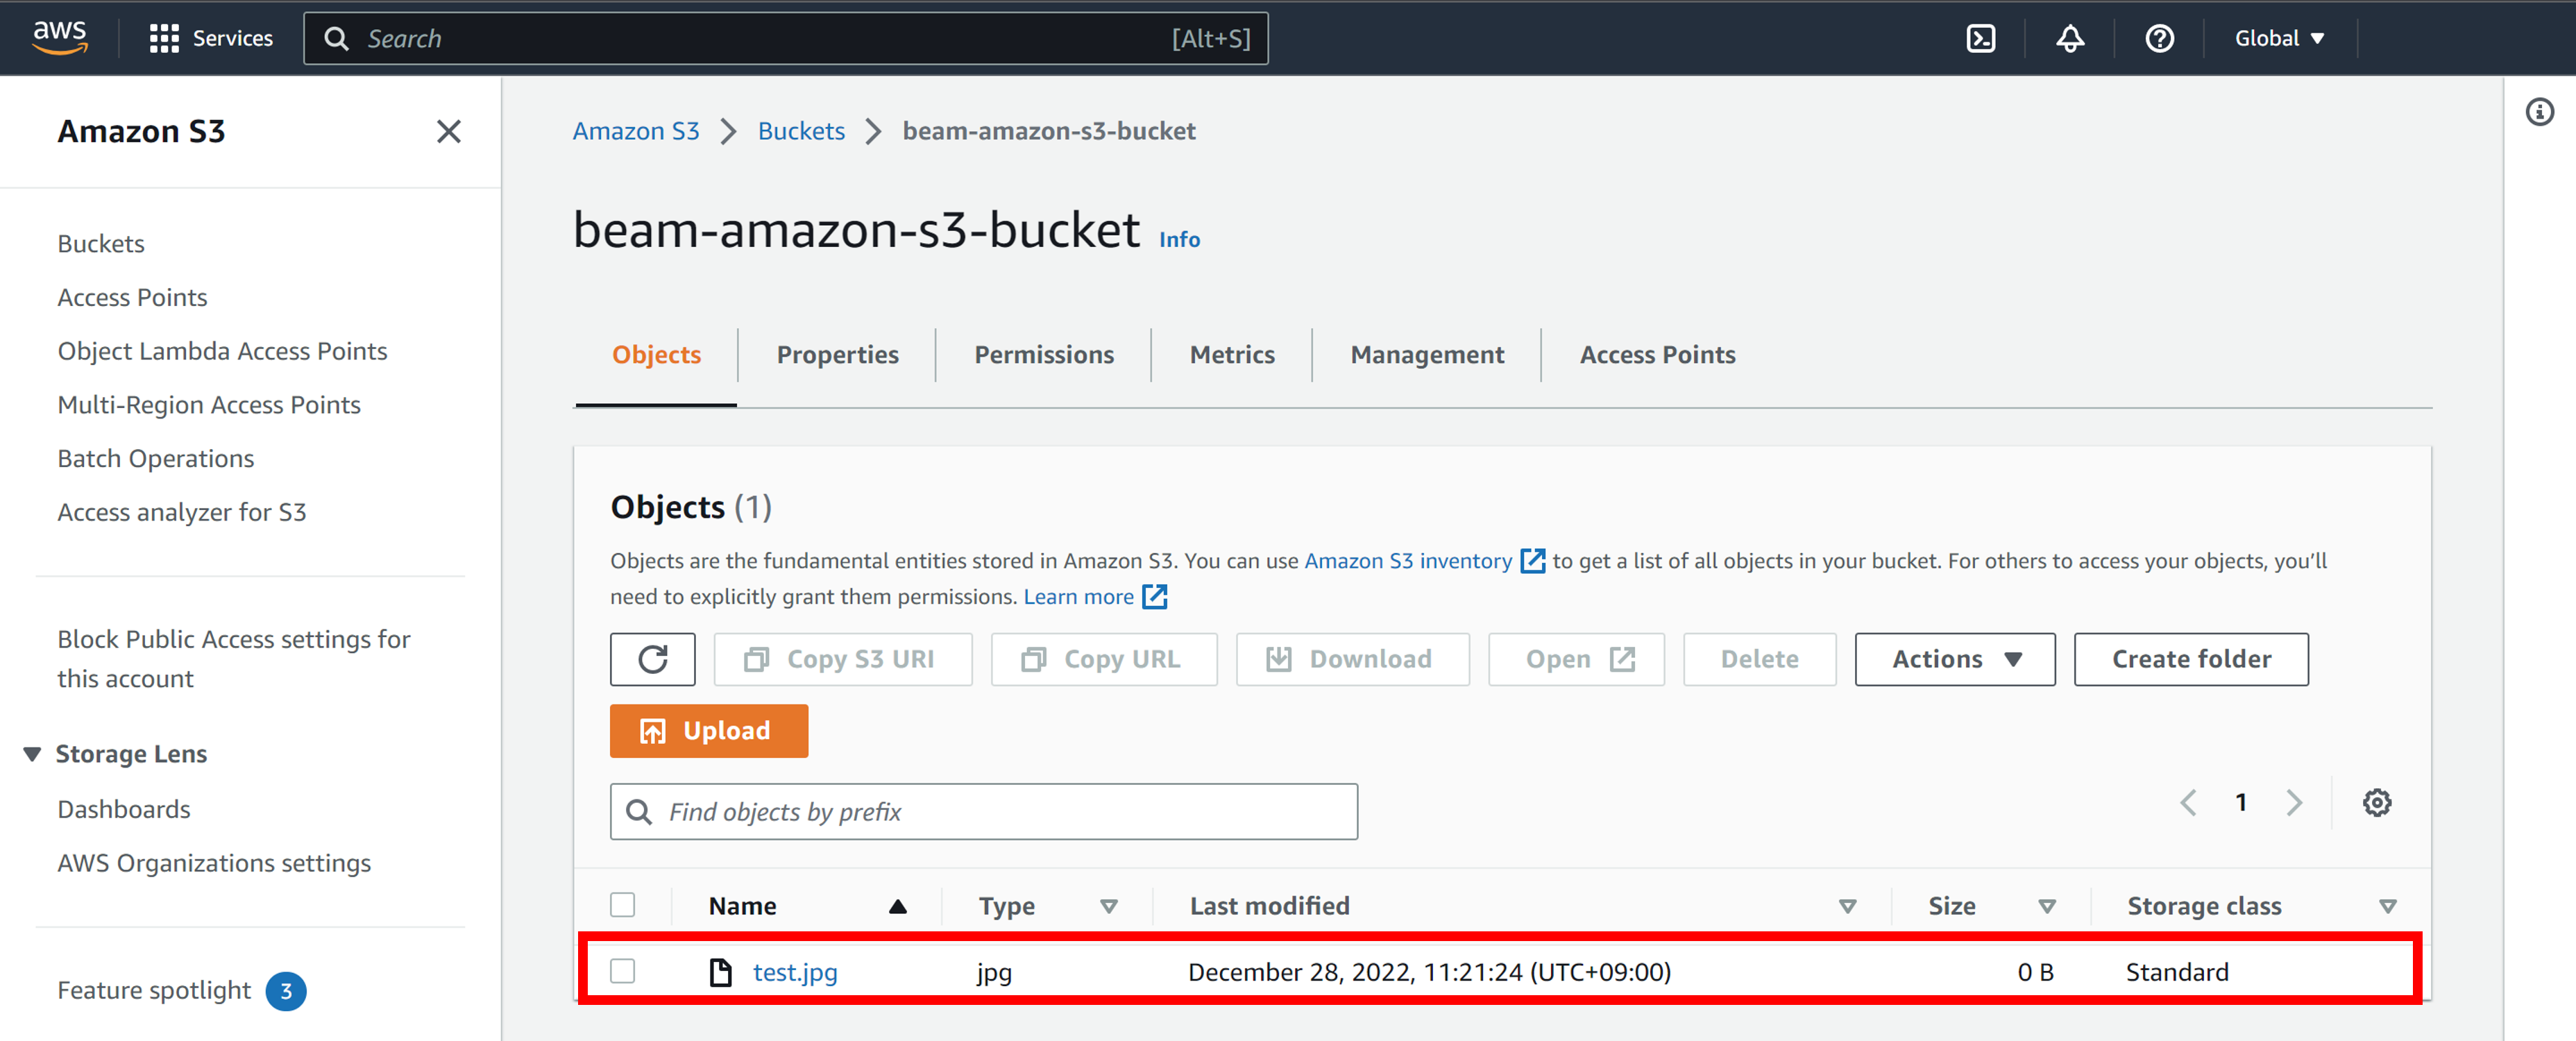
Next, check the uploaded file in the Amazon S3 console.
Access the Amazon S3 Management Console and click on the bucket you created.
You will see the uploaded file.
Upload & Download Files Using AWS SDK for Python (Boto3)
-
Install the AWS SDK for Python (Boto3) on the device.
pip install boto3 -
Download file_upload_resource.py to the device.
file_upload_resource.py is a sample script that uses the AWS SDK for Python (Boto3) to upload and download files to Amazon S3.
-
Upload the file by executing the following command on the device
python -c "import file_upload_resource;
|  file_upload_resource.upload(
|    bucket_name='beam-amazon-s3-bucket',
|    rel_file_path='./bigfile.zip',
|    key='bigfile.zip',
|    content_type='application/zip')"
The arguments of the
file_upload_resource.upload()method are as followsItem Description bucket_nameSpecify the name of the Amazon S3 bucket. It is used as the first level folder name. rel_file_pathRelative path of the file to upload (filename on device). keySpecify the key of the uploaded file (file name in Amazon S3 bucket). content_typeSpecify the content type according to the type of file to be uploaded. -
To download a file on the device, execute the following command
python -c "import file_upload_resource;
|  file_upload_resource.download(
|    bucket_name='beam-amazon-s3-bucket',
|    key='bigfile.zip',
|    rel_output_file_path='downloaded_bigfile.zip')"
The arguments of the file_upload_resource.download() method are as follows
Item Description bucket_name Specify the name of the Amazon S3 bucket. It is used as the first level folder name. key Specify the key (filename in Amazon S3 bucket) of the file to download. rel_output_file_path name of the downloaded file (file name on device).
Upload & Download Files Using AWS CLI
The AWS CLI can also be used to upload and download files to and from Amazon S3 buckets.
Upload example:
aws s3 cp bigfile.zip s3://beam-amazon-s3-bucket/bigfile.zip \
|  --no-sign-request --endpoint-url http://beam.soracom.io:18080
Download example:
aws s3 cp s3://beam-amazon-s3-bucket/bigfile.zip ./downloaded_bigfile.zip \
|  --no-sign-request --endpoint-url http://beam.soracom.io:18080