Soracom LTE-M Button Webhook Tutorial
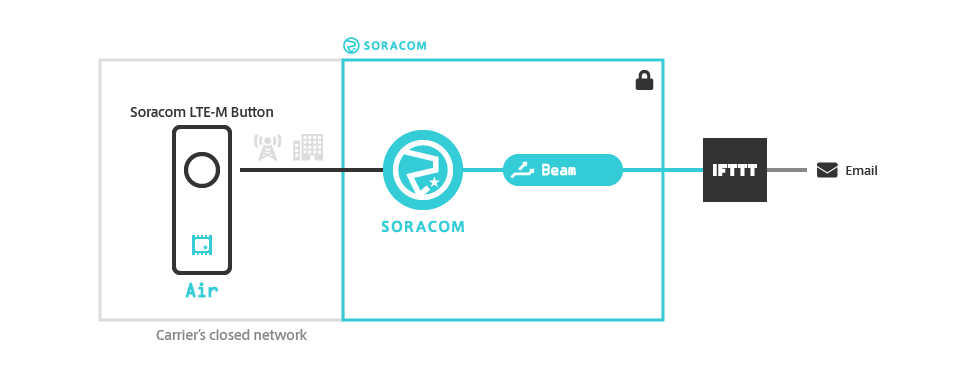
In this tutorial, we will use Soracom Beam to trigger an HTTP webhook that will send an email to ourselves whenever our button is clicked. For this example, we will use IFTTT (If This Then That), which is a popular automation service that provides an intuitive way to quickly build different event-driven actions. IFTTT has a vast library of official and community-made actions that can be combined with a webhook (as well as other types of events), making it easy to prototype different behaviors for your Soracom LTE-M Button.
While IFTTT is a great place to start, it is by no means the only option. You can use Soracom Beam with almost any service that supports HTTP or HTTPS POST webhooks, such as Zapier, Make, and Automate.io. If you want to connect your Soracom LTE-M Button to a different service, simply use its HTTP/HTTPS endpoint instead of the IFTTT example below.
Note that some services may require a specific data format or authentication method which may not be supported by Soracom Beam. Refer to the Soracom Beam documentation for more details on how Beam forwards data to your endpoint.
If you have your own web server or API endpoint that accepts incoming HTTP or HTTPS POST requests, you can also just use it instead of a third party service. Skip to the Enable and configure Soracom Beam section below, and configure Soracom Beam to use your HTTP endpoint instead of the IFTTT example below.
Overview
We will perform the following steps to set up Beam with IFTTT:
- Create a new IFTTT email webhook
- Enable and configure Soracom Beam for our Soracom LTE-M Button group
- Click the button to send a message to the webhook
- Check that we received an email
- Disable Beam after we're done
Prerequisites
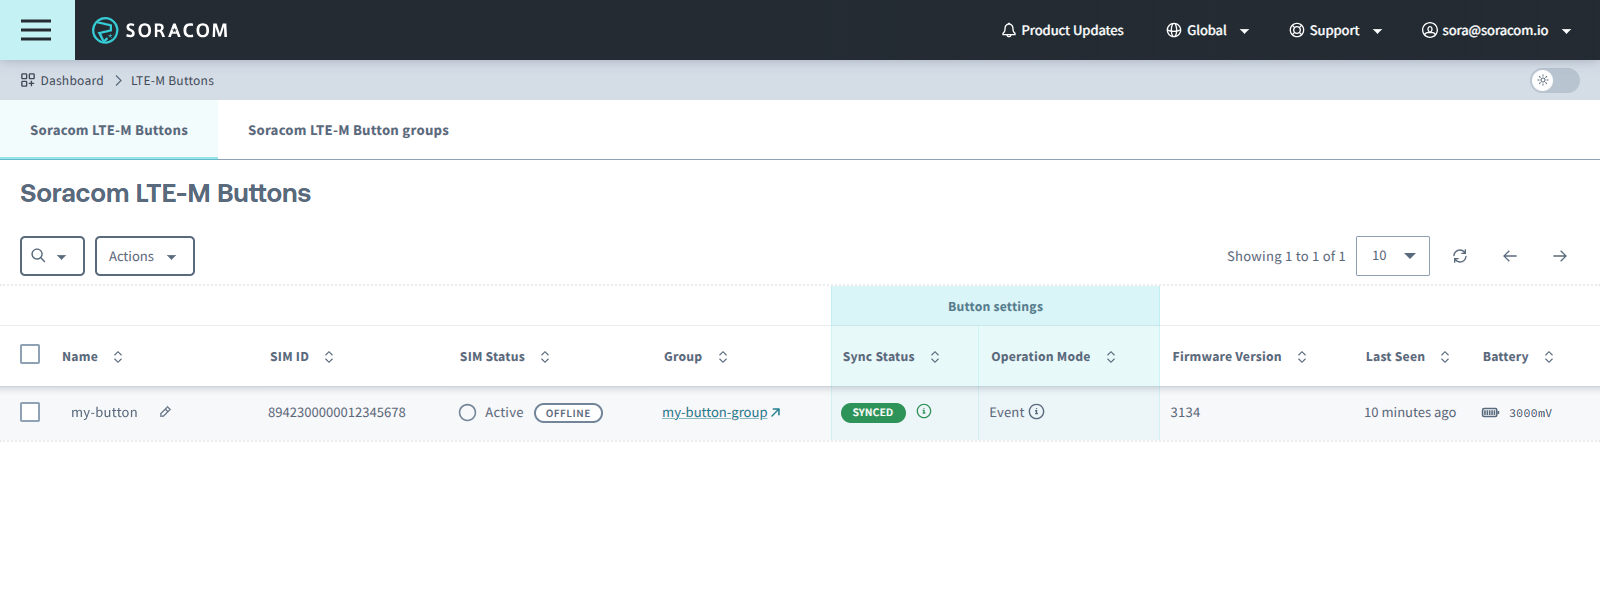
Before proceeding, make sure you have finished setting up your Soracom LTE-M Button using the Getting Started instructions. From the Menu > Gadgets > Soracom LTE-M Button screen, you should be able to see your button in the list of buttons, and its status should be Synced:
To make following this tutorial easier, your button's operation mode should also be configured as one of the following:
If your button's operation mode is configured as Timer, you can still follow this tutorial, however you will need to wait until your button sends a message based on its configured Uplink frequency before a message will be sent to the webhook.
Create an IFTTT Email Webhook
Before we can configure Soracom Beam, we need to set up a webhook. Let's create one now.
-
Log in to IFTTT or create a free account.
-
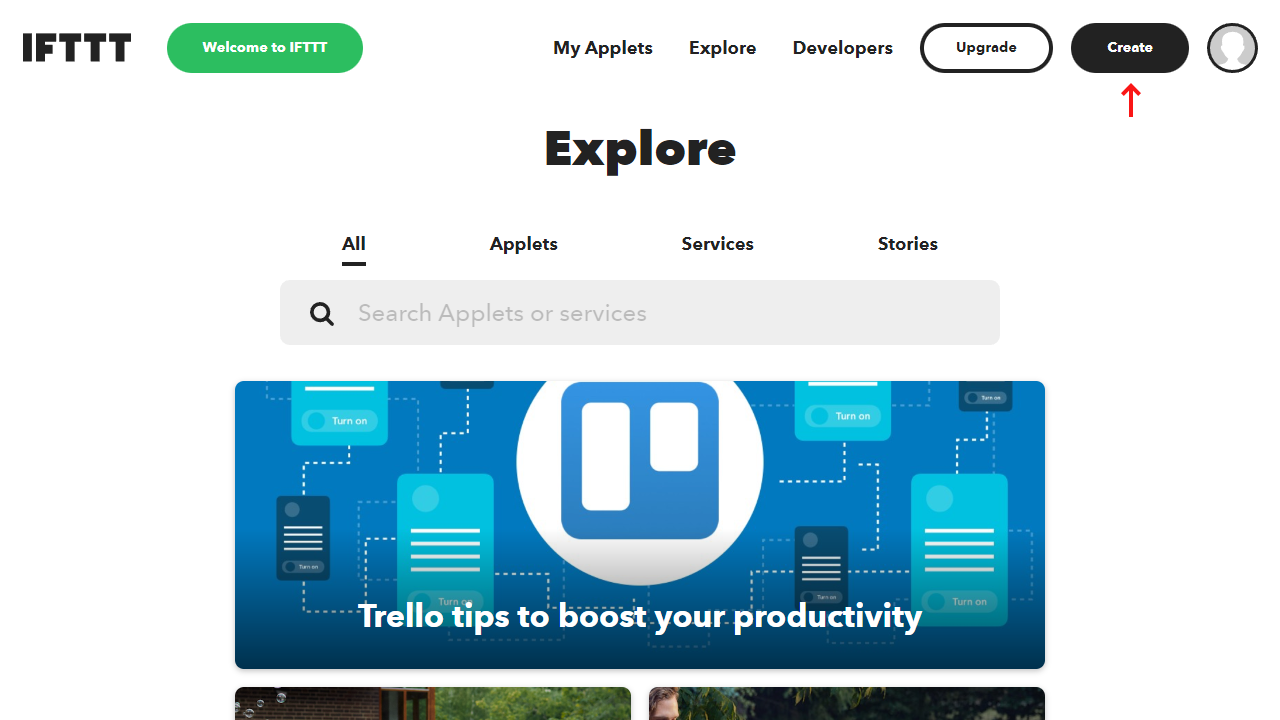
From main menu, click Create to create a new IFTTT applet.
-
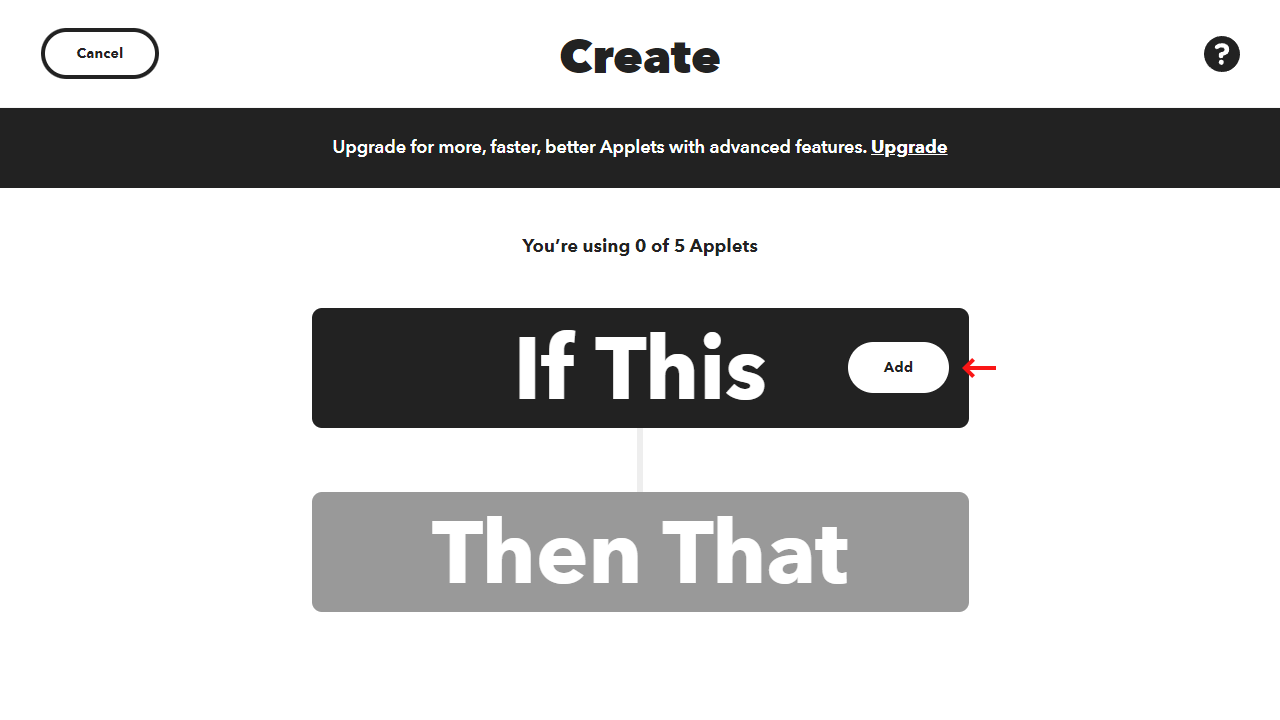
In the If This block, click Add.
-
In the list of available services, search for
webhookand select Webhooks. Then select the Receive a web request with a JSON payload trigger.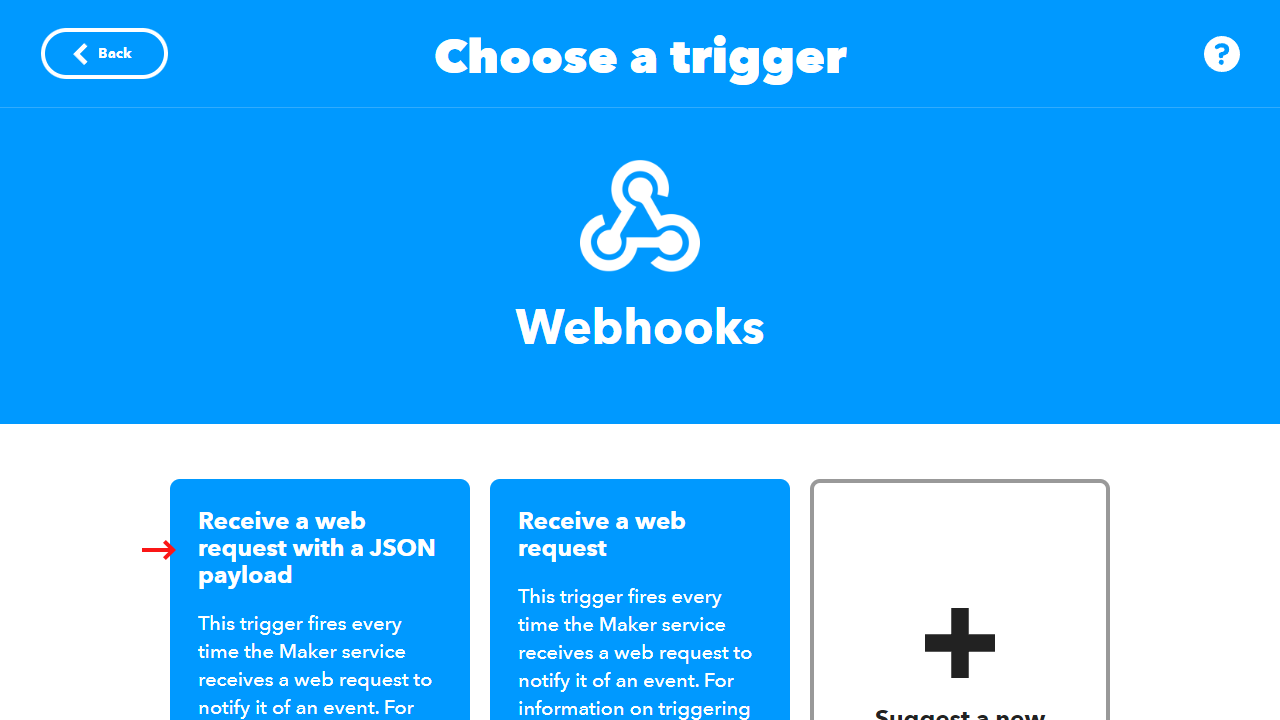
-
Configure the webhook trigger by choosing a trigger Event Name. Since this webhook will be triggered when we press our Soracom LTE-M Button, let's call this
button_pressed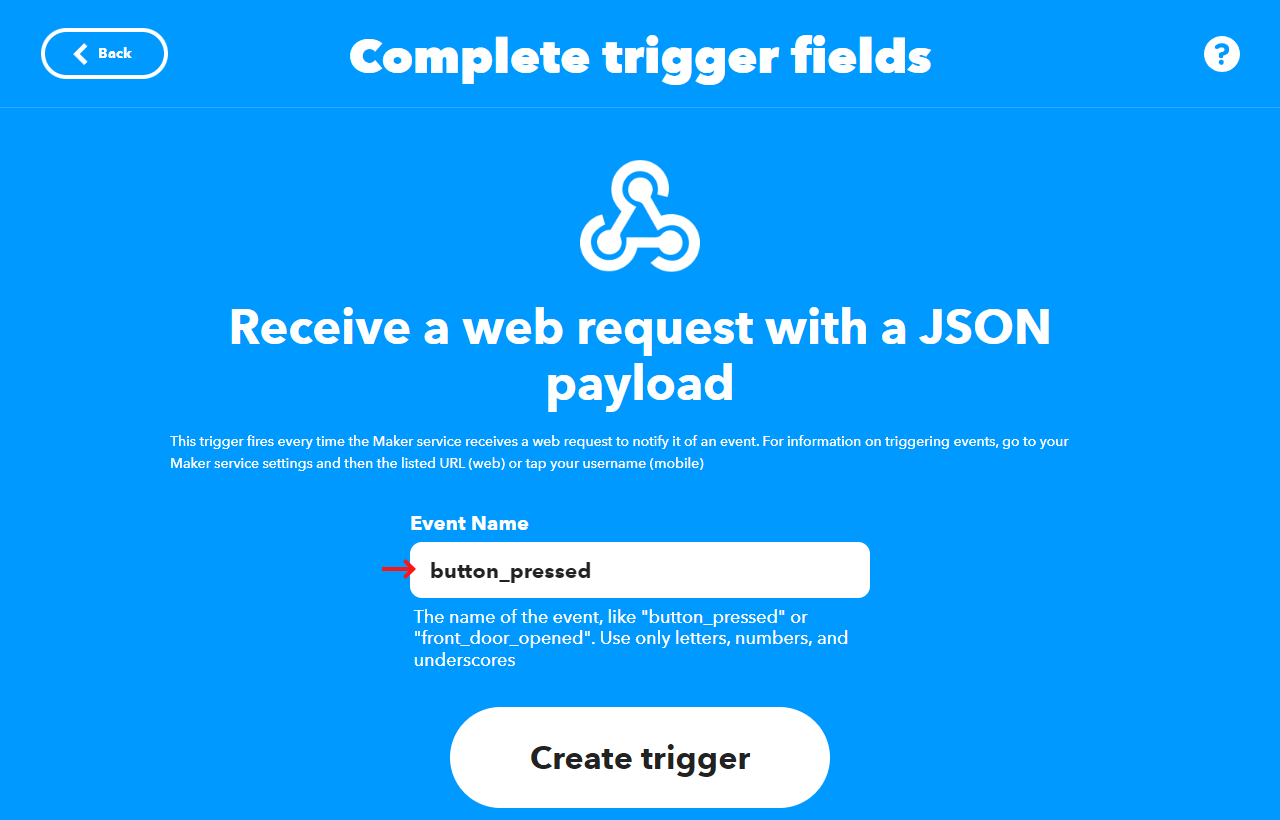
-
Next, in the Then That block, click Add.
-
In the list of available services, search for
emailand select Email. Then select the Send me an email action.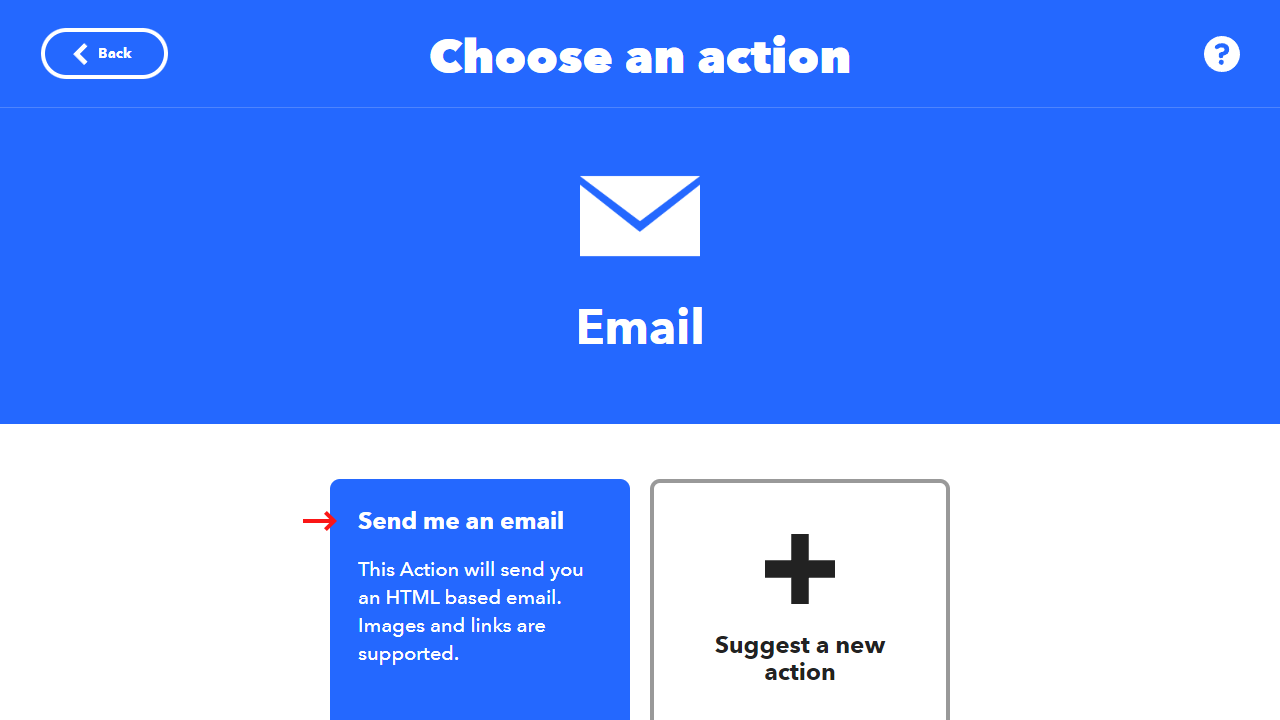
-
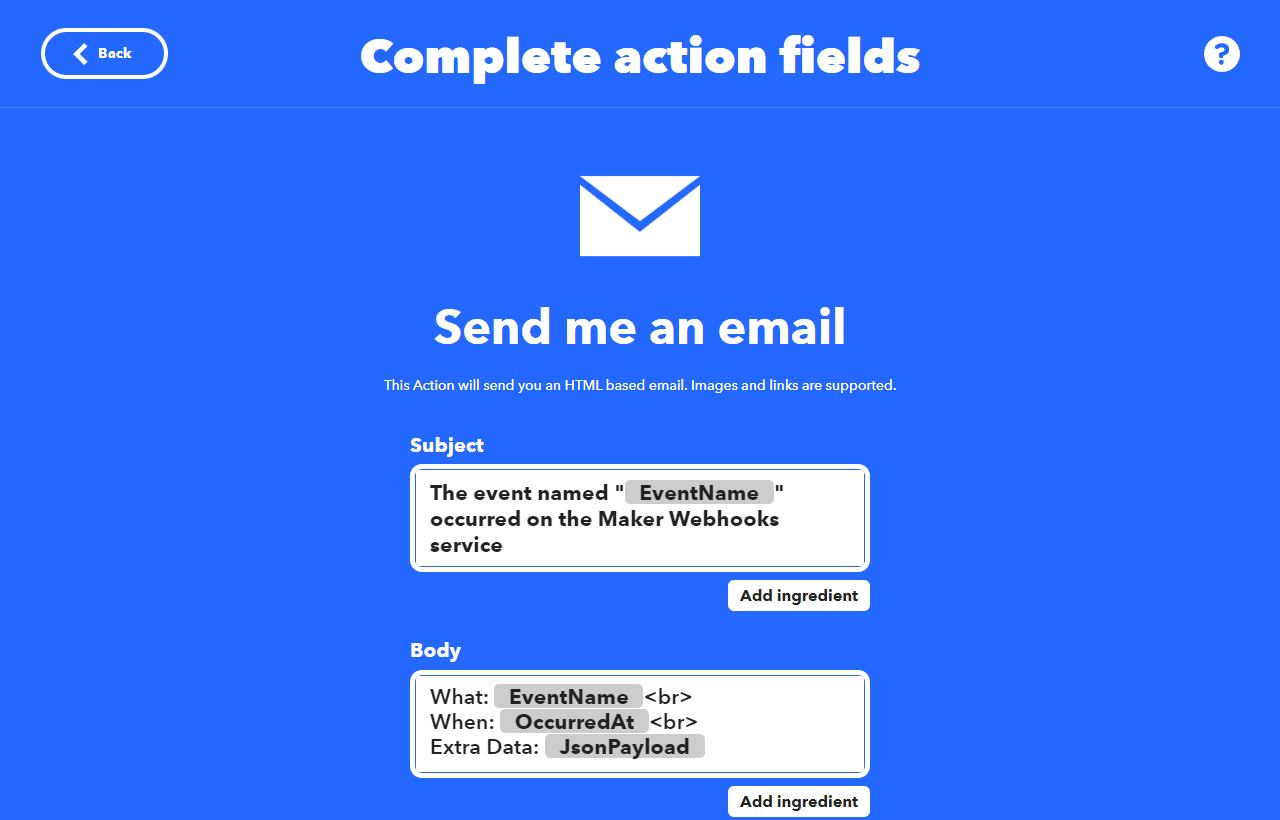
Here you can configure the email action to customize the email that will be sent. For now, we can keep the default values.
-
Once you have finished selecting and configuring both the If trigger and Then action, click Continue, and finish the set up by giving your IFTTT applet a name such as
Send me an email when my Soracom LTE-M Button is pressed.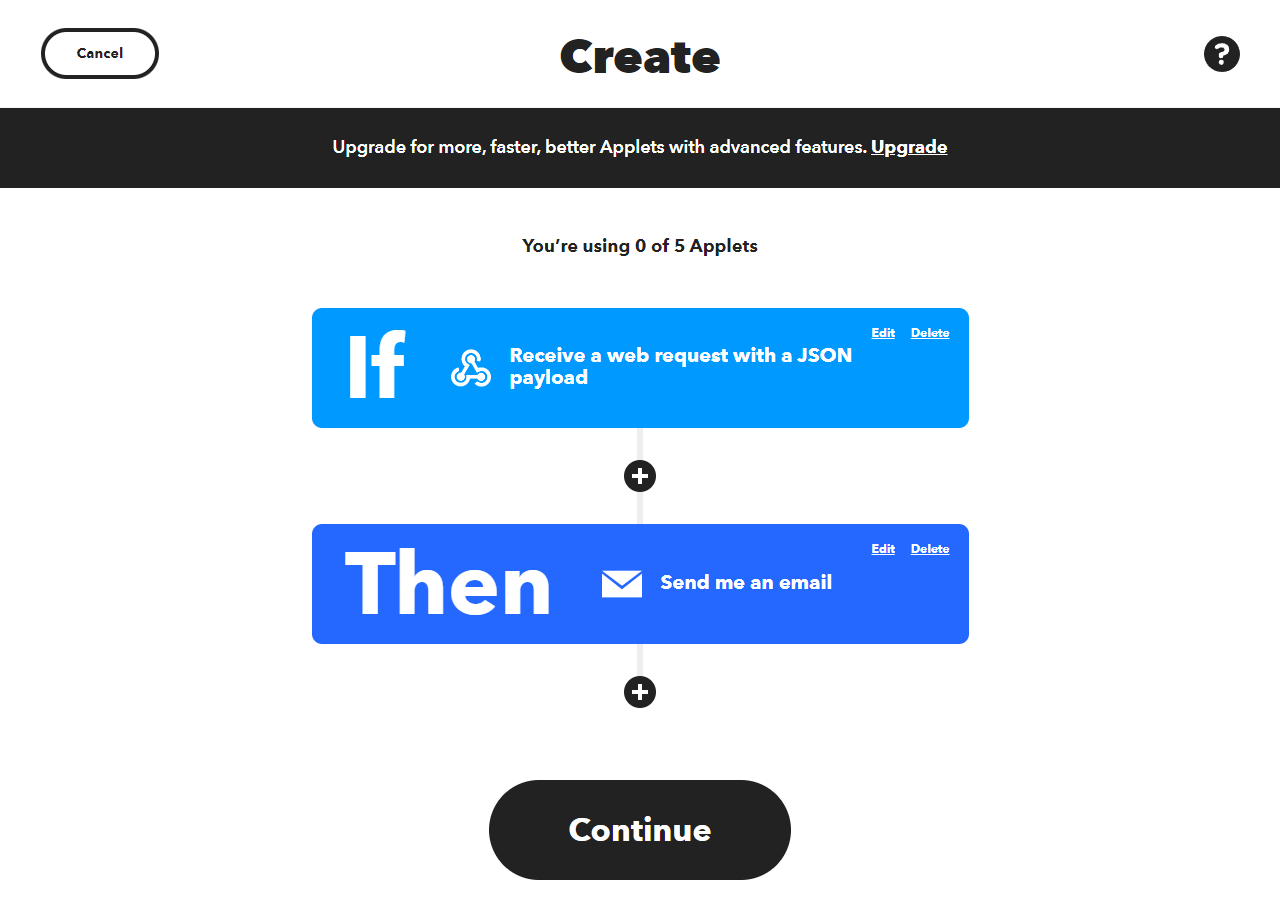
Next, to hook up this IFTTT applet to Soracom Beam, we need to get the Webhook trigger address.
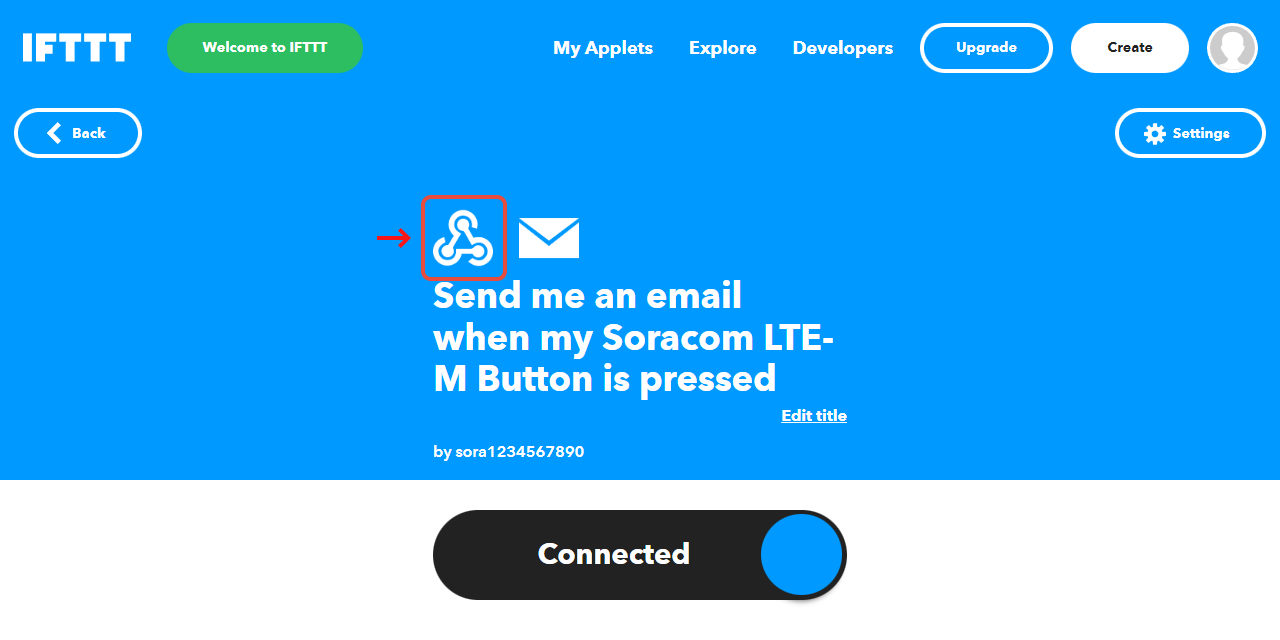
-
From applet details page, click the icon that corresponds to the Webhooks trigger:
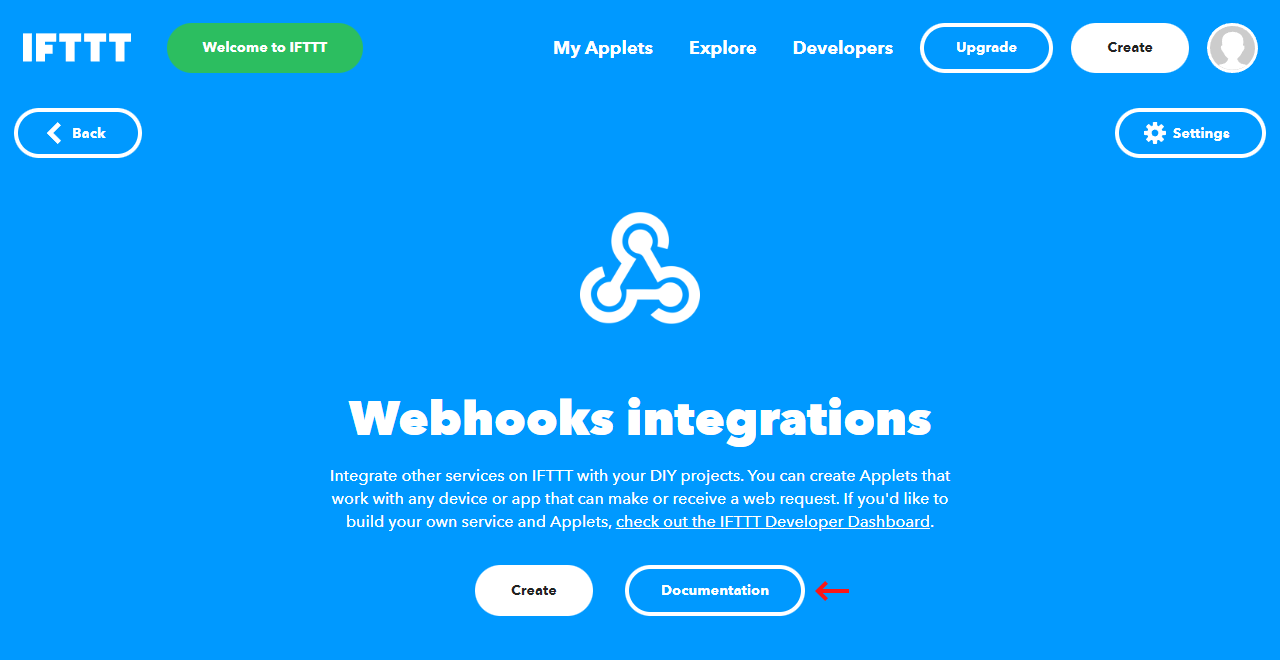
-
Then click the Documentation link:
-
A new page will open containing information for how to trigger the webhook:
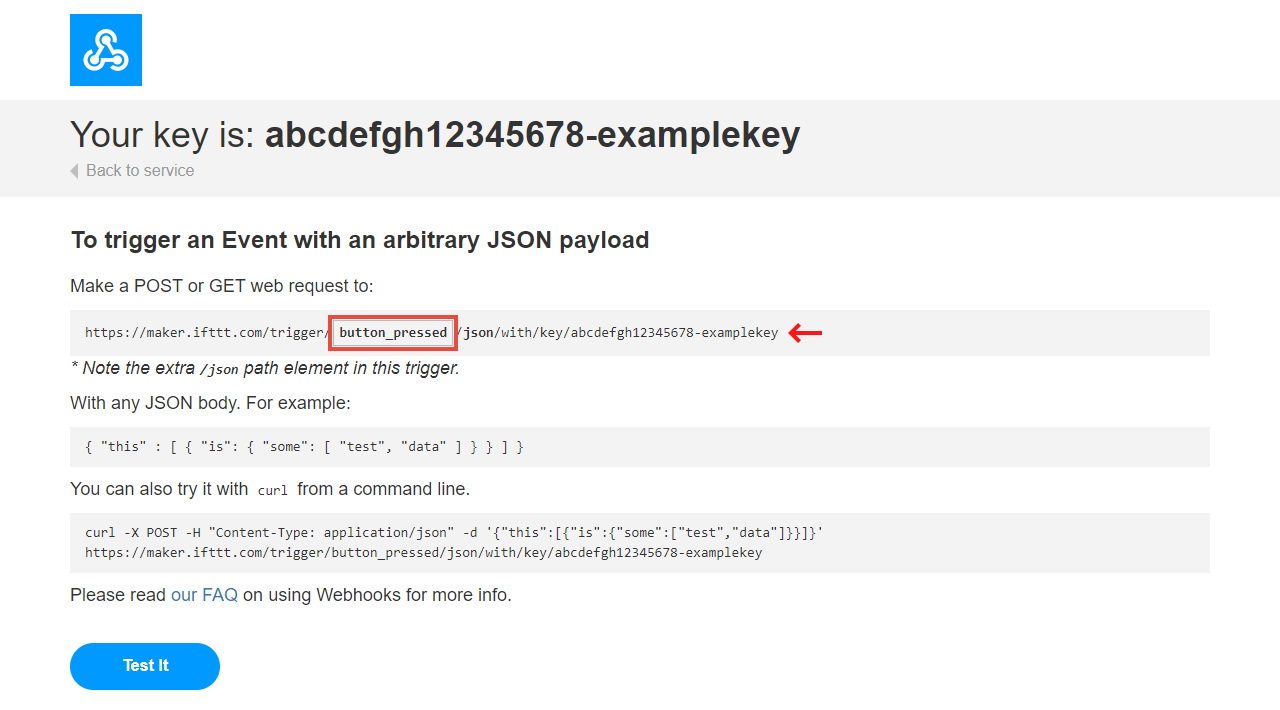
In the first URL, modify the
{event}field to match the webhook Event Name you specified earlier. In this case, let's change this tobutton_pressed.Then copy the full URL. This is the IFTTT webhook URL that we will configure in Soracom Beam.
Important! The key at the end of the IFTTT URL is your personal key for accessing the webhook. Take care to keep this key secret, otherwise an unauthorized person could run your IFTTT applet without your permission.
Enable and Configure Soracom Beam
Soracom Beam is a paid service billed according to the number of requests used. A free tier is available, which will provide enough requests for thousands of button clicks each month. However, if you are planning to deploy a large number of Soracom LTE-M Buttons, you might exceed the free tier.
Please note that regardless of the free tier, sending and receiving data over the cellular network will still incur data usage fees.
We're almost there! Now with IFTTT set up and the webhook URL handy, let's enable and configure Soracom Beam:
-
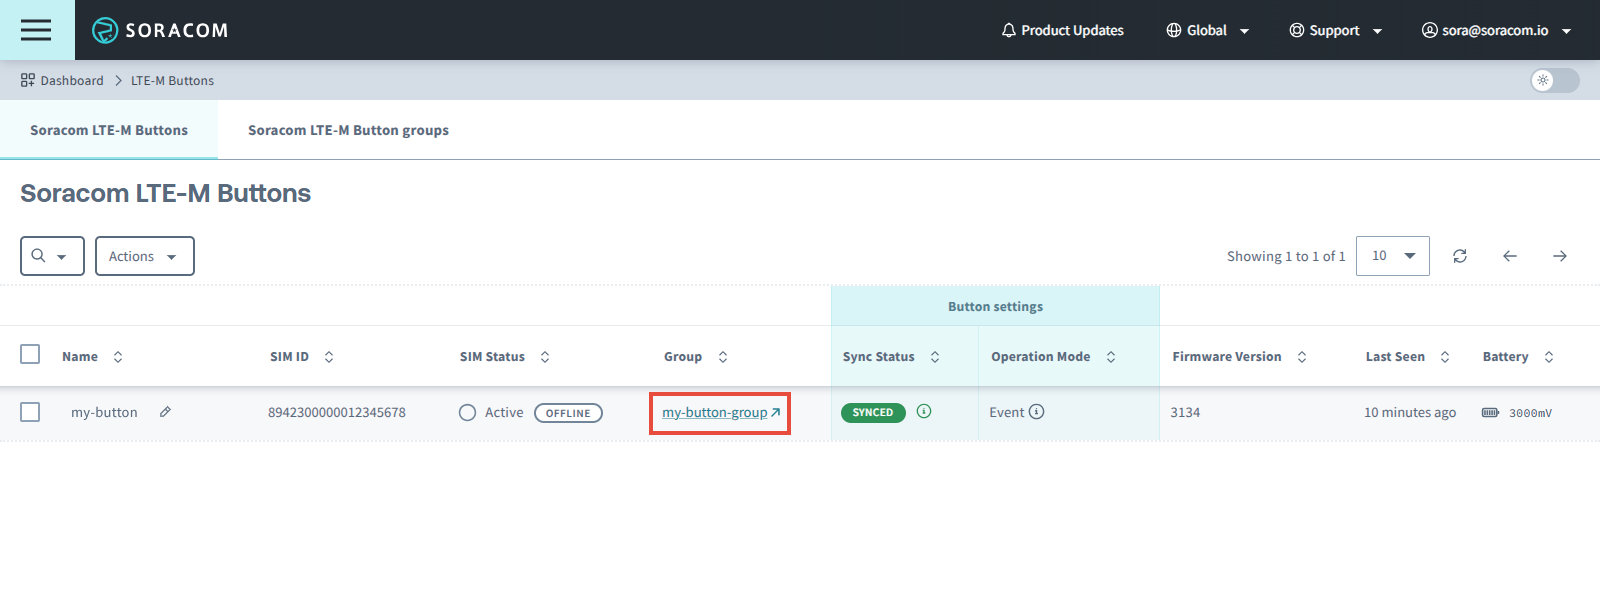
Find your button in the Soracom LTE-M Buttons list and click the link for the group:
-
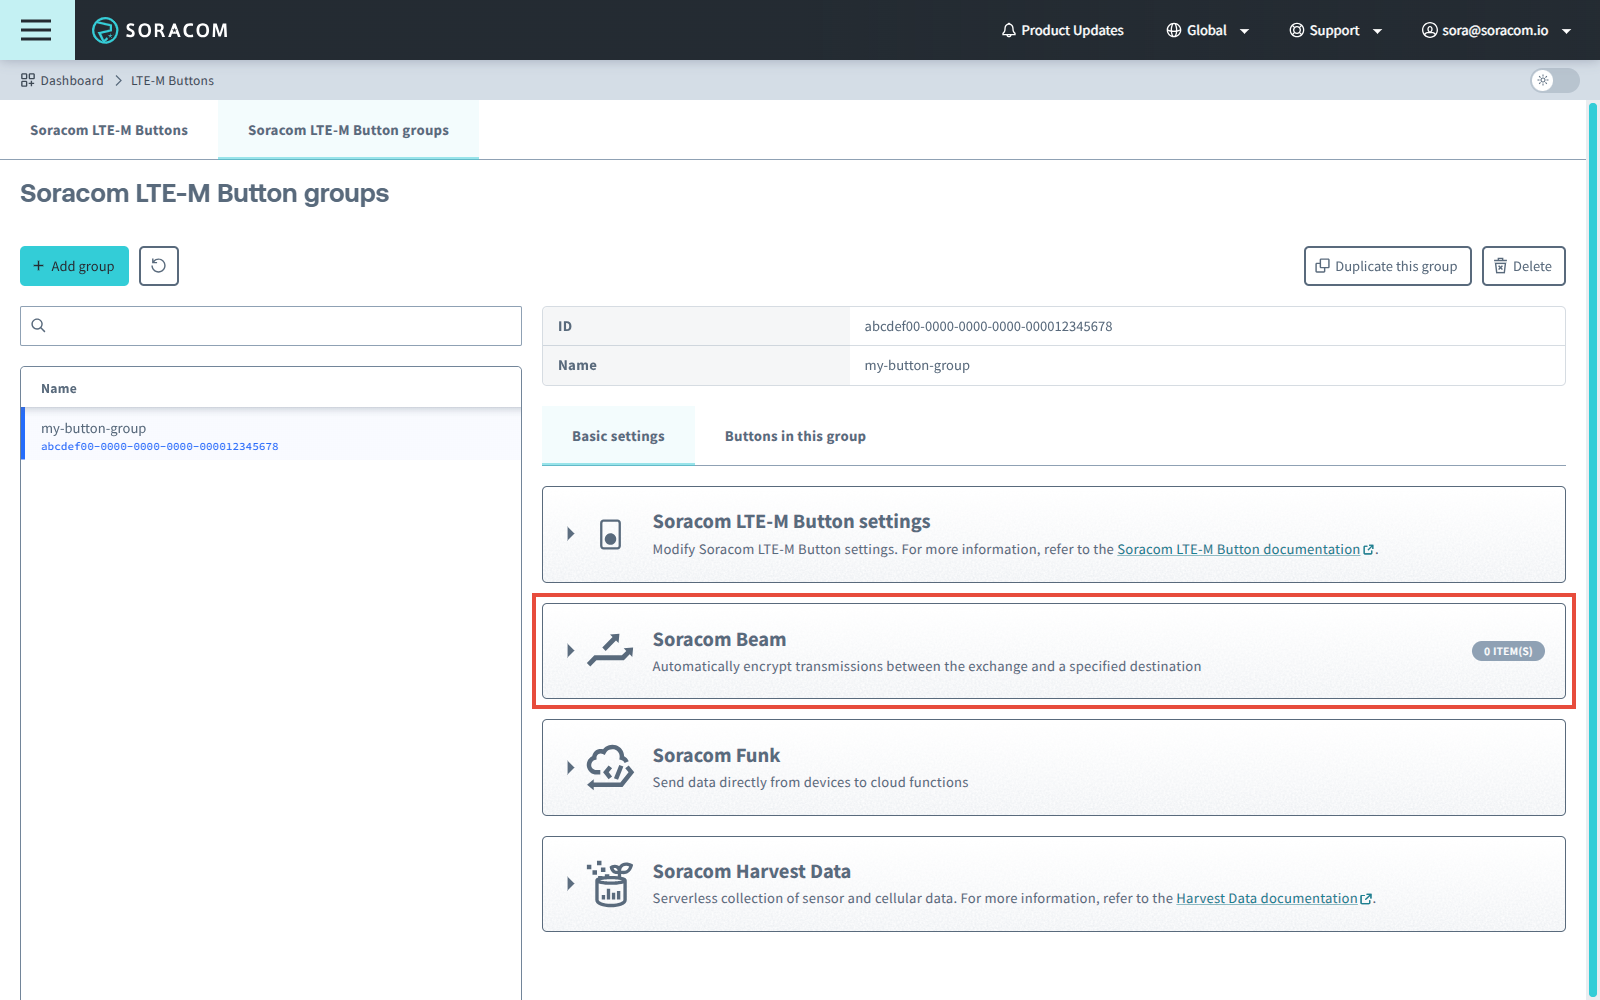
In the group configuration screen, click the Soracom Beam panel to show its settings.
-
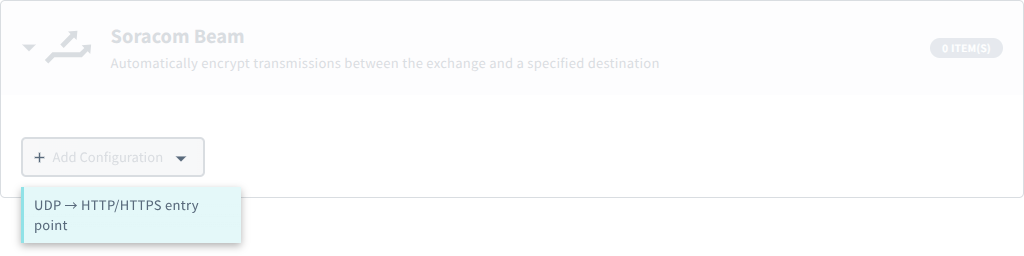
Click Add Configuration, then select UDP → HTTP/HTTPS entry point.
We're using the Beam UDP → HTTP/HTTPS entry point option because the Soracom LTE-M Button will send its click data in a UDP packet. Since our IFTTT webhook will be expecting an HTTPS request instead, we can take advantage of Soracom Beam's Protocol Conversion function so that we don't have to convert UDP to HTTPS by ourselves.
-
Configure Soracom Beam with the following settings:
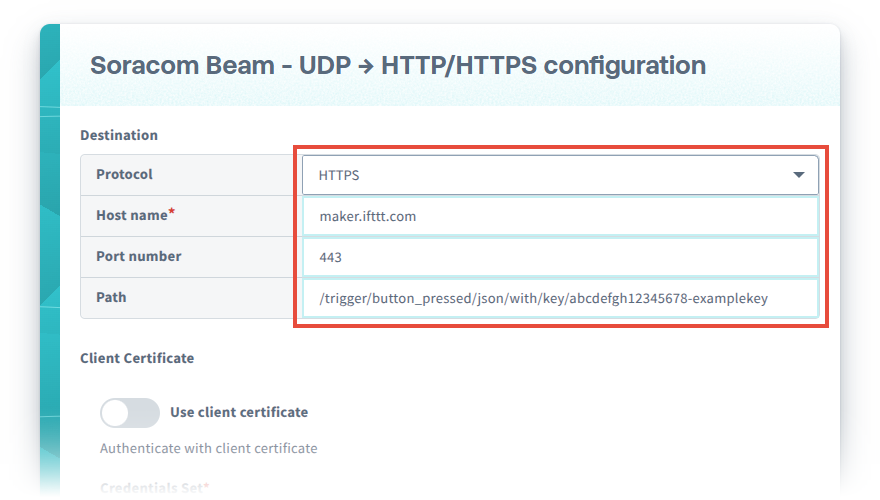
- Protocol -
HTTPS - Host Name -
maker.ifttt.com - Port Number -
443(the default port for HTTPS connections) - Path - The IFTTT webhook URL from earlier, with the
https://maker.ifttt.compart removed, as we have specified these in the Protocol and Host Name settings above.
If you are using a different webhook service, or if you have your own web server or API endpoint, enter the HTTP or HTTPS endpoint details here.
As we don't need any other settings, we can leave the rest of the Beam options with their default values.
Then click Save.
- Protocol -
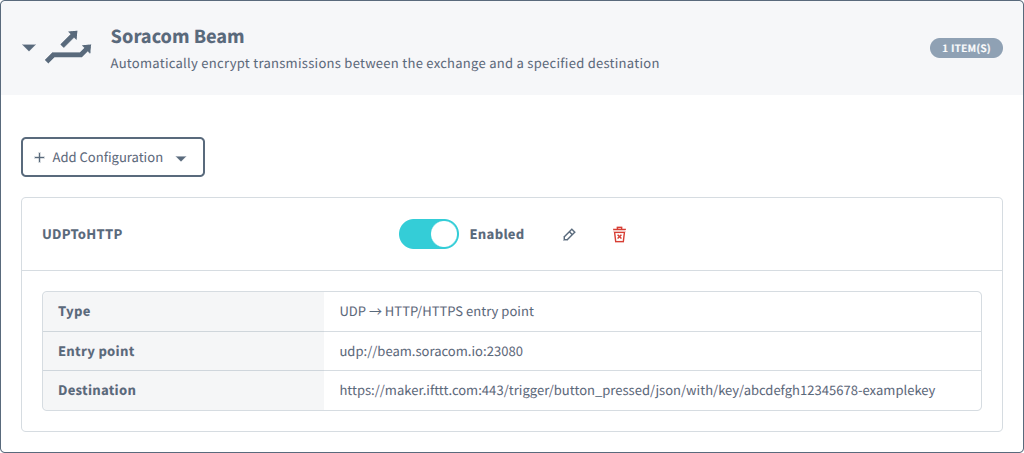
With the IFTTT webhook URL added to Beam, the Soracom Beam configuration should now look something like this:
Click the Button
Now that Soracom Beam is enabled and configured, it's time to test a button click.
-
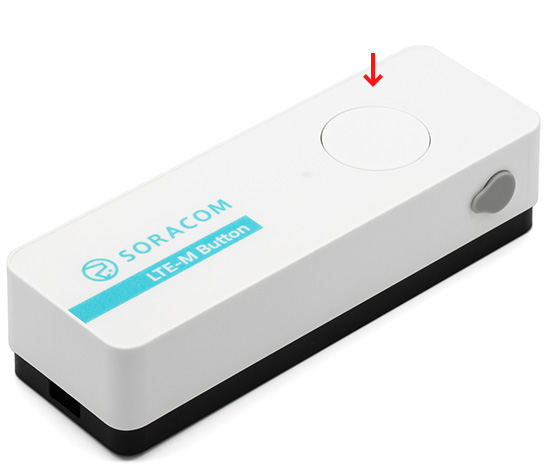
Click the button once.
After a second, the LED on the button will begin to blink green ☀──☀──☀── (1 blink per second). This indicates that the button is in the process of connecting to a cellular network.
Once the button has connected to the cellular network, it will automatically send a message containing the click details to Unified Endpoint.
If the transmission was successful, the LED will turn solid green for 2 seconds ☀────────, and the button will automatically turn off. We can now go back to the User Console and verify the data that was sent by the button.
If the LED turns red ☀──────── during this process, it indicates that the button was unable to find a suitable network, or that the network connection failed. Refer to the Troubleshooting section for details.
Verify the Data
Finally, let's go to our inbox and see if we received the email from IFTTT:
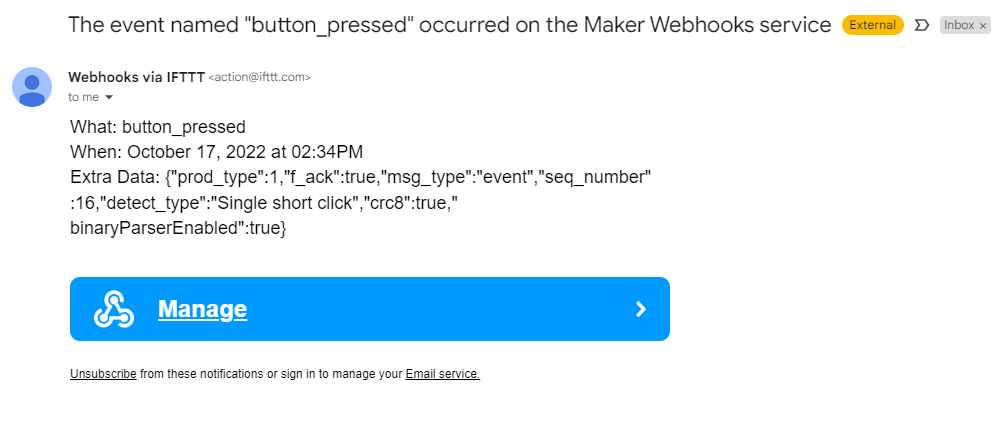
If you see an email similar to the above, congratulations! You have just sent a button click message from your Soracom LTE-M Button to a webhook!
Taking a closer look at the Extra Data, we can see the binary data that was decoded into JSON by Binary Parser. For more information on the message contents, refer to the Message Examples documentation.
We can also test out the Double short click and Single long click events and check that in the additional emails, the detect_type reflects the click we performed.
Next Steps
Operation Modes
With the Soracom LTE-M Button up and running, you can now test its different operation modes or attach accessories to the external I/O port in order to trigger messages from other sensors. Check out the Soracom LTE-M Button documentation for more details.
Additional Soracom Beam Settings
While this tutorial demonstrated how to connect the Soracom LTE-M Button to IFTTT, you can connect it to just about any other webhook service that is available. Simply follow the webhook service's instructions for setting up an action and generating a webhook URL that you can enter in your Soracom Beam settings.
Soracom Beam also provides many other features, such as the ability to add custom headers, which some webhook services may require for authentication. Refer to the Soracom Beam documentation for more information on configuring Beam options.
Using Different Groups
Although a Soracom LTE-M Button group can only have one Soracom Beam configuration, you can create multiple groups, each with different Beam configurations, and move your button from one group to another. This allows you to "wirelessly reprogram" your button to switch from one webhook to another without actually changing any settings on the button itself.
Disable Soracom Beam
If you are switching to another Soracom service such as Soracom Funk, or if you want to temporarily stop forwarding button data to the webhook, don't forget to disable or delete the Soracom Beam configuration.
-
Open the group configuration screen again, and click the Soracom Beam panel to show its settings.
-
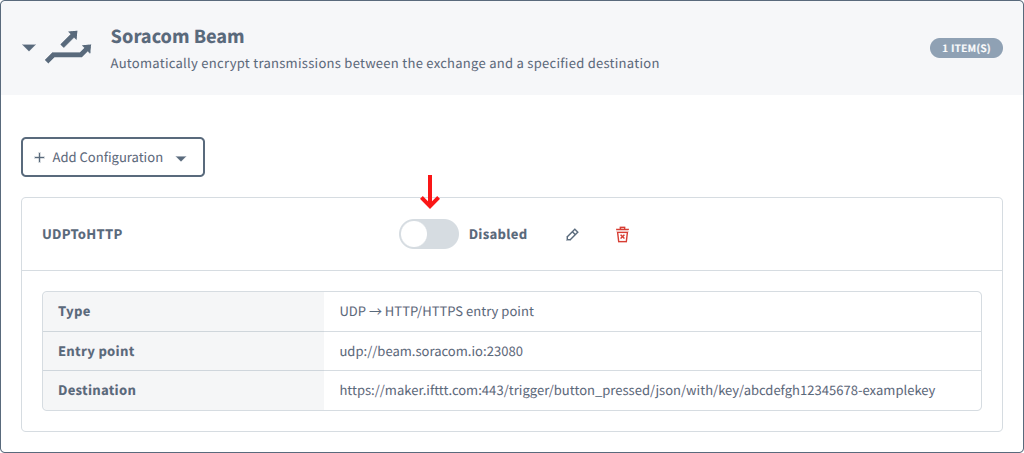
Click the toggle switch to disable the Beam configuration, or the to delete it instead.
If you disable the Beam configuration, it will still be saved in the group configuration so that you can easily re-enable the setting later if needed.
After disabling or delete the Beam configuration, you may also want to clean up your IFTTT Email Webhook.