Redirection Mode
Junction's Redirection mode will forward all packets passing through the VPG to a forwarding destination. At the destination, you can then perform custom routing and traffic shaping in order to control the behavior of devices attached to your VPG.
Unlike Junction's Mirroring mode, Redirection will set the "next hop" of each packet as your redirection destination, so that you have the ability to inspect, filter, or perform other actions on traffic before it proceeds to its destination.
Note that if you have enabled Junction's Redirection mode and are using Soracom Gate Device to Device connections, the packets will be routed to your Gate Peer. The Gate Peer will have to be configured to route the packets to the destination device.
Example Implementation
In order for Junction's Redirection mode to function, you must establish a L2 connection between your Soracom VPG and the redirection destination. This is accomplished by enabling Soracom Gate in the VPG, and then configuring a Gate Peer within your private network. The VXLAN connection between Gate Peers in the VPG and in your private network establishes the required L2 connection.
In turn, the VXLAN connection requires an underlying network connection, which can be provided through Soracom Canal, Direct, Door, or even by using the VPG Fixed Public IP Address option.
This guide will demonstrate packet redirection from the VPG to an AWS EC2 instance acting as a Gate Peer, utilizing the VXLAN connection between the EC2 instance and the VPC as the L2 connection, and Soracom Canal and a VPC peering connection as the underlying network connection.
Requirements
- A Virtual Private Gateway
- An AWS account
- An AWS VPC
- Soracom Canal configured
- An AWS EC2 instance has been configured as a Gate Peer
In this guide, we will use 172.16.0.0/16 as our AWS VPC CIDR block. When configuring Redirection for your network, ensure that you use the CIDR block that corresponds to your private network.
Canal Setup
Before we can redirect packets, we need to have a connection between our VPG and our private network. As we have an AWS VPC, we can establish the connection by using Soracom Canal, which will use an AWS Peering Connection to create the network connectivity.
Follow the Soracom Canal Configuration documentation to set up a Peering Connection from the VPG to your private network, ensuring that you have updated your VPC's route table to accept traffic from the VPG.
Gate Peer Configuration
To set up the VXLAN connection, we need to register an EC2 instance that will act as a corresponding Gate Peer within our private network. Follow the Soracom Gate Peer Configuration documentation to create an EC2 instance, register it with your VPG as a Gate Peer, and configure the VXLAN interface.
Next, we will perform some additional configuration to handle packets that are redirected to our Gate Peer.
-
Connect to your Gate Peer EC2 instance.
-
Add a rule that will mask the private IP addresses of redirected packets with the IP address of the Gate Peer's
eth0interface:sudo iptables -t nat -A POSTROUTING -o eth0 -j MASQUERADE -
Next, check that packet forwarding is enabled:
sudo iptables -t nat -L -v
>Chain PREROUTING (policy ACCEPT 0 packets, 0 bytes)
> pkts bytes target      prot opt in     out     source               destination
>
>Chain INPUT (policy ACCEPT 0 packets, 0 bytes)
> pkts bytes target      prot opt in     out     source               destination
>
>Chain OUTPUT (policy ACCEPT 0 packets, 0 bytes)
> pkts bytes target      prot opt in     out     source               destination
>
>Chain POSTROUTING (policy ACCEPT 0 packets, 0 bytes)
> pkts bytes target      prot opt in     out     source               destination
>    0     0 MASQUERADE  all  --  any    vxlan0  anywhere             anywhere
>    0     0 MASQUERADE  all  --  any    eth0    anywhere             anywhere
In the
POSTROUTINGchain, we should see both theeth0MASQUERADE rule we added, as well as thevxlan0rule we created during Gate Peer Configuration.Just as noted in the Gate Peer Configuration documentation, the routing settings are not permanent and will be lost if the Gate Peer is restarted. Use
sudo services iptables saveoriptables-saveto ensure that configuration is saved.
Our Gate Peer is now ready to accept redirected packets over the VXLAN interface.
Configure Junction
So far, we've completed the following:
- Our Soracom VPG is connected to our AWS VPC using Soracom Canal
- We have enabled Gate for our VPG.
- We have an EC2 which is registered as a VPG Gate Peer, and its VXLAN interface is configured with an additional MASQUERADE rule for the
eth0interface.
Let's configure our VPG to redirect packets to our Gate Peer.
Follow the Redirection configuration instructions from the Junction Configuration documentation, providing the following parameters:
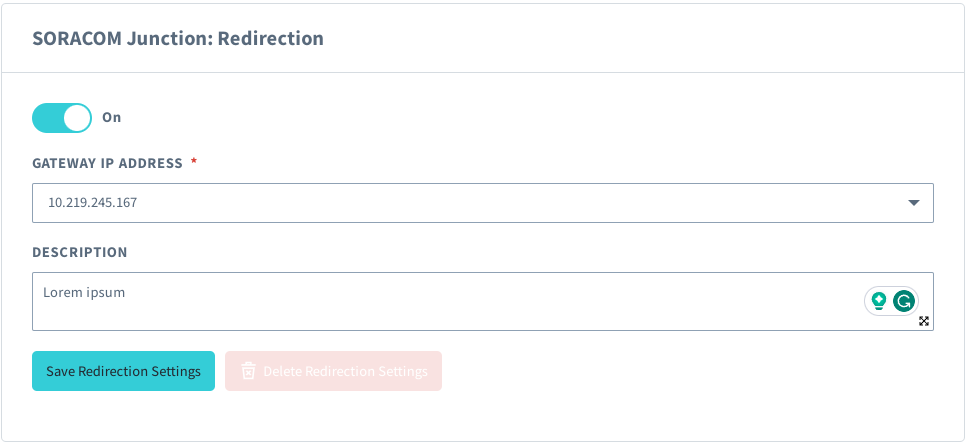
- Gateway IP Address - The Inner IP Address (Device Subnet IP Address) of the Gate Peer in our VPC.
- Description - An optional description to identify where packets are being sent.
Once we save these settings, Junction will immediately begin redirecting packets to our EC2 Gate Peer.
If any IoT SIMs were not previously attached to the VPG, you must disconnect and reconnect their cellular connection in order to connect to the VPG.
Checking Redirection
To make sure our traffic is being redirected properly, we can check for the redirected packets using tcpdump.
Because packets are being redirected, troubleshooting any connectivity issues may be difficult. Before attaching an IoT SIM device to the VPG, first ensure that it is able to connect to network resources (such as accessing the Internet) in order to rule out device-side errors. Then attach it to the VPG in order to test that its packets are being redirected as expected.
If an IoT SIM device works normally prior to attaching to a VPG, but its packets are not redirected after attaching, check your VPG Gate configuration, Gate Peer configuration, and Junction configuration.
If testing Internet traffic, ensure that your Gate Peer is able to route traffic to an Internet gateway.
Connect to the EC2 Gate Peer using SSH. Then run tcpdump to start viewing the incoming packets. Depending on your EC2 image, you may need to install the tcpdump package first.
sudo tcpdump -vvv -i eth0 not port ssh
>sudo: unable to resolve host ip-172-16-1-92
>...
To check that redirection is working correctly, inspect the packets to check that packets arriving on the VXLAN interface are encapsulated before being sent to the eth0 interface, and then are also released towards its destination from the eth0 interface.
Blocking Packets
Because all packets are being routed through our EC2 Gate Peer, we can add additional rules with iptables to control how packets should be handled.
As an example, we can add a rule that will drop ICMP Echo Requests (ping).
-
First, from an IoT SIM device, test that
pingis redirected to the Gate Peer before continuing to its destination, and returns as expected:ping -c 3 soracom.io >PING soracom.io (52.222.205.45) 56(84) bytes of data. >64 bytes from 52.222.205.45: icmp_seq=1 ttl=247 time=4.52 ms >64 bytes from 52.222.205.45: icmp_seq=2 ttl=247 time=4.61 ms >64 bytes from 52.222.205.45: icmp_seq=3 ttl=247 time=4.51 ms > >--- soracom.io ping statistics --- >3 packets transmitted, 3 received, 0% packet loss, time 2003ms >rtt min/avg/max/mdev = 4.511/4.550/4.618/0.048 ms -
Next, connect to the Gate Peer using SSH, and add a
DROPrule:sudo iptables -A OUTPUT -p icmp --icmp-type echo-request -j DROPJust as noted in the Gate Peer Configuration documentation, the routing settings are not permanent and will be lost if the Gate Peer is restarted. Use
sudo services iptables saveoriptables-saveto ensure that configuration is saved. -
Now try
pingagain:$ ping -c 3 soracom.io >...
We have effectively filtered traffic coming from our Air device!
If we want to remove the DROP rule (and unblock the packets), we can list the iptables rules by line number:
$ sudo iptables -L --line-numbers
>...
>Chain OUTPUT (policy ACCEPT)
>num  target                     prot opt source               destination
>1    ufw-before-logging-output  all  --  anywhere             anywhere
>2    ufw-before-output          all  --  anywhere             anywhere
>3    ufw-after-output           all  --  anywhere             anywhere
>4    ufw-after-logging-output   all  --  anywhere             anywhere
>5    ufw-reject-output          all  --  anywhere             anywhere
>6    ufw-track-output           all  --  anywhere             anywhere
>7    DROP                       icmp --  anywhere             anywhere             icmp echo-request
>...
Then delete the DROP rule (above, line number 7):
sudo iptables -D OUTPUT 7