VPC Peering Connection Configuration
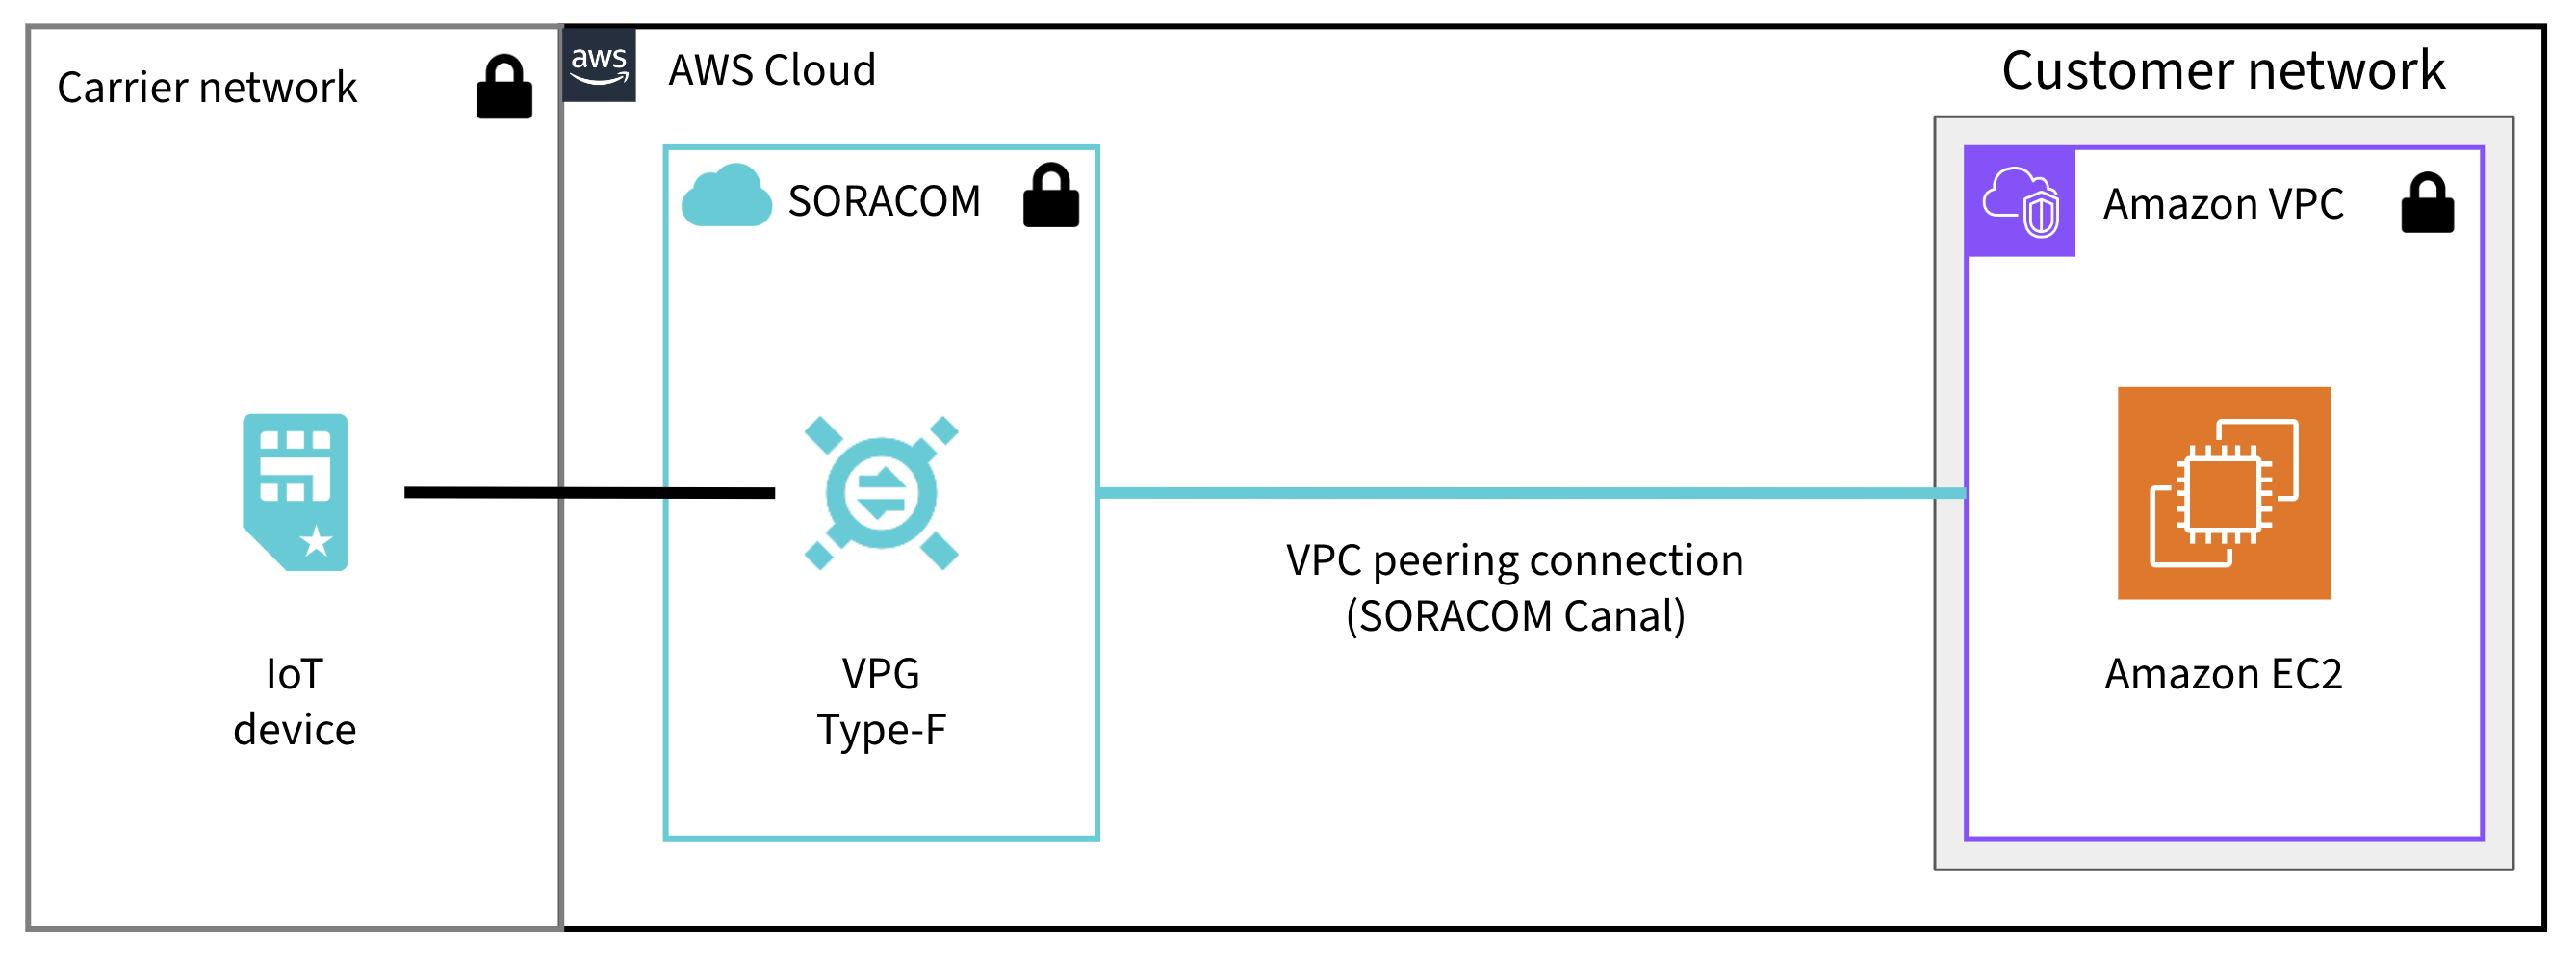
The Soracom Canal VPC peering connects a Type-F or Type-G VPG to your Amazon VPC. This connection enables a one-way connection with Carrier Grade NAT (CGNAT) from devices using IoT SIMs to instances such as EC2 in your Amazon VPC over a private network. If you need bidirectional communication with Canal VPC peering, you also need Soracom Gate.
Requirements
To configure Canal with an Amazon VPC Peering Connection, you will need the following information:
- Your AWS Account ID (12-digit account number)
- The ID of the AWS VPC you want to connect to, such as
vpc-12345678 - The AWS Region where your VPC is located
- The CIDR block of your VPC, which should comply with RFC 1918
The CIDR block of your VPC must be within one of the following IP address ranges:
10.0.0.0/8(excluding10.21.0.0/16; see Limitations below)172.16.0.0/12192.168.0.0/16
If you don't have a VPC yet, follow the instructions in the Creating a VPC section in this document.
In addition, you will need to create a Type-F or Type-G VPG (Virtual Private Gateway).
Limitations
If you have created a VPG in Japan coverage, your VPC cannot include the 10.21.0.0/16 IP address range. If your AWS VPC uses a CIDR block that includes this range, you will need to create a new VPC with a CIDR block that does not include this range.
Configuration
Creating a VPG
Creating a VPG will incur fees. Refer to the Pricing & Fee Schedule for more information.
Follow the instructions from the VPG Type-F Configuration documentation to create a new VPG with the following options:
- Name - Any name to identify this VPG
- Type - Select
Type-ForType-G(other VPG types do not support Peering Connections). - Use internet gateway -
ONorOFF - Rendezvous Point - When creating a Type-F or Type-G VPG, you can select the region where your VPG will be located in, in order to maximize the Peering Connection performance.
- CIDR Range for device subnet (optional) - The CIDR block of IP addresses assigned to Air and Arc devices that connect to this VPG. If left blank, a default block of
10.128.0.0/9will be used. Manually specified Device Subnets must be within the10.0.0.0/8,172.16.0.0/12, or192.168.0.0/16CIDR ranges and have a subnet mask of/24or larger.
Adding a Peering Connection
While your first VPC peering connection is included with your VPG at no additional cost, adding additional peering connections will incur additional fees. Refer to the Pricing & Fee Schedule for more information.
After creating a VPG, add an AWS Peering Connection in order to connect it to your AWS VPC.
-
Sign in to the User Console. From the Menu, open the VPG screen.
-
From the list of VPGs, click the name of the VPG you want to configure to open its settings page.

-
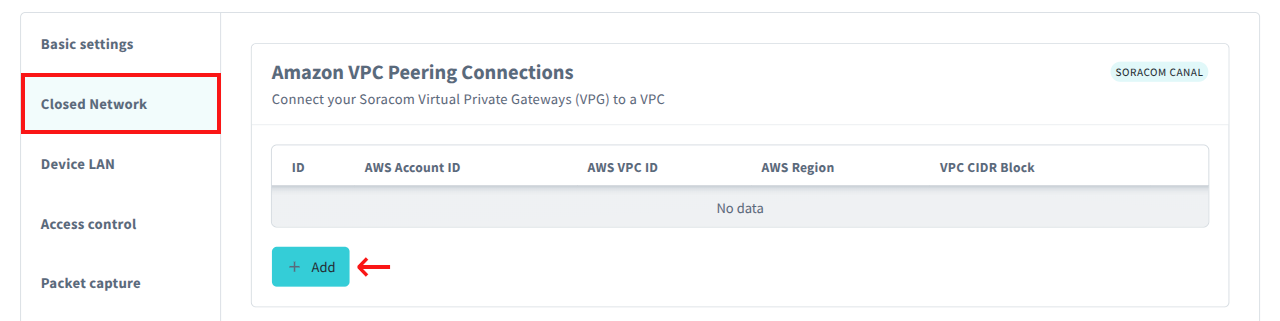
From the Closed Network tab, in the Amazon VPC Peering Connections panel, click the Add button.
-
Enter your AWS Account ID, the AWS VPC ID, the AWS Region, and the VPC CIDR Block.
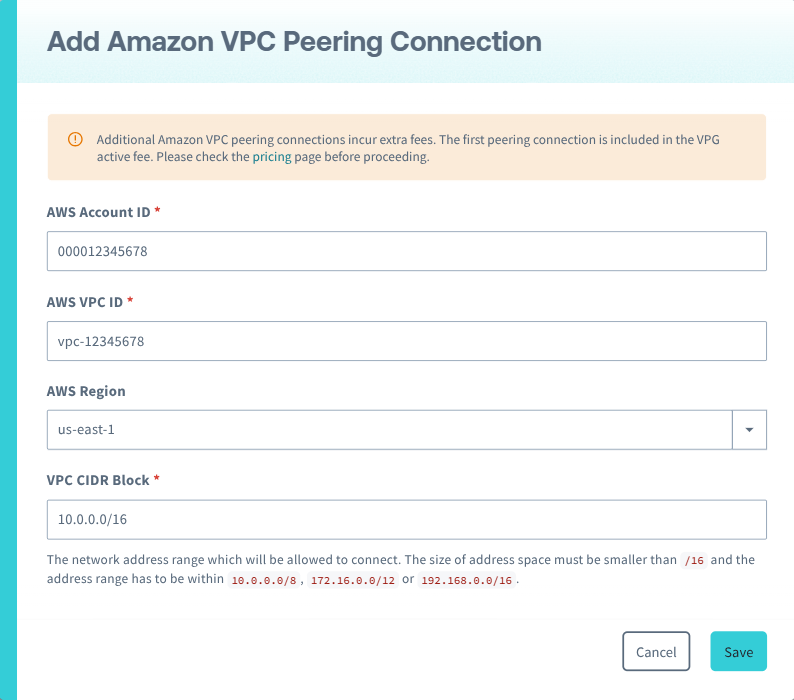
Then click the Save button.
This will initiate a Peering Connection request with your AWS account. Next, accept the connection request to complete the Peering Connection setup.
Accepting the Peering Connection Request
-
Sign in to the AWS Management Console. From the Services menu, open the VPC dashboard.
-
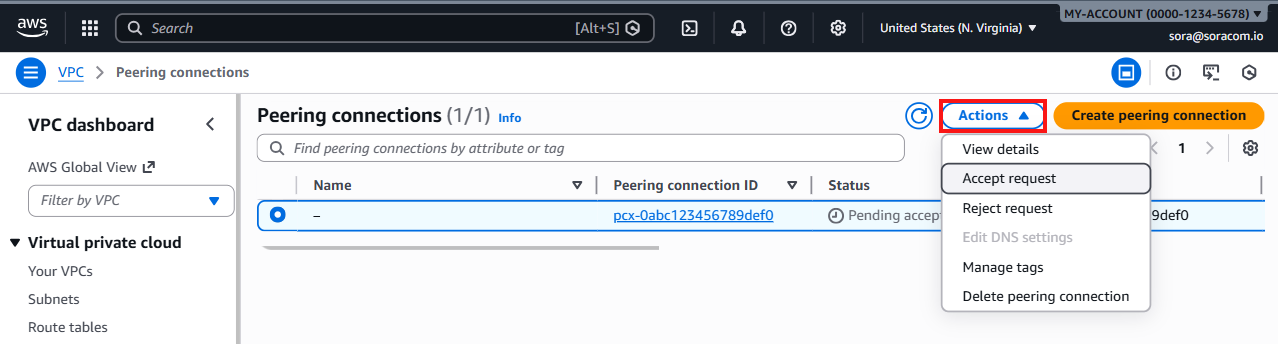
Select Peering connections.

-
Select the Peering Connection request in the list. Its Status should appear as Pending acceptance.
-
Click the Actions menu, then select Accept request.
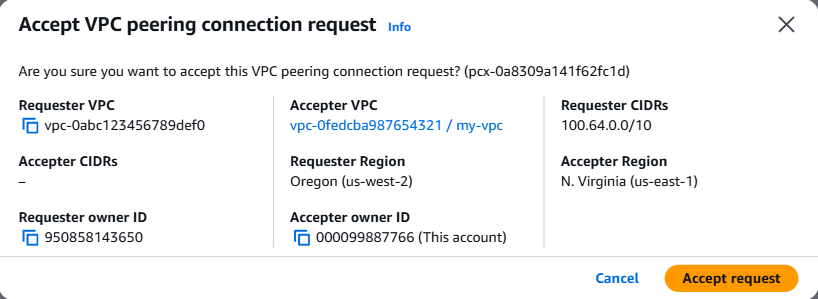
A dialog will appear displaying the peering connection details. Confirm the requester and accepter VPC information, then click Accept request.
-
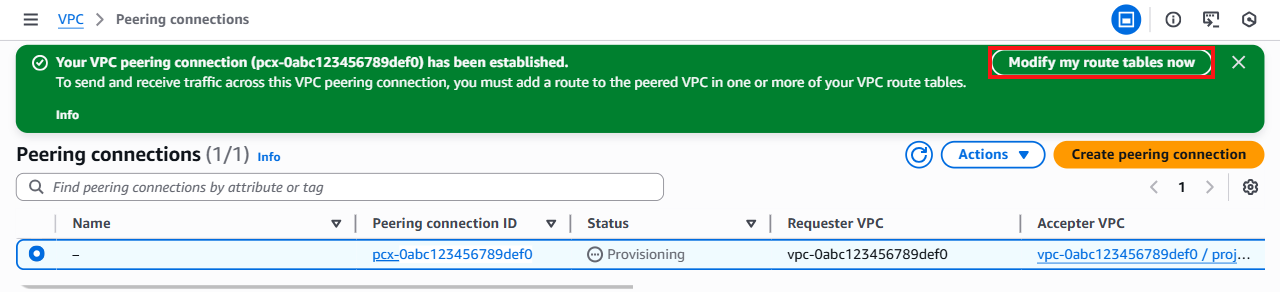
Click the Modify my route tables now link.
AWS may display a banner asking if you want to update your VPC's routing table. In order to route traffic correctly between the Soracom VPG and your AWS VPC, you need to add a new routing rule. If it is not displayed, you can update the route table manually in the following steps.
-
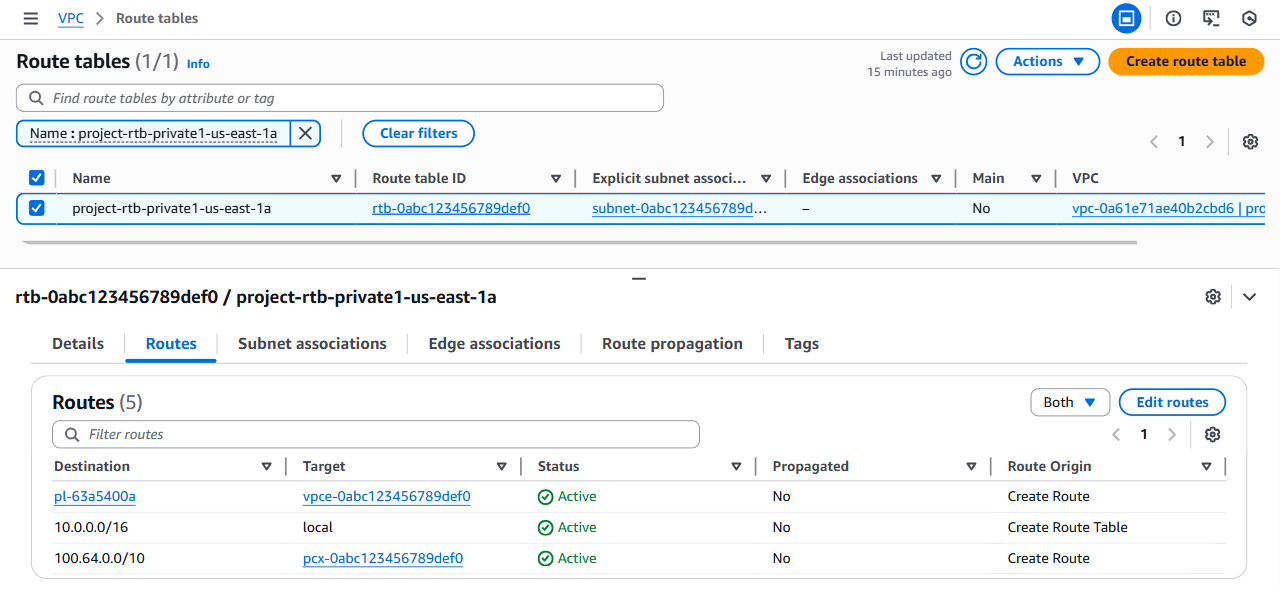
From the list of route tables, select the route table associated with the subnet where your AWS resources, such as an EC2 instance, are deployed.
In the Explicit subnet associations column, confirm that the route table is associated with the subnet(s) where your AWS resources are deployed.
-
From the Route tables page, select the Routes tab and click Edit routes.
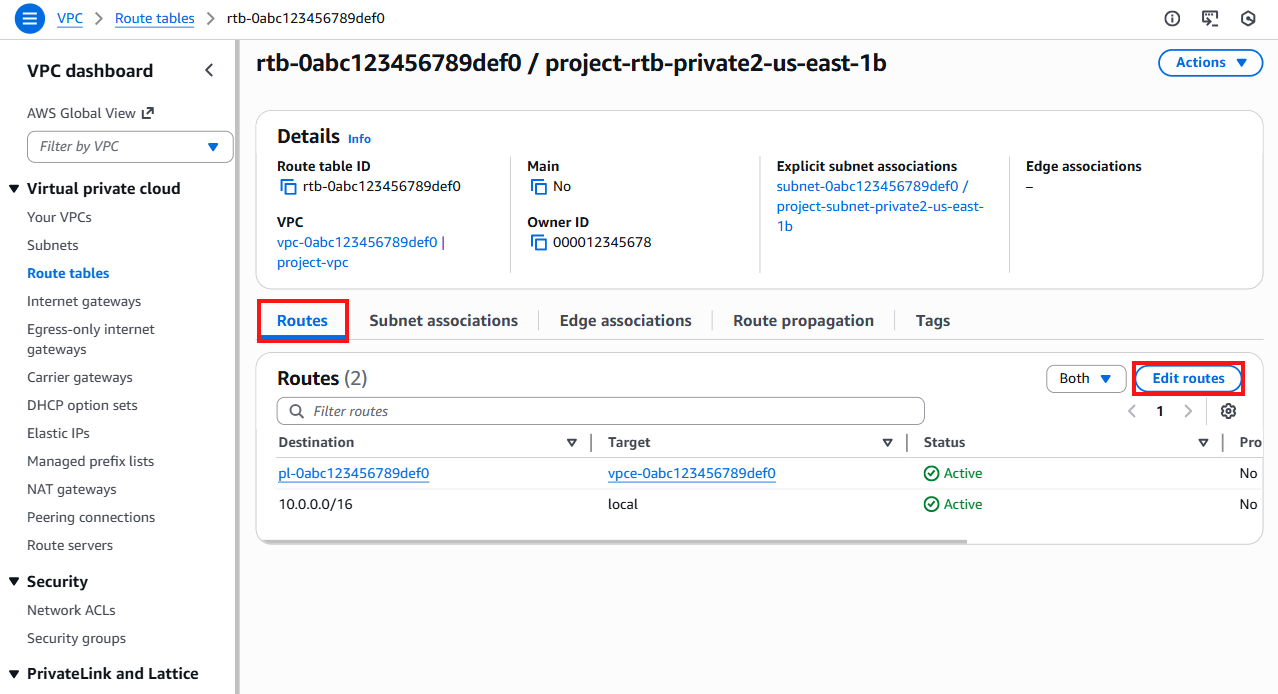
In a standard AWS VPC peering configuration, routes are typically added for the peer VPC CIDR. For Soracom Canal, you must instead add a route to the VPG IP Address Range so that return traffic from your VPC is routed back to the VPG.
-
Click Add route, then add a route with the following values:
- Destination - The VPG IP Address Range. If you have not already recorded this value, this range can be found in the VPG overview table under VPG IP Address Range. For example,
100.64.0.0/10. - Target -
pcx-xxxxxxxx. The Target option tells the VPC that traffic returning to the VPG should be routed using the selected Peering Connection. As you typepcx, the approved Peering Connection should appear automatically.
- Destination - The VPG IP Address Range. If you have not already recorded this value, this range can be found in the VPG overview table under VPG IP Address Range. For example,
-
Click Save changes.
Once saved, the route table will display the new route with the peering connection target.
Canal is now configured, and IoT SIM devices that are attached to the VPG will be able to connect to network resources within your VPC.
Soracom Canal VPC peering provides one-way connectivity from devices to your AWS VPC. If you require bidirectional communication between your VPC and devices, you must also configure Soracom Gate.
Testing Canal
To test the Canal connection, simply create a network resource within your VPC.
For example, you can create a basic EC2 instance, making sure that it belongs to your VPC, and is assigned a private IP address within your VPC's CIDR block range.
Then connect to the EC2 instance to install and start an Apache webserver with its default welcome page.
Configure your EC2 instance's Security Group to allow inbound HTTP traffic on port 80 from 0.0.0.0/0 as the source.
Finally, test that your IoT SIM device is able to view or curl the default Apache webpage using the EC2 instance's private IP address.
Configuring your EC2 instance to allow inbound traffic from 0.0.0.0/0 (any source) is intended only to simplify testing. Leaving this configuration as-is will expose your EC2 instance to external access.
Once you have verified that your devices are able to reach your EC2 instance, you should update this configuration to, for example, only allow traffic from your VPG by changing the source CIDR block to match the Requester CIDRs found in your list of VPC Peering connections, or remove this configuration altogether if you plan on using a different protocol.
Reference
Creating a VPC
-
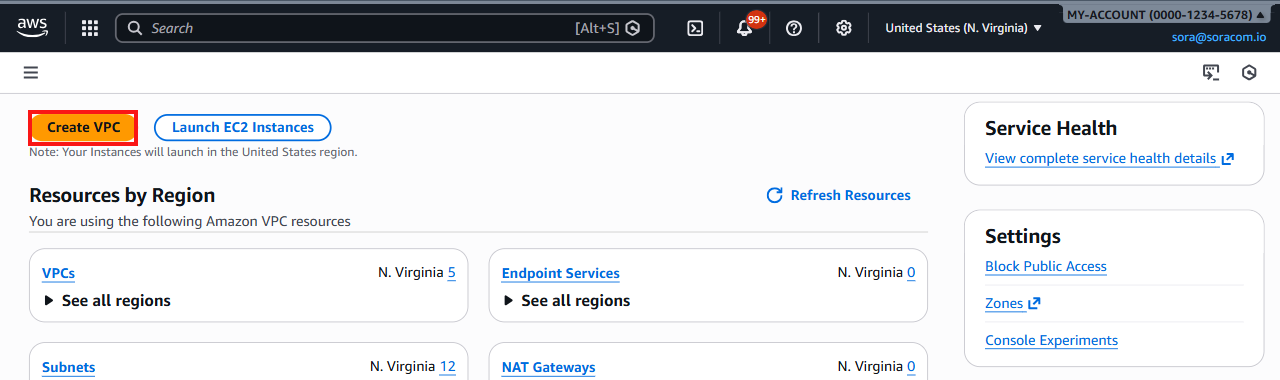
Sign in to the AWS Management Console, open the Amazon VPC service, navigate to the VPC dashboard, and click the Create VPC button.
-
On the Create VPC page, under VPC settings, select VPC and more. Specify a name and IPv4 CIDR block for the VPC, and leave the remaining settings at their default values unless you require a different configuration.
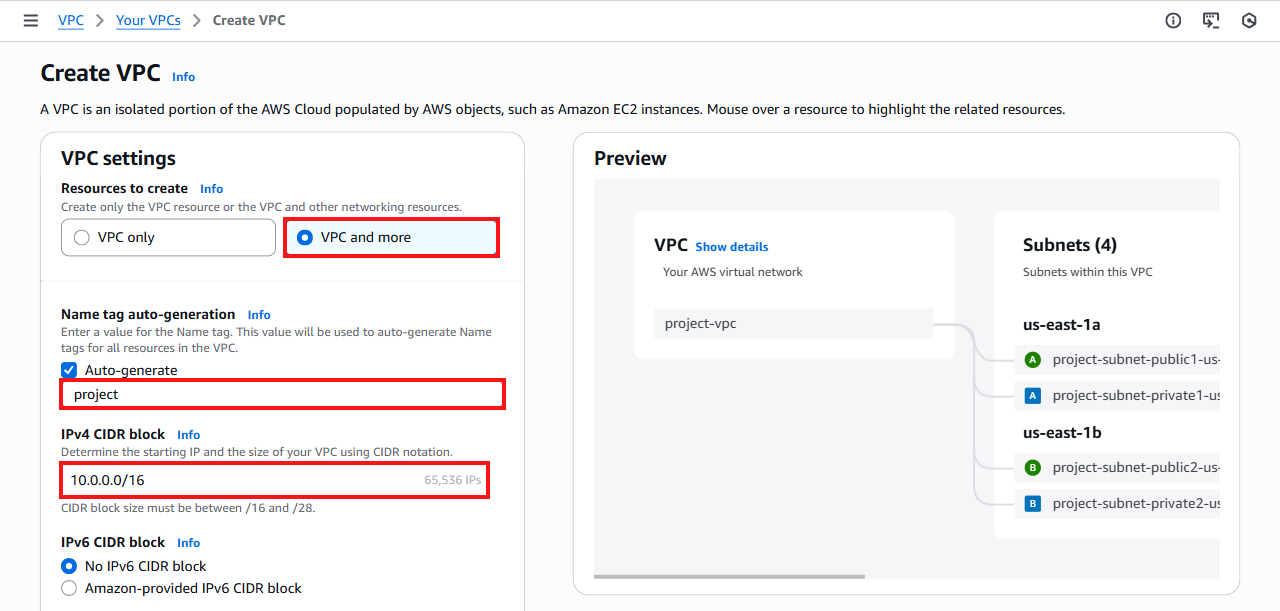
If you have created a VPG in Japan coverage, ensure that your VPC's IPv4 CIDR block does not include the
10.21.0.0/16IP address range. Soracom allocates internal resources within this IP address range. If you specify a CIDR block that includes this IP address range, you will have to create a new VPC. -
Review the VPC configuration, then click the Create VPC button to create the VPC.
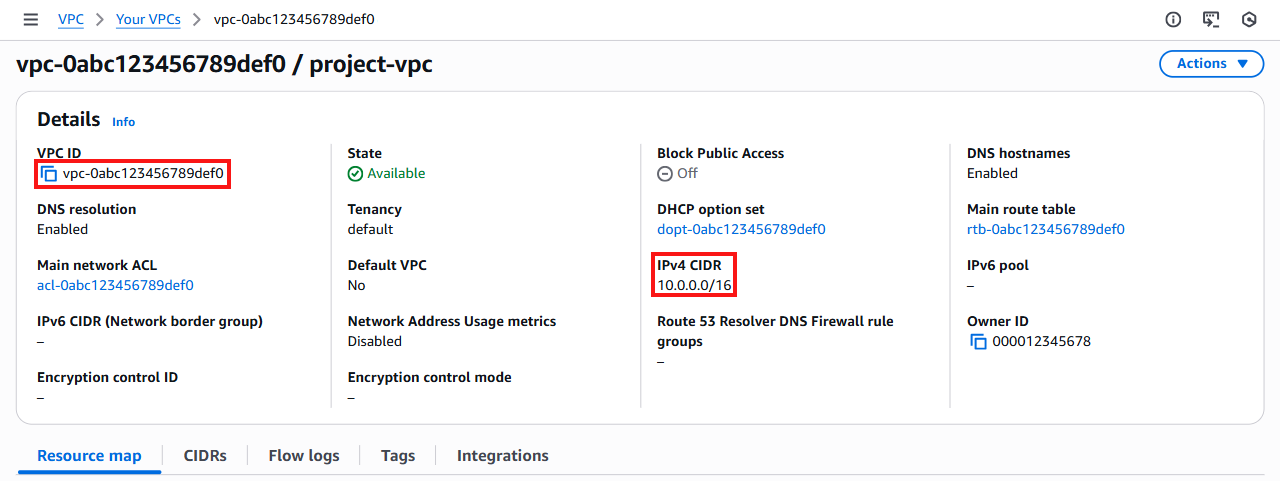
Once the VPC is created, the VPC details page will be displayed. If it is not displayed automatically, click View VPC to proceed.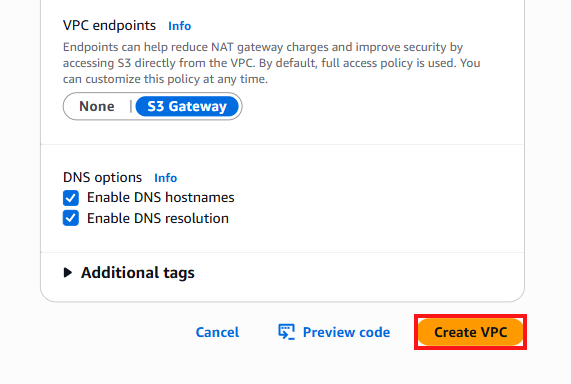
-
Confirm that the VPC has been created successfully and note the VPC ID and IPv4 CIDR block.
These values are required when configuring a VPG.
Finding Account Information
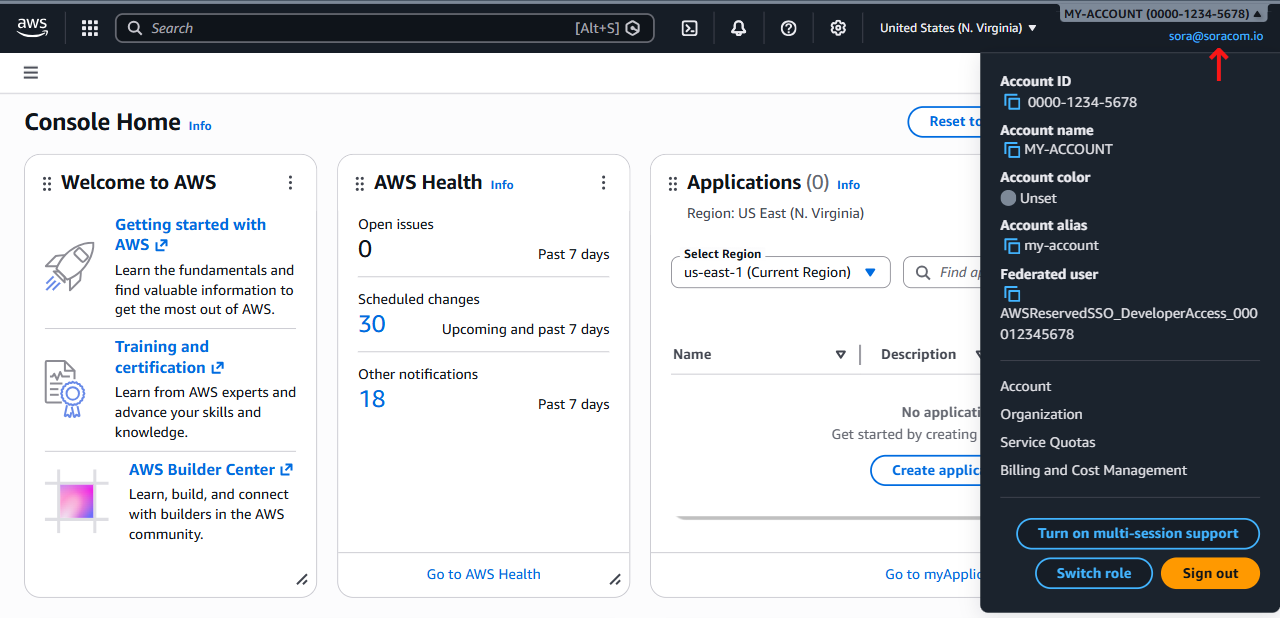
Your AWS account name and account ID are displayed in the upper-right corner of the AWS Management Console. Click the account name to open the Account menu, where additional account information is available.
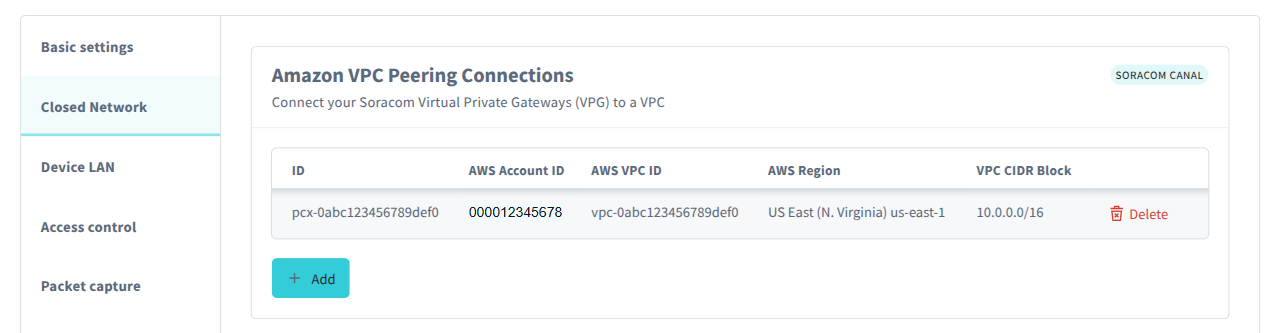
Terminating Canal Connections
To remove a Canal connection, click the Delete button next to the corresponding VPC peering connection.