Getting to Know the Soracom User Console
The Soracom User Console provides an intuitive web interface for easily managing your Soracom IoT SIMs and conveniently accessing essential features of your Soracom Account.
Dashboard
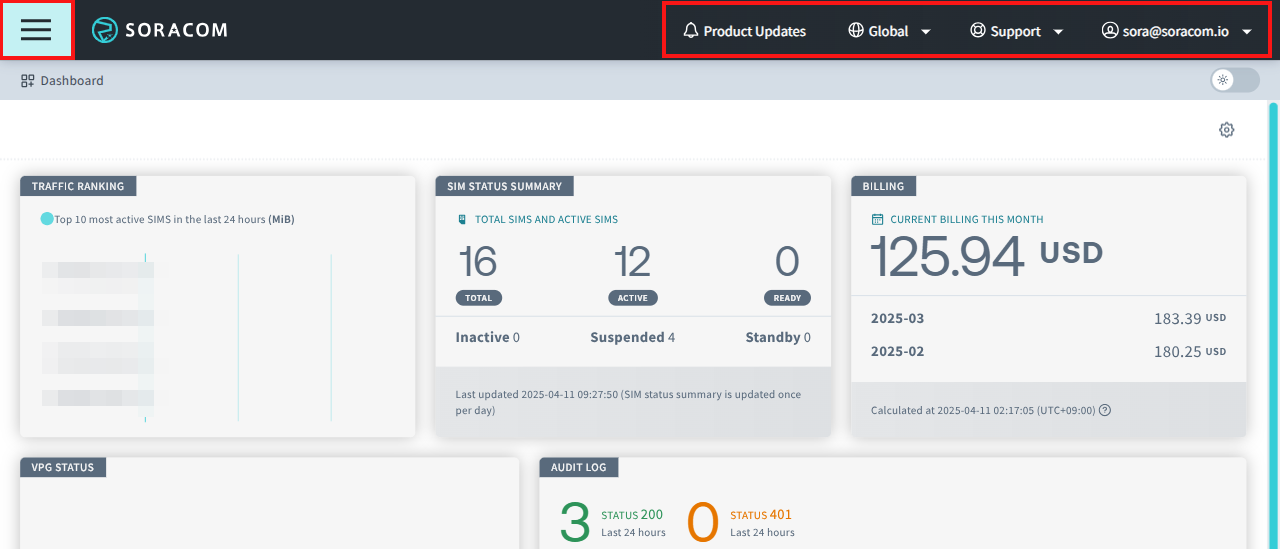
When you sign in to the User Console, you will be greeted by the Dashboard.
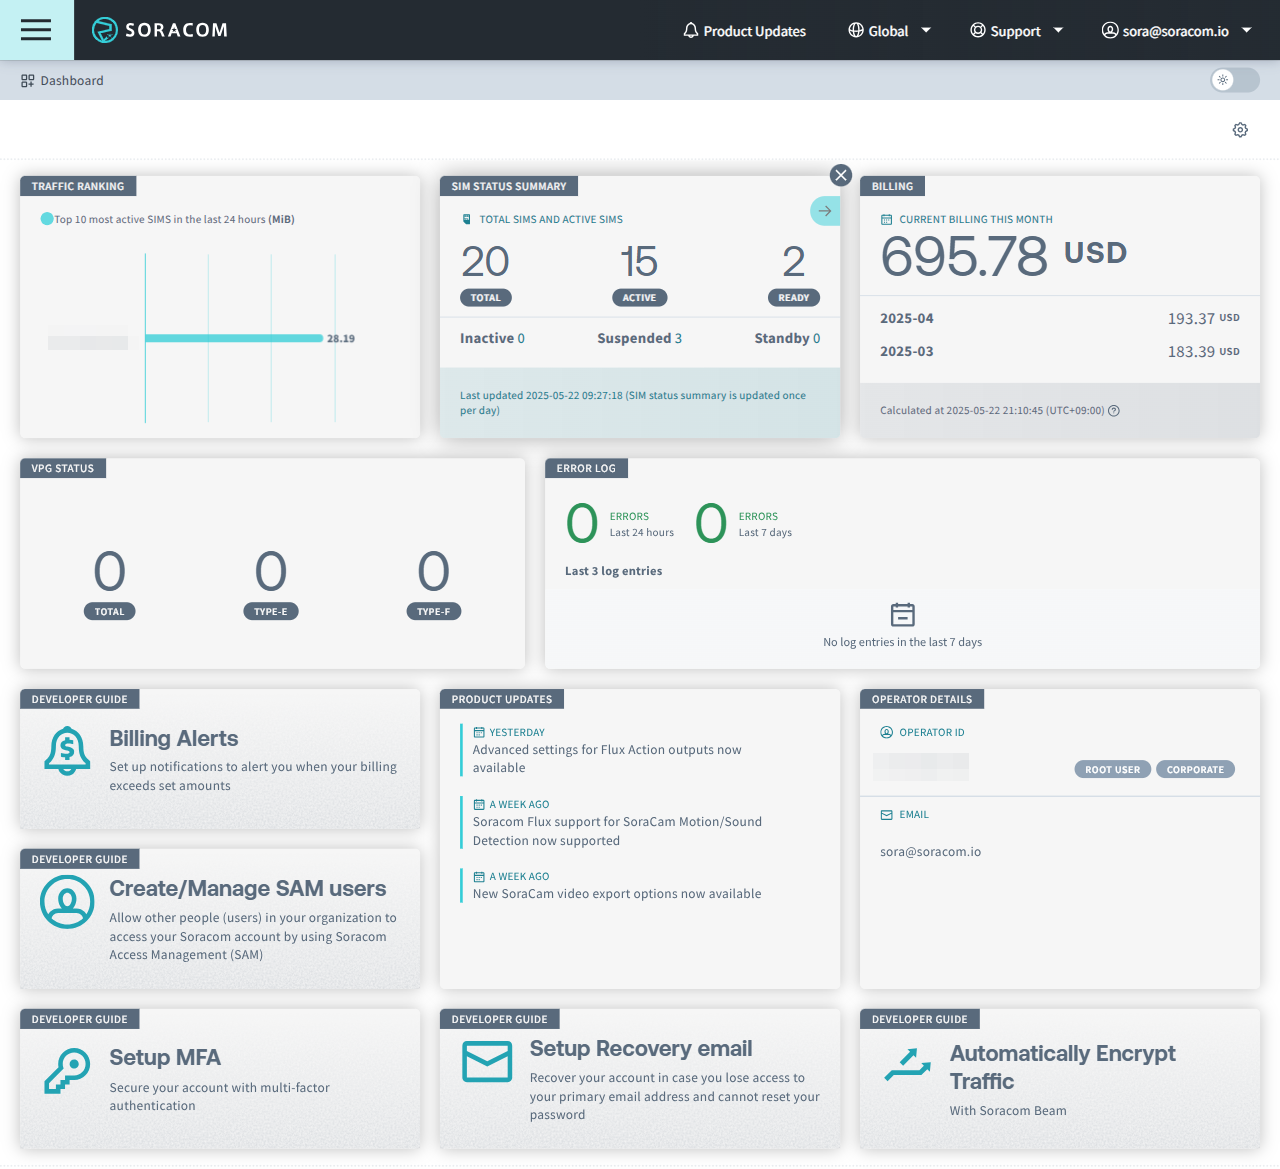
The Dashboard features information on up-to-date IoT SIM activity, pricing and more for your Soracom Account.
-
Click on a panel to view the relevant information. For example, if you click on the Billing panel, you will open the Billing Dashboard.
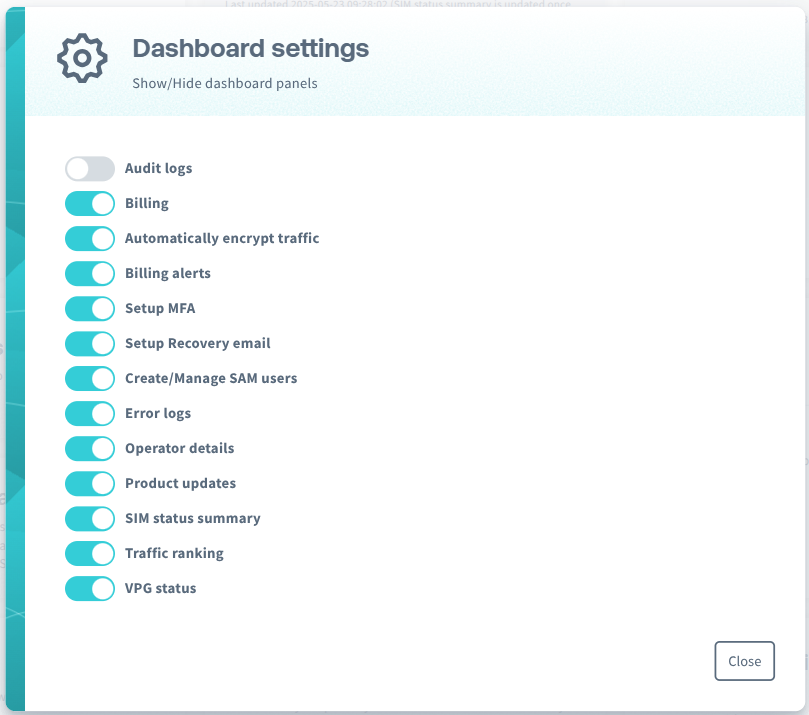
- The displayed content is customizable to better fit your needs.
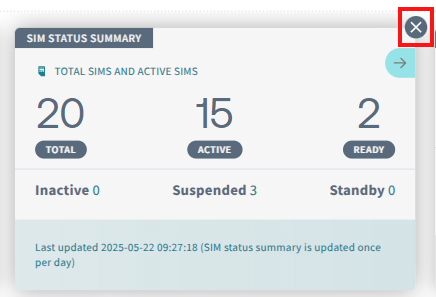
- You can hide panels by clicking the button in the upper right corner of a panel.
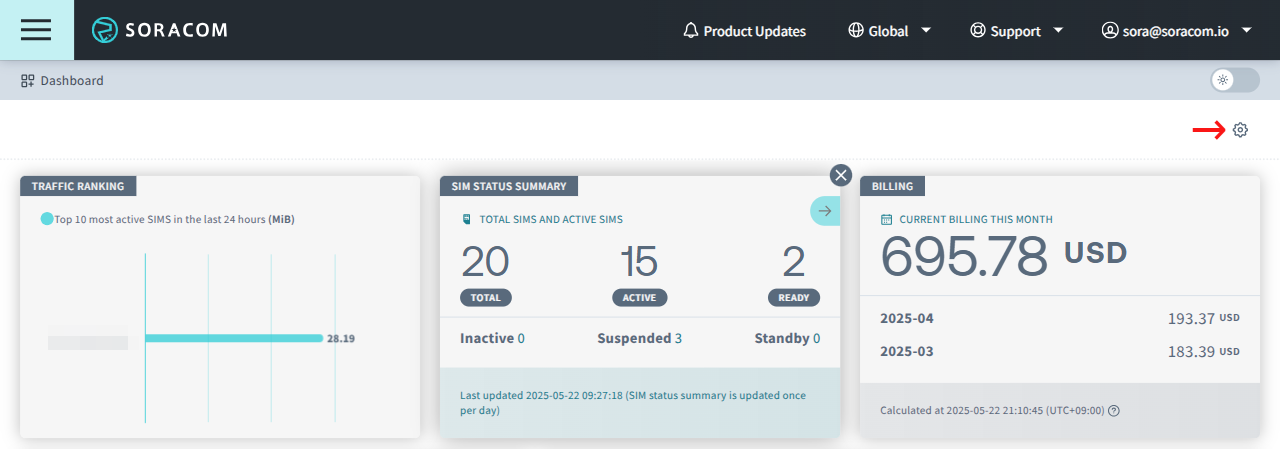
- To display hidden panels again, or to set the show/hide settings, click the in the upper right of the dashboard to open the Dashboard settings dialog.
 You can display or hide each panel as needed.
- You can hide panels by clicking the button in the upper right corner of a panel.
If you are signed in as a Soracom Access Management (SAM) user and cannot view the Dashboard, ask your administrator to grant the following permissions as required.
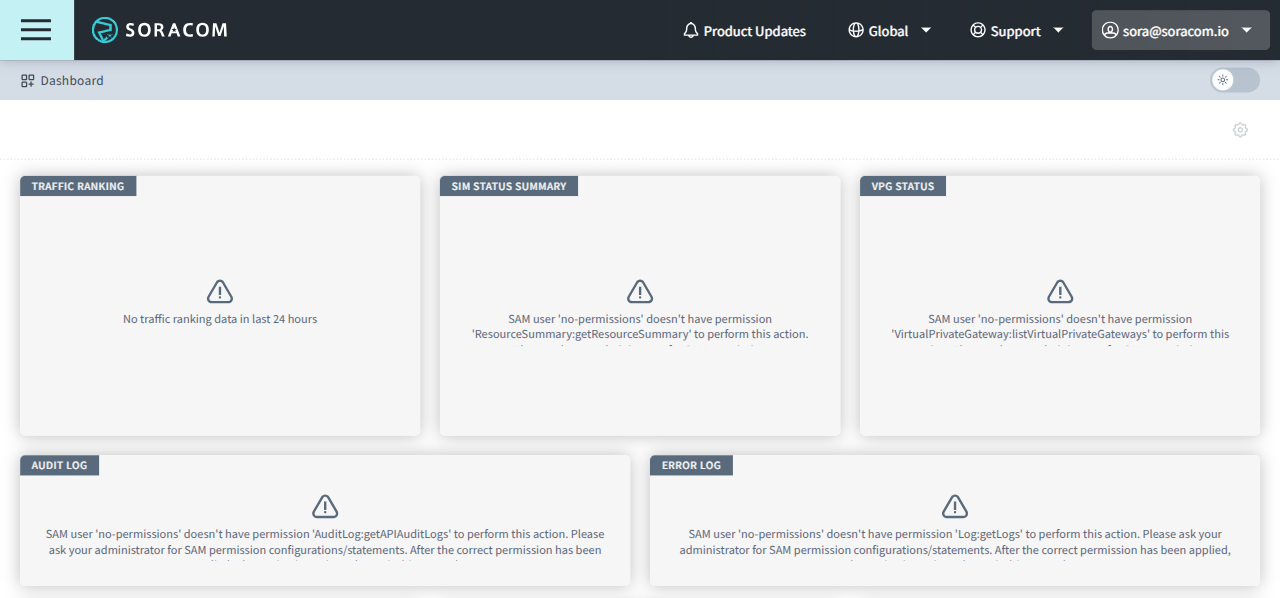
| Panel | Required Permissions |
|---|---|
| Billing | Billing:getLatestBilling and Billing:getBillingHistory |
| Traffic Ranking | Query:searchSubscriberTrafficVolumeRanking |
| SIM Status Summary | ResourceSummary:getResourceSummary |
| VPG Status | VirtualPrivateGateway:listVirtualPrivateGateways |
| Audit Log | AuditLog:getAPIAuditLogs |
| Error Log | Log:getLogs |
Main Menus
The buttons and selectors in the top menu bar provide quick access to the primary features and management tools of the User Console.
Menu
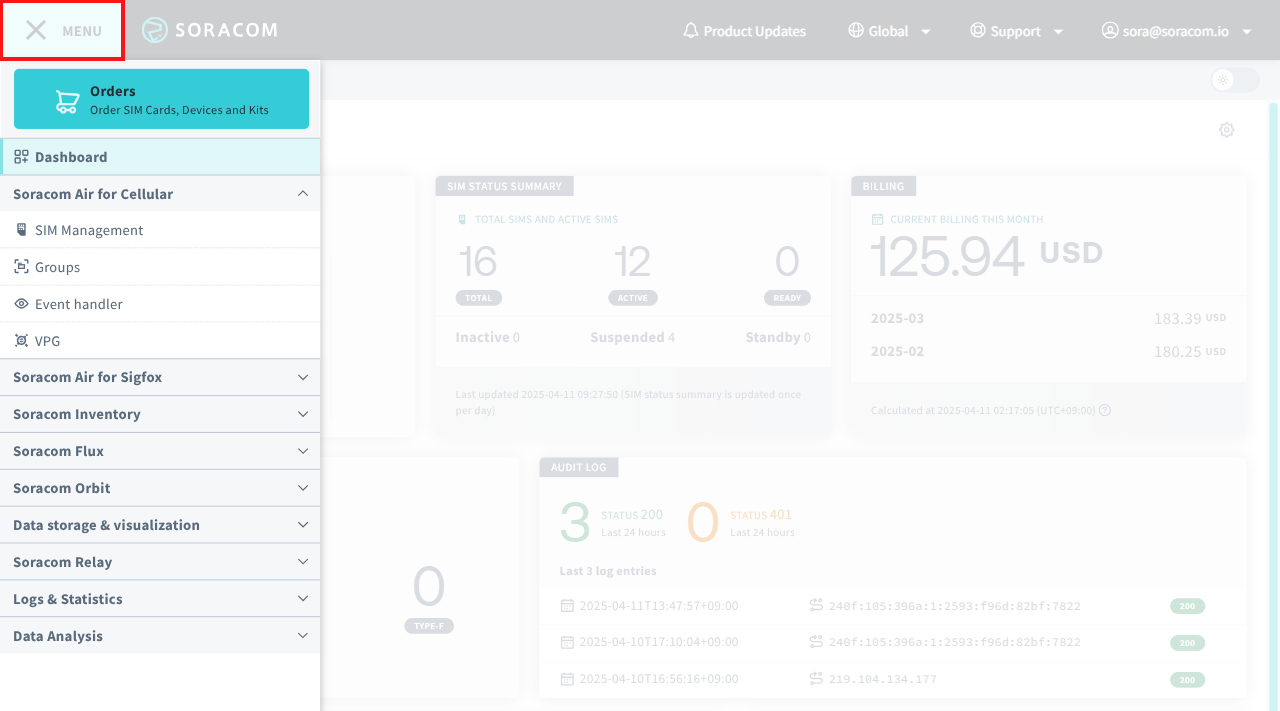
Menu - Show or hide the main navigation menu
- Orders - Purchase Soracom-compatible devices and manage order history
- Soracom Air for Cellular
- SIM Management - List IoT SIMs and perform SIM management functions
- Groups - List IoT SIM groups and configure group options
- Event Handler - Configure IoT SIM management behavior
- VPG - List Virtual Private Gateways and configure VPG options
- Soracom Air for Sigfox
- Sigfox Devices - List Sigfox devices and perform management tasks
- Sigfox Groups - List Sigfox groups and configure group options
- Soracom Inventory
- Inventory Devices - List Soracom Inventory devices and perform management tasks
- Inventory Groups - List Soracom Inventory groups and configure group options
- Object Models - List Soracom Inventory models and configure object model options
- Soracom Flux
- Flux Apps - Create and manage apps in Soracom Flux, a low-code IoT application builder
- Flux Pricing - View and manage your Flux plan
- Soracom Orbit
- Soralet Management - Create and manage Soracom Orbit modules
- Data storage & visualization
- Soracom Harvest Data - View Harvest Data
- Soracom Harvest Files - View Harvest Files
- Soracom Lagoon - Launch Soracom Lagoon dashboard
- Soracom Relay
- Early Access application form - Submit an application to participate in the Soracom Relay Early Access program
- Logs & Statistics
- Audit Logs - View detailed API calls made against your Soracom account
- Napter Audit Logs - Monitor connections to your devices using the Napter service
- Error Logs - View Air, Beam, Funk, Funnel, Harvest, Napter, Orbit, and Unified Endpoint error logs
- Usage statistics - View reports displaying data use for your device or group
- Service usage history - Download Soracom platform service usage history in CSV format
Coverage Type

Global - Switch between coverage types
Clicking the Coverage Type selector allows you to switch between different coverage regions. For more information regarding coverage types, refer to the SIM Types documentation.
Support Menu
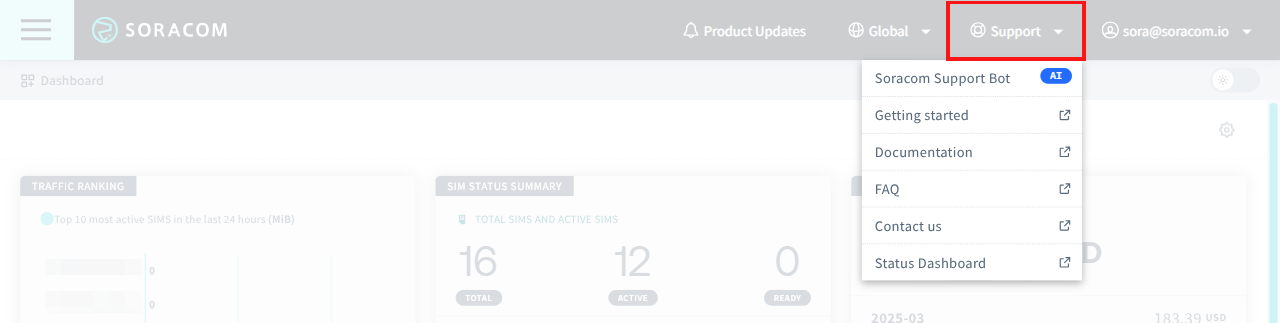
Support - Show or hide the Support menu
- Soracom Support Bot - Opens the Soracom Support Bot panel; ask the bot a question
- Getting Started - Opens Soracom's developer guides
- Documentation - Opens Soracom's developer documentation
- FAQ - Opens the Soracom Support Center knowledgebase
- Contact us - Opens the Soracom Support Center
- Status Dashboard - Opens Soracom's system status dashboard
Account Menu
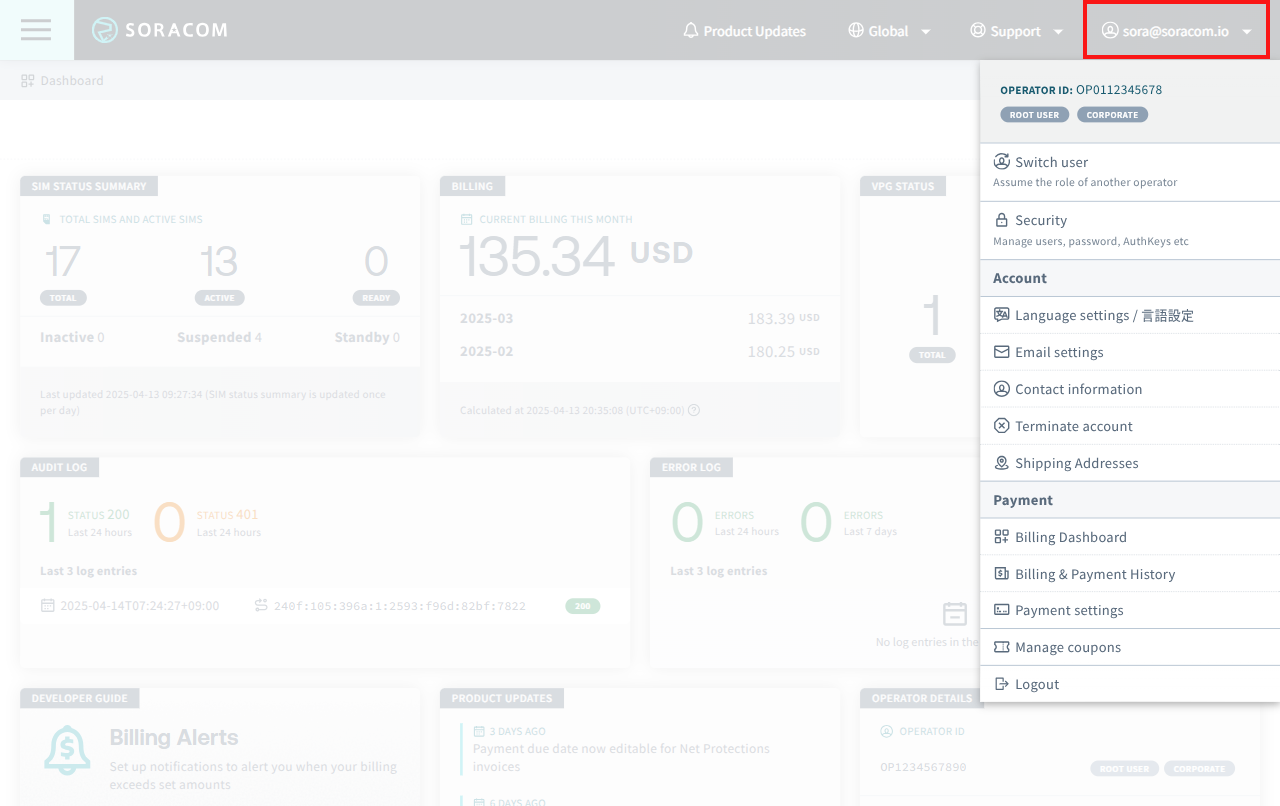
(your email) - Show or hide the account menu
- Operator ID - Your Soracom Operator ID
- Switch user - Quickly assume the role of a Soracom Access Management (SAM) user in your root account or another Soracom account without logging out
- Security - Manage security settings in your Soracom account
- Users - Manage Soracom Access Management (SAM) users, their authentication settings, and permissions
- Roles - Add, edit, or remove roles that can be applied to SAM users
- Credentials - Add or remove credential sets for use with various authentication providers (AWS, Azure, X.509, etc.)
- Password - Manage the password for your Soracom account
- Multi-Factor Authentication - Enable or disable MFA for your Soracom account and its SAM users
- AuthKeys - Add or remove AuthKeys to allow programmatic access to your Soracom account
- Default SAM Permission Configuration - Set default permissions for all SAM users
- Account - Account management
- Language settings - Change the User Console display language
- Email settings - Manage email addresses associated with your Soracom account
- Contact information - Change the contact information associated with your Soracom account
- Terminate account - Initiates a request to permanently delete your Soracom account
- Shipping Addresses - Register and manage shipping addresses to your account for future purchases
- Payment - Payment-related functionality
- Billing Dashboard - Manage payment methods and list current and previous billing history
- Billing & Payment History - Review payment history and download detailed billing records
- Payment settings - Opens the Payment settings screen for managing payment methods
- Manage coupons - Register a coupon to your account
- Logout - Securely log out of the User Console