Soracom Krypton
Provisioning with AWS IoT
By enabling Krypton for AWS IoT, you can easily provision and deliver AWS IoT device certificates, and perform device registration on AWS IoT. Provisioning can be initiated during the device's initialization process, so that installing certificates on the device is not required beforehand.
After completing provisioning, your device will be able to communicate directly with AWS IoT services using MQTTS.
Configuring AWS IoT
In order to enable AWS IoT integration, your AWS account must be configured to provide Krypton with programmatic access to AWS IoT. This process only needs to be performed once, and involves the following steps:
- Create an AWS IoT Policy.
- Create an IAM User with access to AWS IoT, and generate an Access key ID and Secret access key credential set.
- Register the credential set on Soracom, and configure Krypton.
Creating an AWS IoT Policy
-
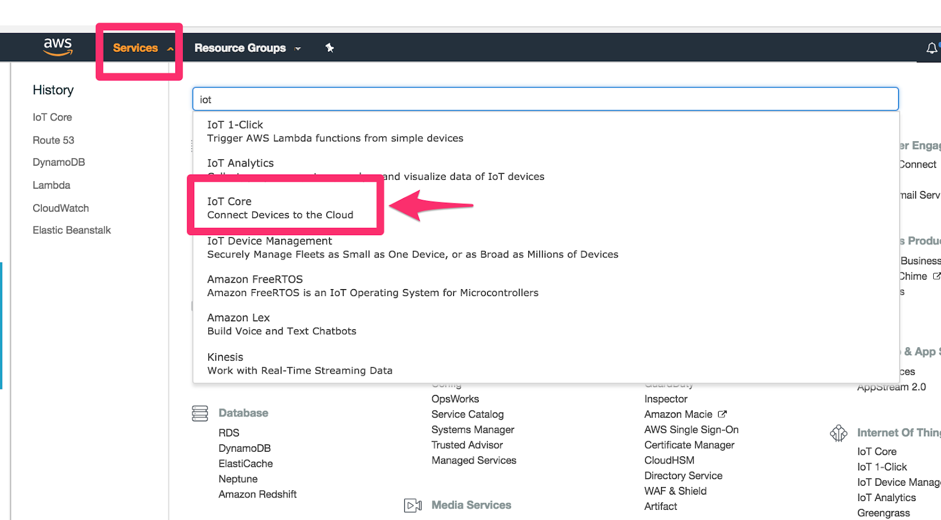
Login to the AWS Management Console. From the Services menu, open the IoT Core dashboard.
-
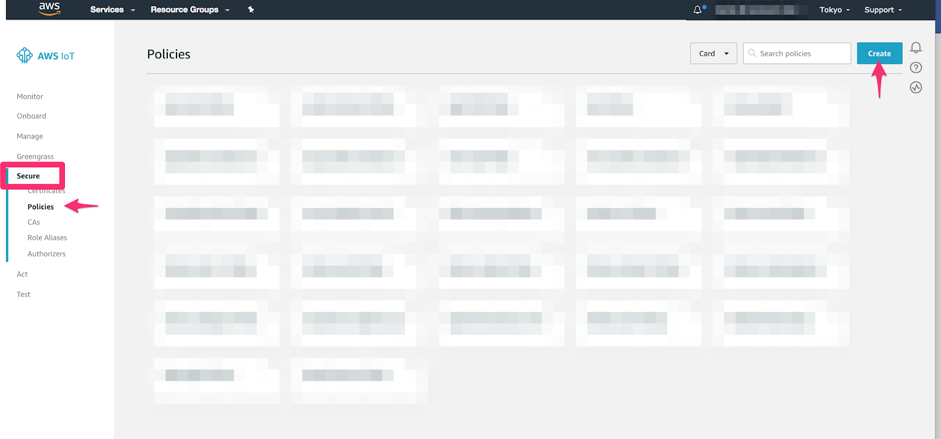
Click the Secure section, then click the Policies screen.
-
Click the Create button.
Follow the Create a policy wizard to configure the device policy that your devices should receive when connecting with AWS IoT.
Refer to AWS IoT Policy documentation for information on how to configure a device policy. You can modify this policy later if needed.
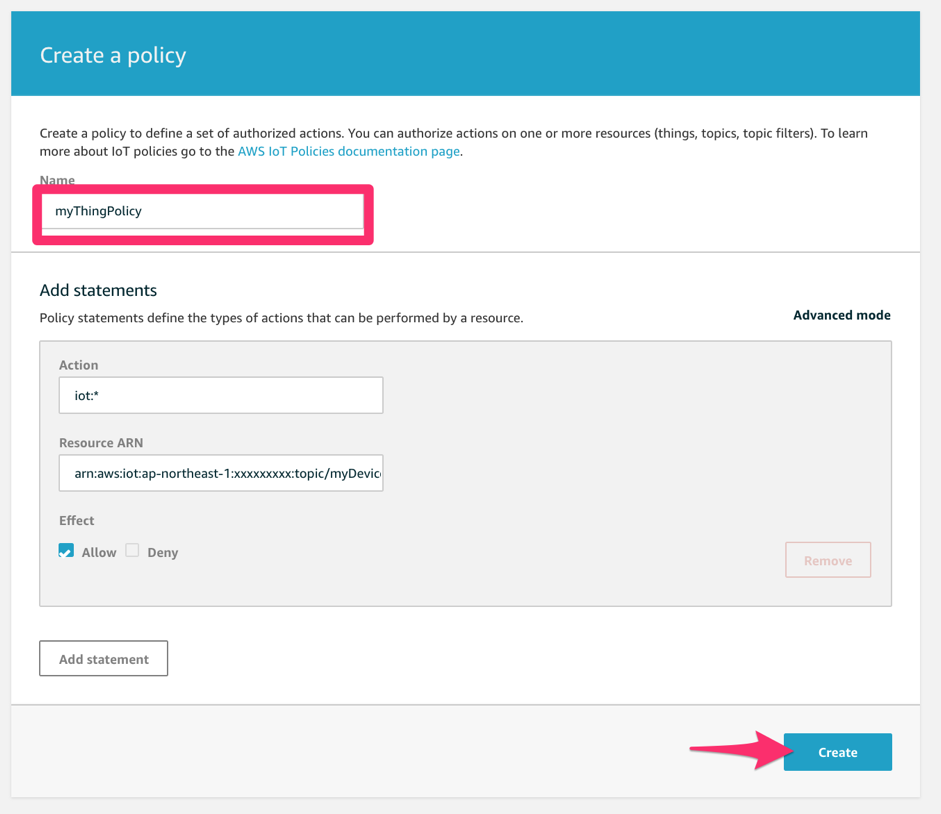
Once the policy has been created, it should show up in the AWS IoT Core dashboard in the list of policies. Note the policy Name, as it is required when configuring Krypton.
Creating an IAM User
-
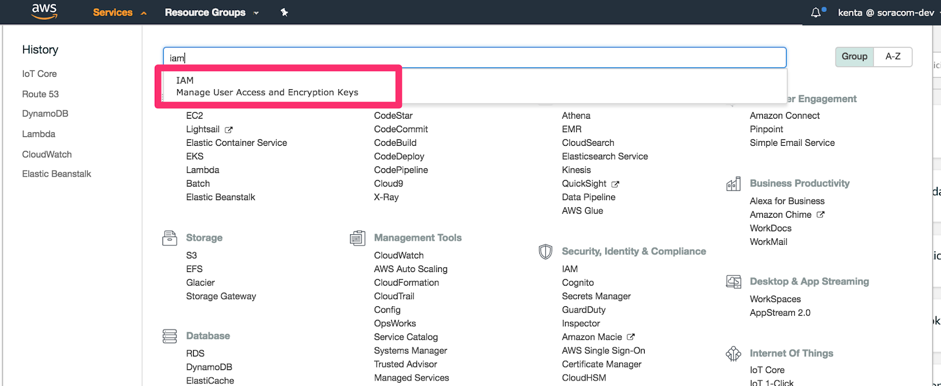
From the AWS Services menu, open the IAM dashboard.
-
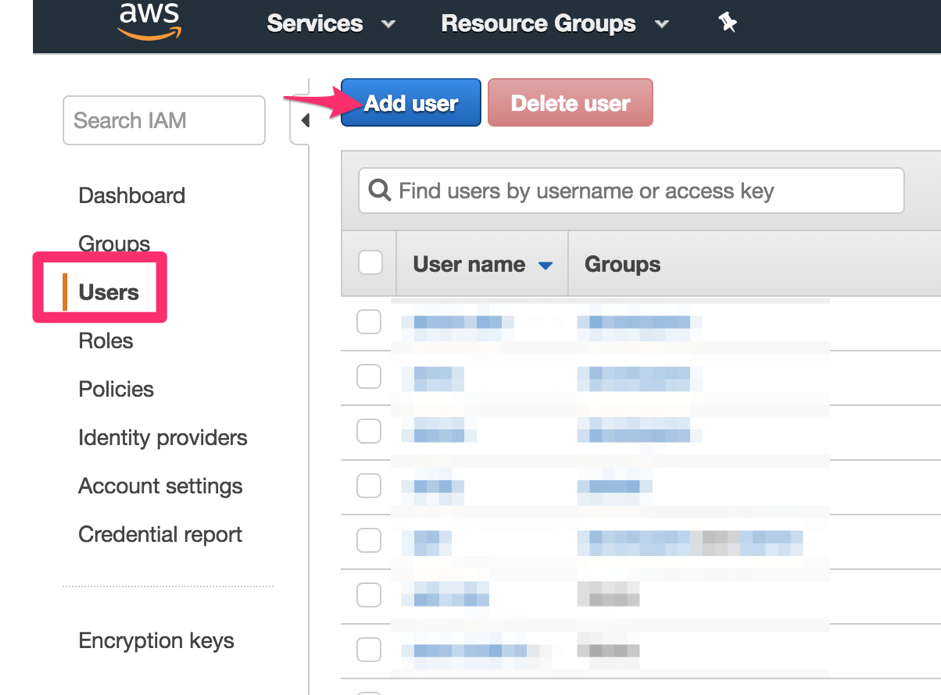
Click the Users section, then click the Add user button.
-
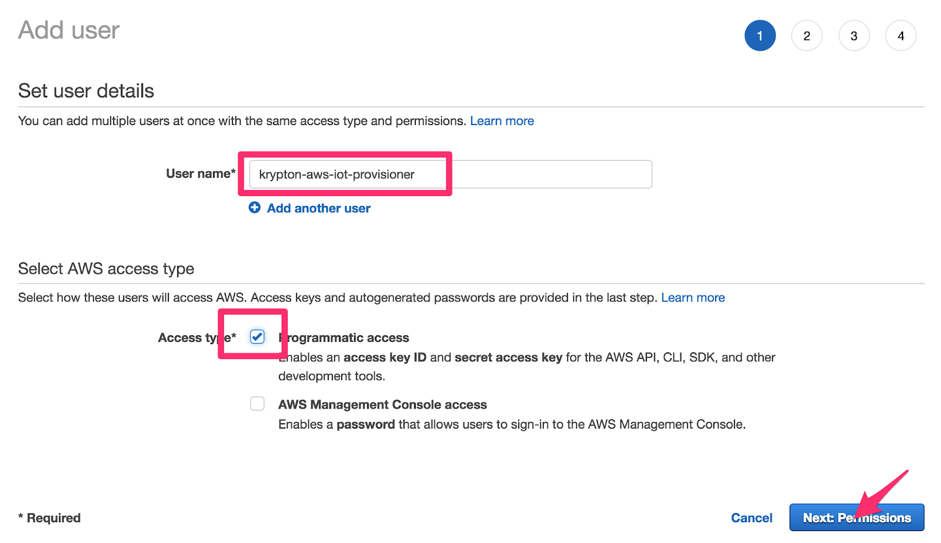
Enter a User name, and enable Programmatic access. Then click the Next: Permissions button.
Our IAM user requires a two permissions in order to generate certificates and register devices. These permissions are provided by AWS policies, which we will attach to our user:
-
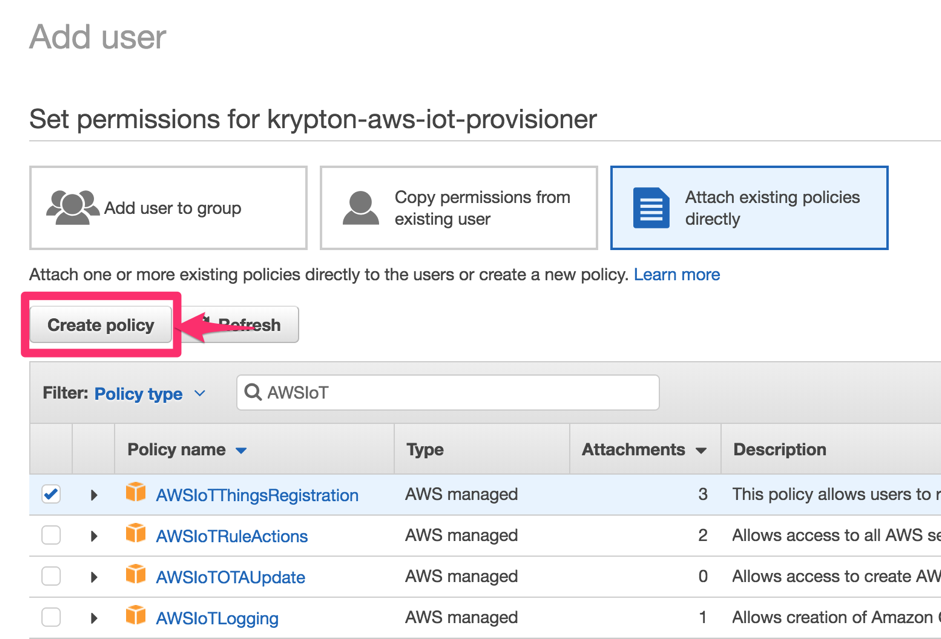
Under the Set permission section, click Attach existing policies directly.
-
Attach a policy that enables certificate generation:
-
Click the Create policy button. A dialog will pop up.
-
In the Create a policy wizard, click Choose a service, then search for and select the
IoTservice. -
In the Actions options, search for
CreateKeysAndCertificate, and click its to add the action to the policy.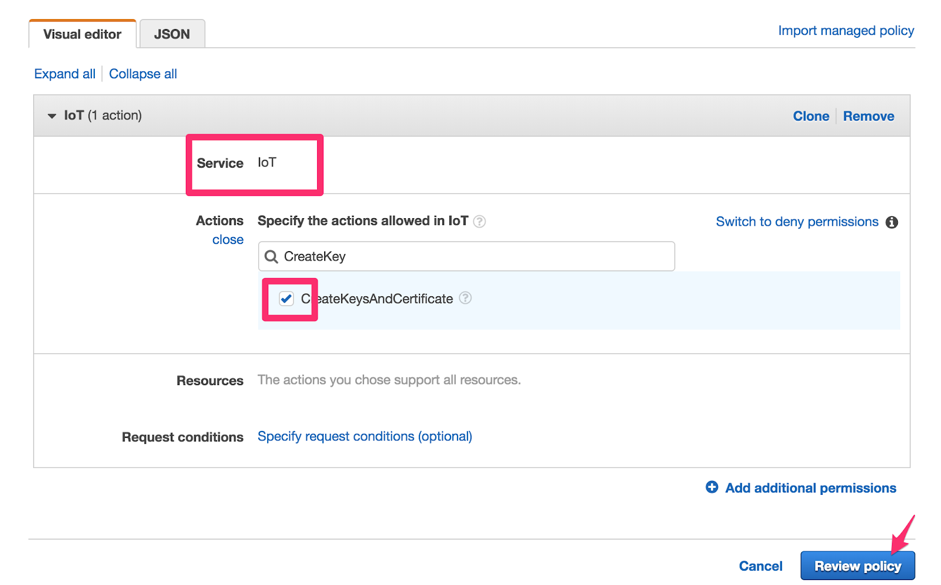
-
Click Review policy.
-
Enter a Name for the policy, such as
AWSIoTCreateKeysAndCertificate. Then click the Create policy button.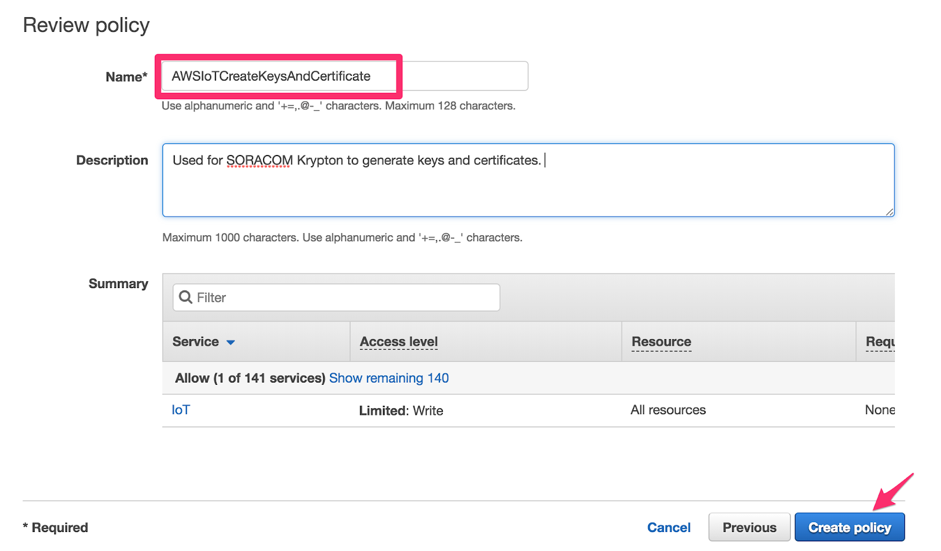
-
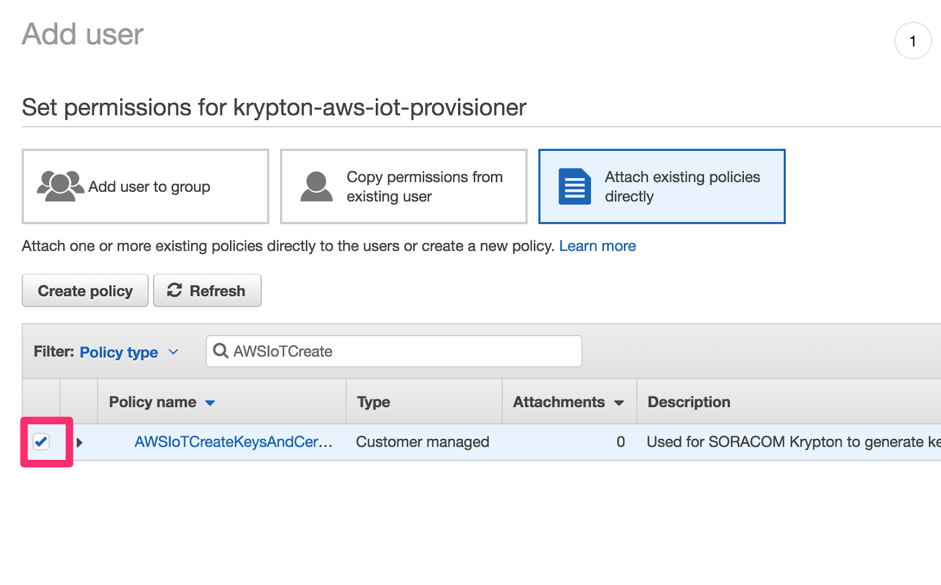
Return to the Add user screen. Click the button to reload available policies, then search for the policy we just created. Click the to attach it to the new user.
-
-
Attach a policy that enables device registration:
-
Search for the
AWSIoTThingsRegistrationpolicy and click its to attach it to the new user.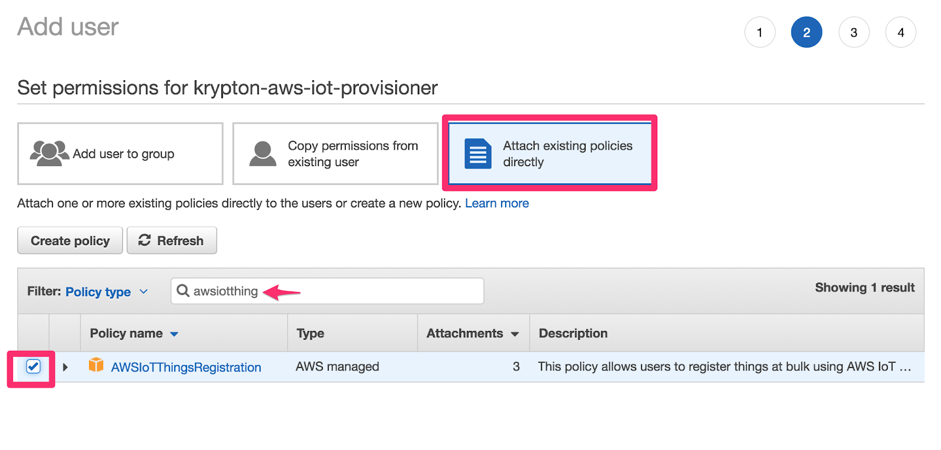
-
-
Continue the Add user wizard by clicking the Next buttons, keeping the default values for the remaining sections. Then click Create user to complete the wizard.
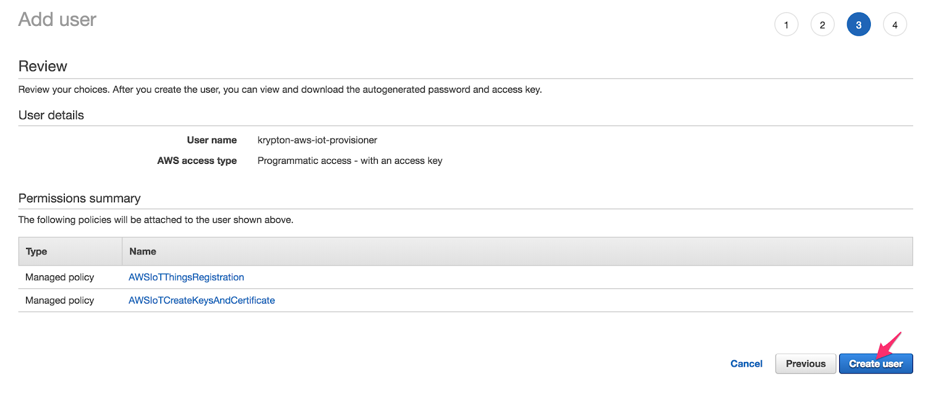
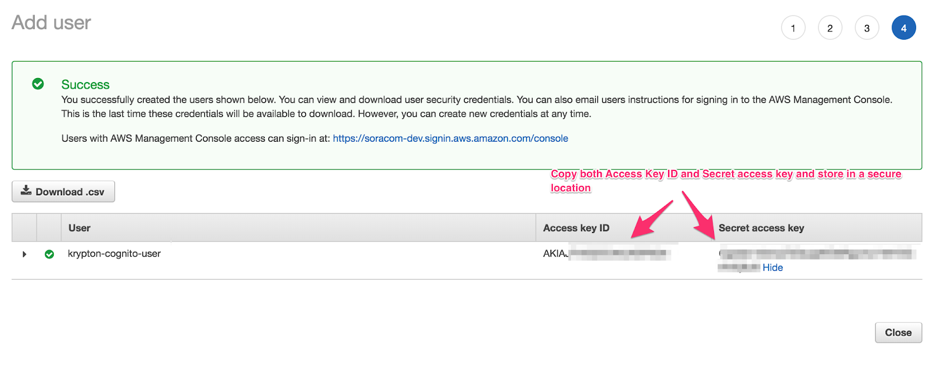
Once the new user has been created, it will appear along with its Access key ID and Secret access key. Save these keys in a secure location.
Configuring Krypton
Once your AWS account has been configured using the above steps, you will have the following information:
- AWS IoT Thing Policy name
- IAM user Access key ID and Secret access key
You can then use this information to configure Krypton using the Krypton Configuration documentation, following the instructions for integrating Krypton with AWS IoT.
Once Krypton has been configured, your devices can begin using Krypton's provisioning service.
Example Provisioning Process
The following NodeJS project demonstrates the typical bootstrap process utilizing Krypton to register and connect to AWS IoT using MQTTS.
Requirements:
- NodeJS 8.10 or higher
Project Installation
Download the Krypton Example Project for NodeJS to your device and extract it. This will create a /kryptonExamples directory containing an iot-bootstrap.js NodeJS project file.
Open the /kryptonExamples directory and install package dependencies:
npm installAuthentication Method
The iot-bootstrap.js file expects a krypton-iot script which will perform device authentication. Our example project includes the following authentication scripts:
- krypton-iot-cellular - Authenticate using Soracom Air for Cellular
- krypton-iot-endorse-go - Authenticate using Soracom Endorse and Krypton Client for Go
- krypton-iot-endorse-java - Authenticate using Soracom Endorse and Krypton Client for Java
Let's make a symlink for one of these scripts:
ln -sf krypton-iot-cellular krypton-iotIf using Air authentication, ensure that your modem is connected.
If using Endorse authentication, you will also need to download and extract the corresponding Krypton Client to the same /kryptonExamples directory. Refer to the Krypton Overview documentation and Krypton Client repositories for installation requirements and instructions.
Bootstrap
Now let's run the iot-bootstrap.js script:
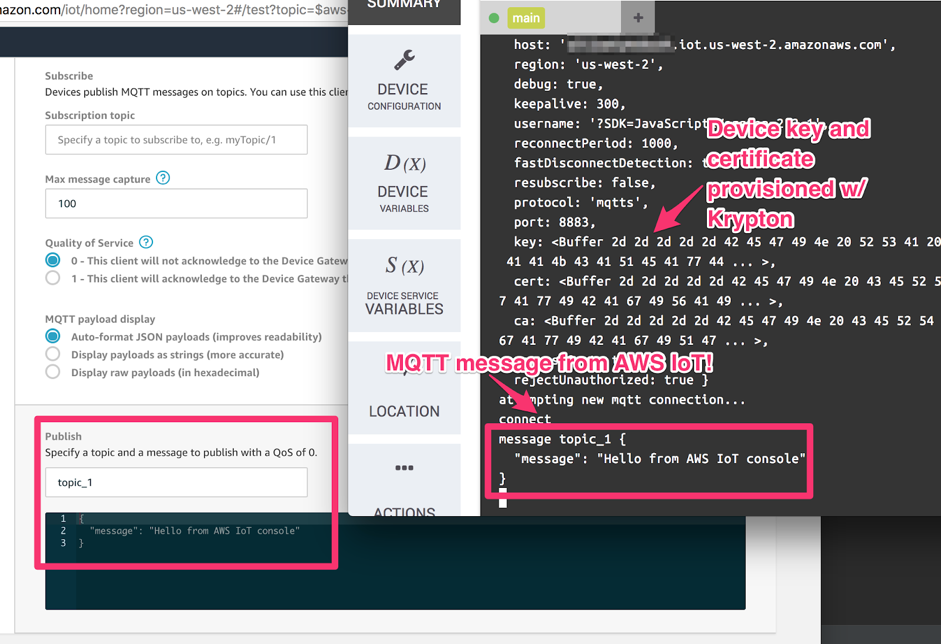
node iot-bootstrap.jsAs the script runs, it will perform the following:
- Perform device authentication using Soracom Air or Soracom Endorse.
- Provision using Krypton and receive AWS IoT certificates, saving them to a
/awsIoTConfigdirectory. - Utilize the AWS IoT certificates to connect to AWS IoT MQTTS endpoint.
Once the device has connected to AWS IoT, the NodeJS script will output connect. You can test connectivity by publishing a message to the test topic topic_1, and observing that the device is able to receive the message.